
Most Wanted Hatch Build… Introduction
I’ve been spending my time seeking after some noteworthy builds within the community and over the next few weeks I will be bringing you guys a first person view of what I have found. Without an overly wordy and drawn out breakdown on the upcoming plans, I will jump right into it.
Jamaal has secretly been a long time fan of Hondas; however, being one of the pioneers in the local Evo world, the stars never aligned for him to follow through with any of his prospective Honda builds. Throughout the years, Jamaal began the process of building several Hondas. Sourcing a variety of chassis and before being able to move forward in any direction, he usually was approached with more than substantial offers for the projects. Needless to say he was reluctant to refuse said offers and to no avail, each time this happened, Jamaal tossed more money into the Evo project to satisfy his urge to modify. Having been through this process a few times, Jamaal put his foot down and he finally made a conscious decision to start a Honda build with a plan in mind to stick it out until completion.
Being very resourceful, it wasn’t long before he acquired a base for his new project which was none other than a EK hatch, one of his most favorable of all Hondas. After owning a Evo for a considerable period of time and having a love for drag racing, Jamaal initially gravitated towards building a AWD Honda, especially with all the advances in development where the conversion is concerned. However, he quickly had to pull himself back and remember what was the main reason for wanting to build a Honda, it was the hype and fun surrounding the all motor scene. With this new focus in mind, Jamaal set out a plan to purchase a stock motor and do a simple K swap in the hatch. As the car would be a dedicated street car capable of daily duty if necessary.
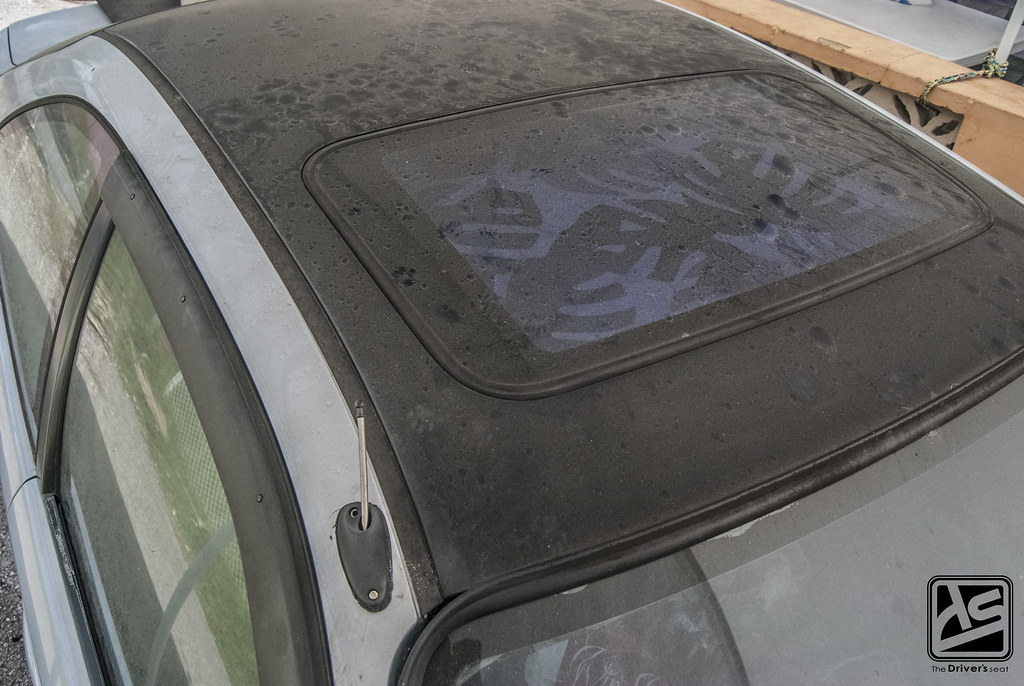
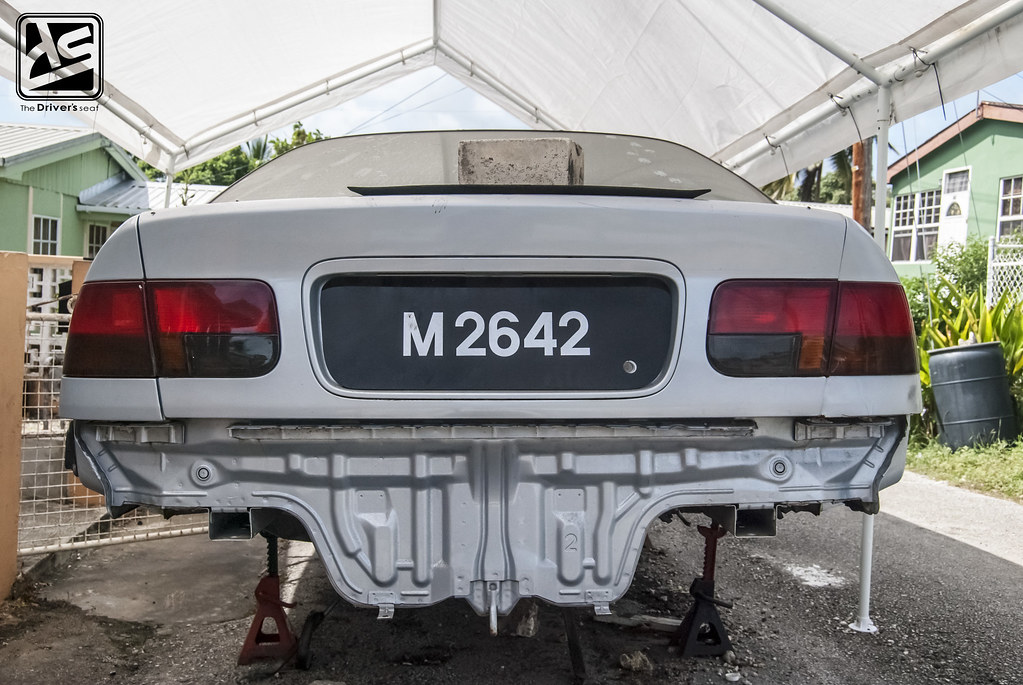
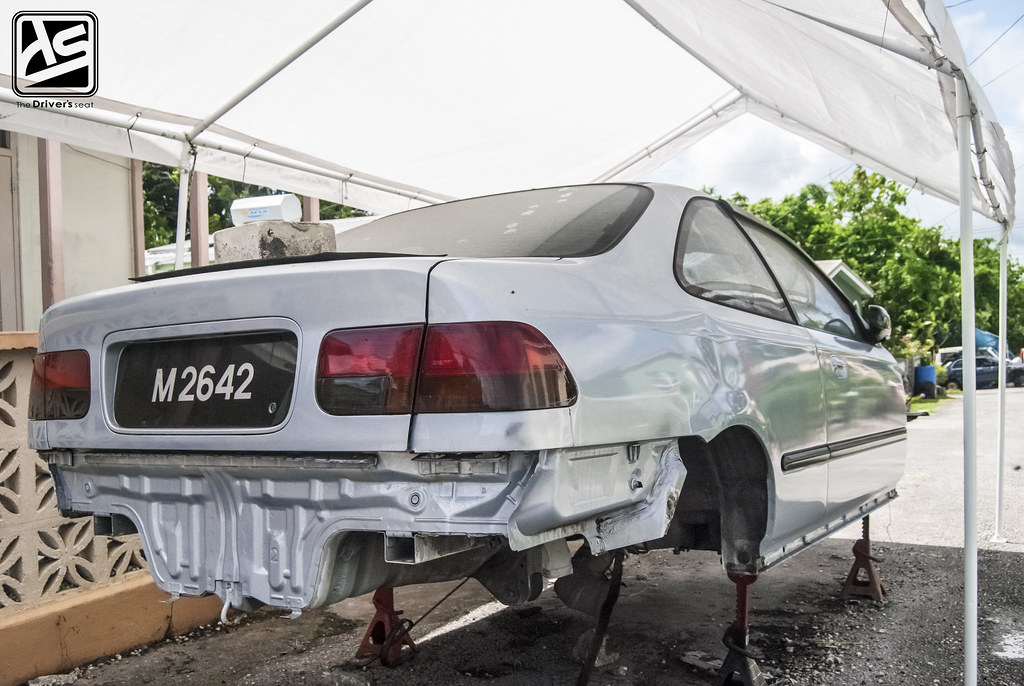
We’ll be taking a look at the shell when Jamaal first got it and some of the work that was necessary before moving forward with the swap.
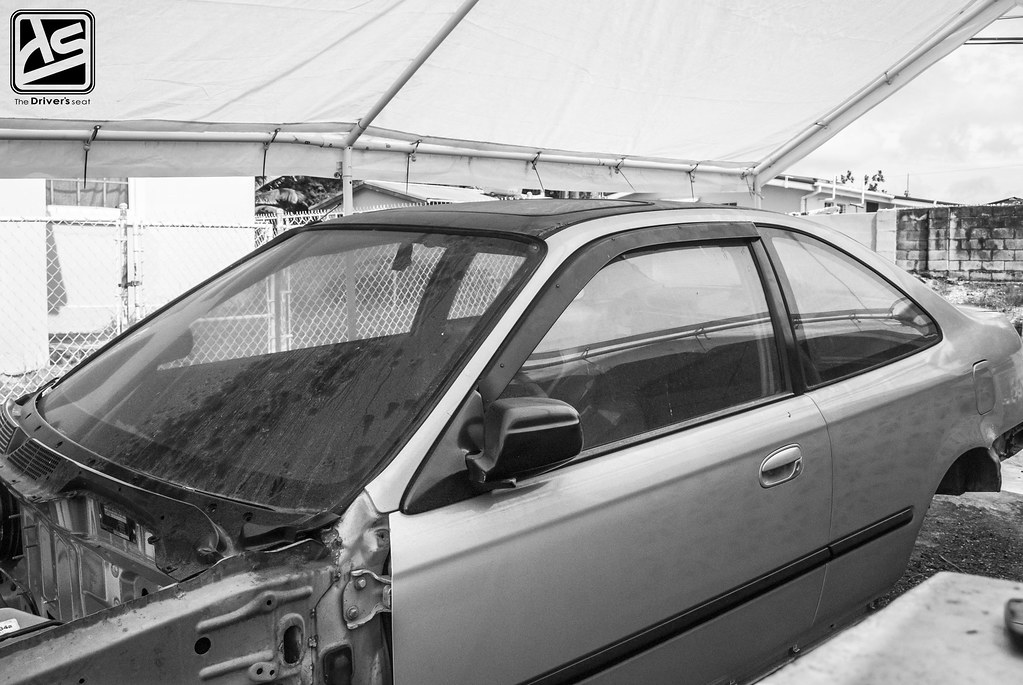
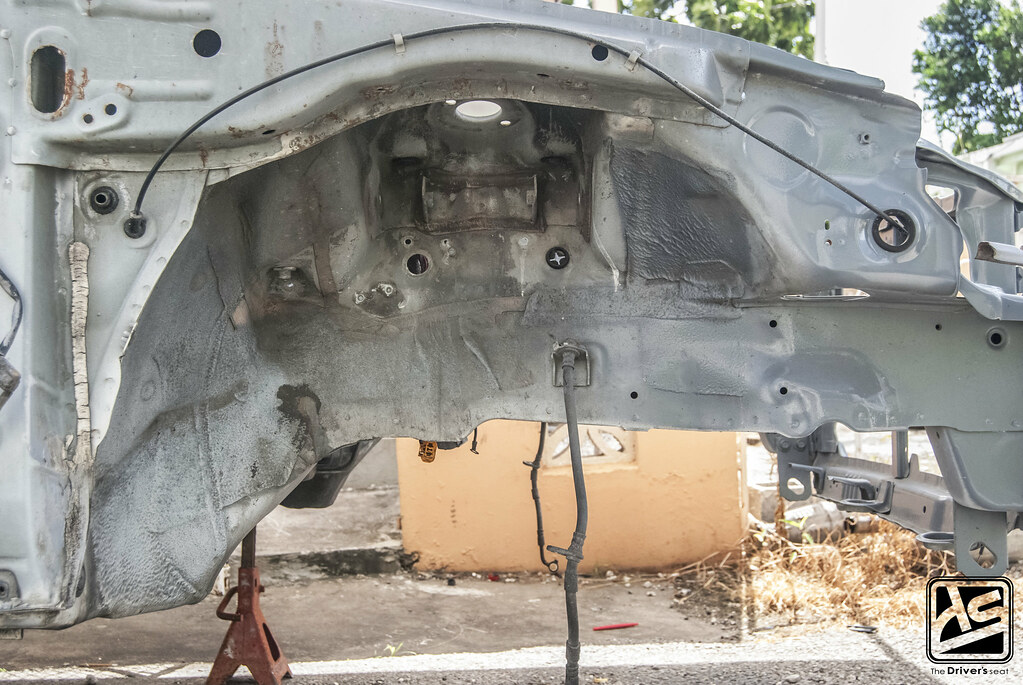
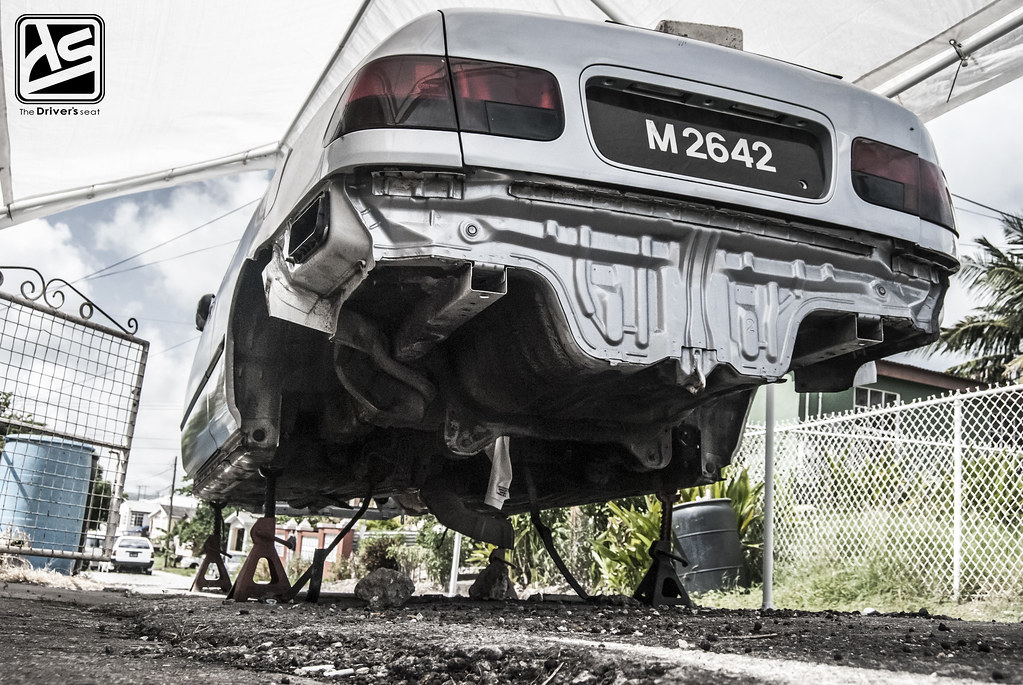
When Jamaal bought the shell it was involved in an accident on the front right side…
After assessing the damage, Jamaal wasted no time and sourced the necessary parts to begin the repairs…
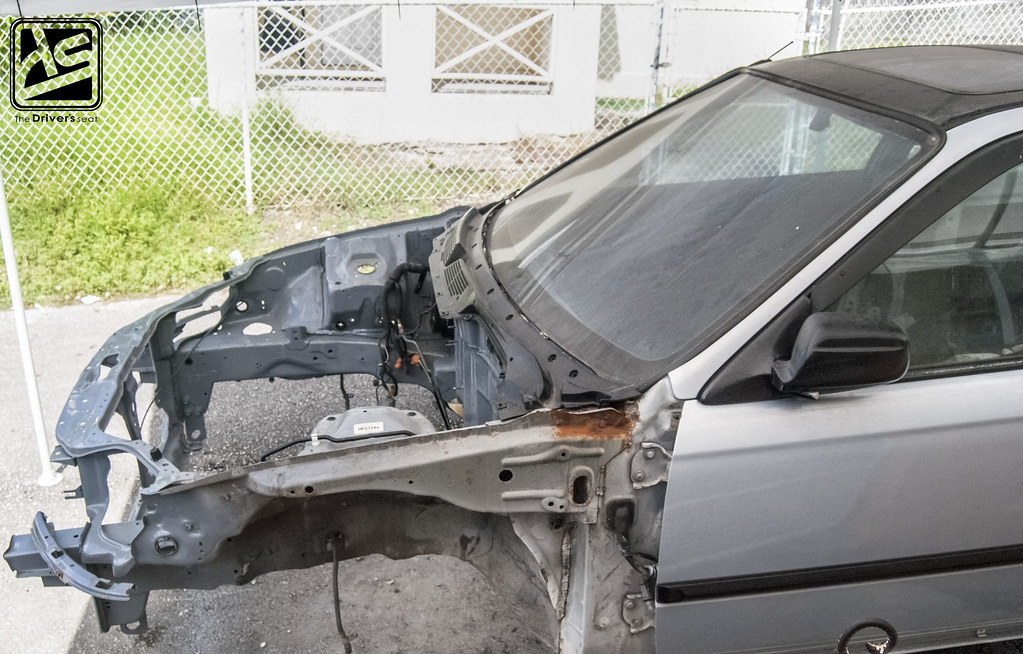
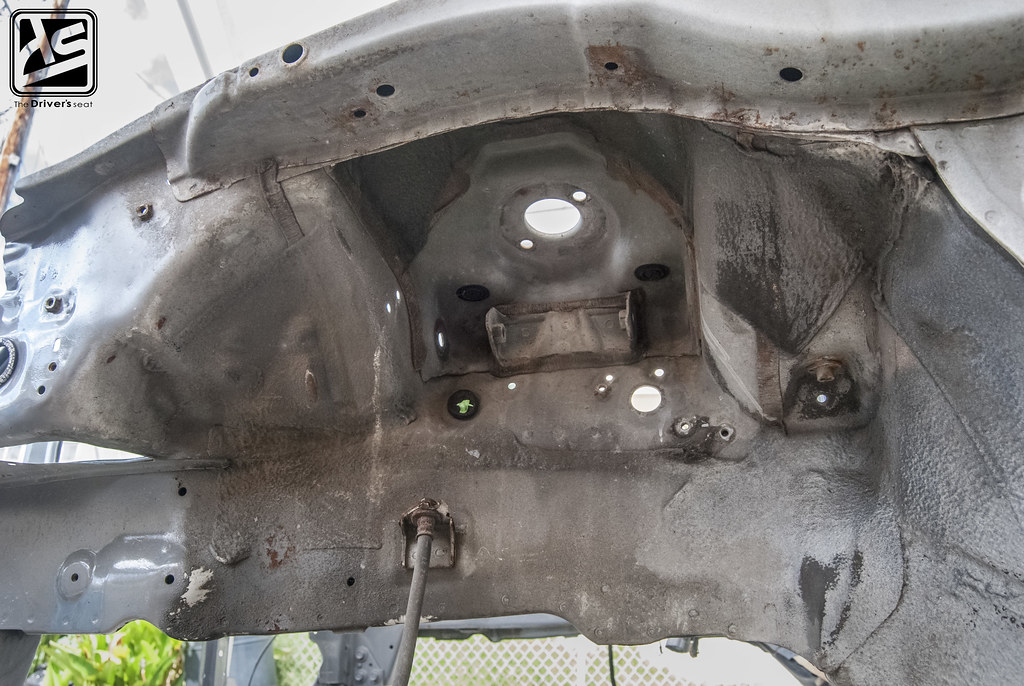
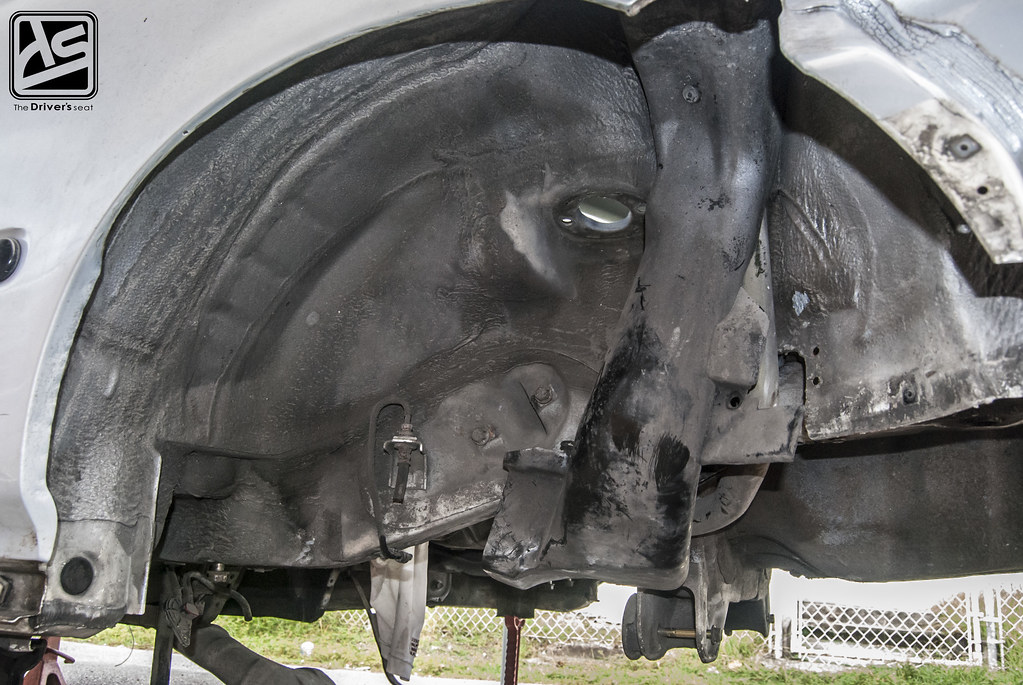
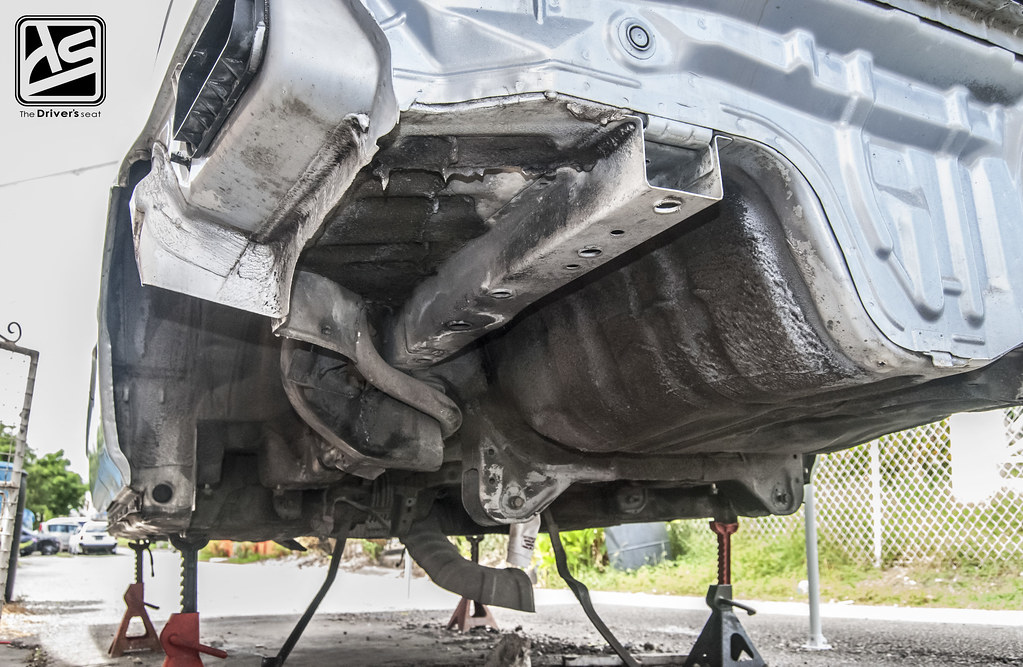
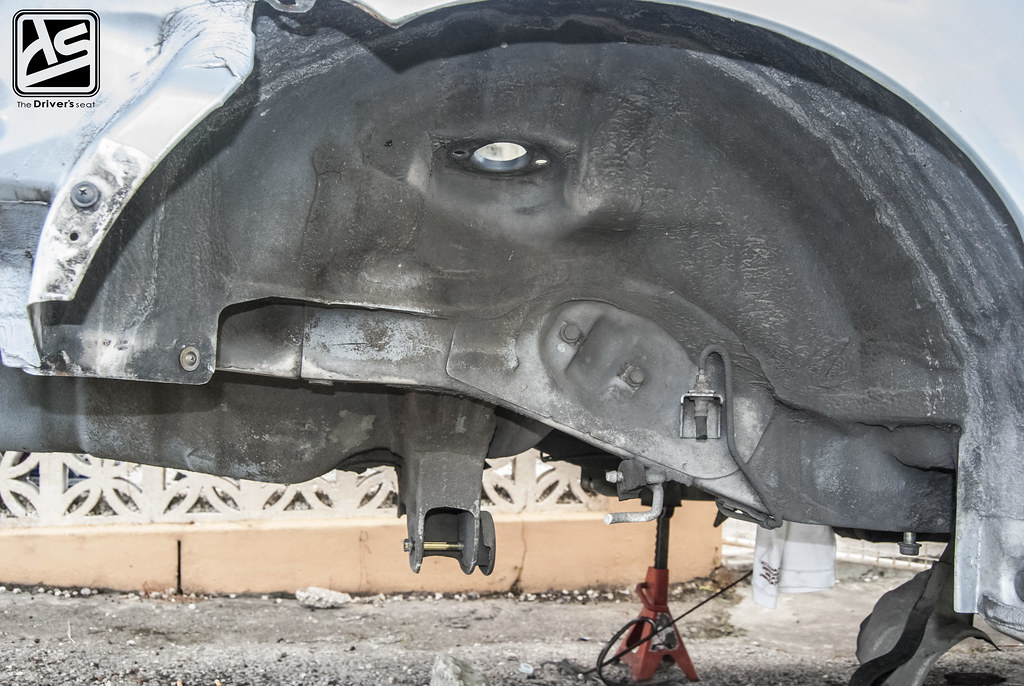
The front end was torn apart and the right side shock tower and fender arch were replaced. As there will be no need for the EK subframe or engine harness, Jamaal went ahead and removed them along with the fuel and brake lines.
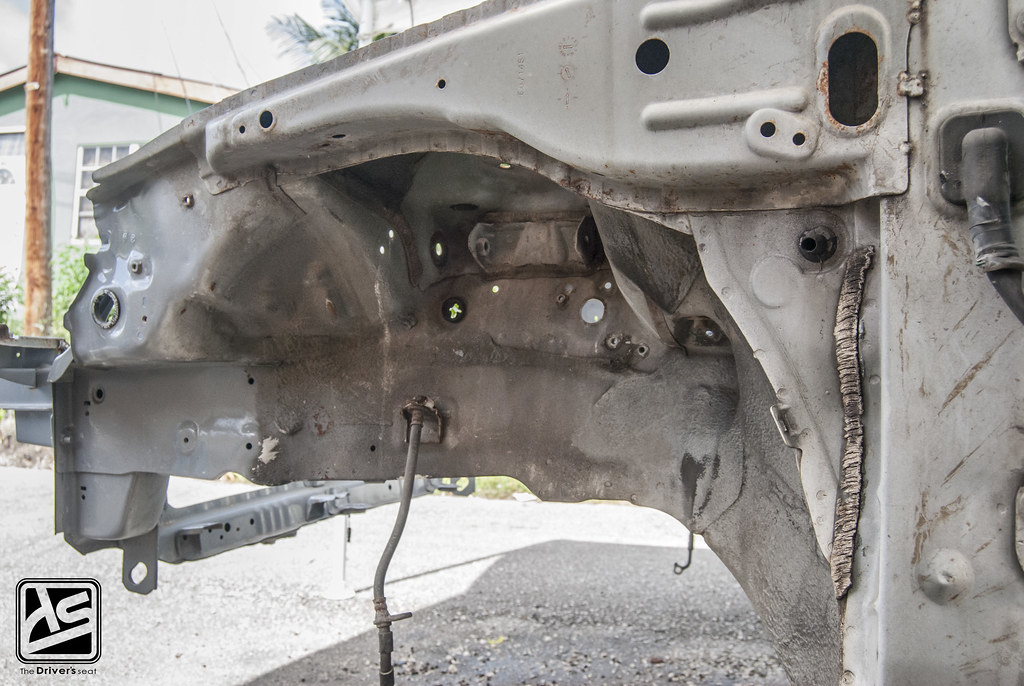
In addition to the shock tower, a new radiator support was fitted to complete the front end…
The shell was then sent off to under go the next phase in development…
A few shots of the shell as the bodywork started to show some progress…
The rear lights and hatch were removed to ensure all hidden signs of rust were addressed before proceeding to the paint stage…

Some shots after the bulk of the exterior bodywork was completed…
At the time of the visit, the engine bay was in the initial stages of having the stone chip applied…
A look at the previously damaged right side with a coat of primer applied and in the process of being shaved…
Meanwhile on the interior…


The bodywork was completed and a coat of blue was applied…
A closer view of the right and left side rear panels…
What was once a problem area by the tailgate has now been resolved…
The hood sanded and ready to be primed…
Making some good progress with the hood and fenders primed and ready to receive some paint…
The final stages of bodywork being completed on the right side of the shell…
With the bodywork completed the shell was sanded and masked for the first stages of primer to be laid…

After searching through several colour pallets Jamaal was finally able to make a decision for the exterior of the hatch…
Seeker version 2 spoiler was what Jamaal opted to go with to mix things a bit away from the typical CTR or Spoon duckbill appearance that is ever popular…
One of the first swap related items to arrive was a K series type S gearbox…
Jamaal wanted to ensure the driveline was well put together from the beginning so he placed an order with Insane Shafts for some 500hp axles…
With hopes to race the car from time to time on the 1/8 mile strip, Jamaal was adamant that he started with a quality clutch from the get go. He invested in a super single disc Competition Clutch assembly which was inclusive of a flywheel…
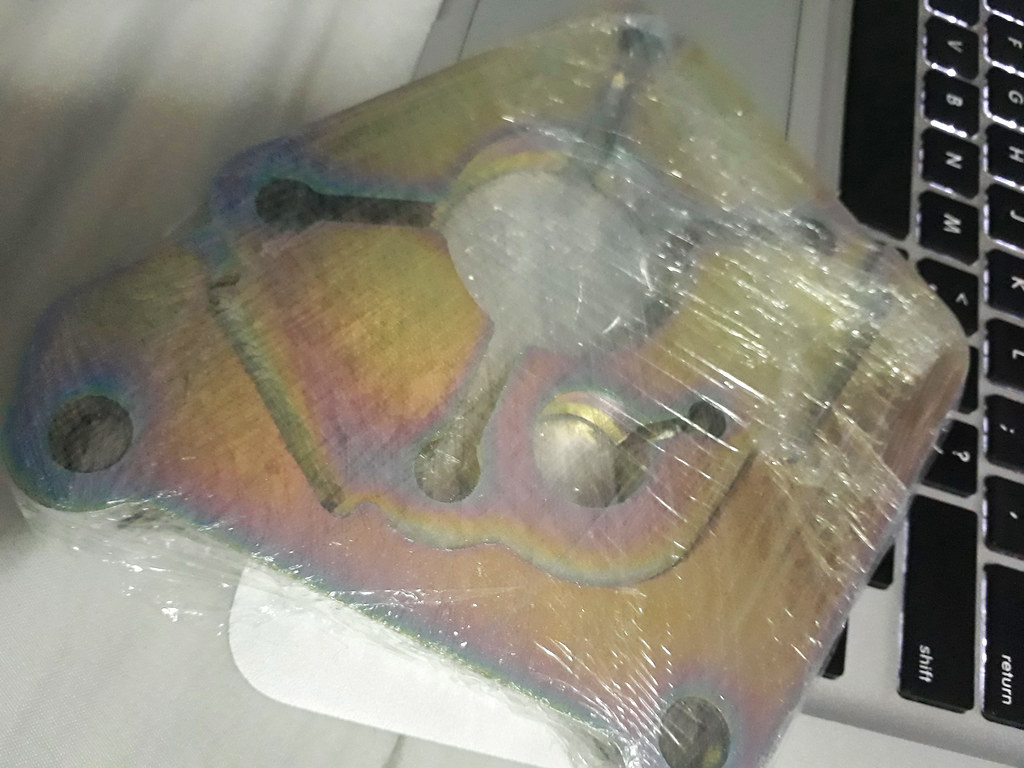
On a mission to keep things simple Jamaal went with a Karcepts shifter plate…
Blox S2000 master cylinder and spacer along with a braided clutch line…

Closing out today’s post with the Hasport EKK2 swap mounts Jamaal picked up…
Thanks for taking a first look at Most Wanted Civic build, be on the lookout for more on this build.
Project EJ8… Part 2
From our last update on project EJ8, the interior painting was completed and I started to remove the suspension. After finally making a decision on the route I was willing to go where the motor swap was concerned, I needed to start collecting some swap parts. In the mix of tearing the suspension apart, I realized there were more worn components than I initially expected. This caused me to divert my k-swap efforts to the restoration of what I deemed were key components. We’ll be taking a look at some of the parts as they came in and the progress made.
For those who may want to view this build from the start I’ve provided the links below:
While I was busy trying to source some goodies, little to no attention was paid to the EJ shell…
Of which it clearly showed…
It was time to break the cycle and direct some effort towards it…
After taking a look at the painted engine bay and interior, the fender arches became an eyesore…
And with the rear suspension removed, I couldn’t solely direct my efforts towards the front end…
However, after taking a closer look, the rear would require significantly more time, effort and patience…
With the work ahead, I decided to start with the front being the easier of the two with hopes that the finished product would motivate me to knock out the rear end…
To my surprise the front end came out looking better than I thought especially with it being a simple rattle can job…

Feeling good about the front I went on to tackle the rear…

A bit more effort than the front but in the end I believe it was all worth it…
Taking few steps back; it was still a long road ahead but the addition of some paint softened the blow…
After the teardown I came to the realization that most of the components would require refreshing. So I went ahead and placed some orders and soon enough, the packages started arriving…
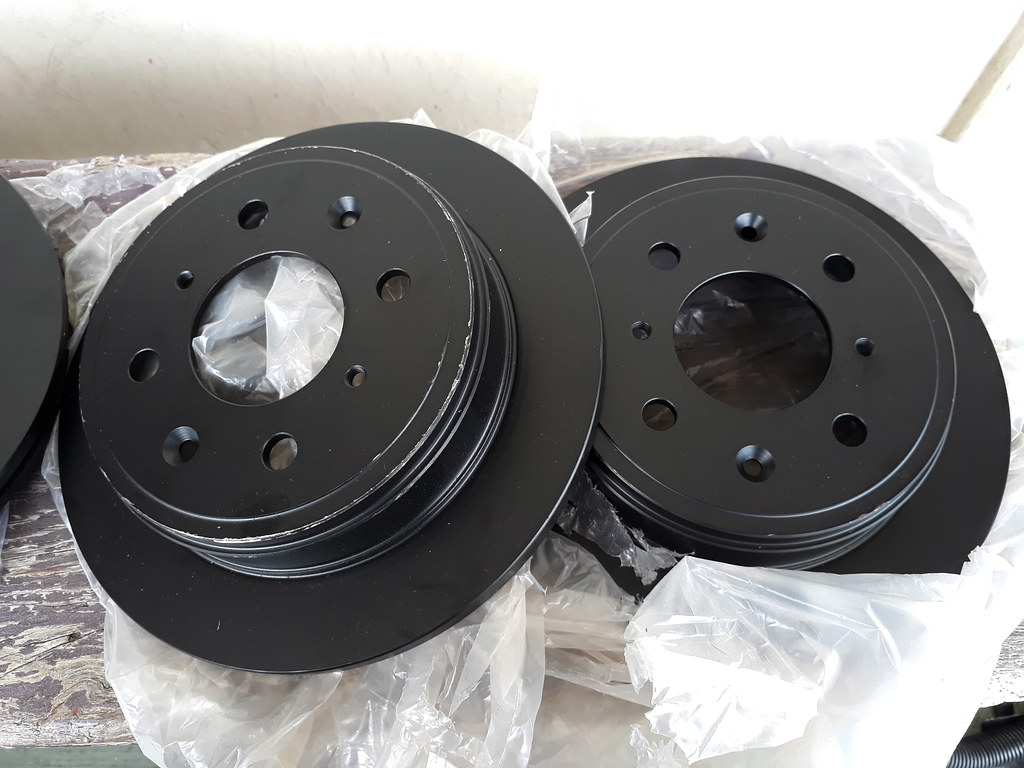
Along with the EBC front rotors I showed you guys in the previous update, I purchased a set for the rear as well…
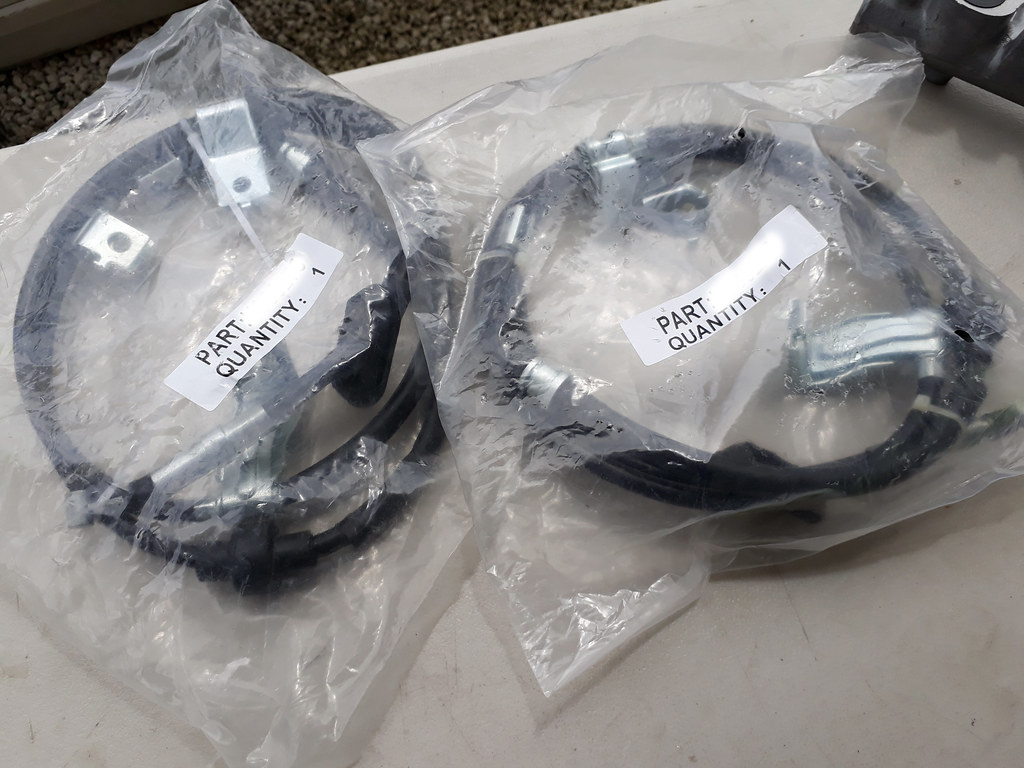
Upon setting a goal to attend some track days with the car, I thought it to be a necessary upgrade to convert from drums to disc. To execute this, the handbrake cables were one of the items that needed to be changed…
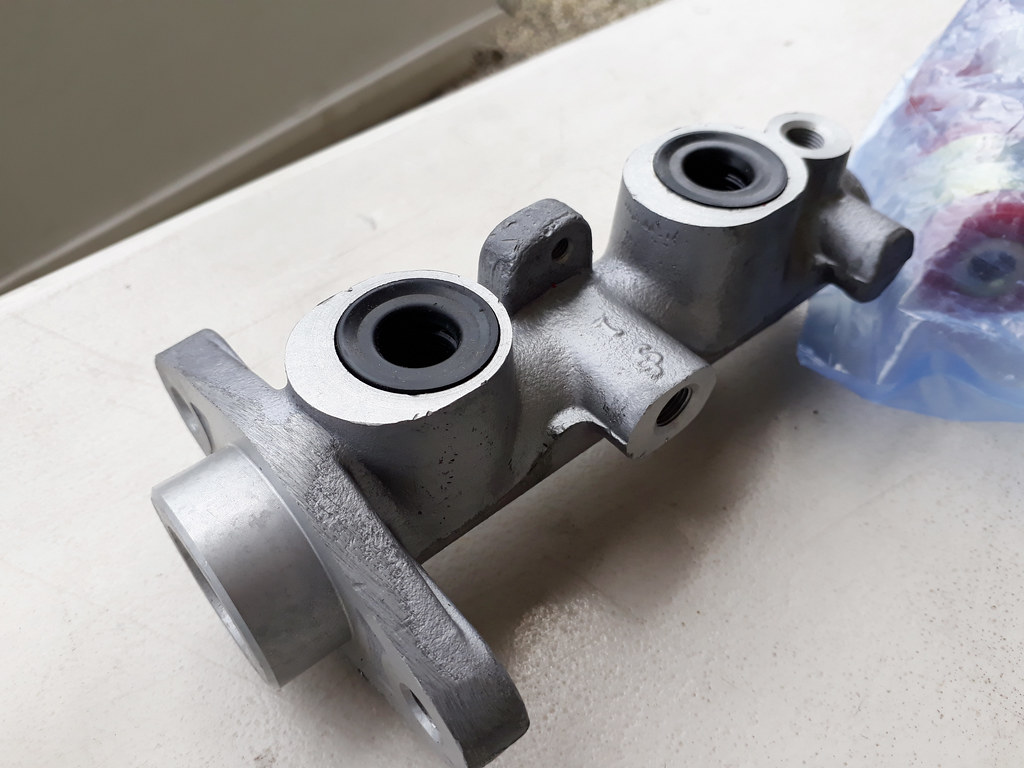
I thought as I was this far I might as well change the master cylinder…
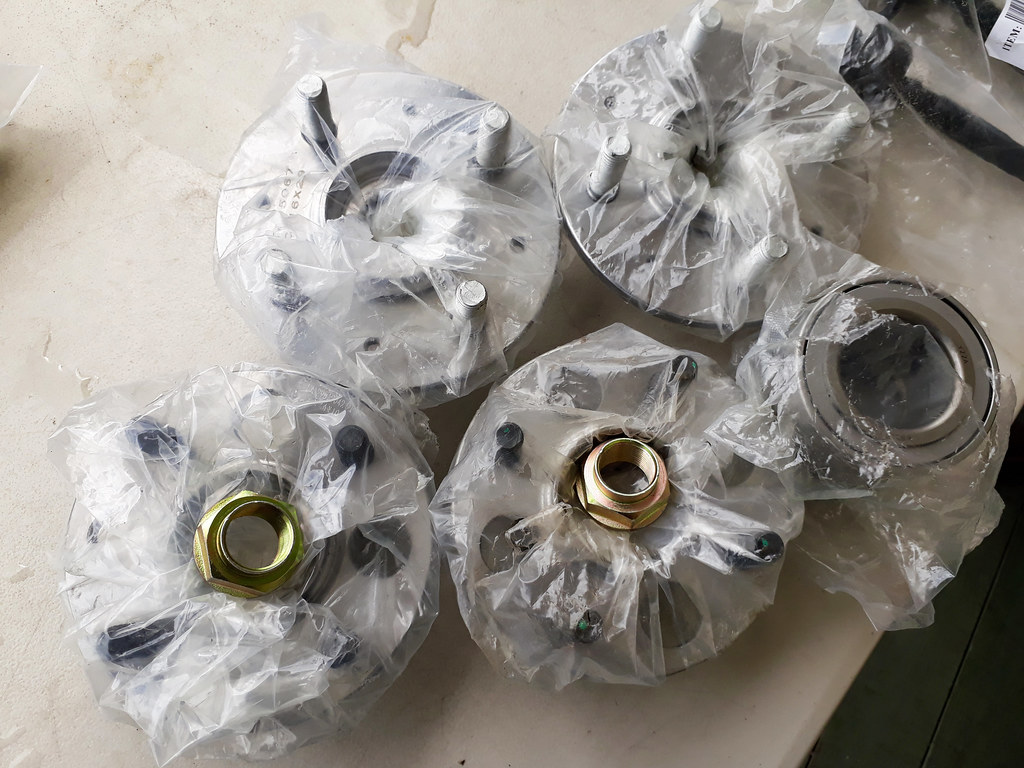
But I didn’t stop there, I decided change the hubs and wheel bearings at the front and rear…
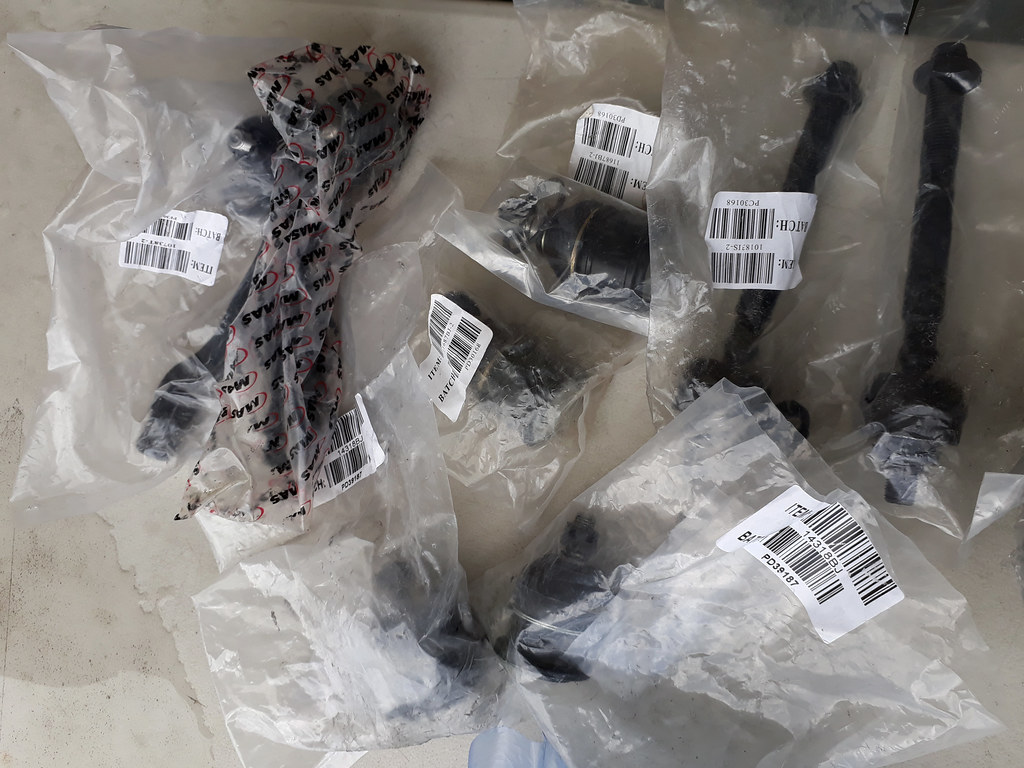
Along with the rod ends, rack ends and upper and lower ball joints…
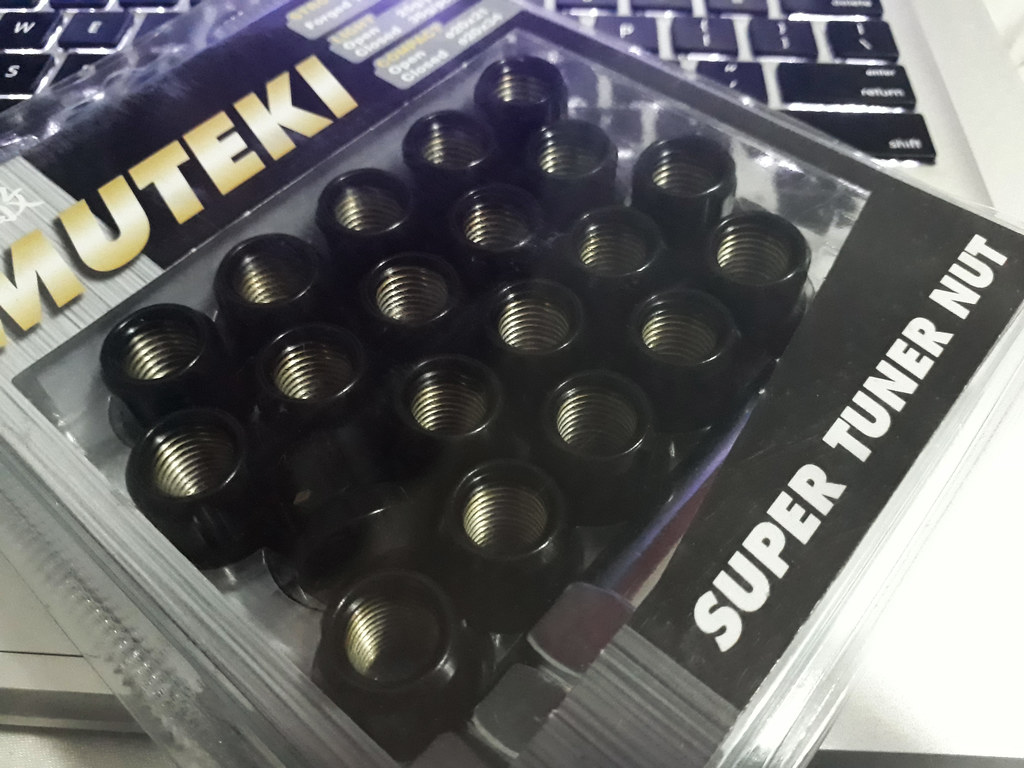
And to close it out, I opted to pick up a set of Muteki open end lug nuts…
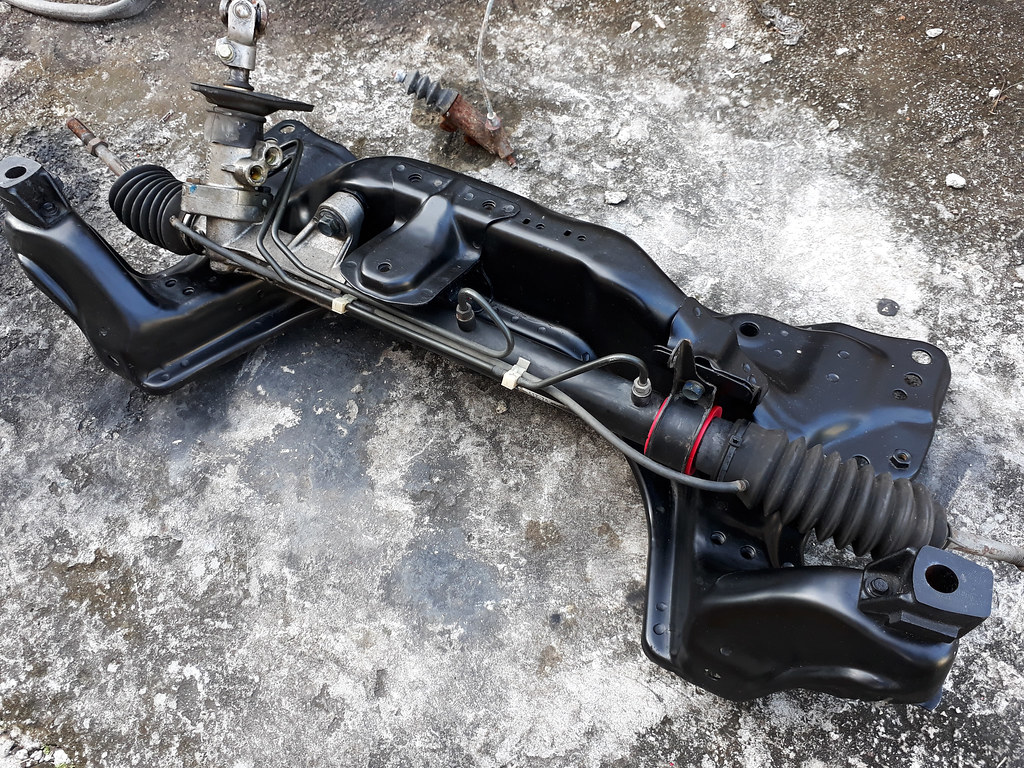
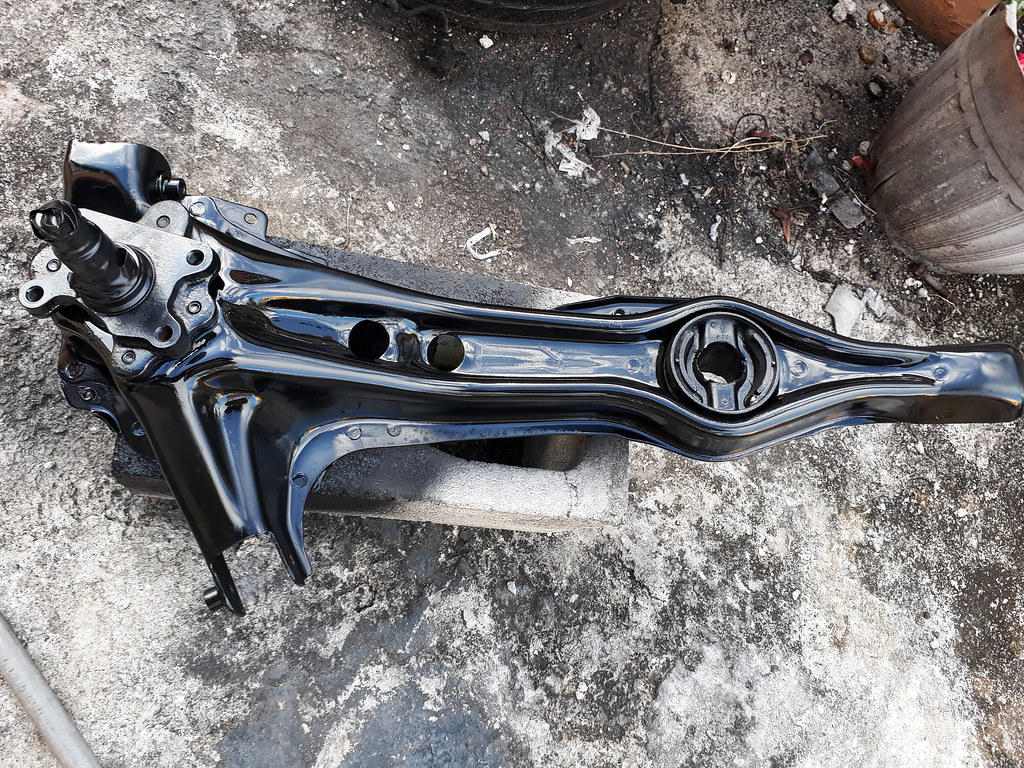
While the subframe was torn apart I went ahead and gave it a quick paint refresh…
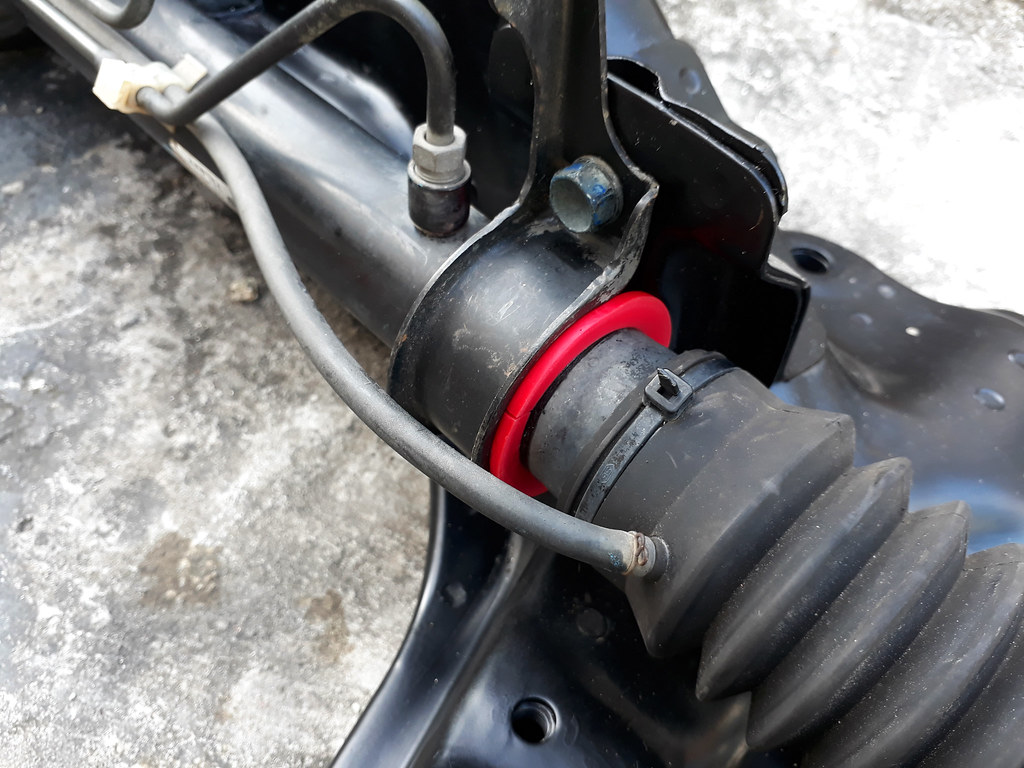
And swapped out the OEM steering rack bushing for an Energy Suspension one…
With that out of the way it was time to bolt it up…
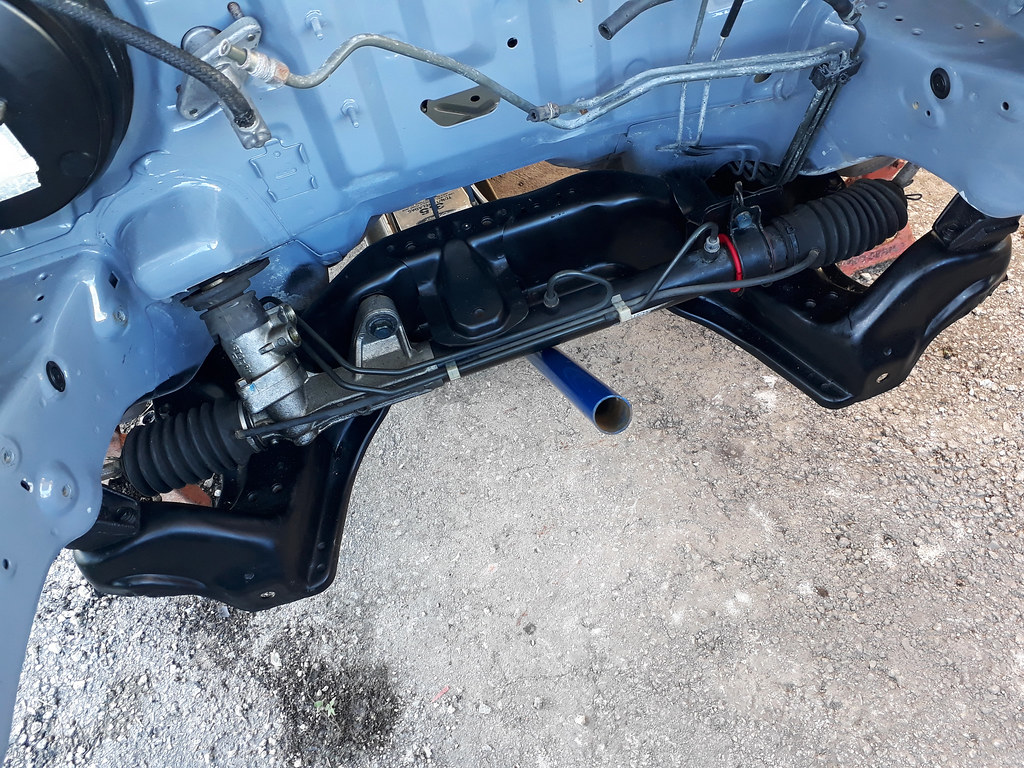
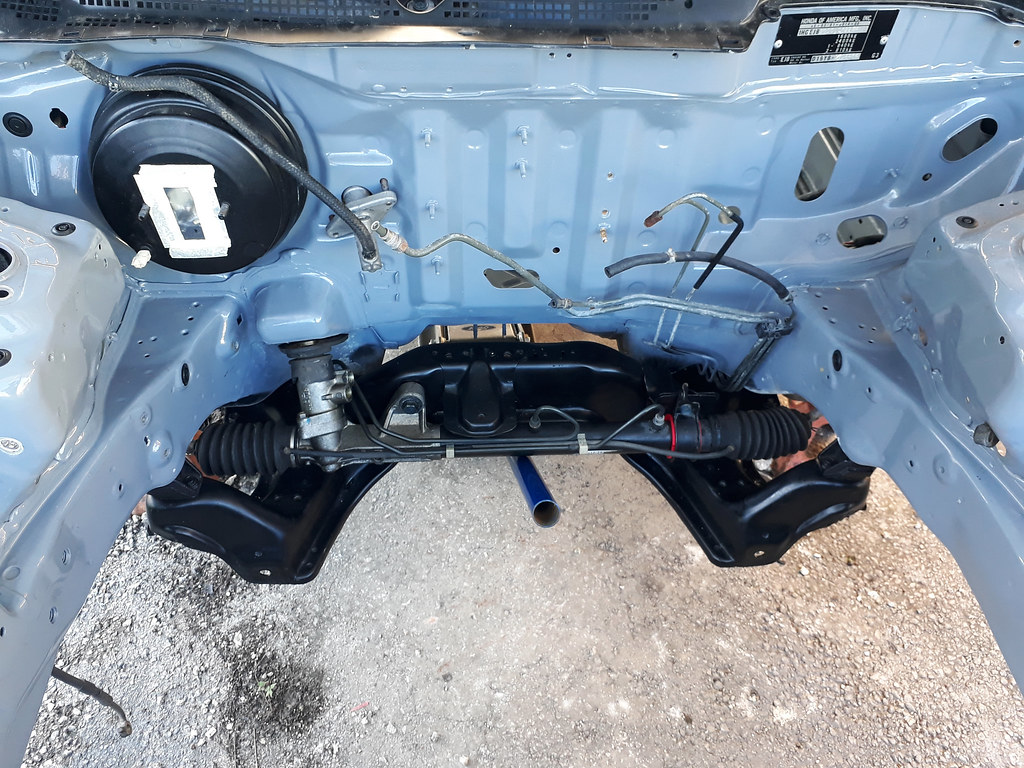
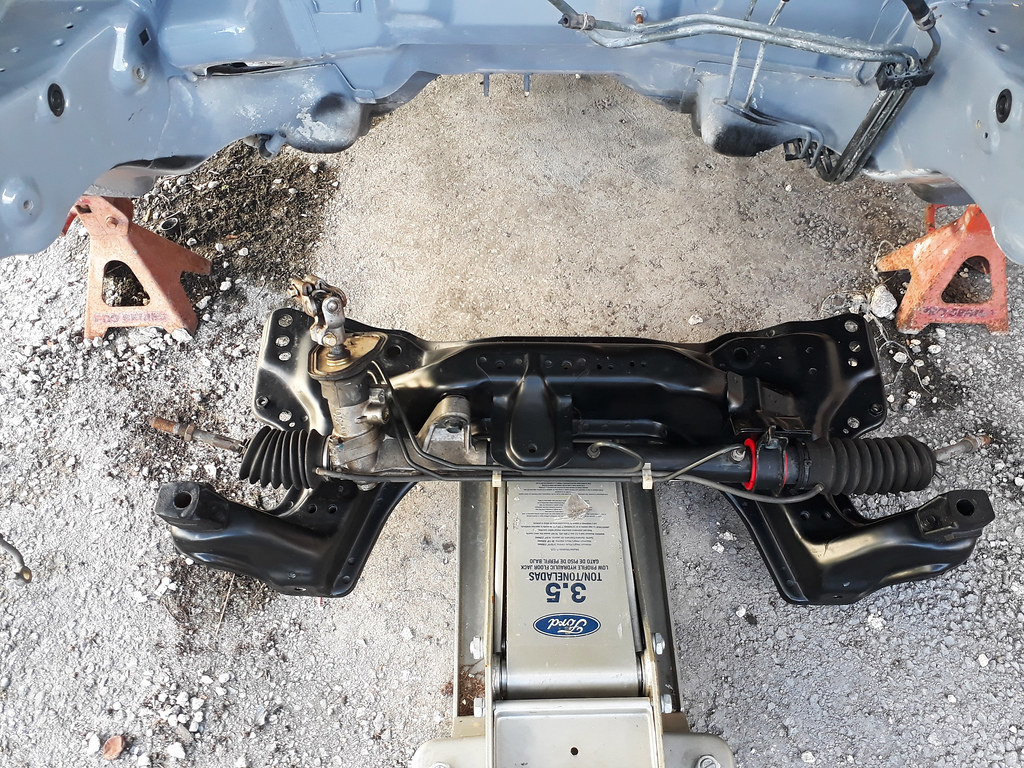
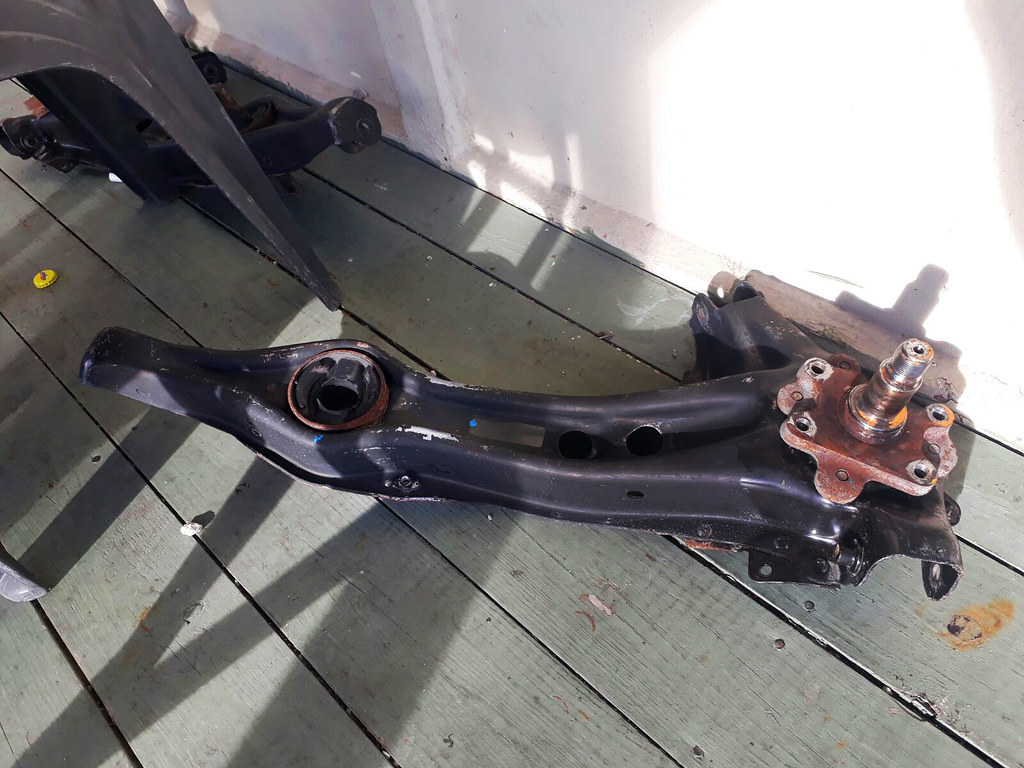
A look at the mounted DC2 Type R steering rack and subframe assembly…
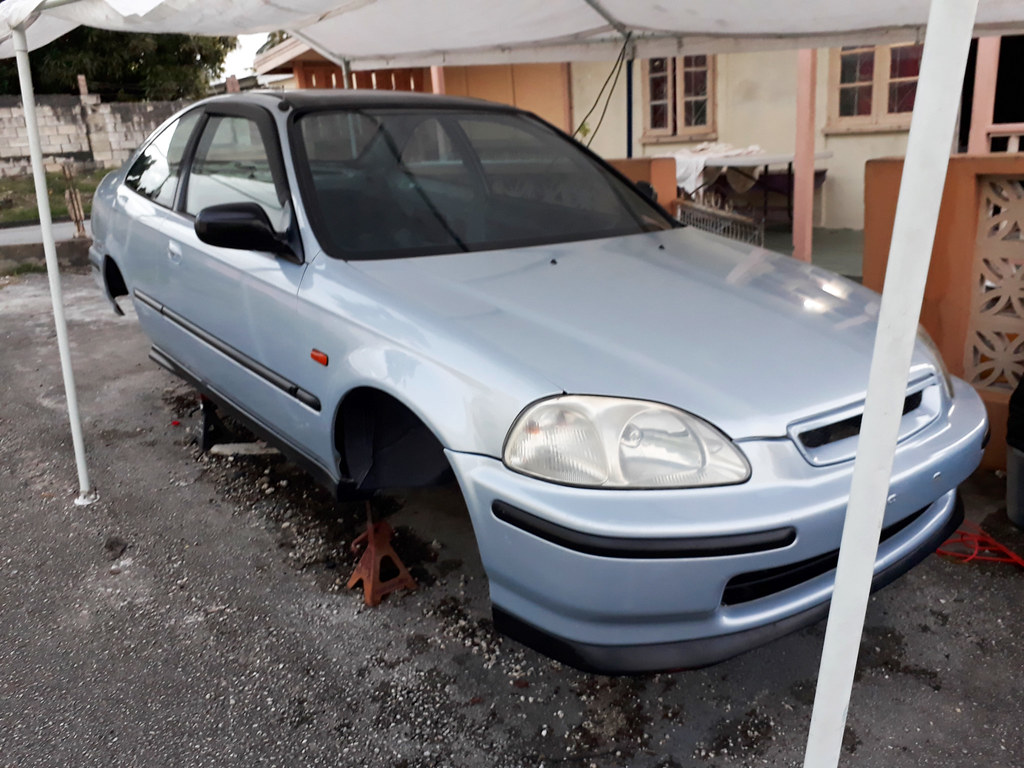
I finally made the trip to collect the front bumper and with it in my possession, I gave the EJ a wash down and fitted the front end together…
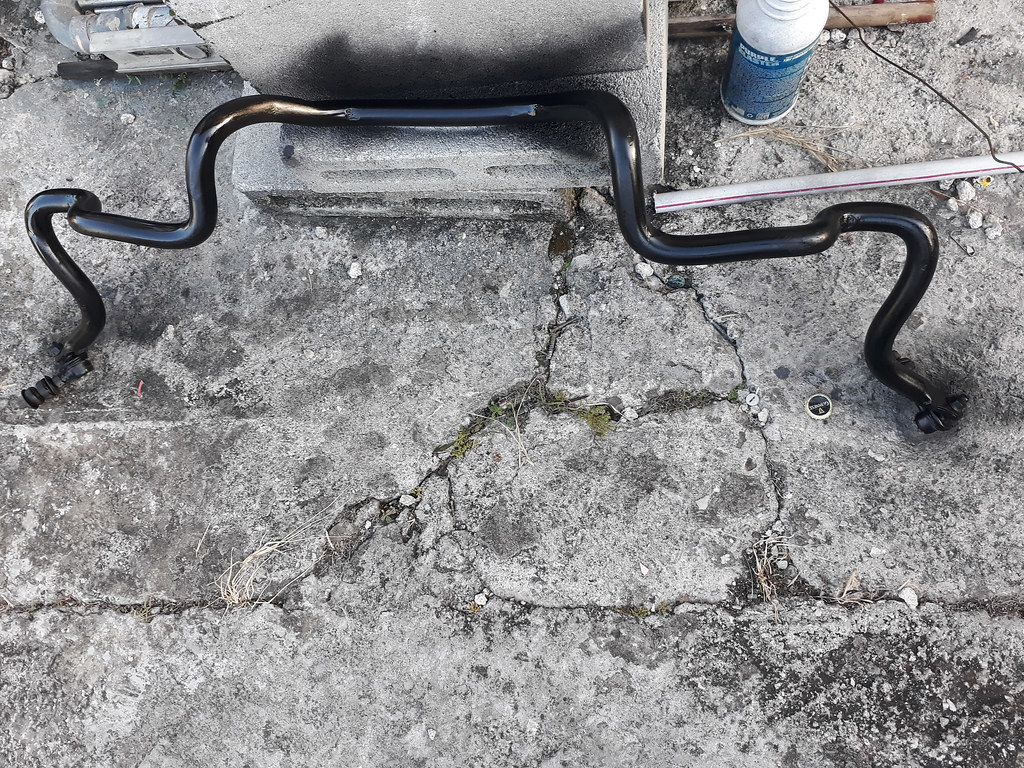
DC2 type R front sway bar after a fresh coat of paint…
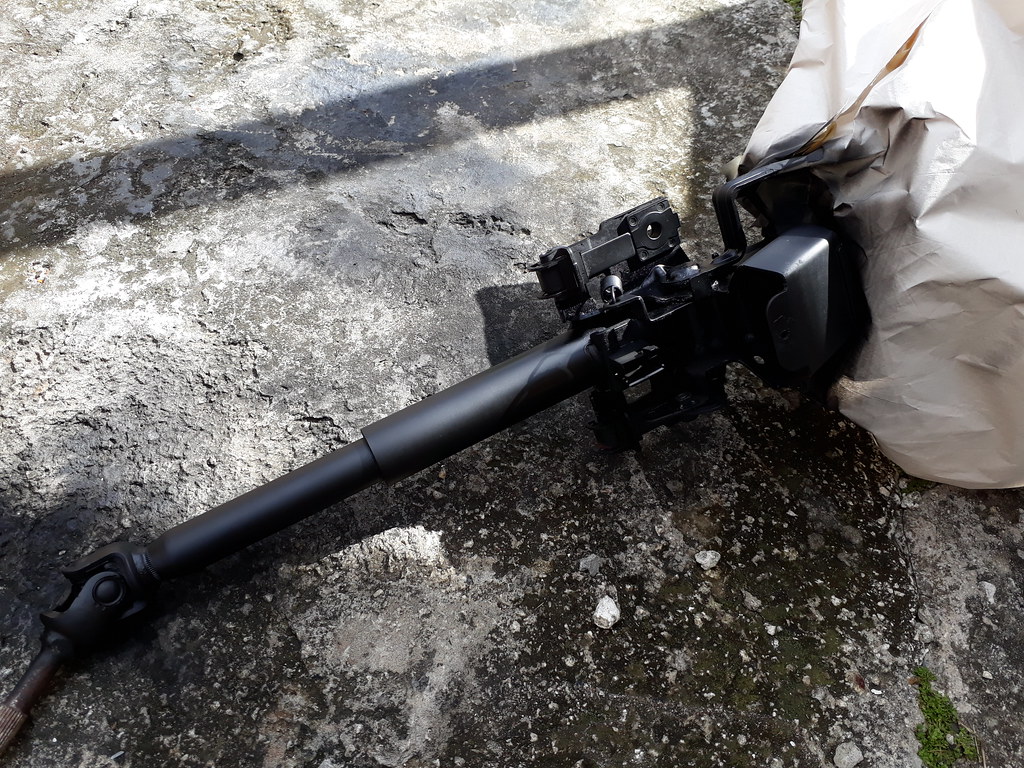

Already in the mood for painting and with the steering column out of the car, I thought why not and applied some paint to it…
At the end of the last update, I had the front and rear brakes loaded up to carry them to be disassembled as I didn’t have the necessary tools available to do so at home…
I had the drums removed and cleaned up the trailing arms…
And much like everything else I couldn’t let these go back on the car without first hitting them with some paint…
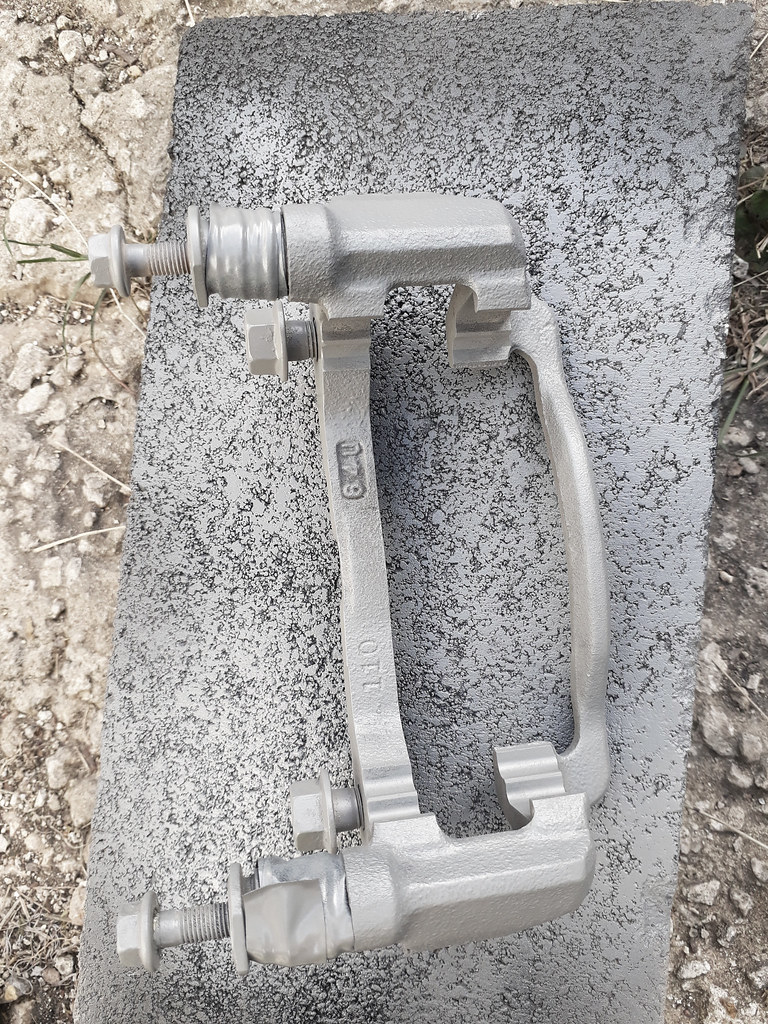
Upon doing some research, I found out that the only OEM route to convert from drums to disc would require changing the entire trailing arm. Determined to find another solution, I took to the forums and found a company called Scarebird that developed an alternative. They have designed a bracket which bolts directly to the factory drums spindles.
Before I began the rebuild, I made sure to have the Energy Suspension trailing arm bushings in hand to swap out the dated OEM bushings…
A look at how the Scarebird brackets bolt to the drum spindles…

Test fitting the caliper after installing the wheel bearing and hub assembly to the trailing arm…
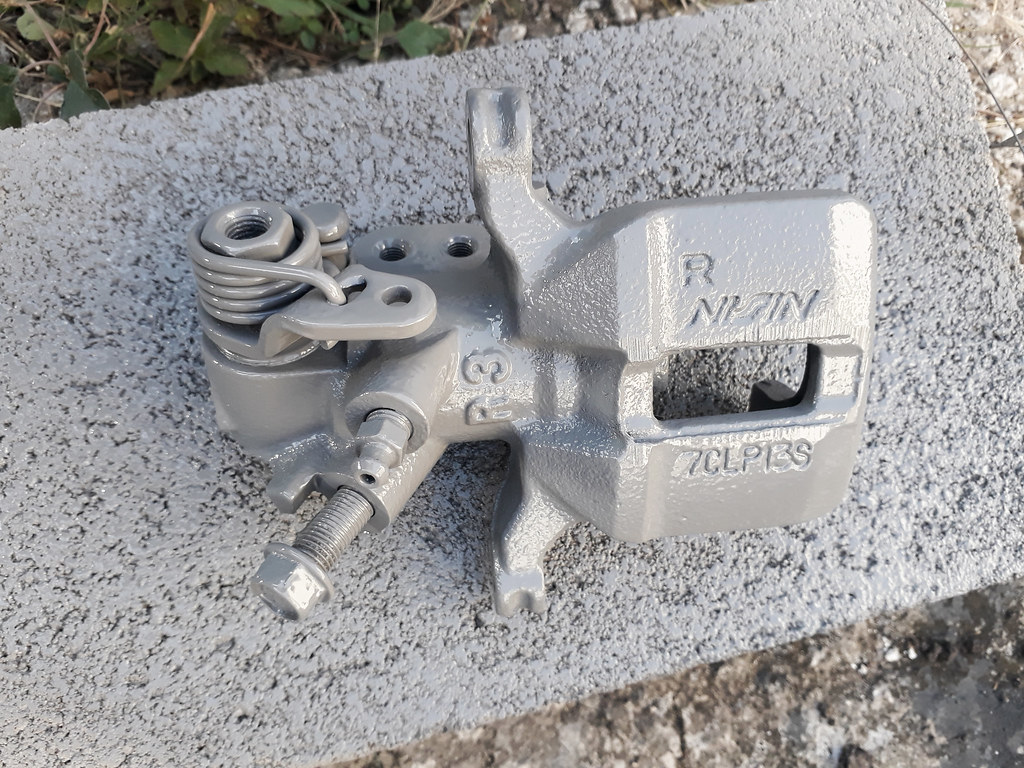
Now that things were looking up, I went ahead and started to clean up the rear calipers…
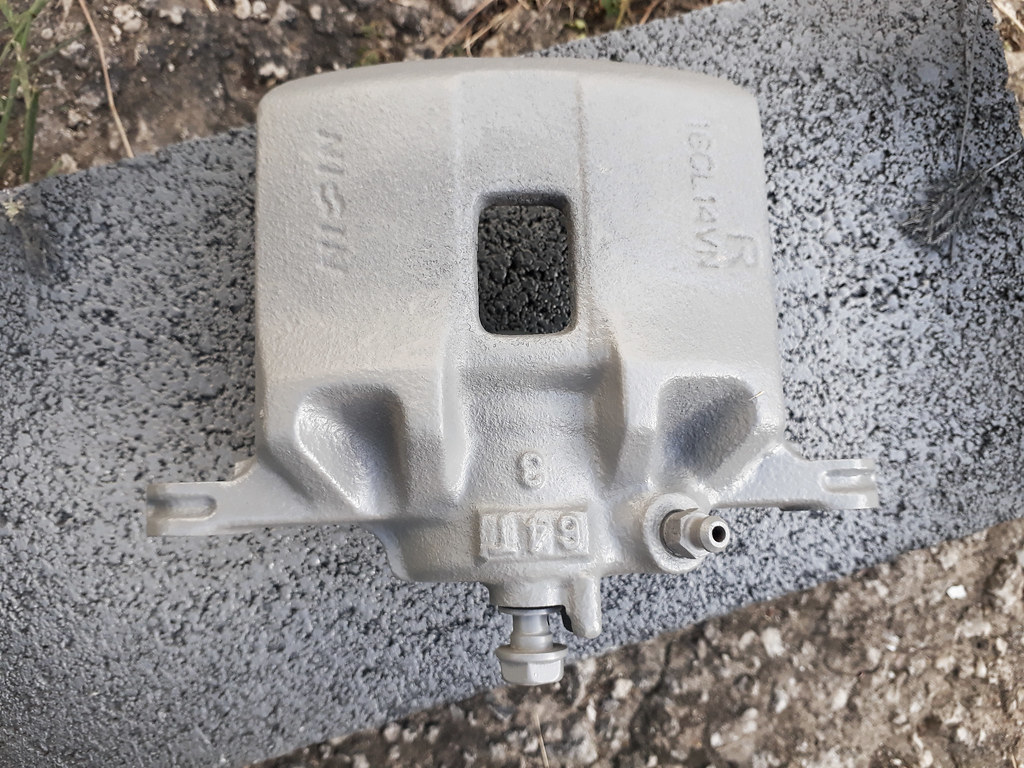
And in true form to this build, I thought why stop there, and gave the front calipers the same treatment…
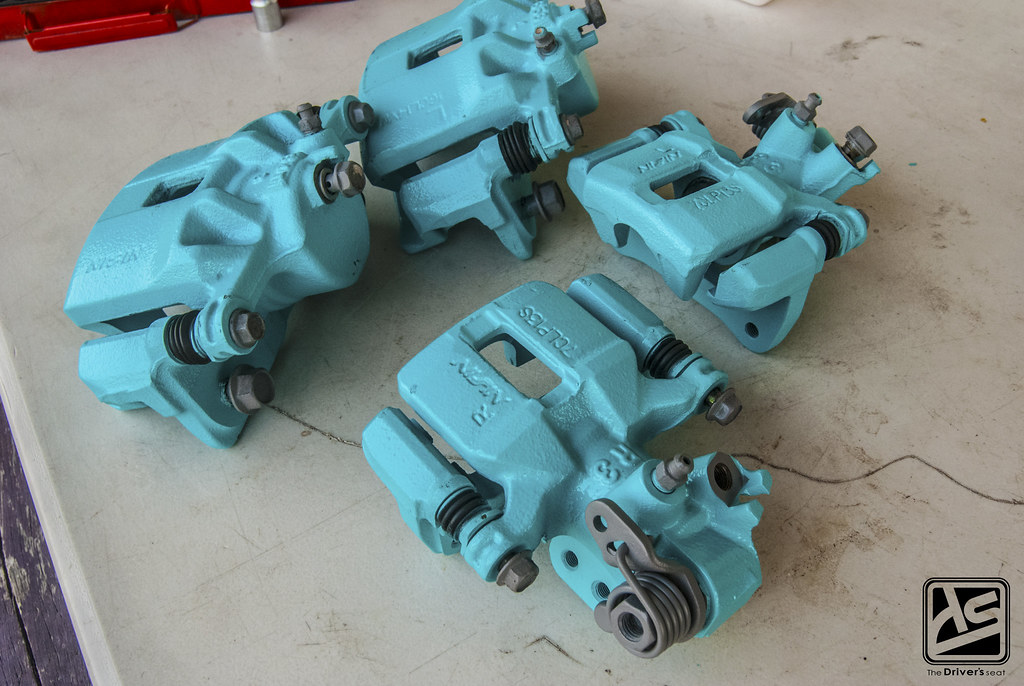
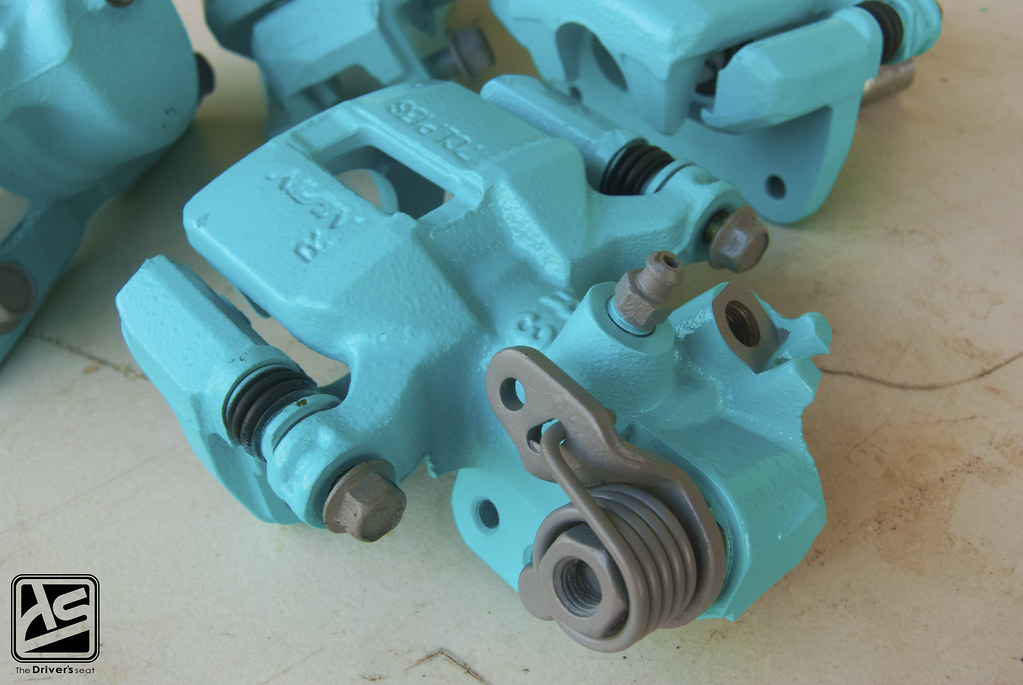
Uncertain as to what colour combination to go with, this was what I finally landed on…
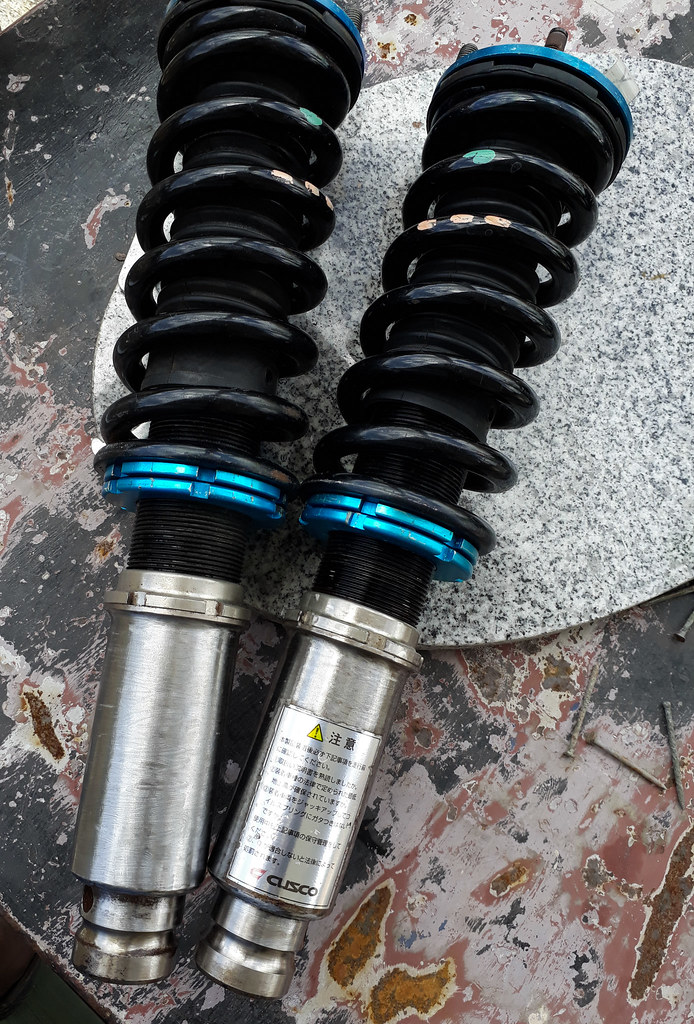
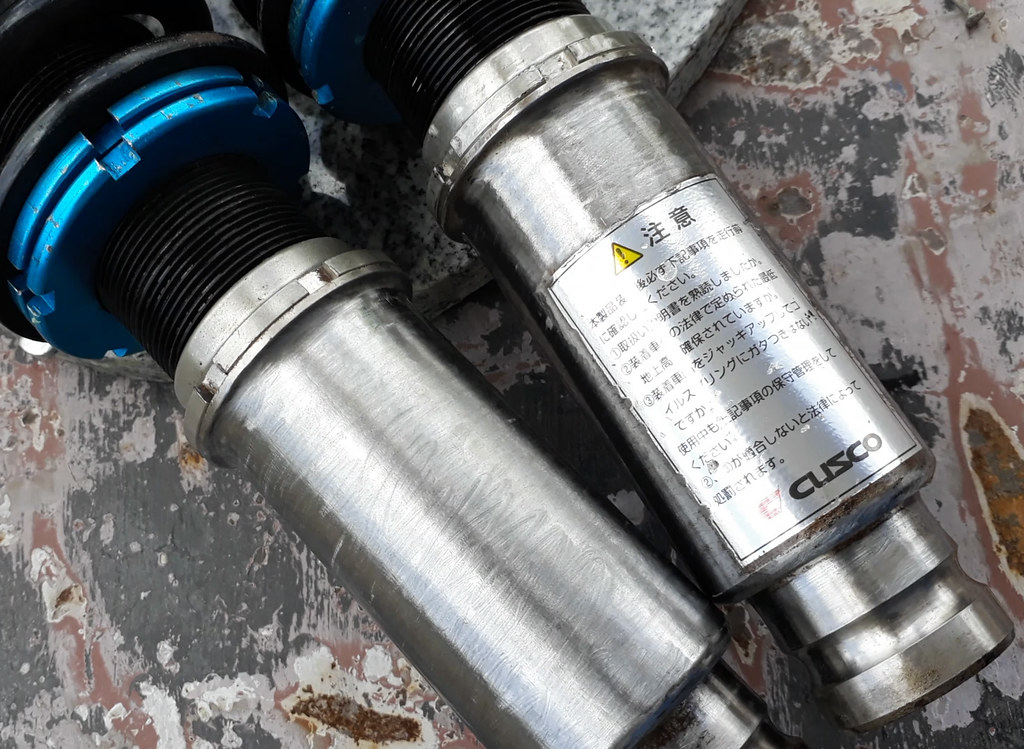
In all the cleaning I couldn’t forget about the Cusco coils I picked up, so I gave those some love as well…
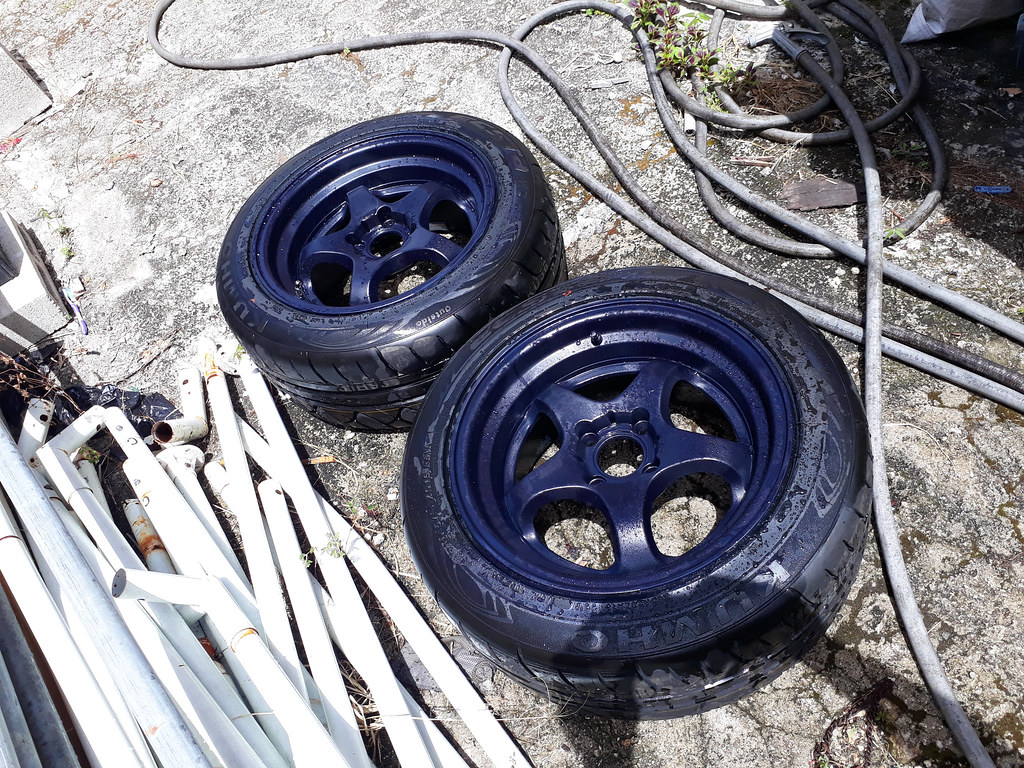
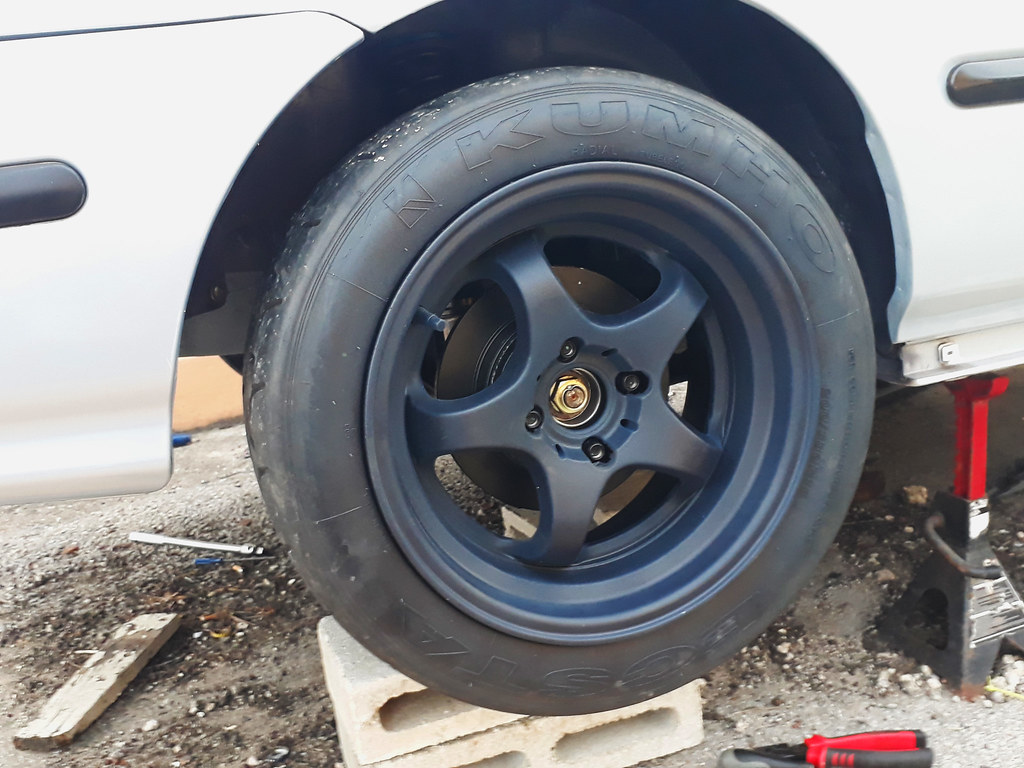
At this point I not only didn’t have any wheels for the build but it wasn’t anywhere close on my radar. Well that was until I made a visit to TT AutoWorks to collect some parts and stumbled on a a set of 15″ wheels still in the boxes…
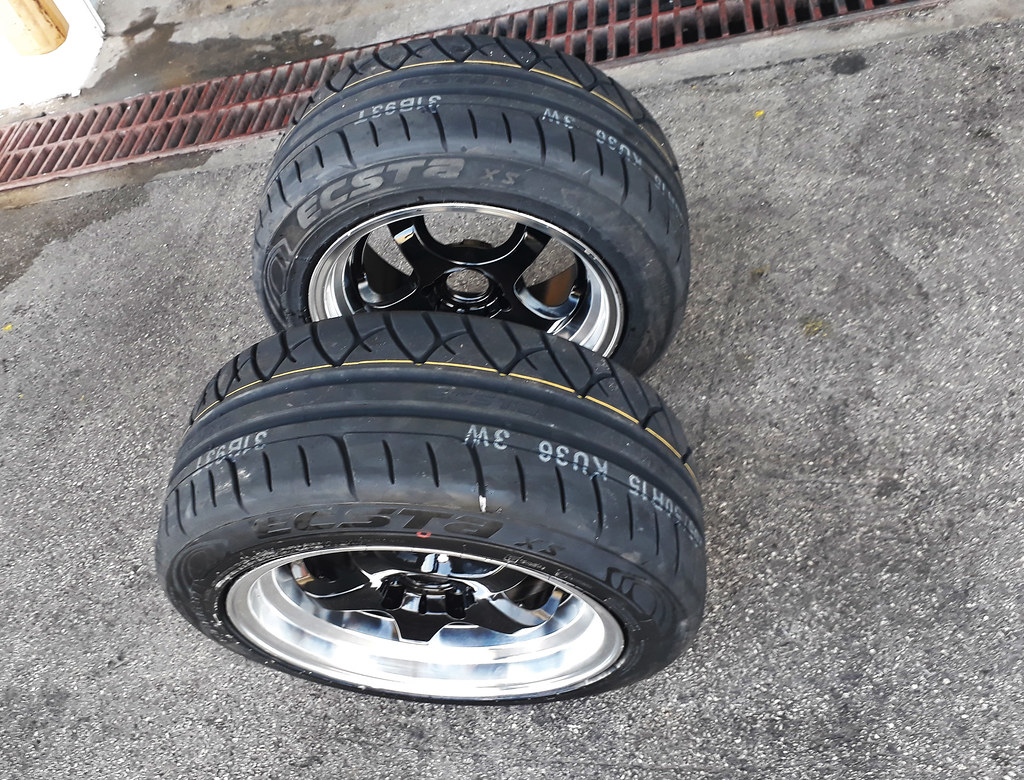
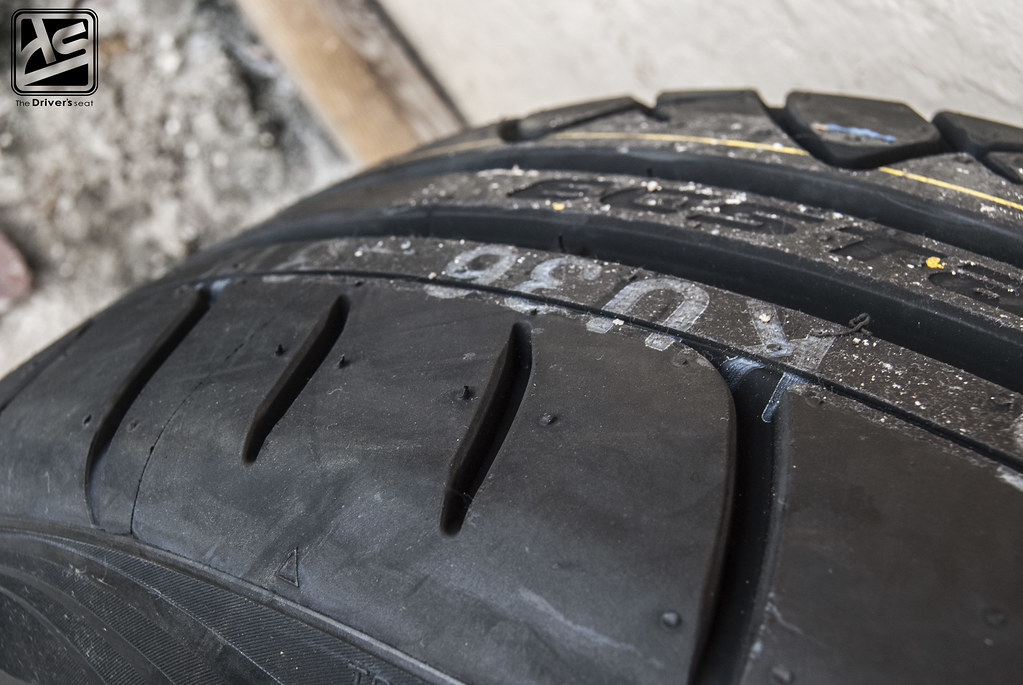
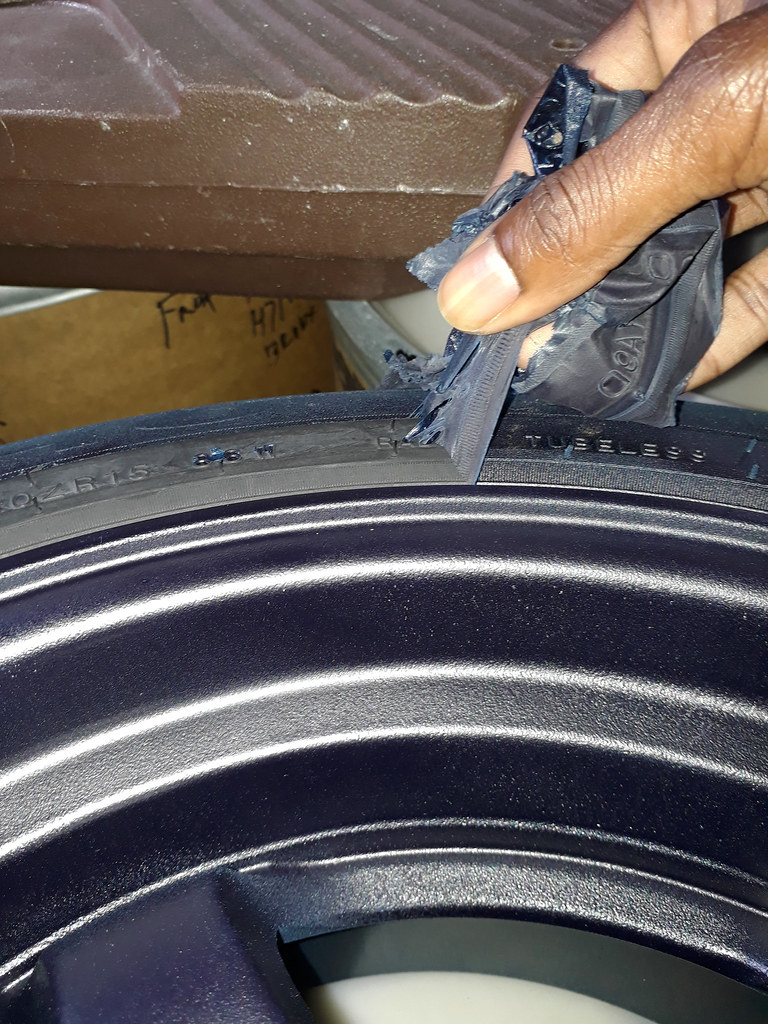
Needless to say I couldn’t pass them up and quickly went to Automotive Art and had them wrapped them in some Kumho Ecsta KU36 rubber…
Unfortunately it was the last two the had in stock at the moment…
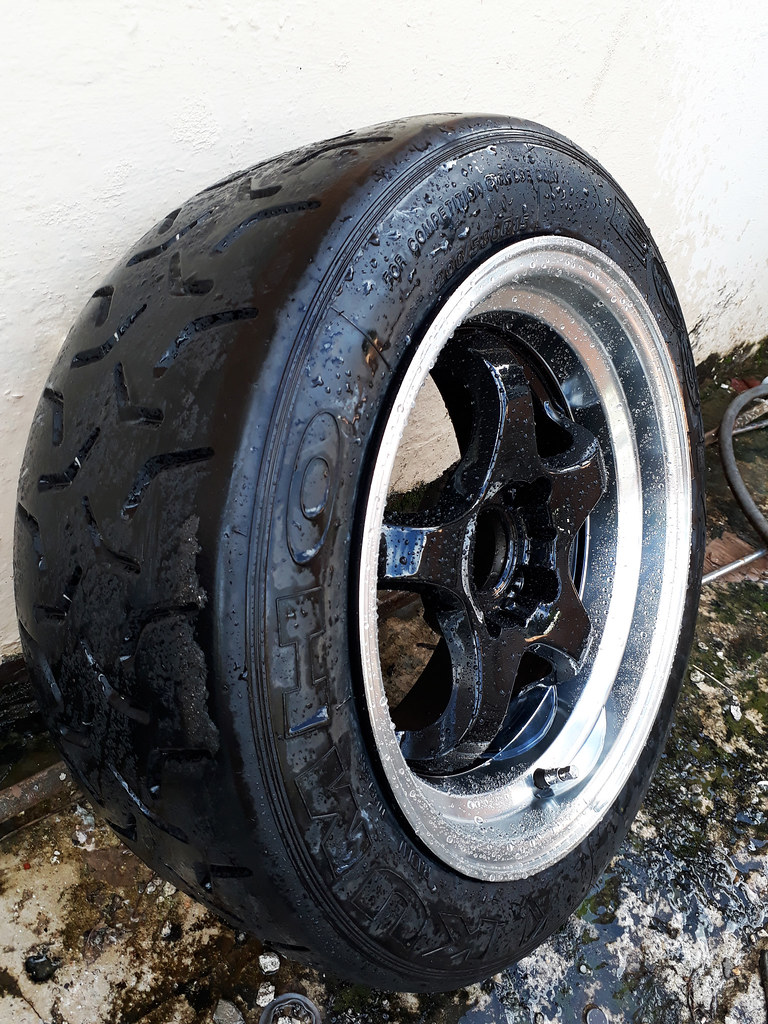
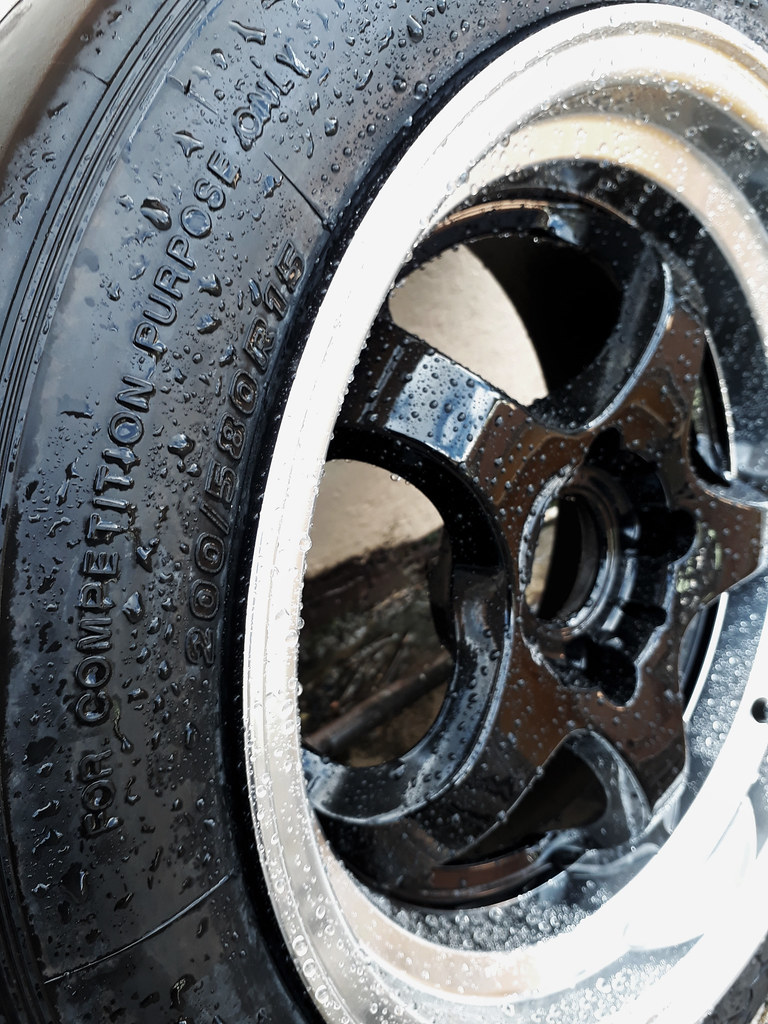
However, I had in my possession some Kumho Ecsta C03 race compound tyres…
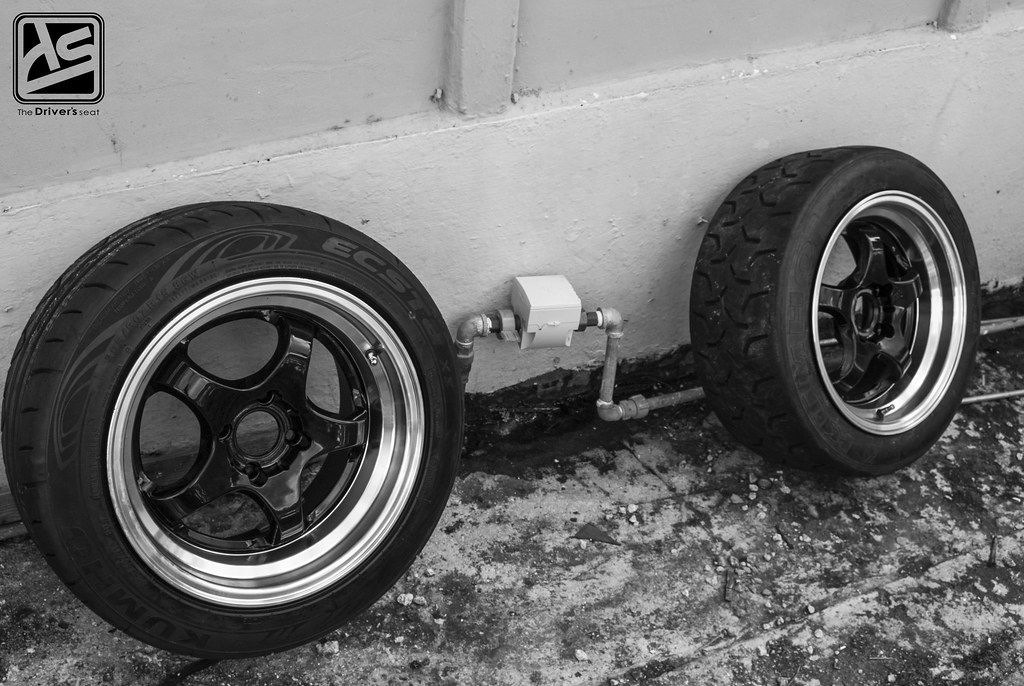
So for the moment the wheels were mixed between the two compounds until the new stock landed…
Messing around as the car still was without any suspension…
Even though I was a step closer with the wheels in my possession, I wasn’t completely sold on the black and machined lip finish, so I opted to go for something a bit different…
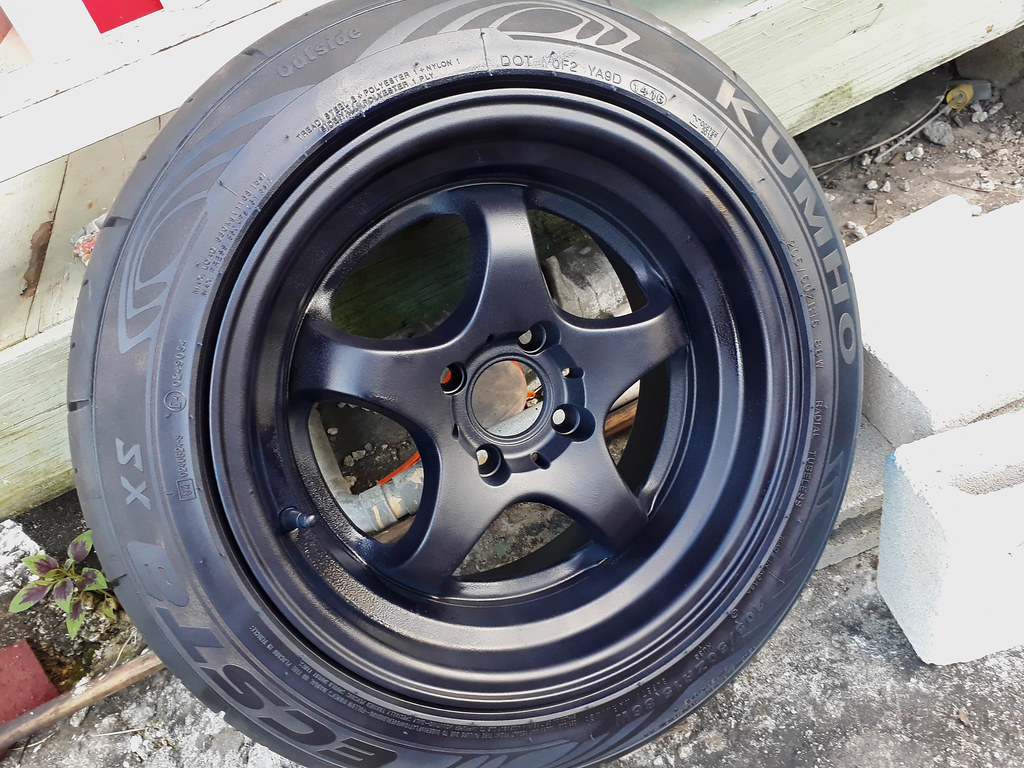
And decided to experiment with some plasti-dip…
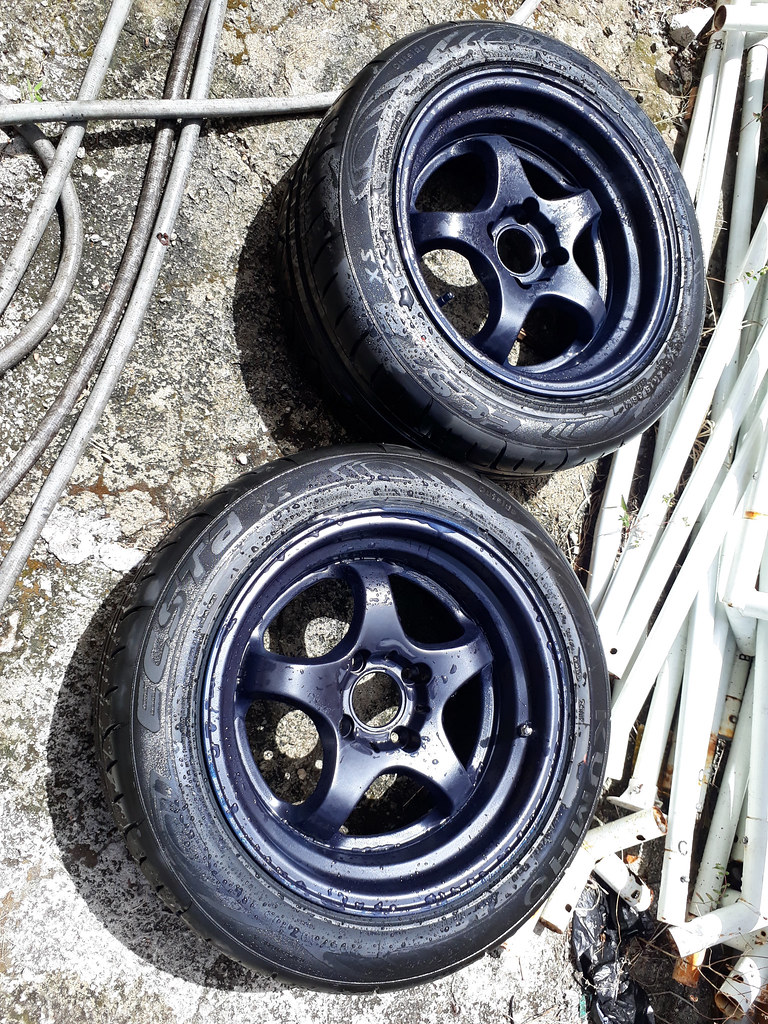
The end result was a bit more subtle which was along the lines of what I was looking for…
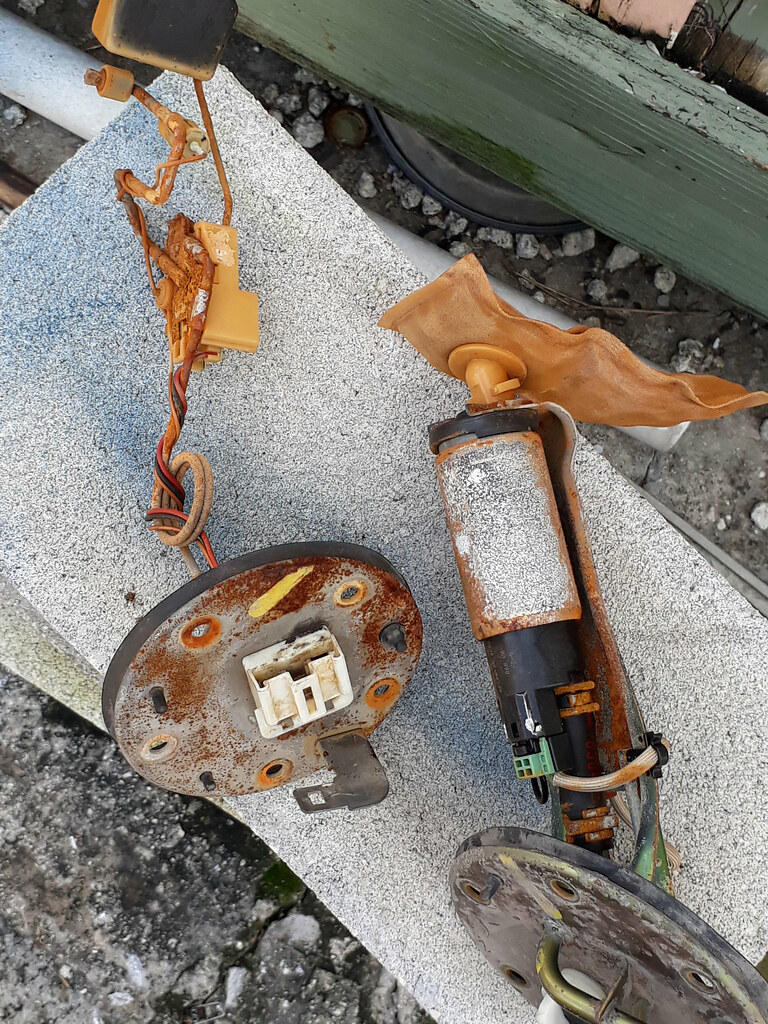
Sad to say after having the car sit for a few years there was some signs of decay when I dropped the fuel tank…
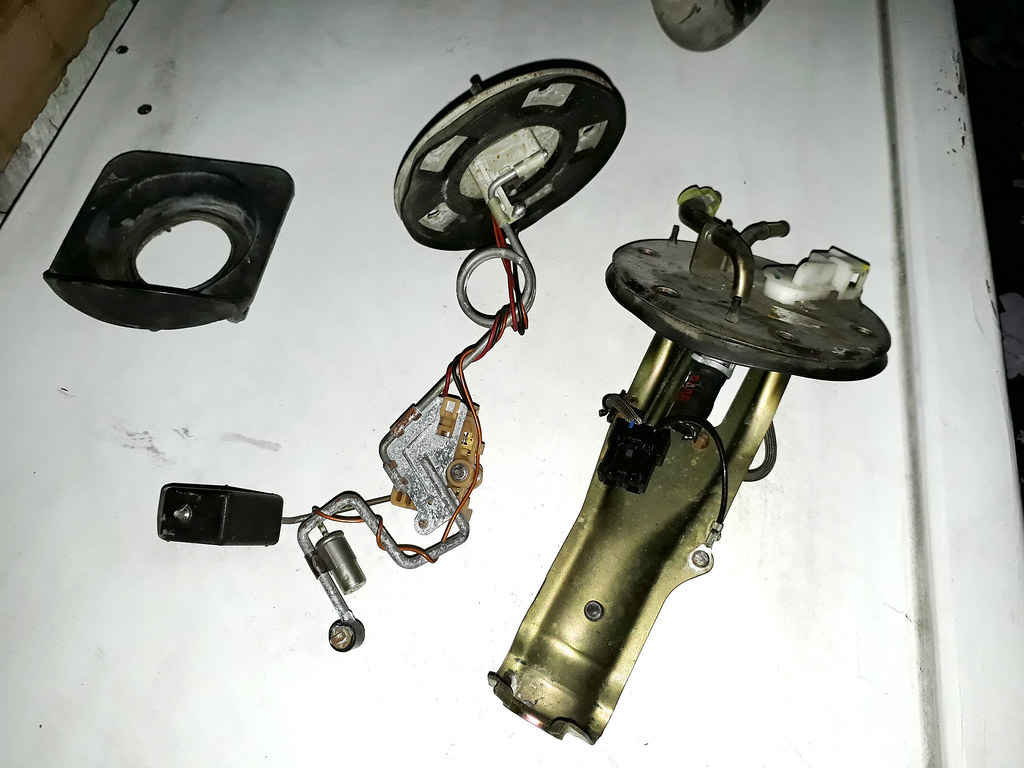
Fortunately I was able to pick up a float and a fuel pump hanger locally for a reasonable price…
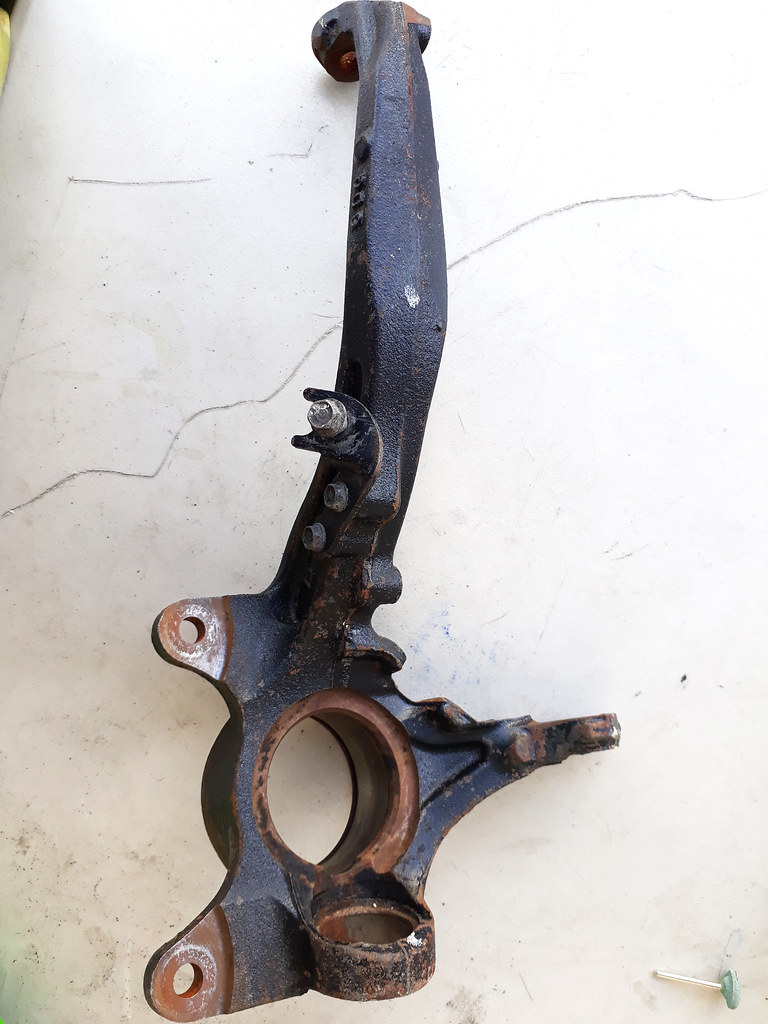
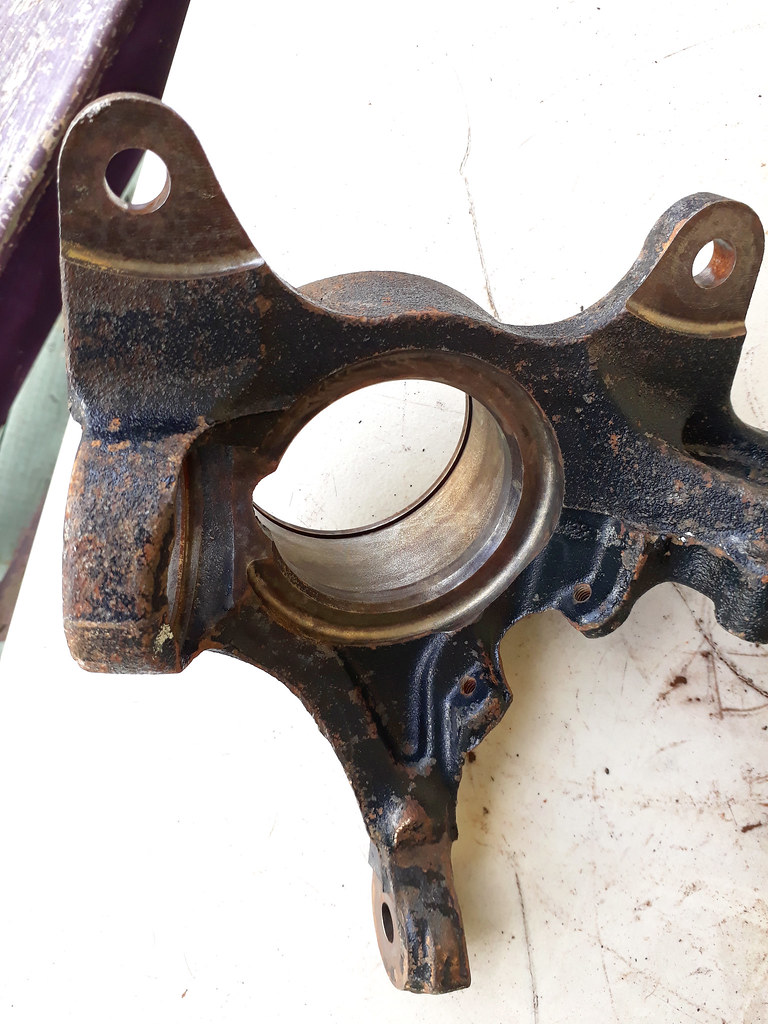
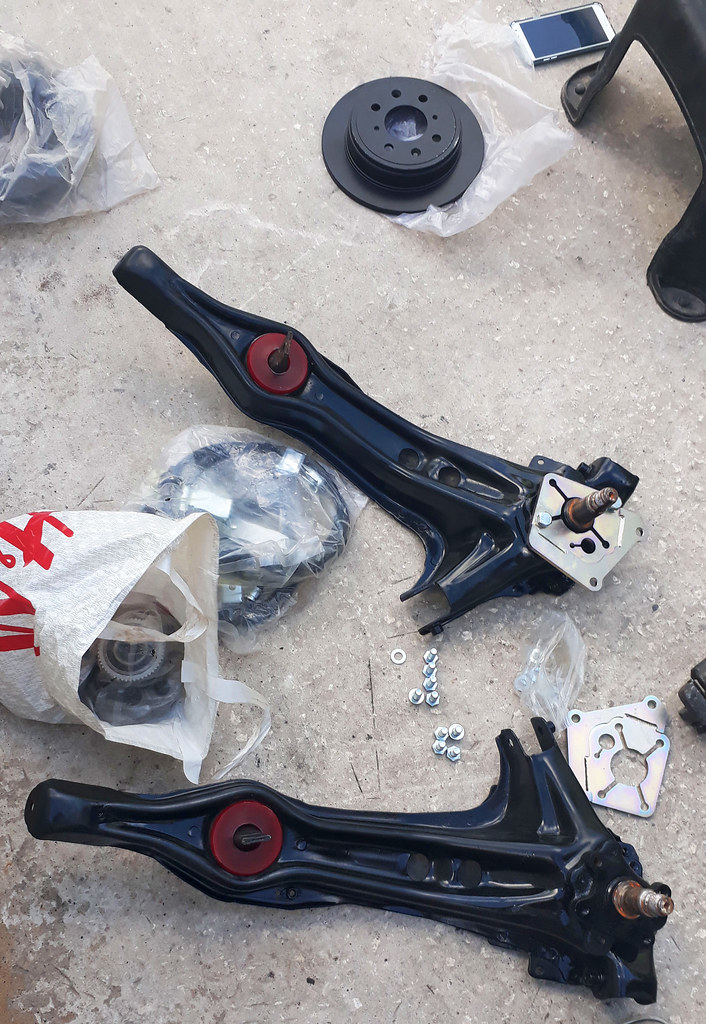
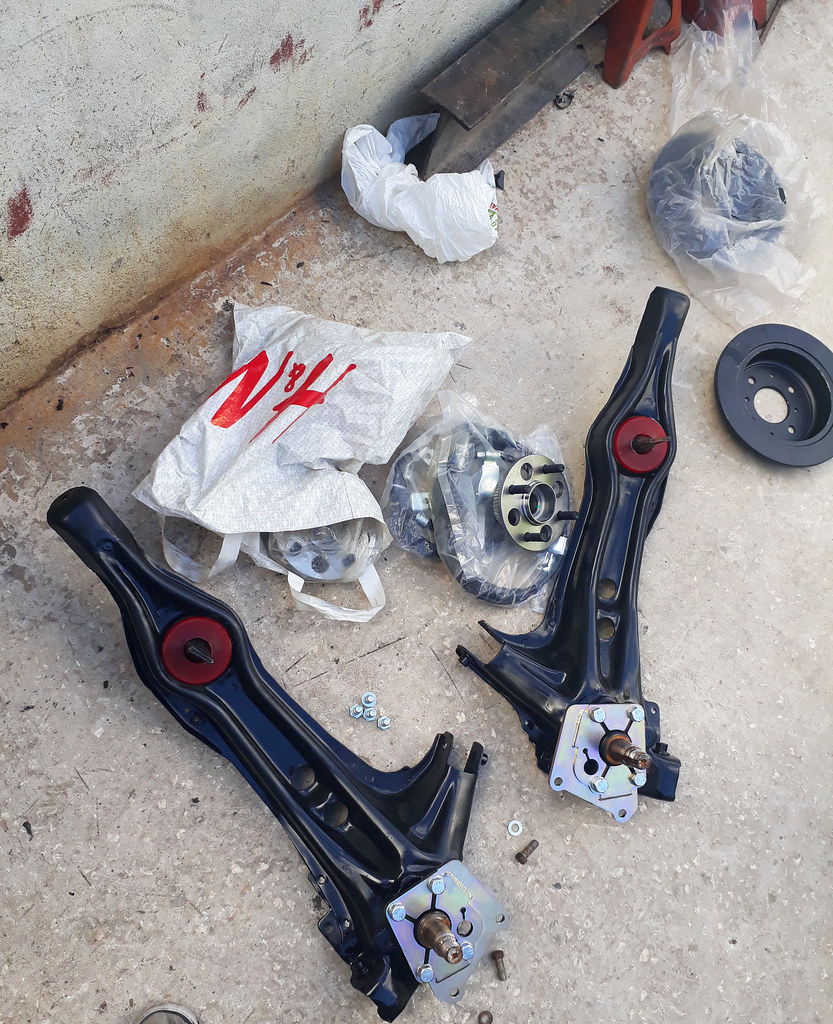
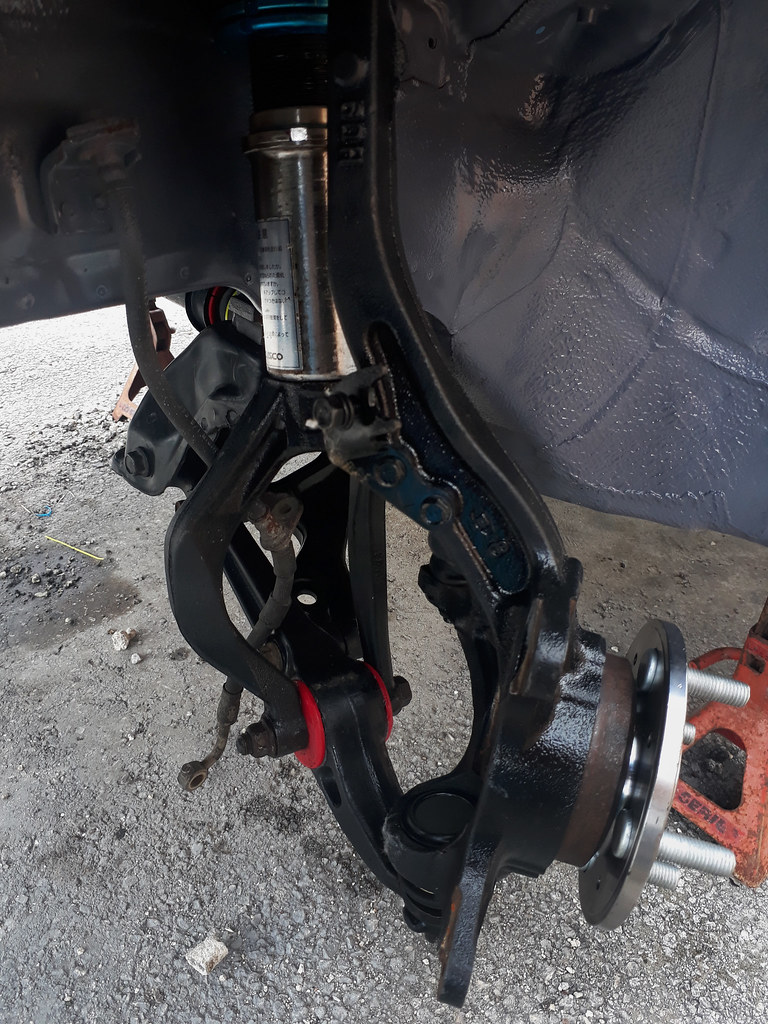
Having received the front knuckles after the ball joint, hub and bearing were removed, I still had some unfinished business to be dealt with…
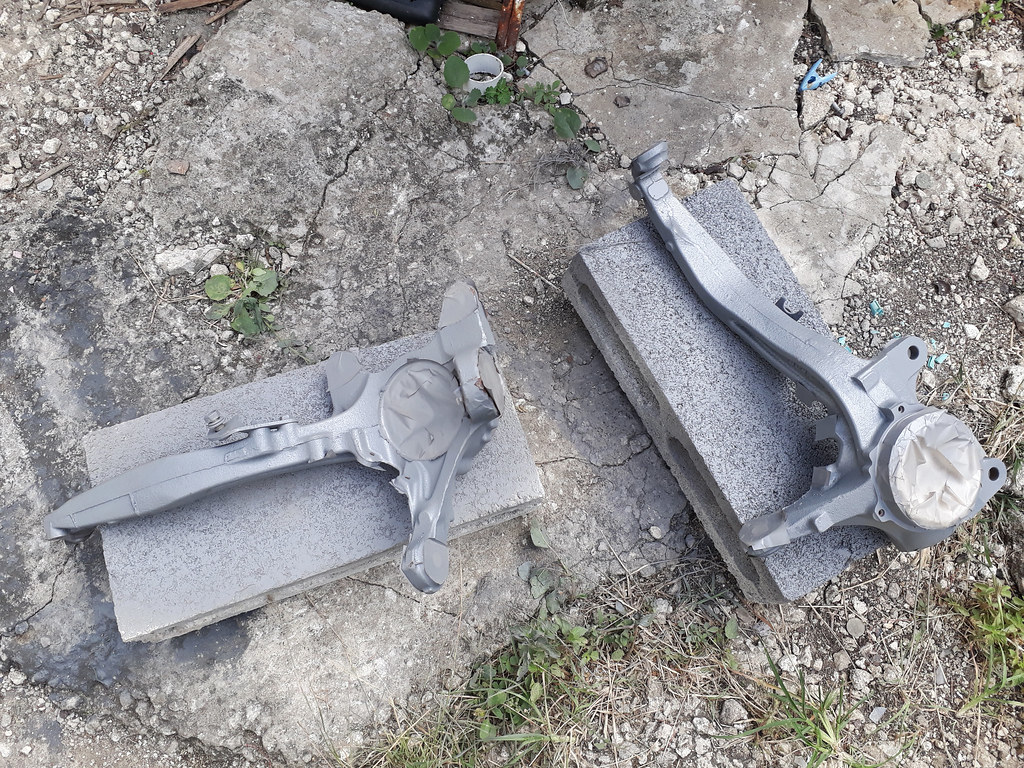
The knuckles would need to look the part…
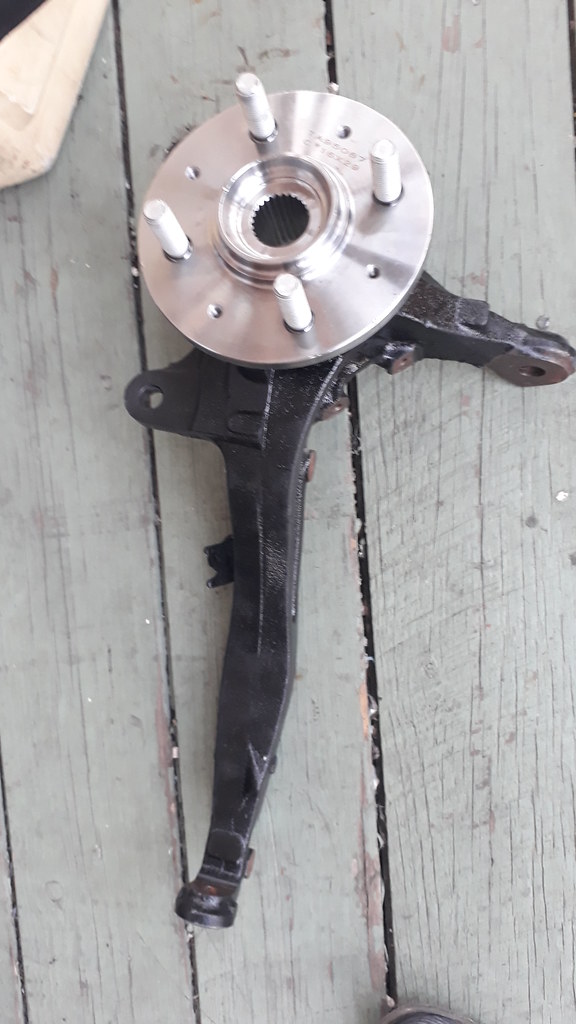

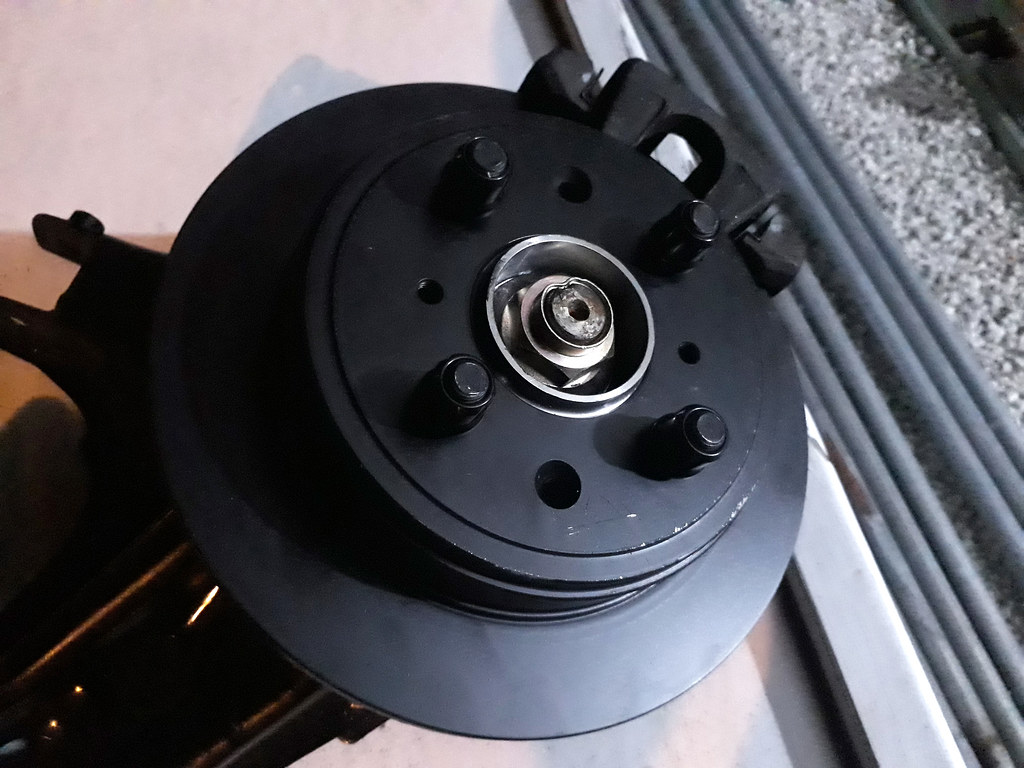
Knuckles with a new hub, wheel bearing and ball joint fitted…
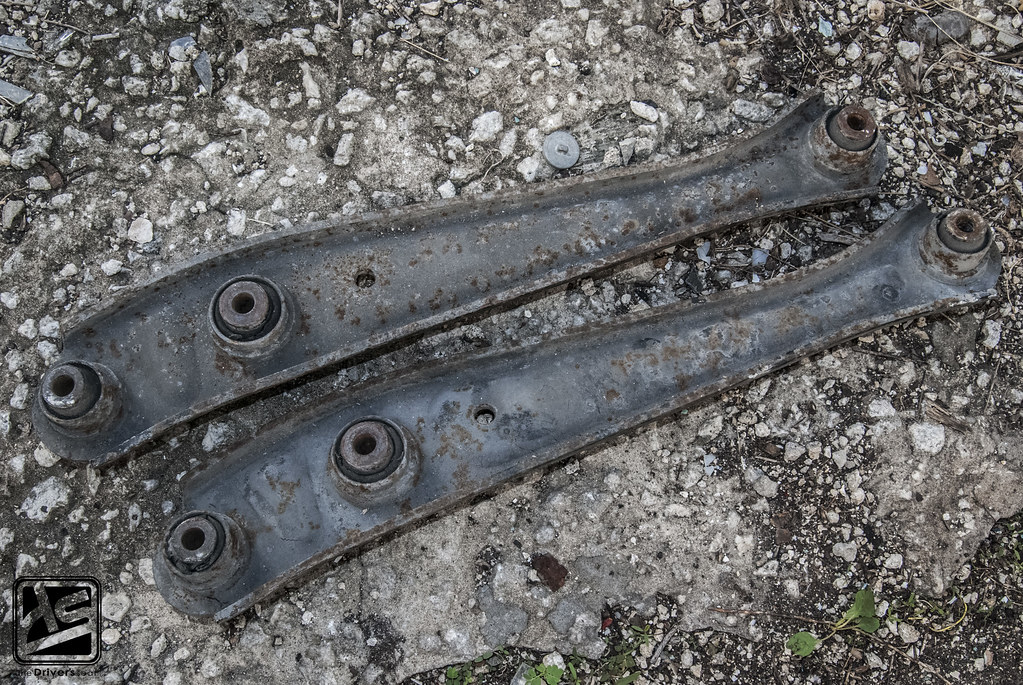
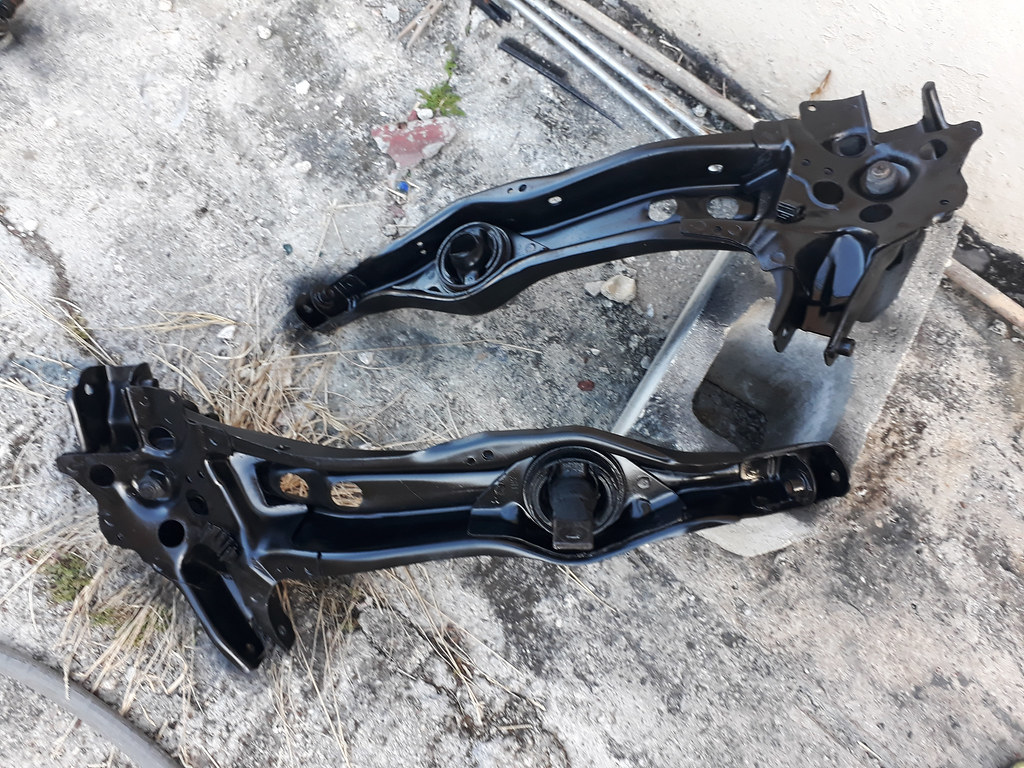
I had one more component to be dealt with, the dated and tired rear LCAs…
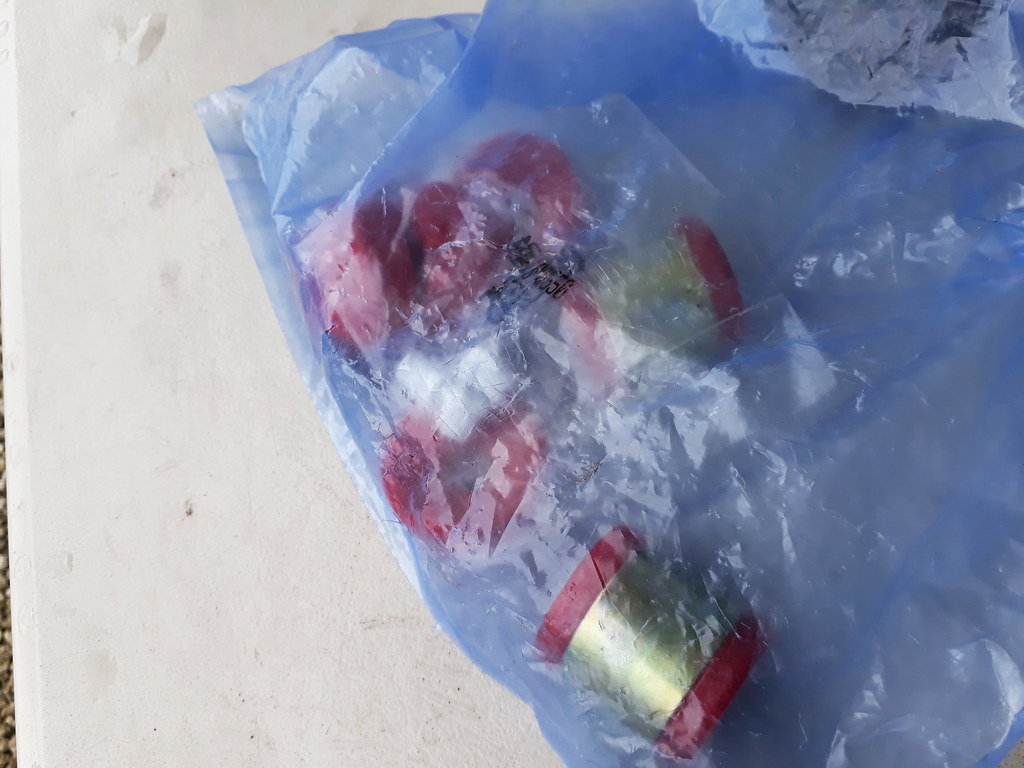
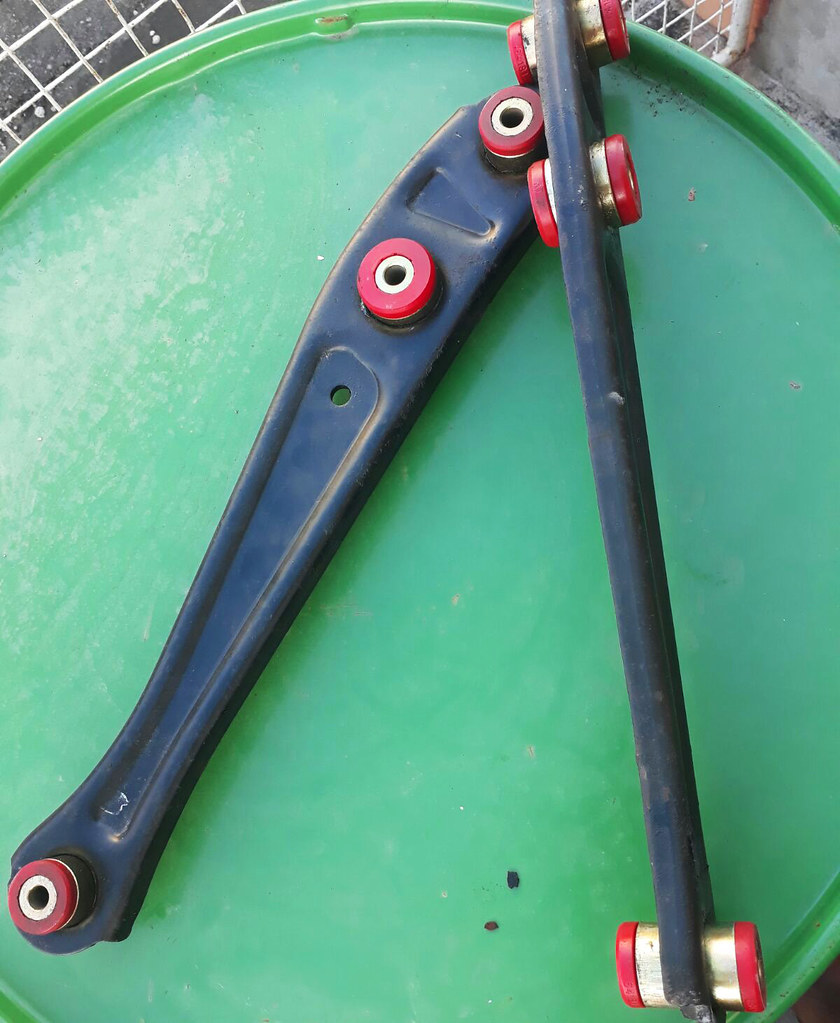
For the moment I opted against going with new rear LCAs and picked up some bushing replacements from Energy suspension…
Things were starting to come together, it felt like such an accomplishment to be finally done restoring the suspension components. It was time to get the parts installed on the car and set it down on the wheels after what was practically a lifetime sitting on jack stands. I was also excited to be able to test fit my wheels.
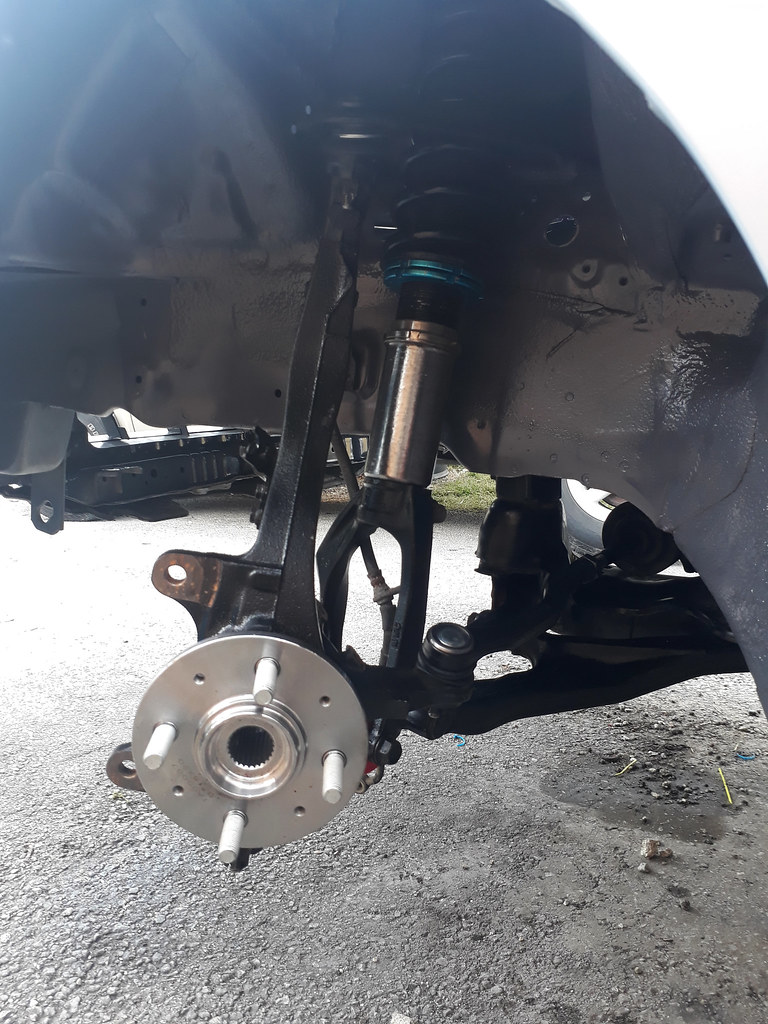
Cusco Zero2 coilovers, knuckle with new hub and bearing along with upper and lower control arms refreshed and assembled…

Meanwhile in the rear, I bolted up the refreshed trailing arms with Energy Suspension bushings, Blox Racing adjustable toe and camber kits along with the new hub and bearing assembly…
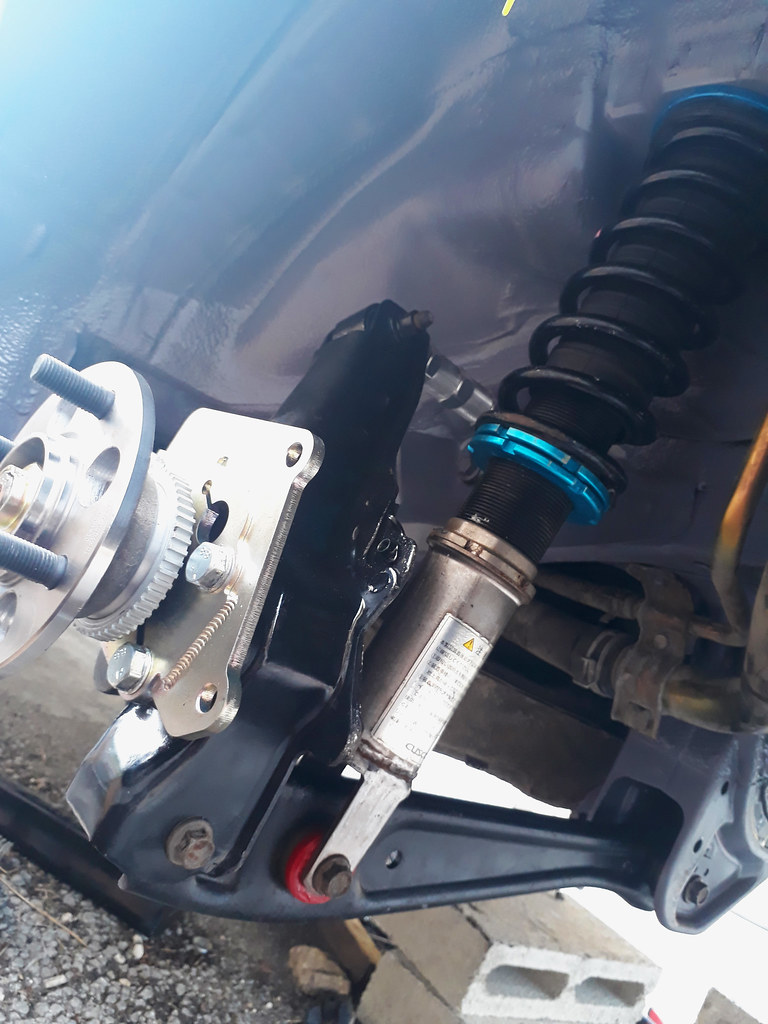
I can’t forget about the Scarebird caliper bracket…
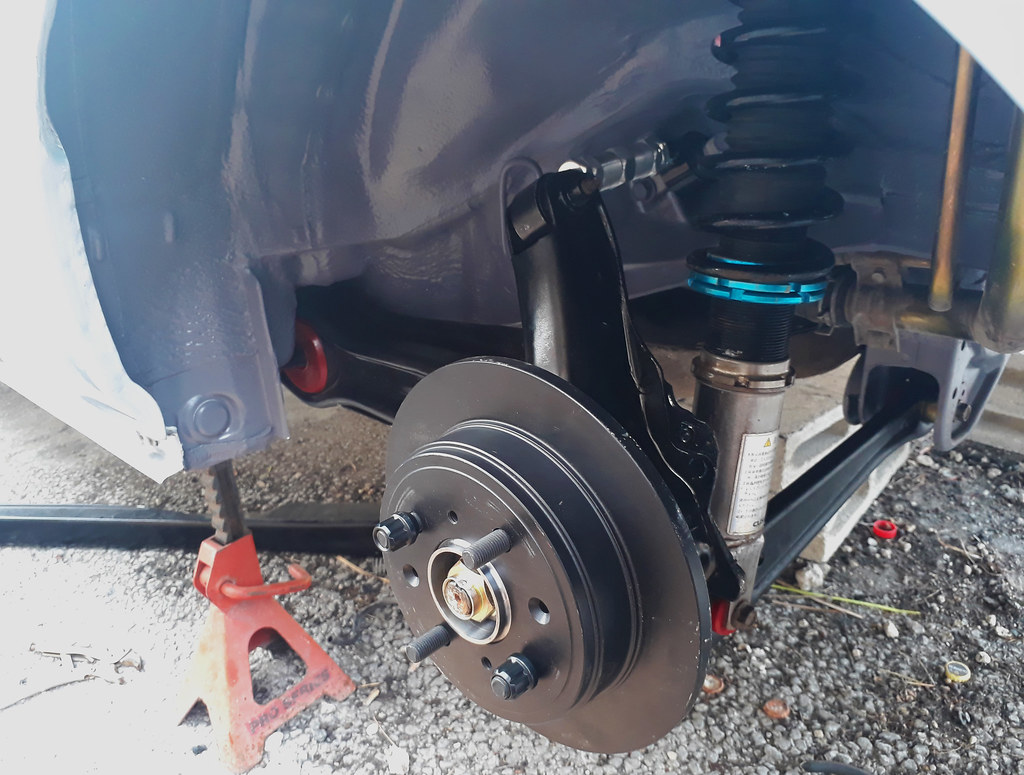
A look at the EBC rotors temporarily mounted in place…
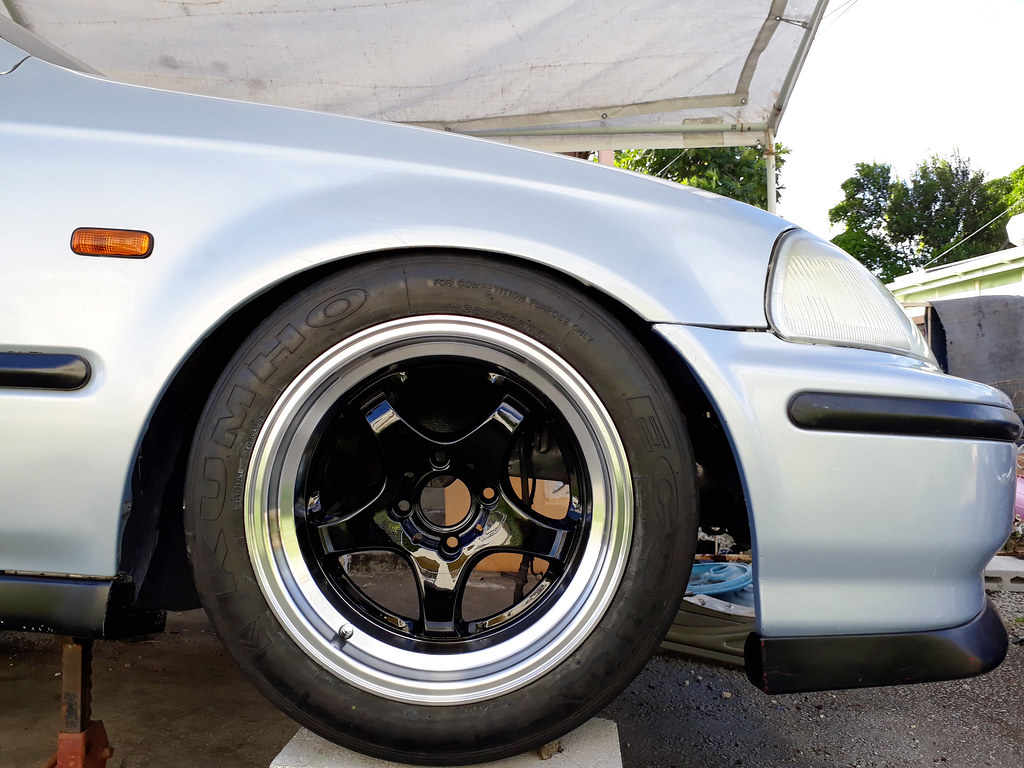
With the suspension bolted up, I was able to test fit the new wheels…
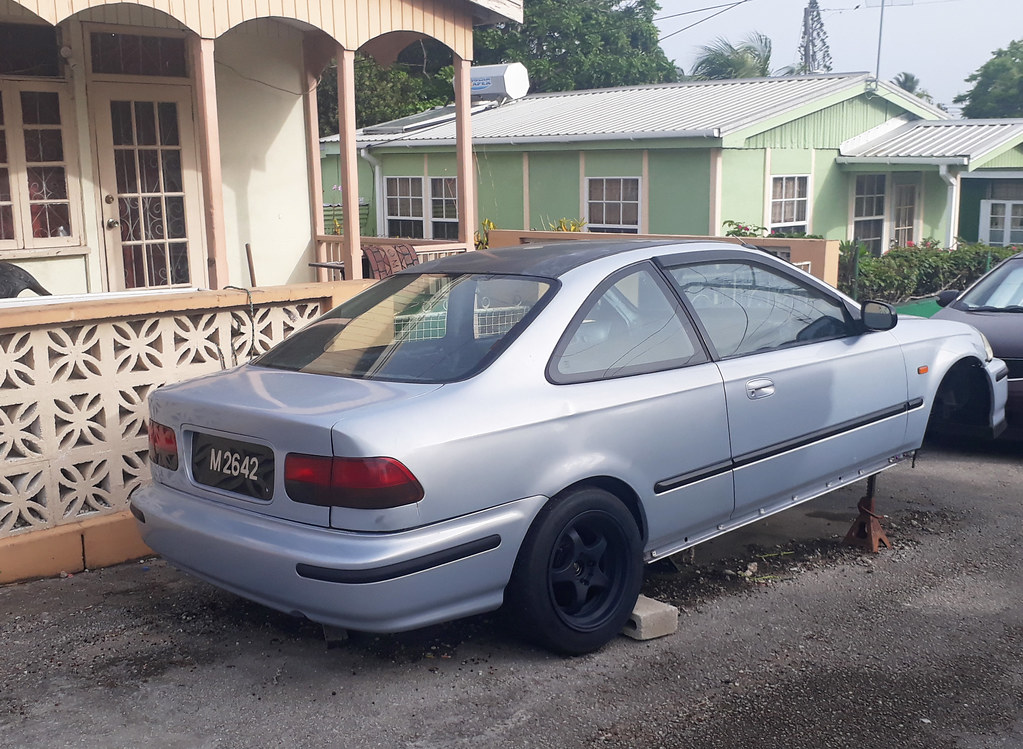
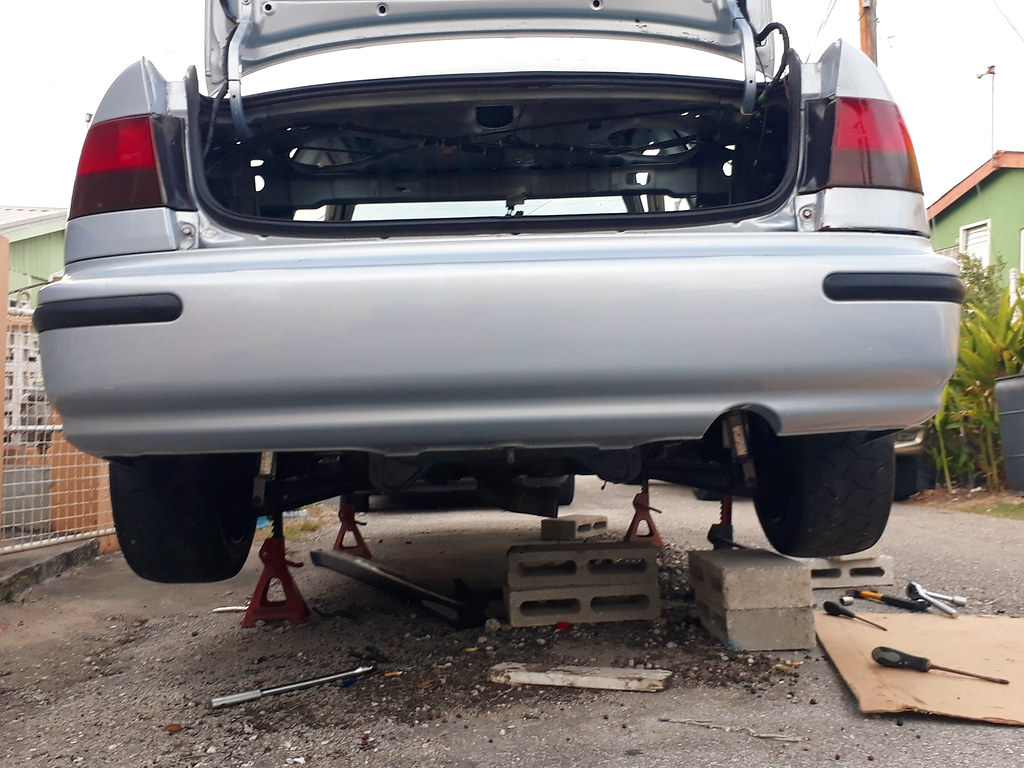
And with that, finally get rear end on the ground…
That’s it for today’s update on my EJ8 build; I hope you guys enjoyed and I will leave you with one final parting shot…

