
Leon’s K-Swapped EK4 Build…Part 3
We return today with an update on Leon’s K-swapped EK4 build. Building cars isn’t an easy task, there comes a point when the challenge at hand feels as though it outweighs the end results. If your passion isn’t strong enough you will certainly give up. We left off with Leon being dead set on a reimagined vision of his car. In his mind after overcoming the worst, the road ahead should be an easy one. After all how hard could paint be? Leon was in for quite a ride as the ups & downs weren’t over as yet. Finding the motivation to continue is what really separates the strong ones who will carry on to do great things.
In this update we’ll be looking at an in-depth view of the paint phase & the additional challenges to follow thereafter. Suited up for the challenge, Leon pressed on to ensure he fulfilled his dream. With this mindset, he was able to push pass the dark times & got a glimpse of the finish line as the car took a turn for the better.
For those who may want to view this build from the start I’ve provided the links below:
Leon’s K-Swapped EK4 Build…Part 2
Having a vision for a build is one thing but the body of a project car really determines the final direction. For starters, having a body shop that produces not only fast but quality work is very important. It is at this stage where many projects begin with high hopes & are often crushed over a slow & unproductive time period…
Fortunately, Leon was able to find a body shop which was more focused on doing a good job over a fast job…


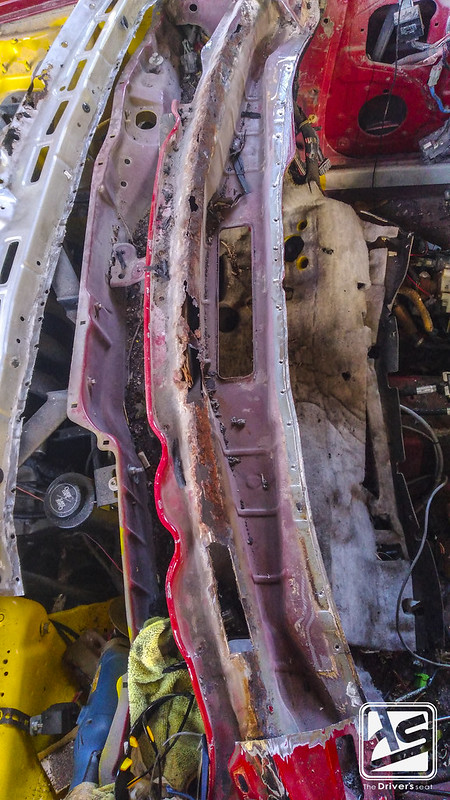
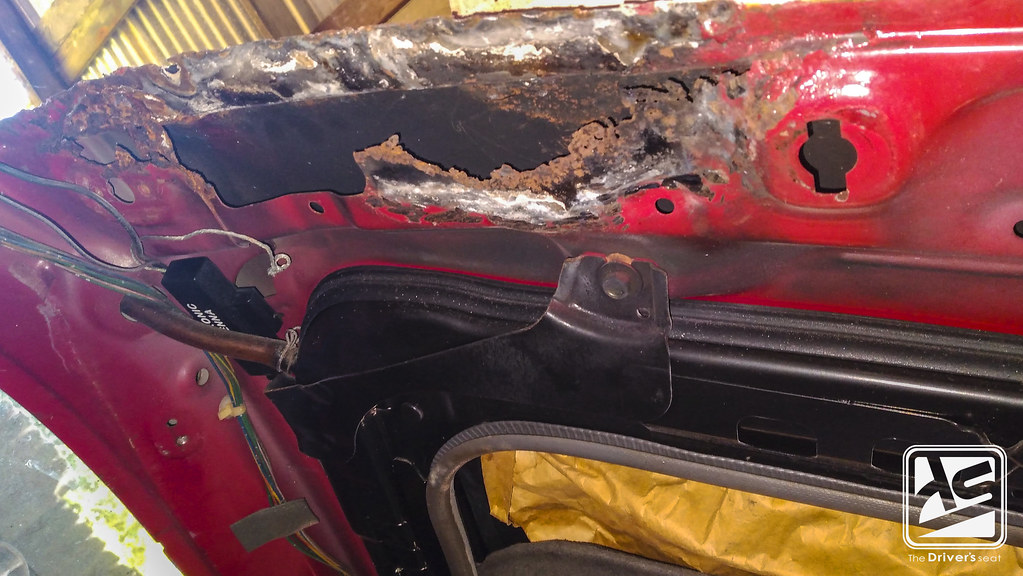
Starting from the top, the teardown began to reveal way more problems than he initially bargained for & it wasn’t looking good…


Even in the locations where Leon knew to have some signs of rust were significantly exaggerated…
Especially since some of these included portions of the car which would have been previously dealt with by another shop…

Working to the rear of the car the story didn’t change & required more time than he expected…

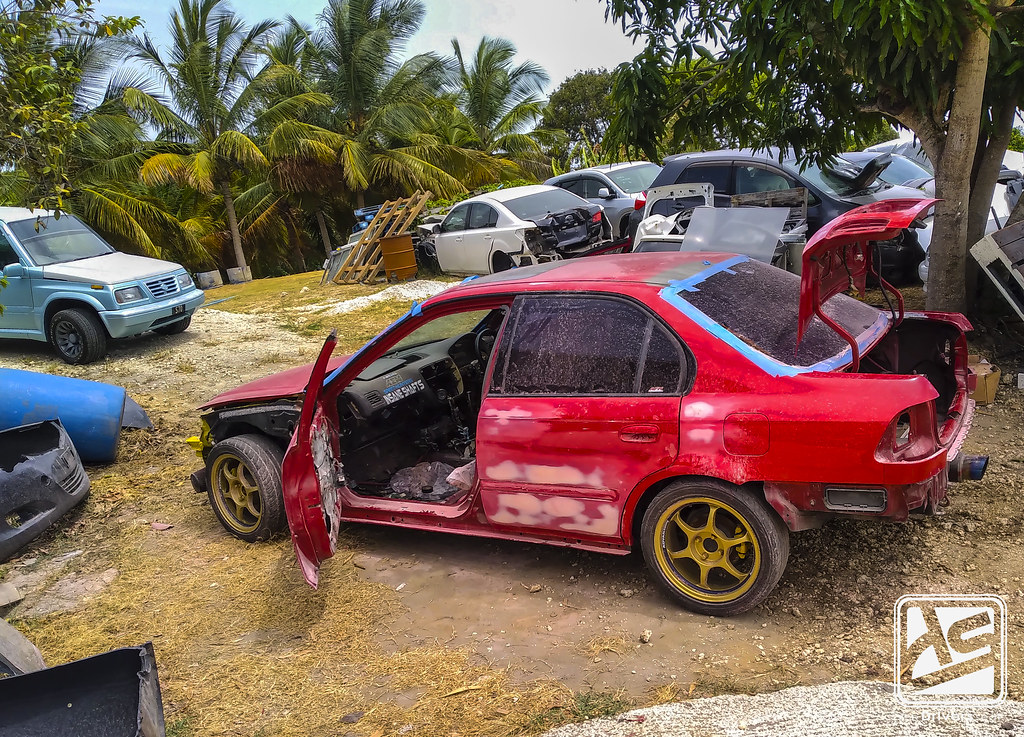
Leon didn’t allow this setback to deter him & began to source the parts required to get the job done. This too was a challenge in itself given the production year ended in 2000…
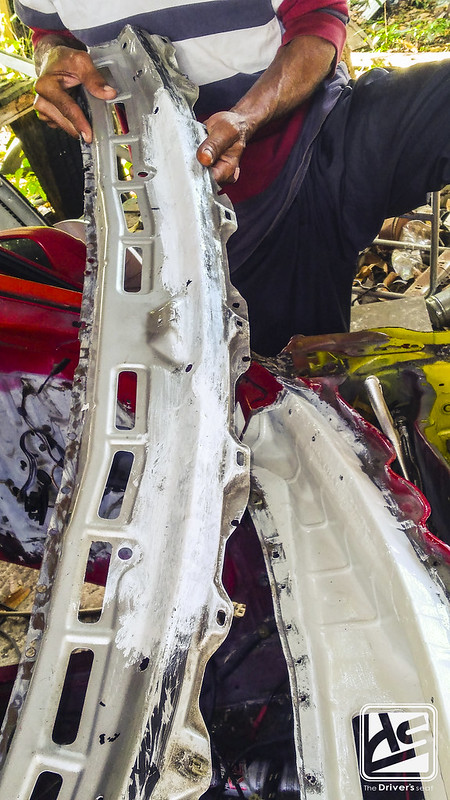
In some instances it was quite simple but as he began searching the troubled areas, Leon had to scavenge through & pick the best of the worst…
The lower windshield portion was a perfect example of this. His original piece was absolutely out of the question as it was a mixture of bad patches & a heavy amount of filler to sift through. Although the panels he was able to get his hands on were rusted, it better maintained the general shape & proved to be less work than what he started out with…
A look at the salvaged panel as it was test fitted into the car & lined up just about perfect…
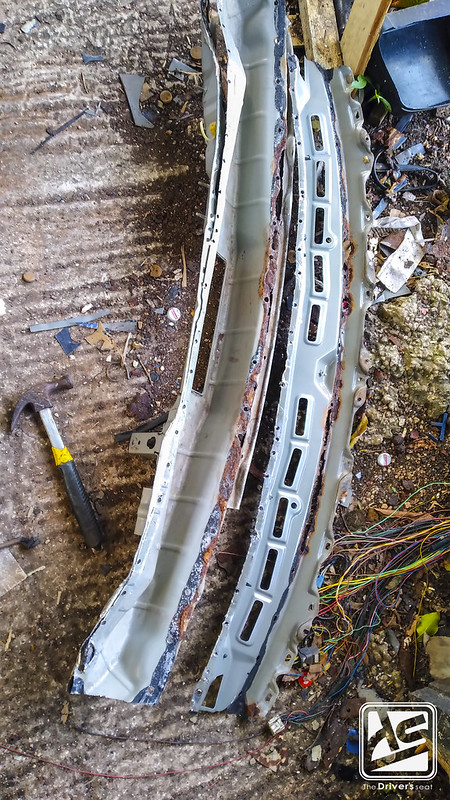
Like most panels, there was an upper & lower portion of this section. Out of the two lower pieces, Leon’s original piece was in better condition than the one he acquired…
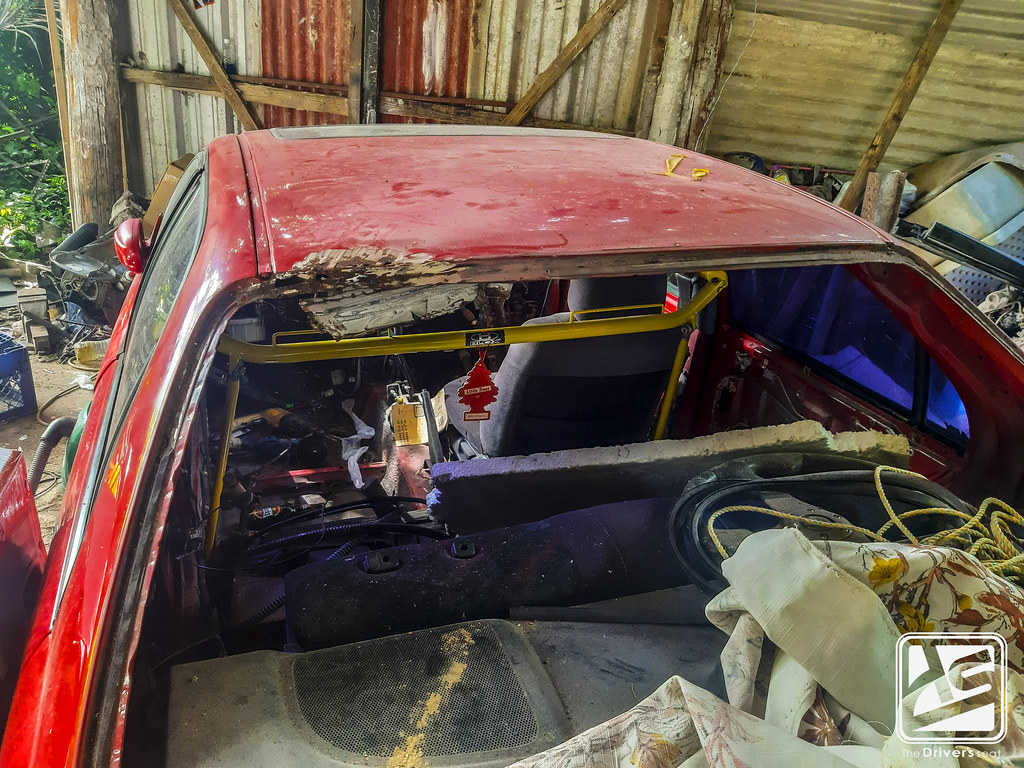
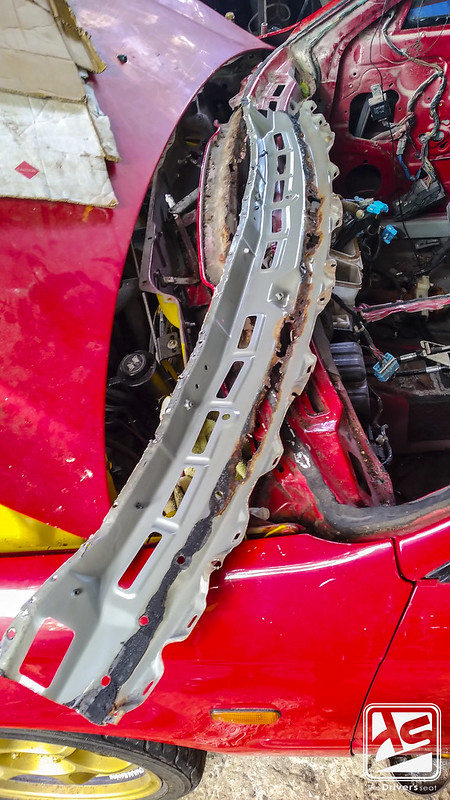
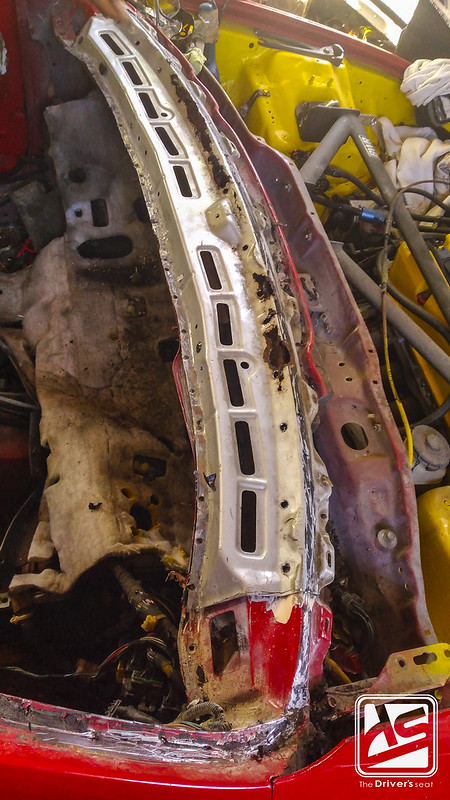
Meanwhile, on the inside of the roof was not looking very good & required a large area to be patched…
Given the tasks at hand, the body guy set out on a mission to bring the EK4 back to life…
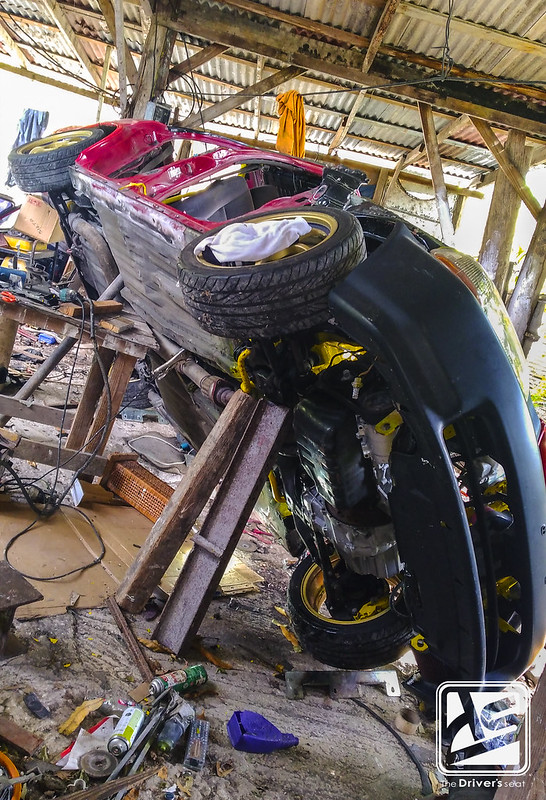
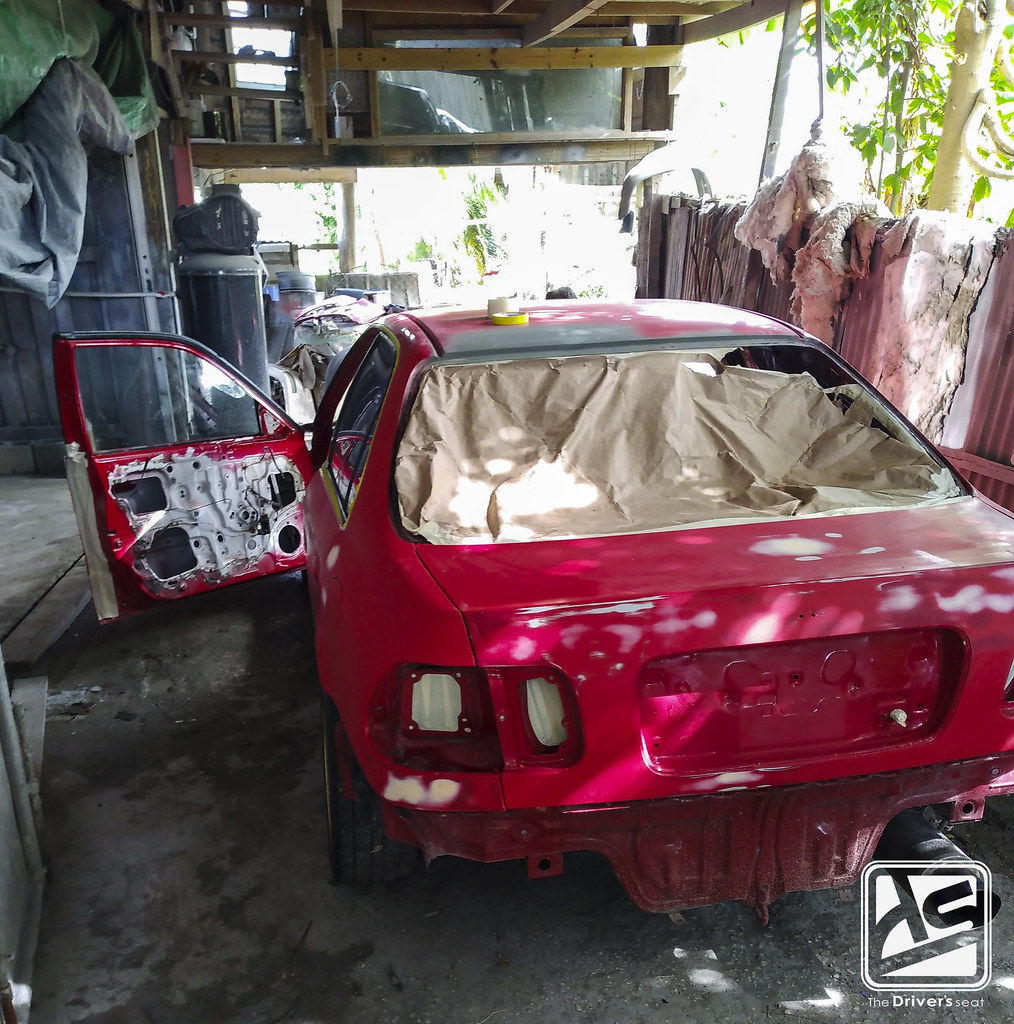
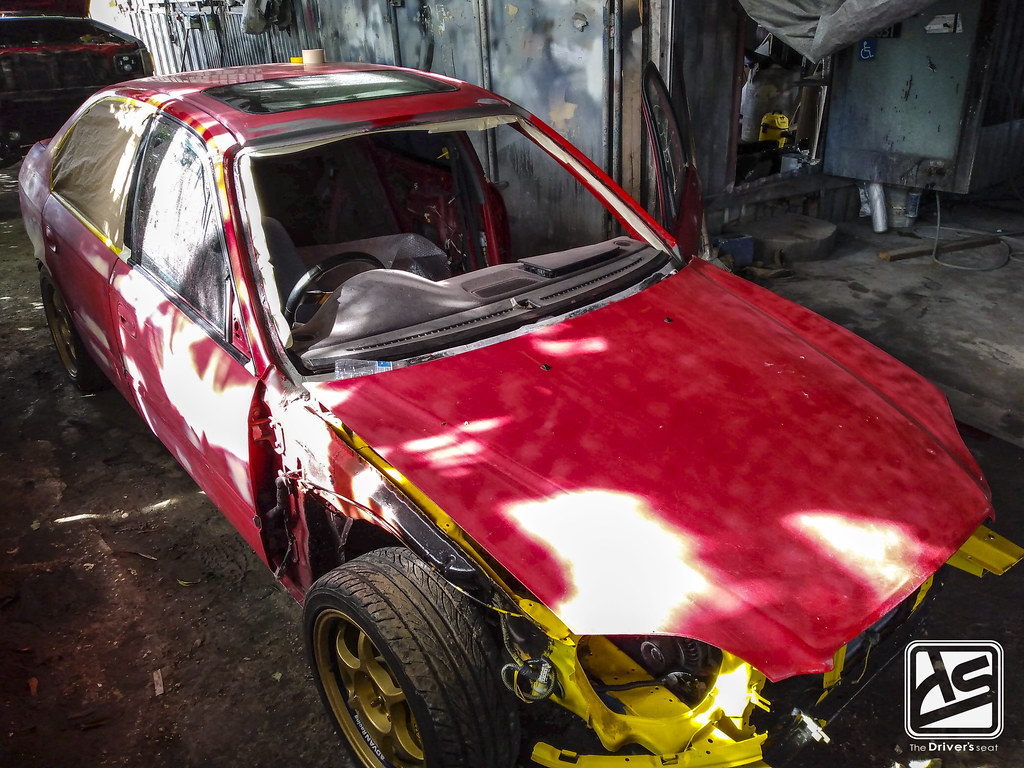
Down to bare bones; as the EK4 sat missing panels in an effort to be restored to greatness…

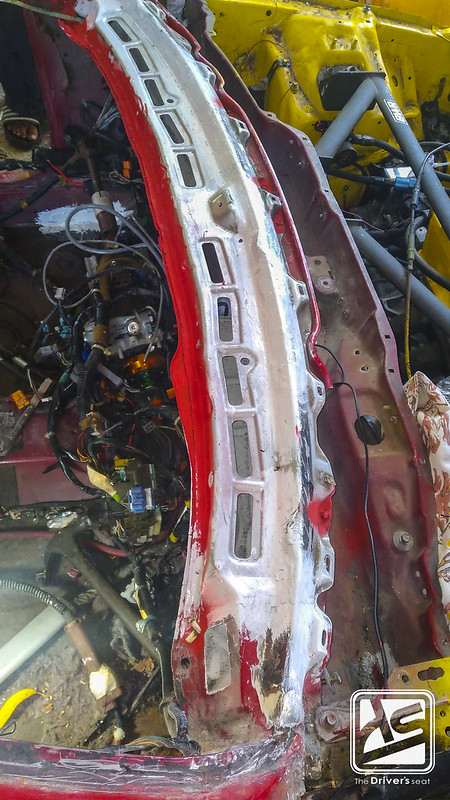
A look at the fully repaired lower panel of the windshield which was rust coated to add a layer of protection to it…
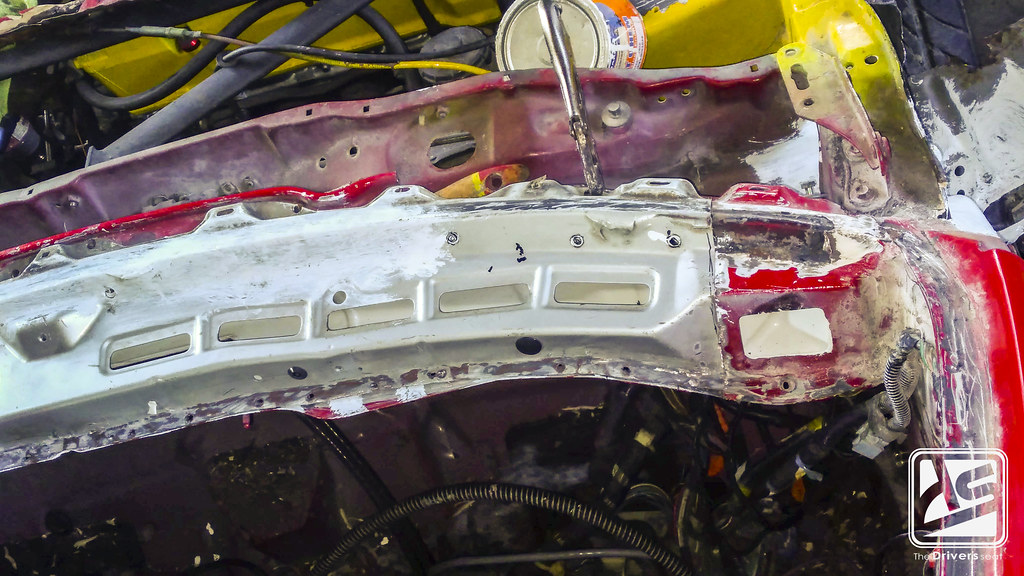
The panel was then tacked into place awaiting the final welds to fully secure it…

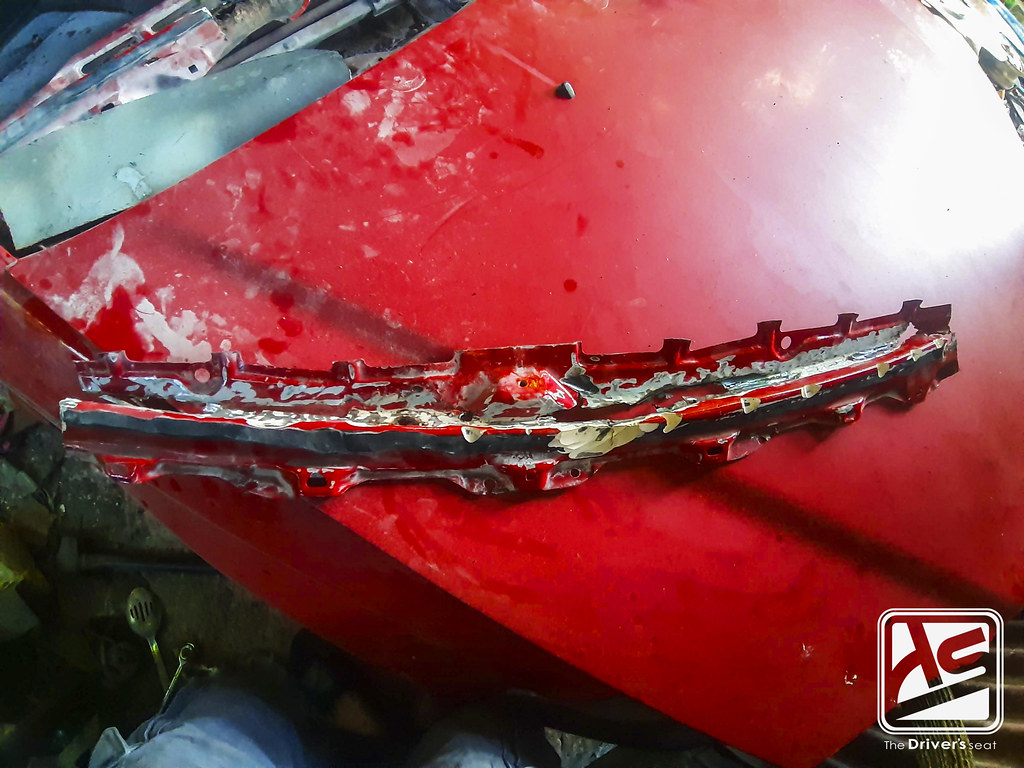
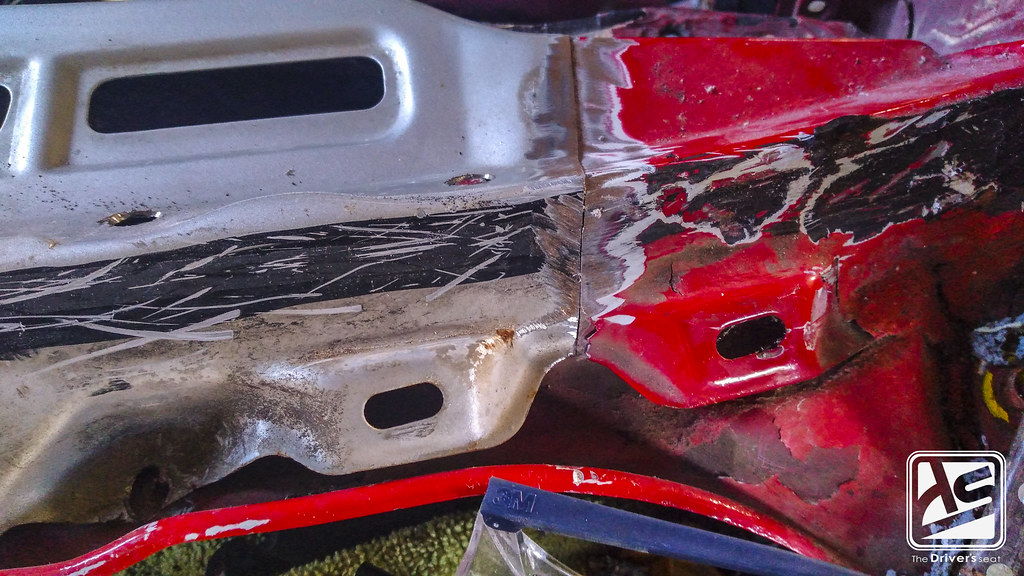
Having dealt with one hurdle, it was on to the next. The underside of the EK4 also saw the likes of some rust & the body guy didn’t shy away from it…
Checking to make sure he didn’t miss any areas & that his work was satisfactory…

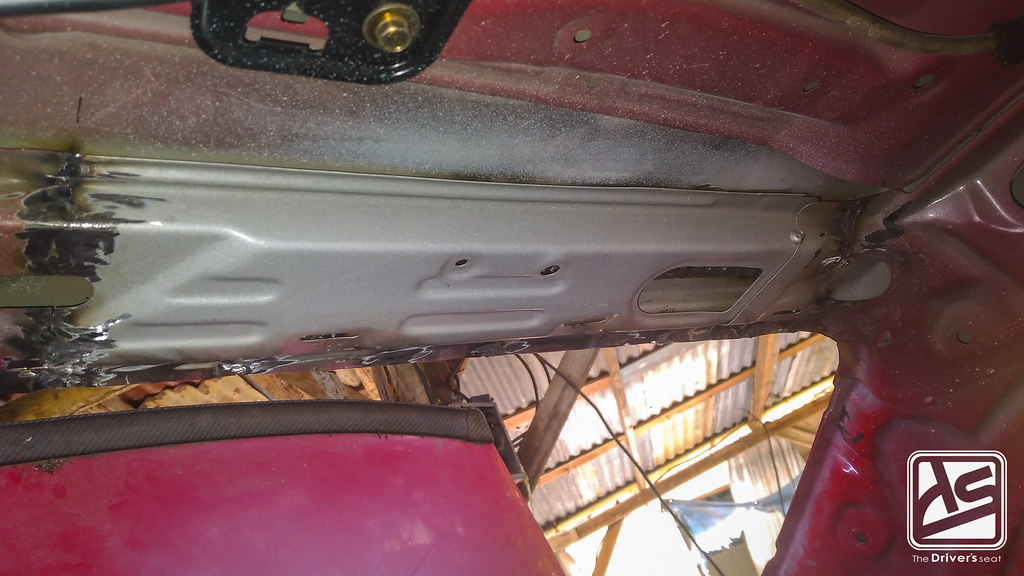
On the inside of the roof was fully patched up with new metal & awaiting the rust protection…

The finishing touches were applied to close out the major bodywork & it was now time to move to the next stage…

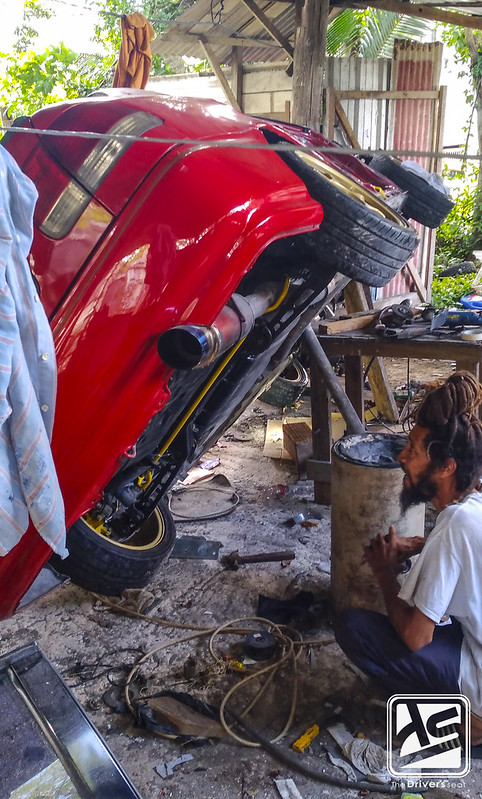
You guys are there probably thinking off to the painter, but not as yet. The car was loaded up & transported back home…
Speaking of home; while the car was over at the body shop, Leon was busy making sure he did everything in his power to turn his dreams to reality…
Previously I would have mentioned that Leon is an avid fan of time attack. In this next chapter of the build he wanted to push the car to be more of a track focused build. First on the list was a set of J’s Racing canards to switch up the look of the front end…

With this restoration in progress there were a few key things Leon was not going to sleep on. A fresh set of headlights were purchased along with a set of tail lights to complete the rear end. As for the engine department, a Unit 2 baffled steel sump was acquired to properly handle the aggressive cornering when he does hit the track. In addition to this, a K20 oil pump conversion was picked up to delete the factory balance shafts found on the K24 motor…

Let’s not forget about the bright red Bride seats which were a long time bucket list item for Leon that he was finally able to check off. Before sending the car off to body work he was having some gearbox related issues & a few necessary parts were ordered to carry out the repairs. Some additional goodies were also picked up to aid with the overall rebuild…

A view of the Bride Low Max seat paired with PCI seat brackets…
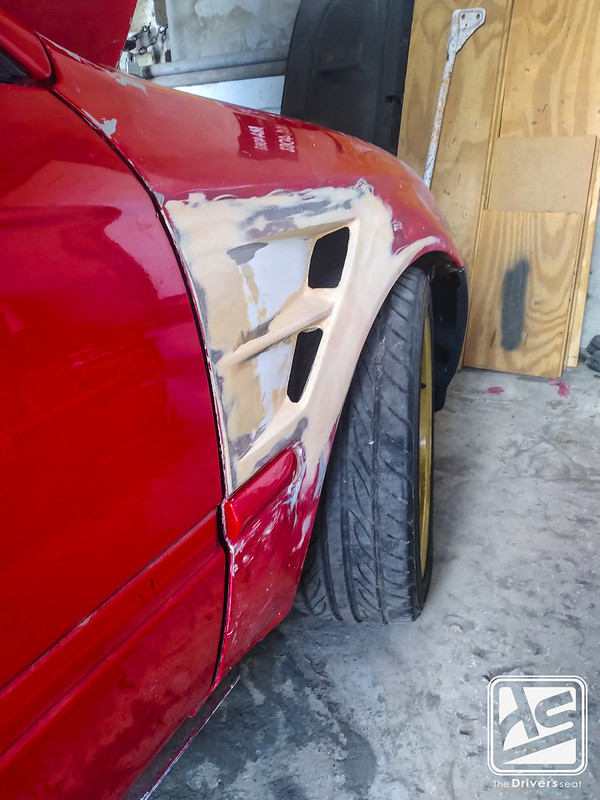
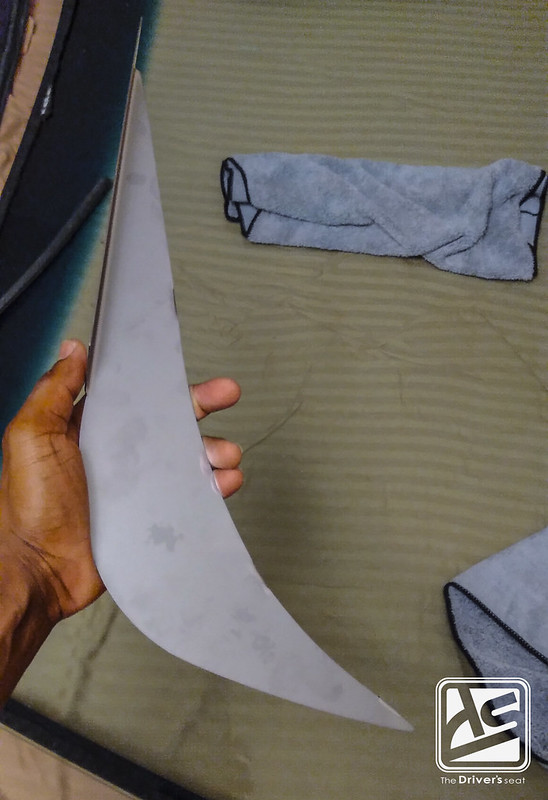
Leon still had one more trick up his sleeve; he went ahead & had his fenders modified based off the J’s Racing design for the DC2 Integra…

Another angle of the fenders filled with his Advan Racing wheel & tyre package…
Upon having the final piece in hand, the car was sent over to the paint shop…
Lights, bumpers & front fenders removed as the paint prep process has began…

After the initial rub down the car was then fully primed & fitted with another bucket list item Leon had in storage for some time…

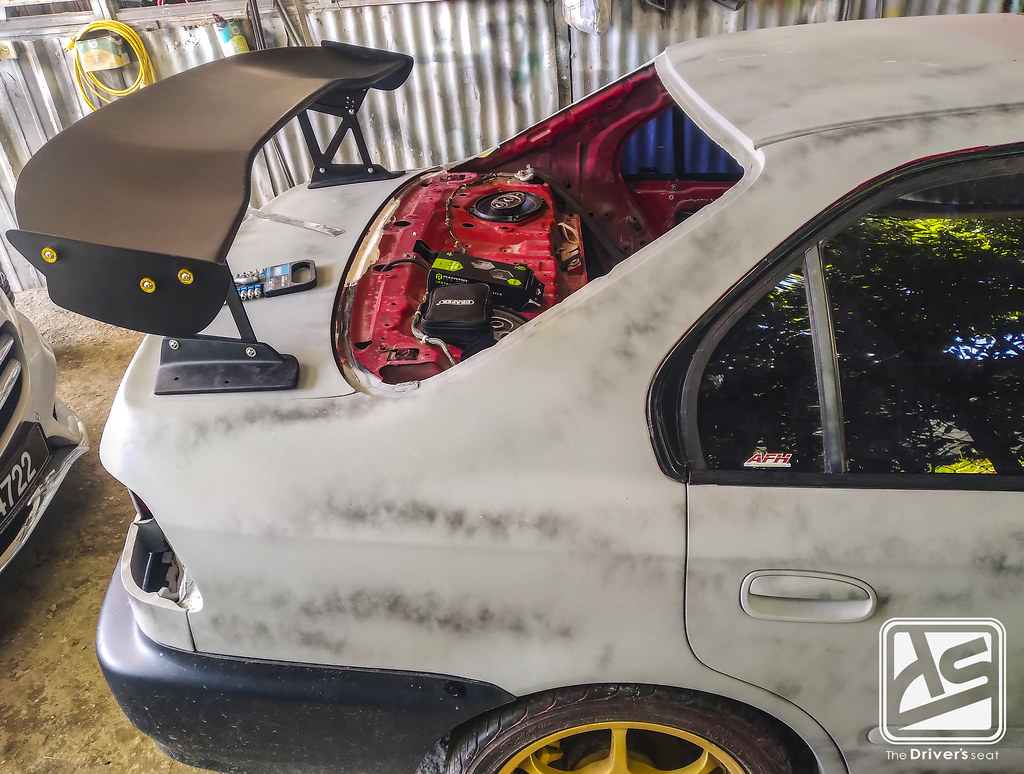
A J’s Racing styled GT wing, by now you guys should be starting to see a trend with this build as it moves forward. The rear bumper Leon picked up was a 99-00 unit, those familiar are able to spot the subtle difference…
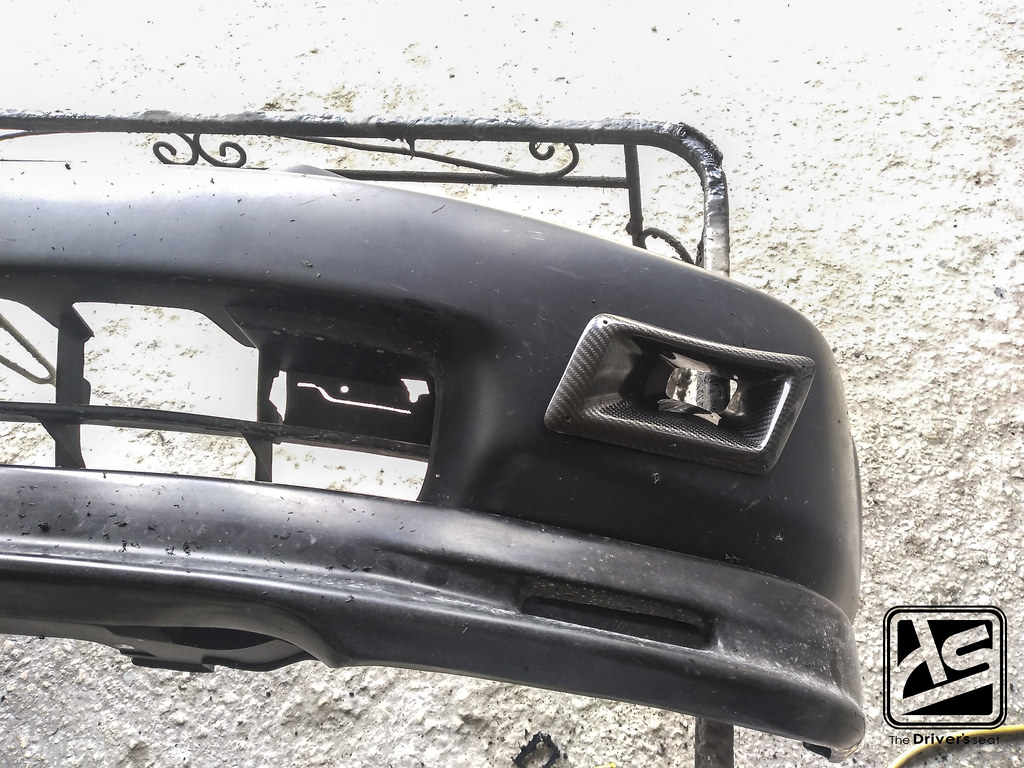
A glimpse of the front bumper that received an air duct that would aid with dropping some intake air temps & also a Mugen styled front lip…

With all the parts fully test fitted, it was time to carry out the final stages of prep before it was time to hit the booth….

A view of Butcher as he works on completing the front bumper…

Meanwhile, back at home Leon took this time to start work on getting the interior in shape for when the car returns…
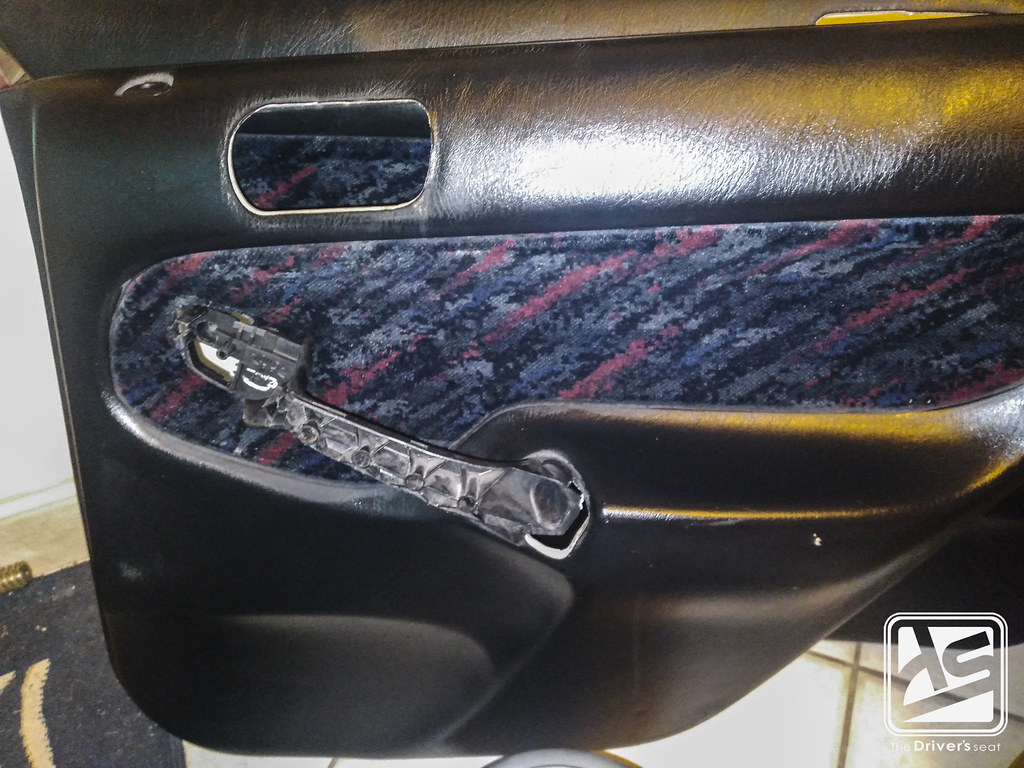
After a good clean of the door panels they too were restored to greatness…
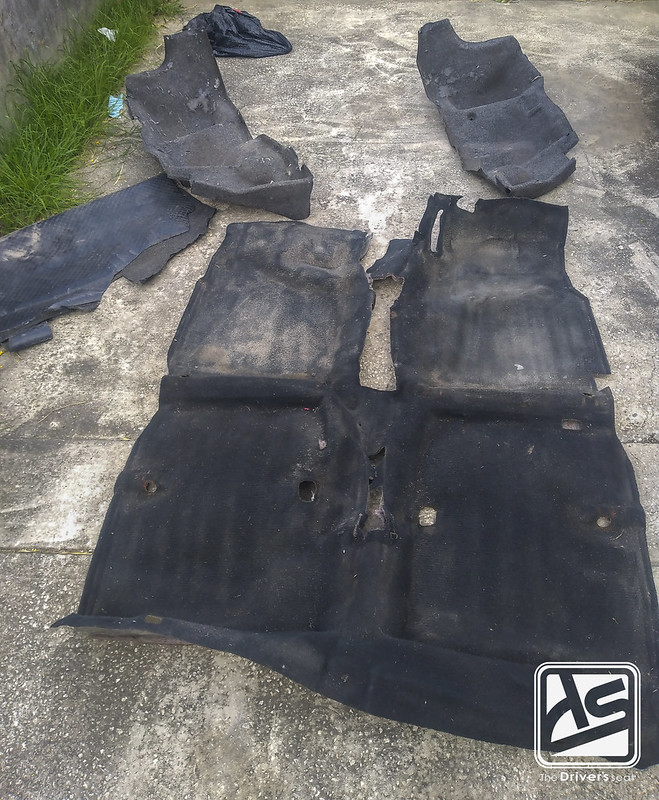
Next up was the carpet from within the cabin & also the one located in the trunk area. The both of which clearly needed a deep clean…

After a good scrubbing & power wash, Leon put them to dry…


After acquiring the seats, Leon also needed the rails to match the chassis…

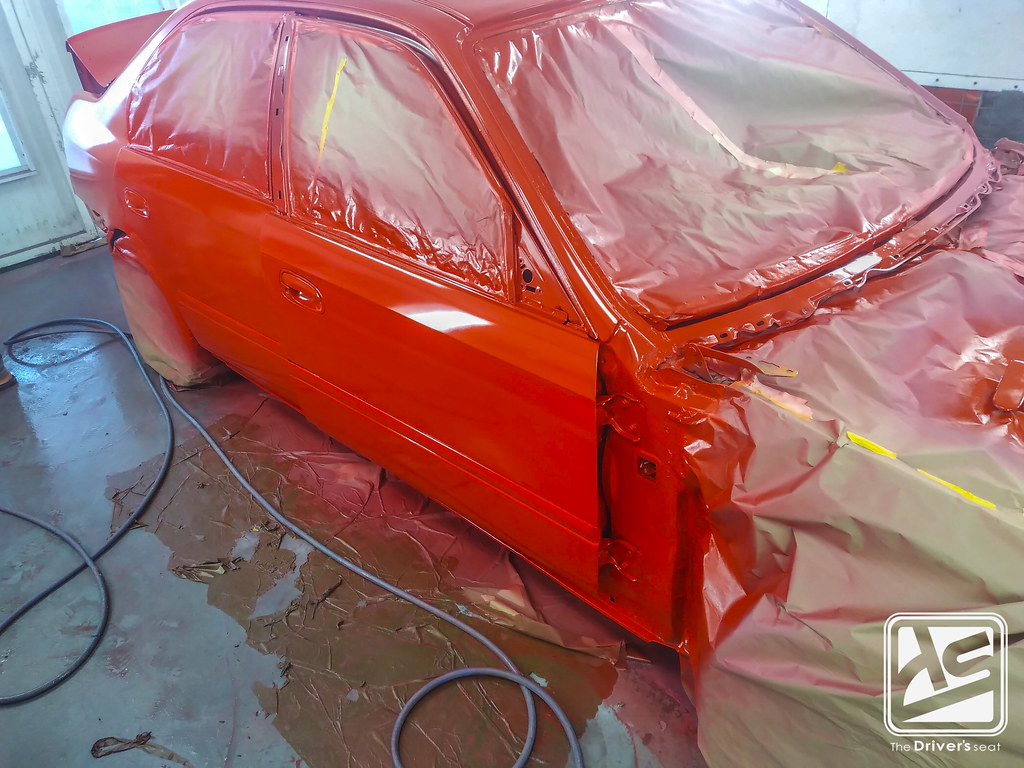
At this point in time Butcher was finished with the prep stage & began to lay down the base coat…

Action shot of the boss himself busy at work applying the final coats…
A view of the completed job in the booth as it sat to bake…


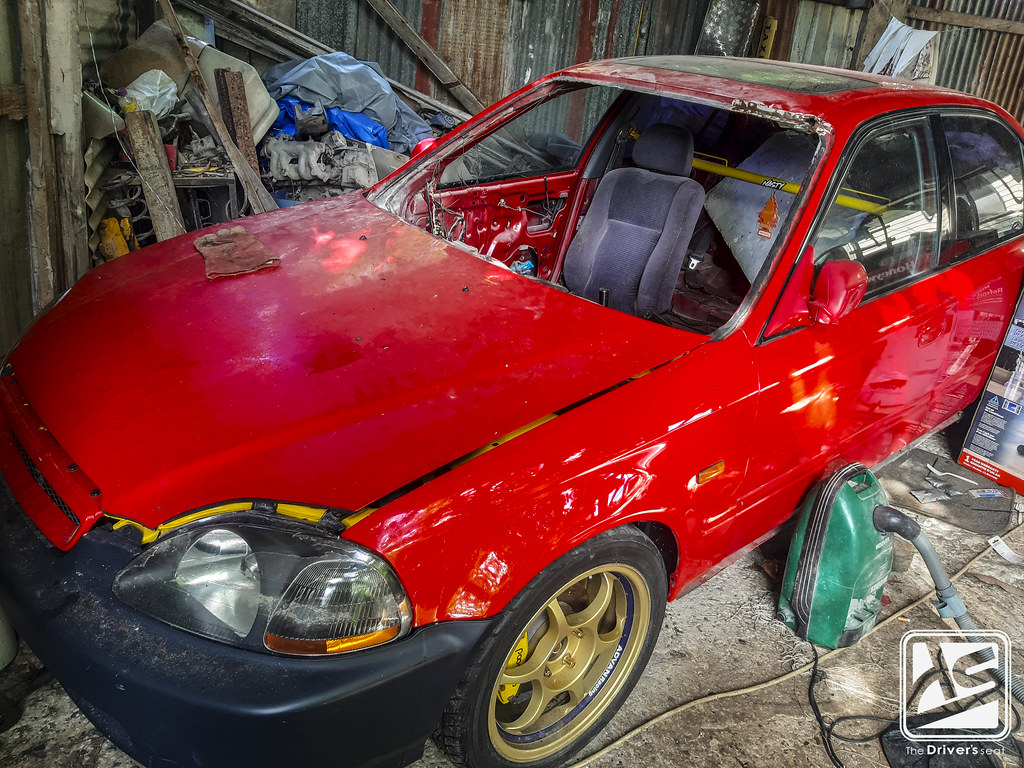
All systems a go! The completed EK4 placed outside for cleaning before heading home to be reassembled…
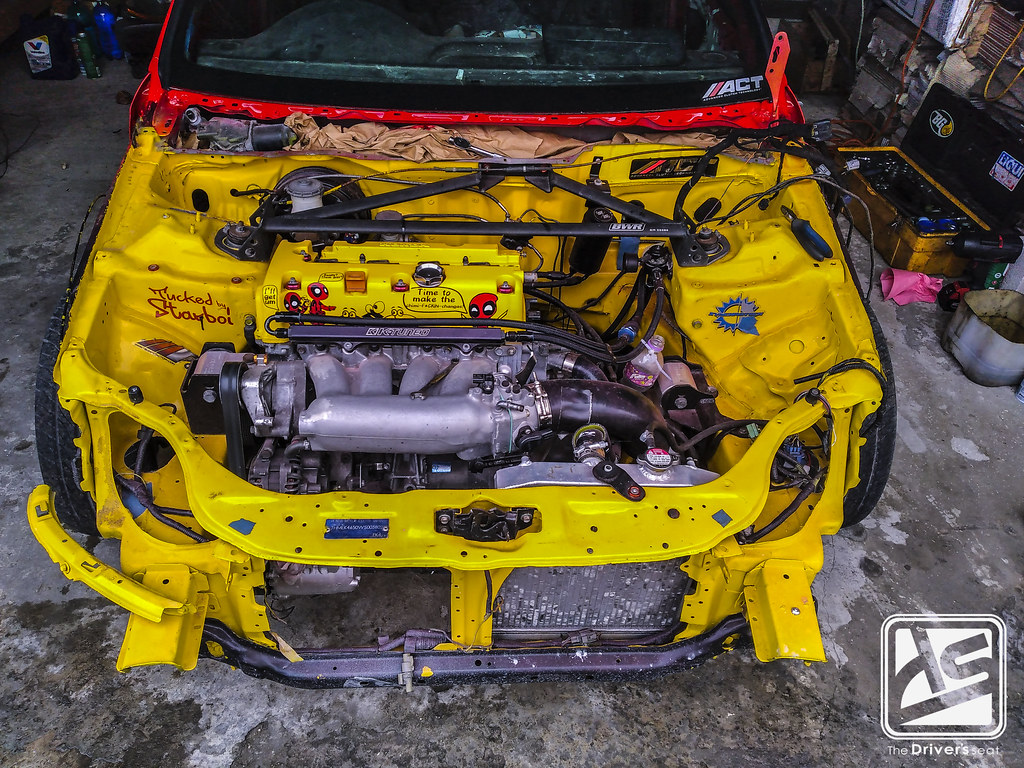
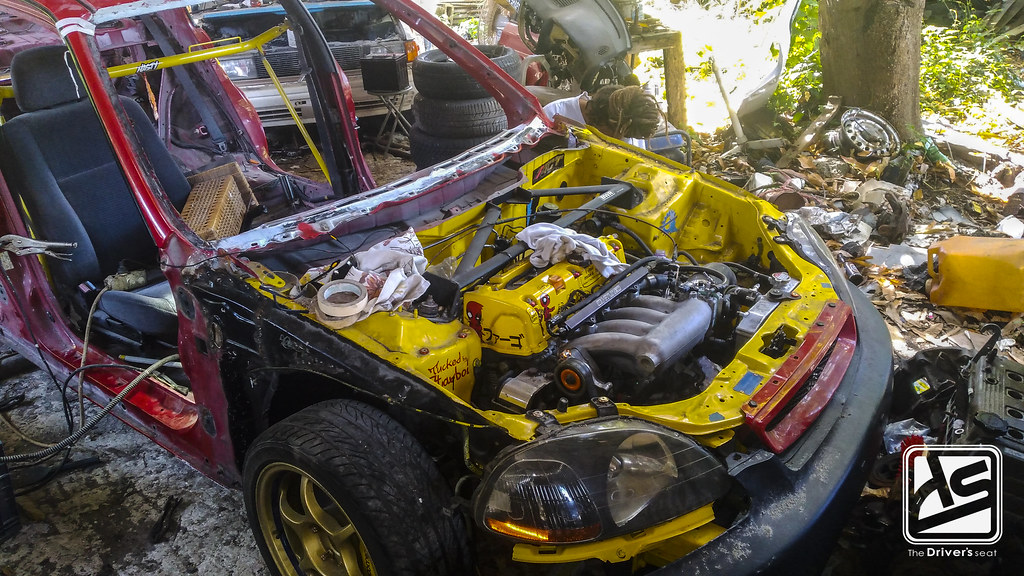
When the car arrived at home it was a sight for sore eyes. However, the K24 power plant would need to be pulled to begin another stage in the teardown process…

During the paint stage, Leon was busy shopping for a few goodies to improve things from not only a power standpoint but also from a reliability & efficiency point of view…
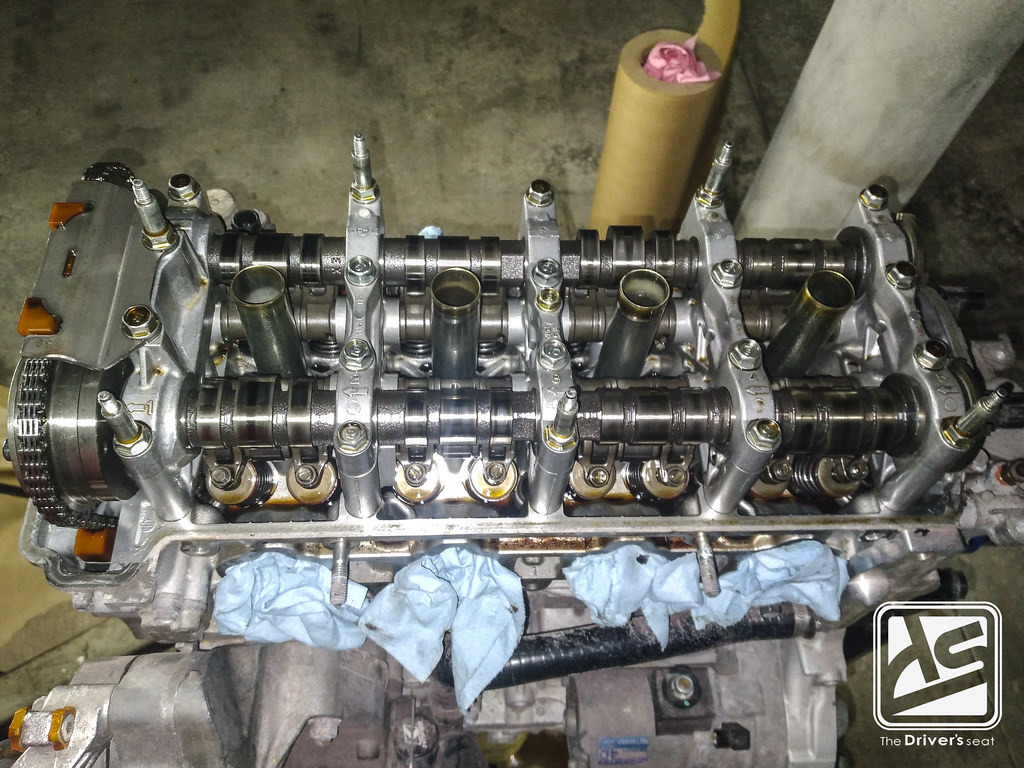
In just a matter of time Leon had the valve & timing face covers removed…

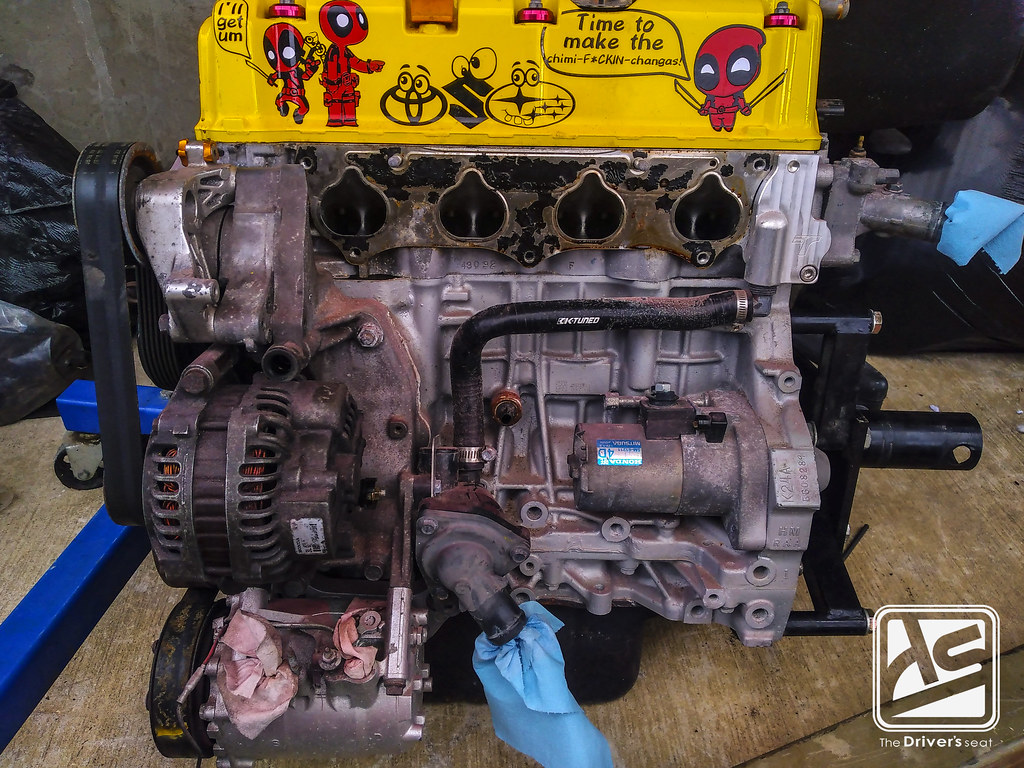
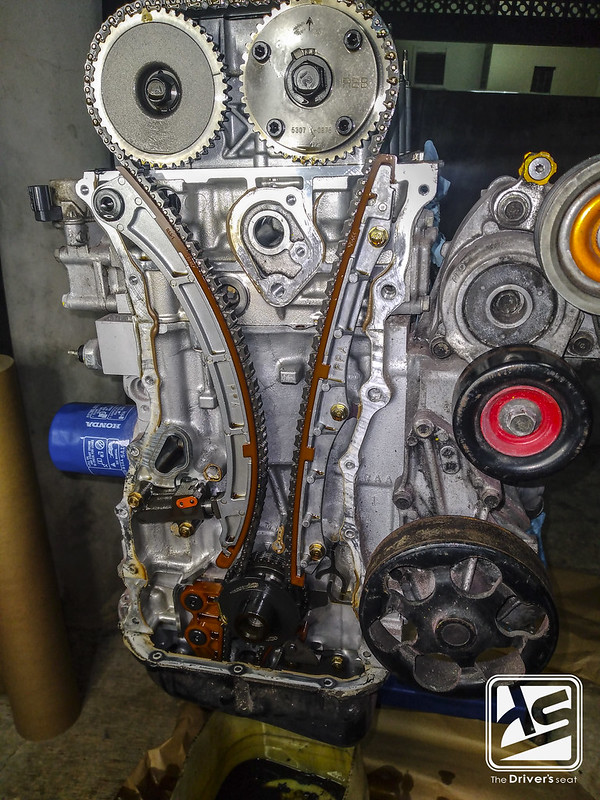
A look at the factory K24 oil pump which carried balance shafts to ensure the vibrations are contained throughout the RPM range. The way Leon’s goals for his build were set up, the factory oil pump will have to go in favor of a K20A2 oil pump. The upgraded pump will allow him to produce a bit more horsepower & also will improve the oil pressure…


A final view of the K20 pump fitted in place & the timing set up…

After buttoning up the reliability side of the motor it was time to attack the drivetrain…
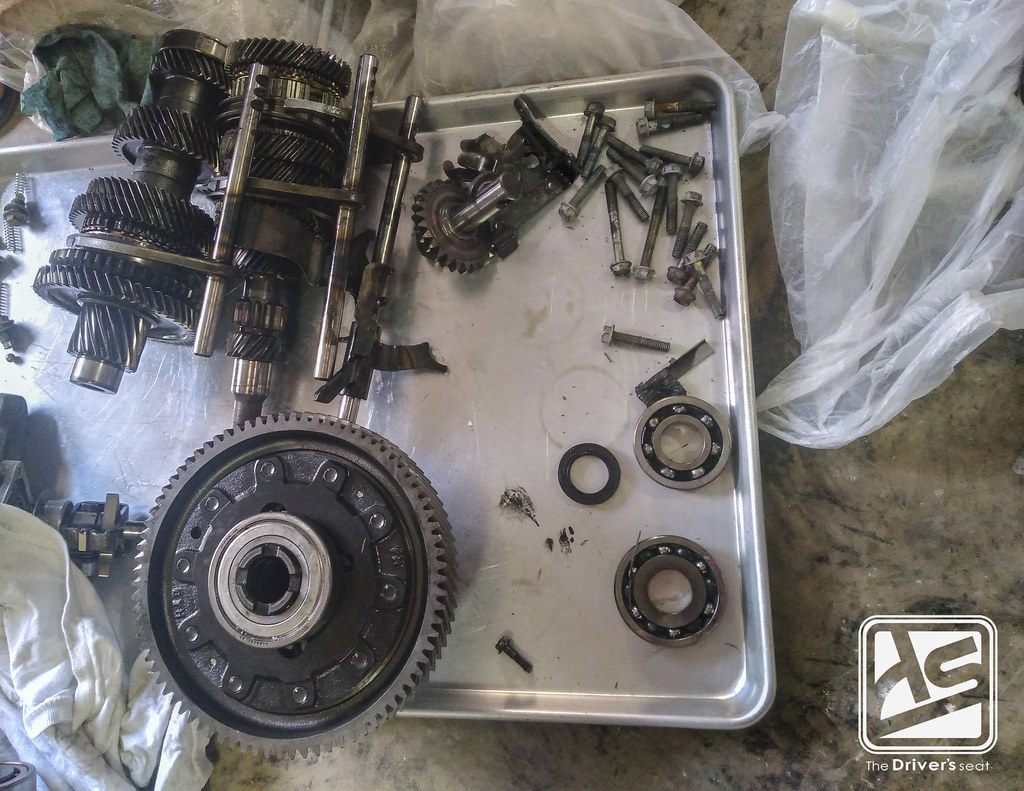
Leon dove right in & fully disassembled the gearbox…
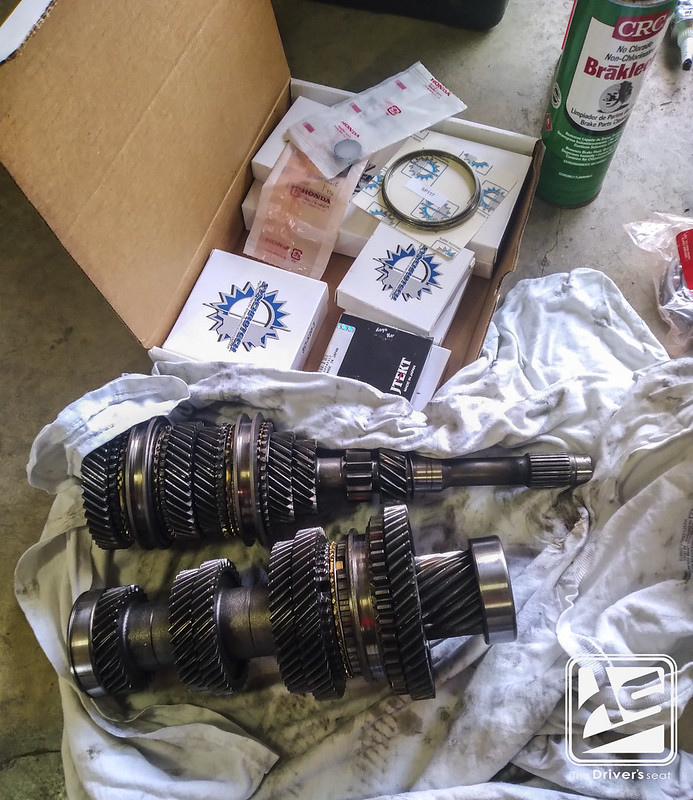
Before heading off to paint Leon had a good idea of what was wrong with the gearbox. He made sure to not only acquire the necessary parts to solve the issue but also to refresh it while he was there. An order was placed to Syncrotech to replace all the bearings & synchros within the gearbox…
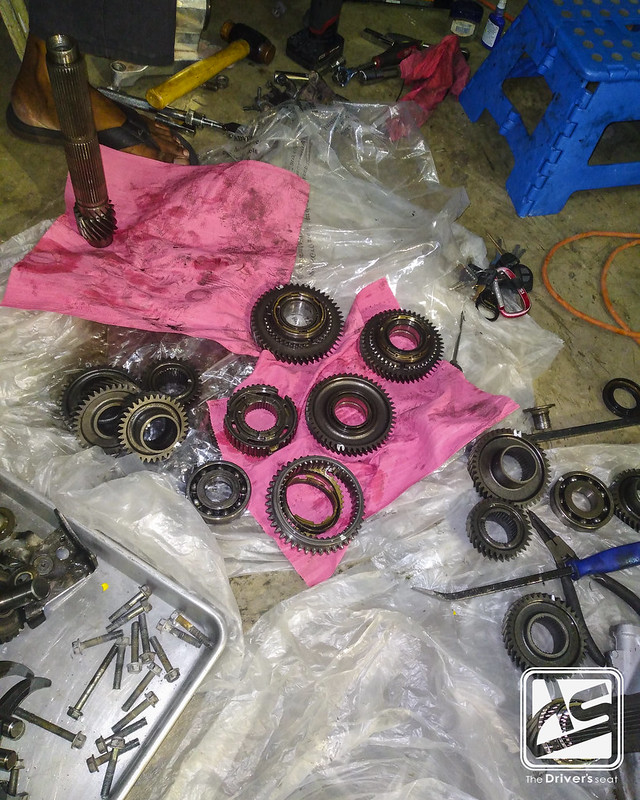
Everything fully torn apart & laid out…


A look at the main culprit responsible for the rebuild; the damaged 4th gear…
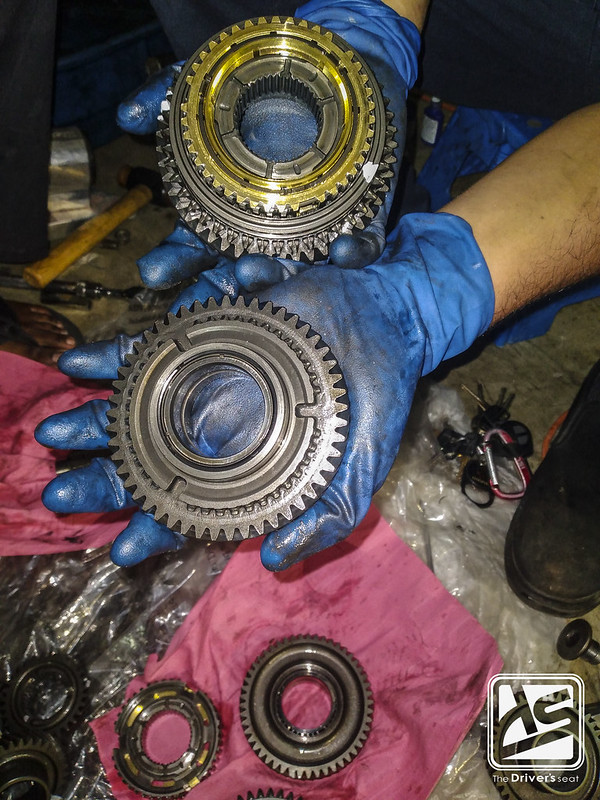
With it still being a street car, Leon opted to replace it with an OEM 4th gear…
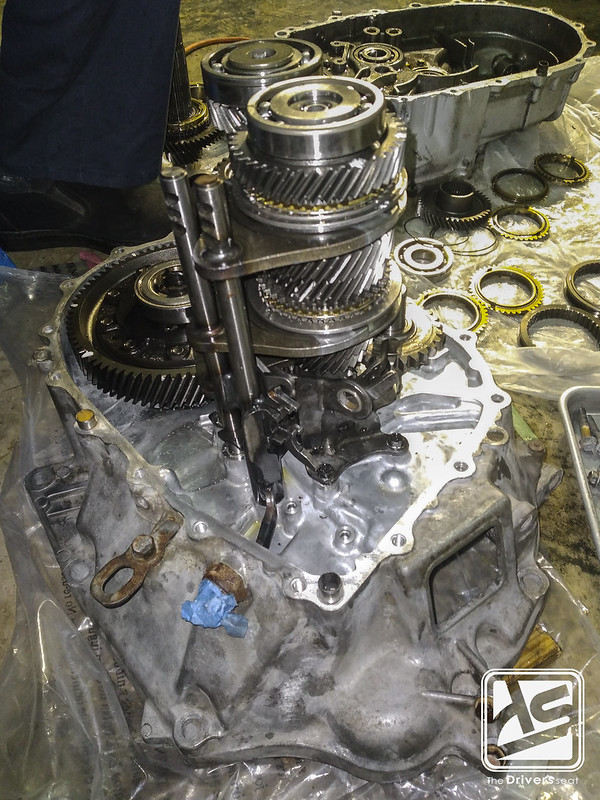
With the damaged parts replaced & fresh synchros in place, Leon began the reassembly…

As the bay was void of a motor, Leon thought it was a good time to also give that a refresh while he was at it. The remaining components were stripped out & the bay was prepped to be blown…

Butcher was in for the job once again…

Laying down a base to kill the previously painted yellow bay & to set the tone for the new colour to come…

Switching things up completely, Leon went the opposite direction with a metallic gray for the bay. As always Butcher killed it given the circumstances…

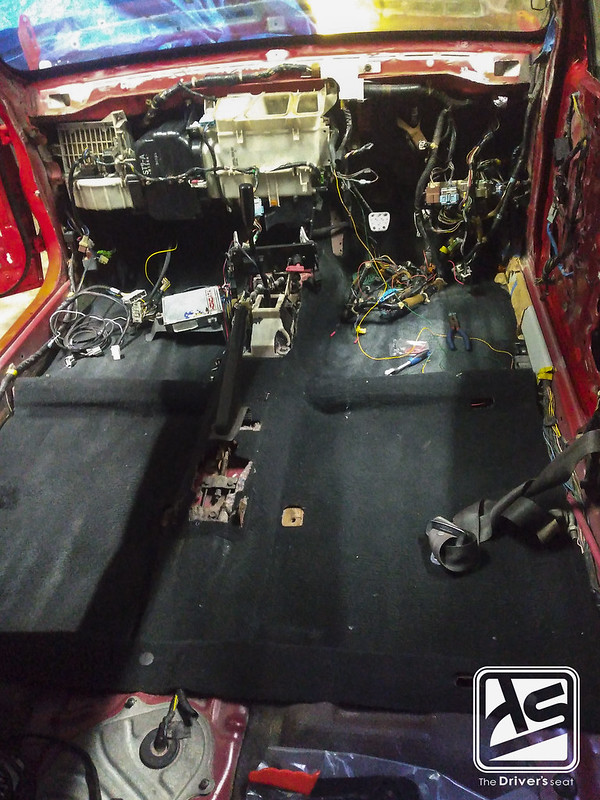
Next up was to finalize some electrical work on the inside…
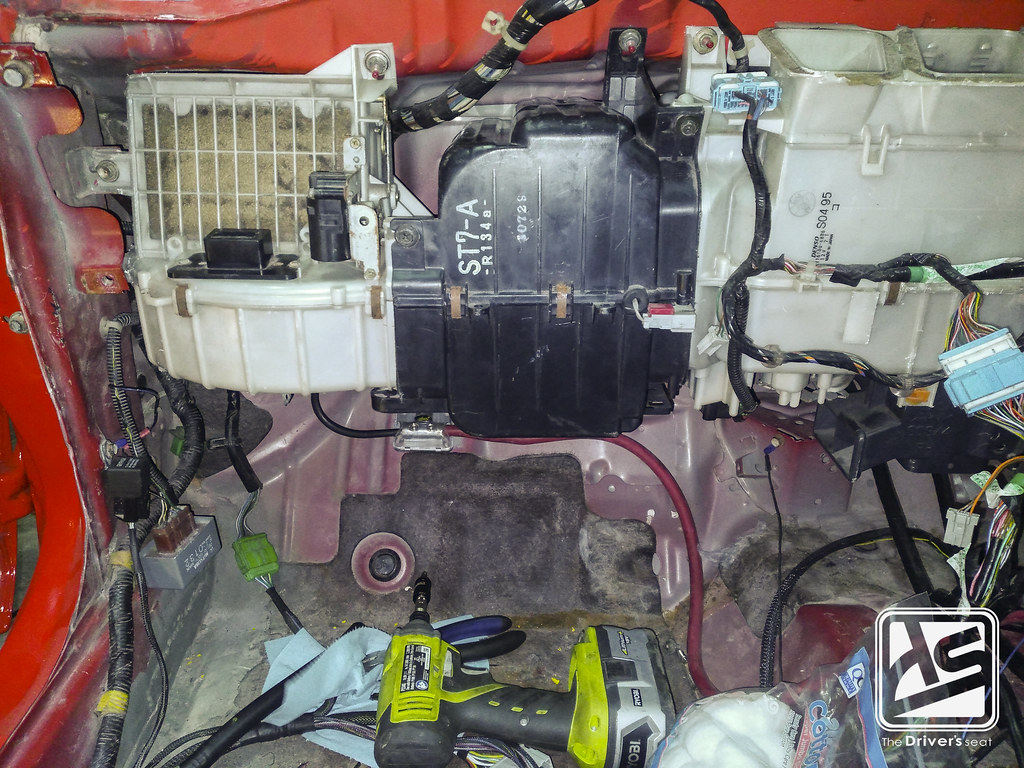
Leon installed the blower motor, as he has plans on retaining the use of the air conditioning…

Also to fit the Hondata V4 in place. Leon opted to go with a Checkerd Sports ecu mounting plate & placed it in the factory location…


Having the car torn apart Leon did some adjustments to the harness routing…

With the carpet in place, Leon got all the motivation he needed to test fit the his newly acquired Bride bucket seat…

With that quickly came the return of the suspension & brake components back onto the chassis…
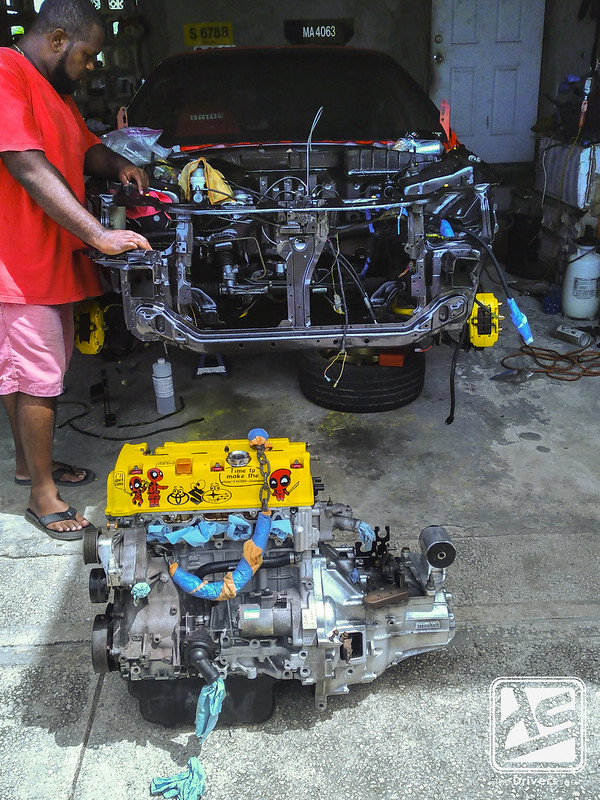
With all the components in place, the last major piece was to lift the motor assembly in place…


Upon fitting the motor, Leon was then able to bolt the Unit 2 fabrication baffled sump in place…
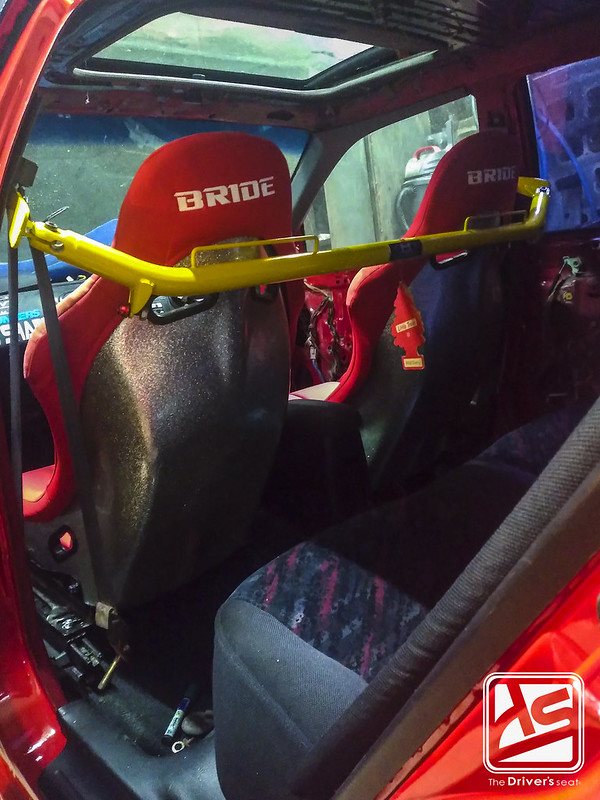
Having the motor finally back into the EK4 further inspired Leon to get to work on fully buttoning up the interior. Both front & rear seats fitted along with the harness bar in place…
That brings us to the end of this update, thanks for taking a look at Leon’s K-Swapped EK4 build. Stay tuned for more to come on this build as it progresses.
