
Project EJ8… Part 1
I’m back with a long awaited post on Project EJ, which is fascinating as I was never planing on releasing any insight to the build. After being persuaded, I chose to shoot a large portion of the content with a cell phone much like how the average enthusiast would. Mainly because in most instances I didn’t have the time to stop to go for the camera. However, in the era we live in our cell phones are always in proximity and times easier to use for snapping quick photos. Though there were some instances where I was able to take out the camera and captured higher resolution photos.
At this stage, the plans for the build weren’t to be anything elaborate. I had a few items on the list of things to be done that intrigued me to execute. A special effort was made to have them completed as clean and simple as I could.
For those who may want to view this build from the start I’ve provided the link below:
With no major rush to get the car back on the road and the details on the direction not fully clear, the car sat for a few months after the bay was painted…

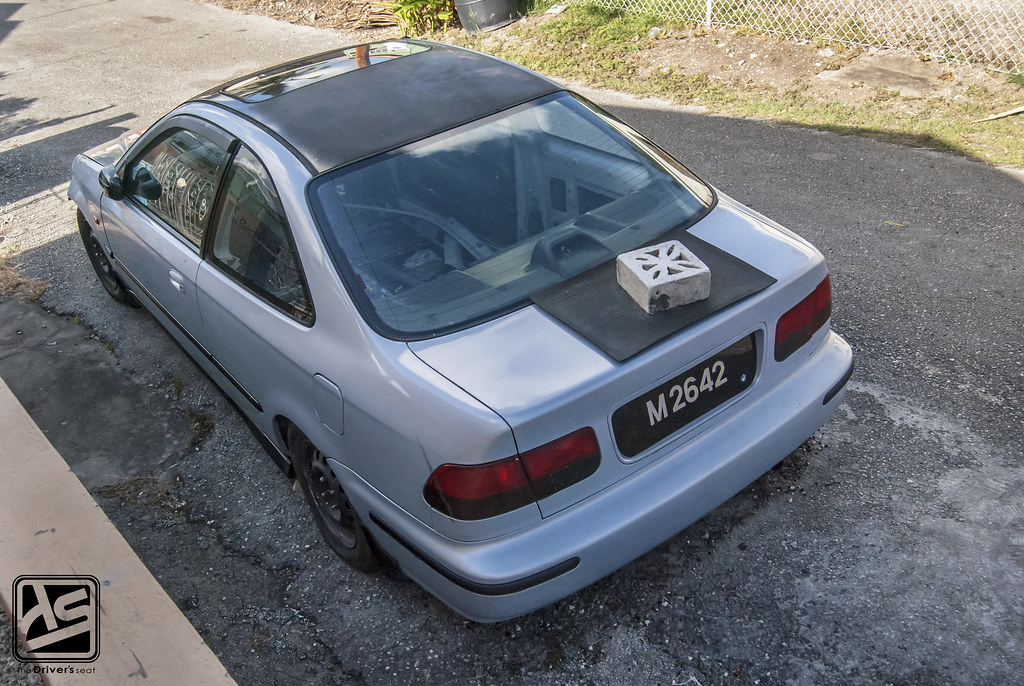
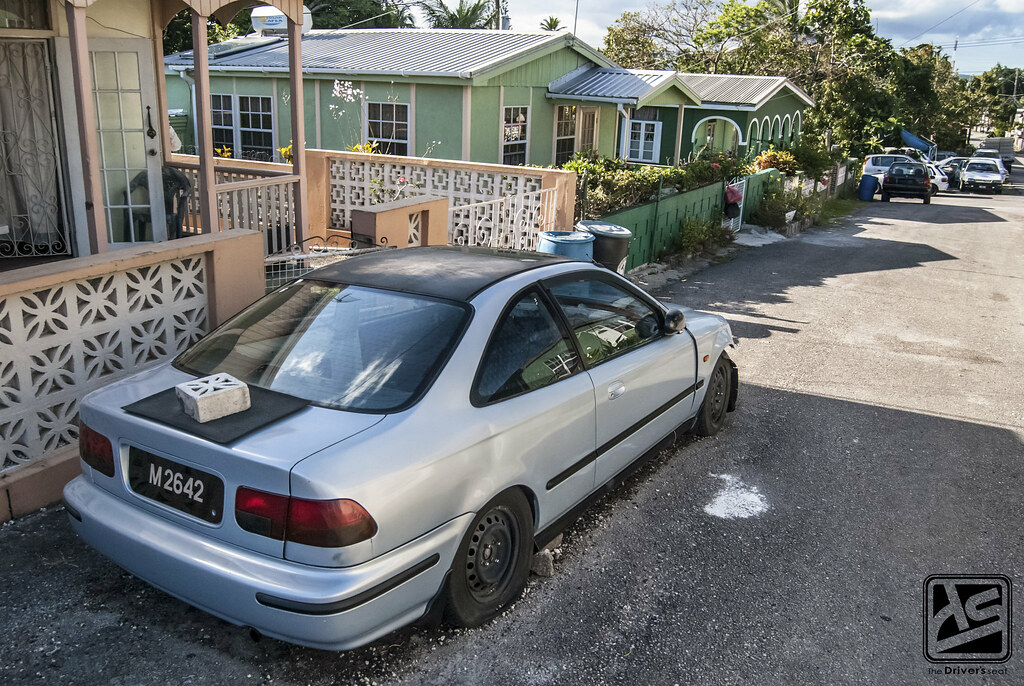
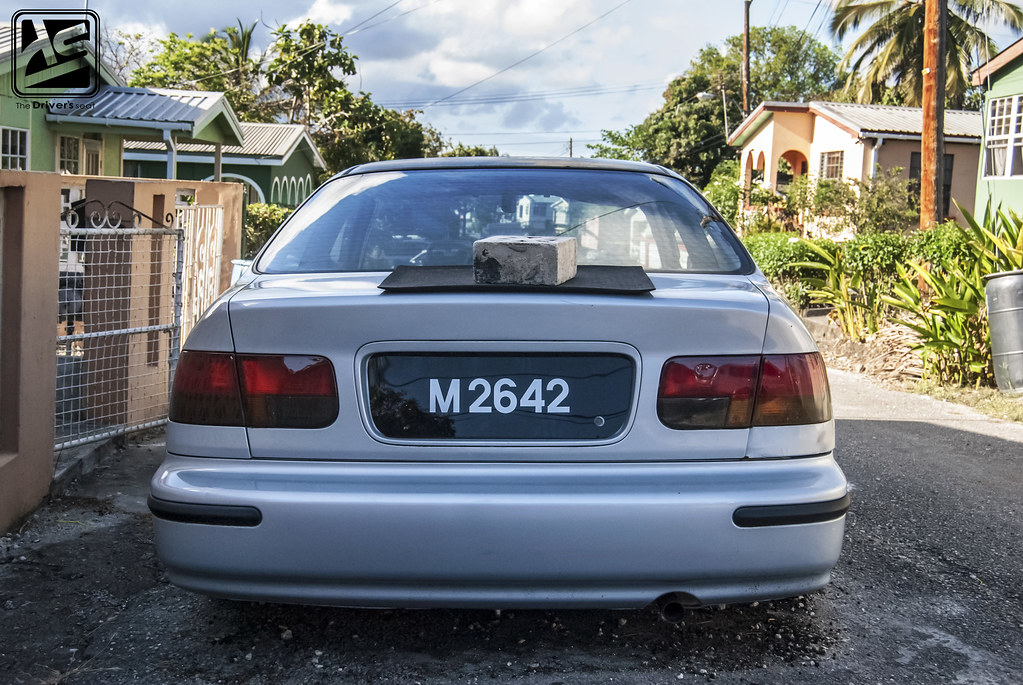
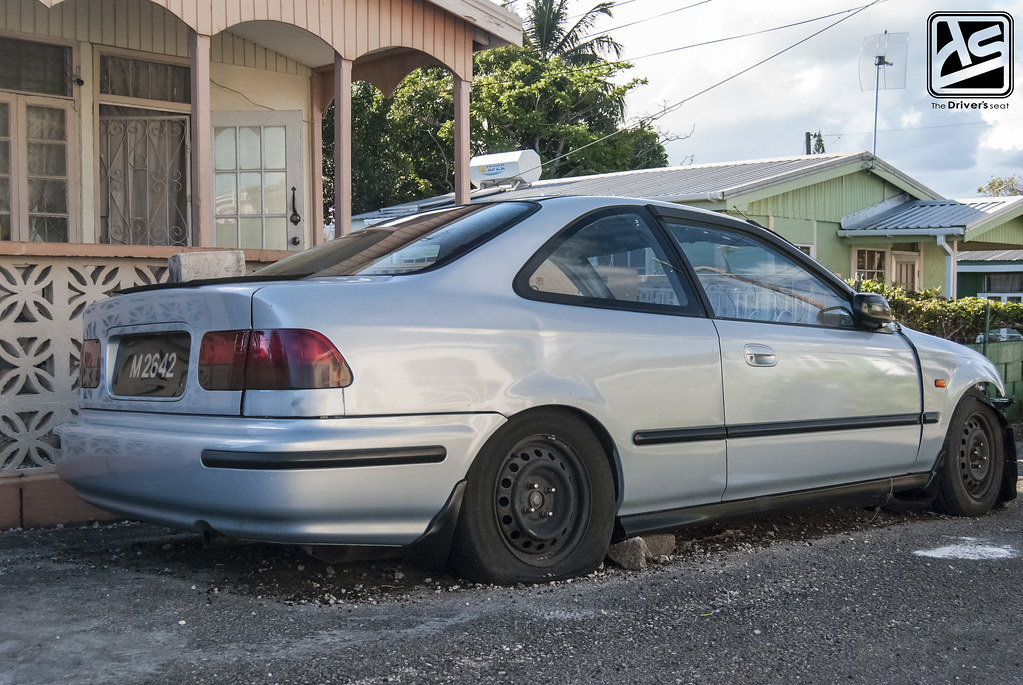
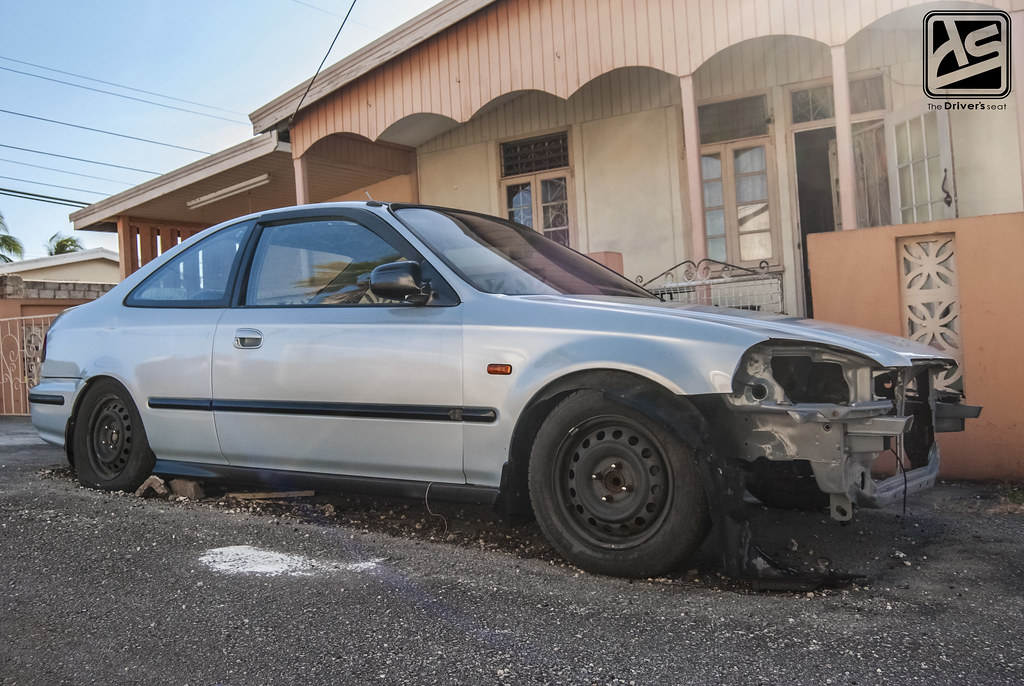
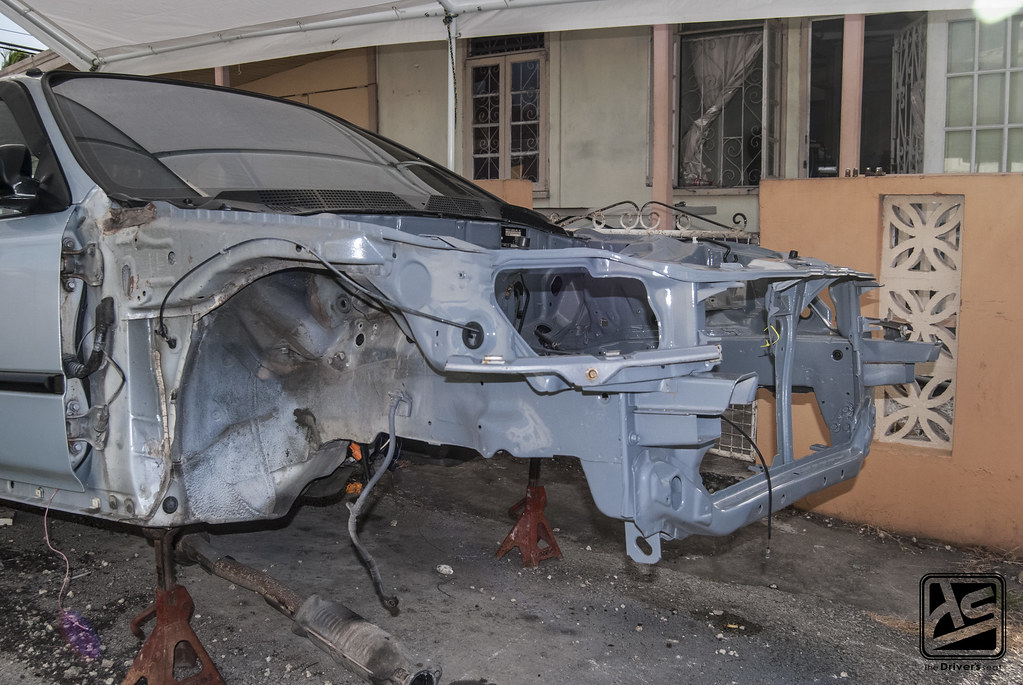
Incapable of moving it was clear the Civic received little to no attention as it rested on a set of steel wheels with some of the tyres losing pressure. Hella slammed though haha…
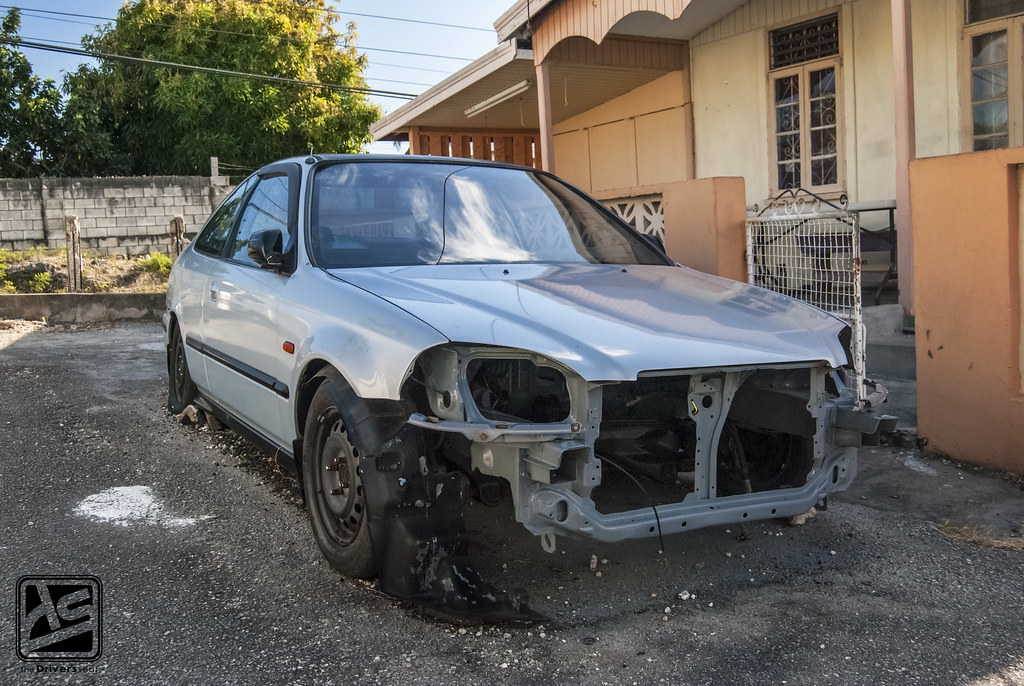
To add insult, the front end was still missing the front bumper which was in a completely different part of the island. I put zero effort towards collecting it, after all I wouldn’t really have much uses for it anyways. So no headlight, no front bumper and the fender guards sagging on the ground. It looked like a complete wreck and yet somehow the offers kept coming in from guys wanting to take it off my hands.
It was somewhere around here I acknowledged the car had sat for enough time and I needed to inject some life into the build…
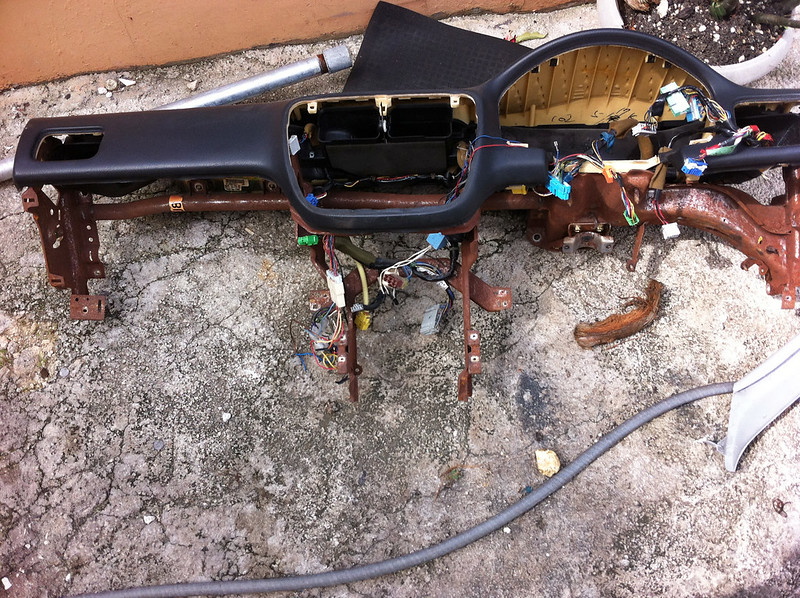
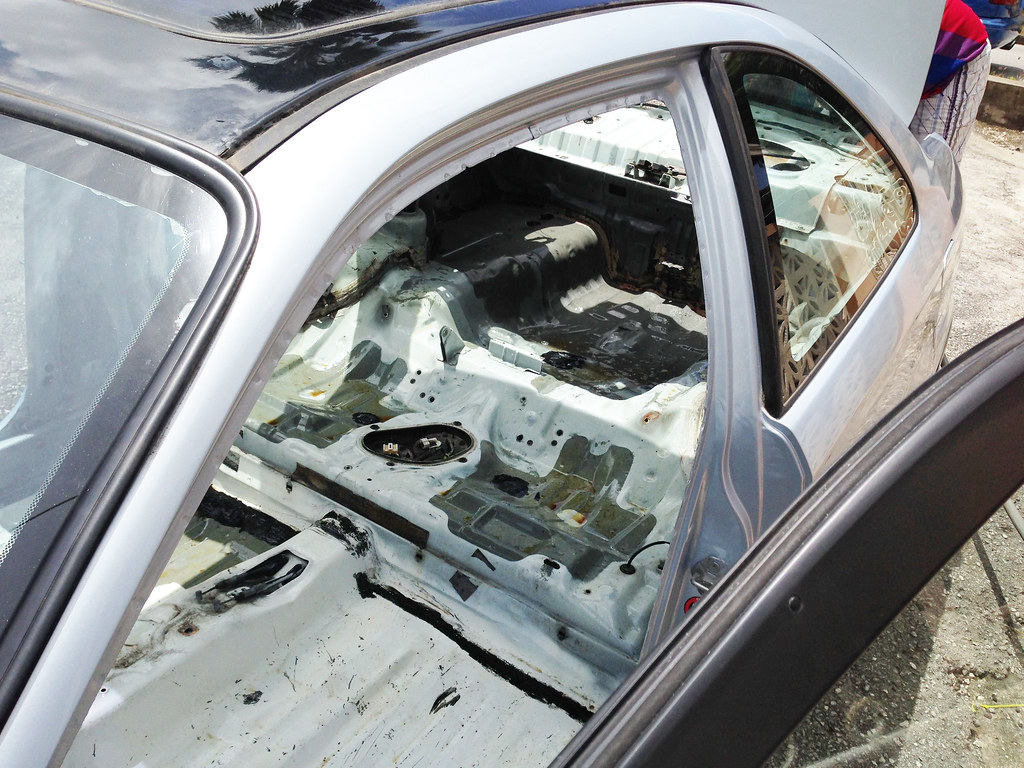
With the bay completed, it was time to direct my efforts onto the interior; I started by removing the dash which will be stripped down, sanded and painted before making its way back into the Civic…
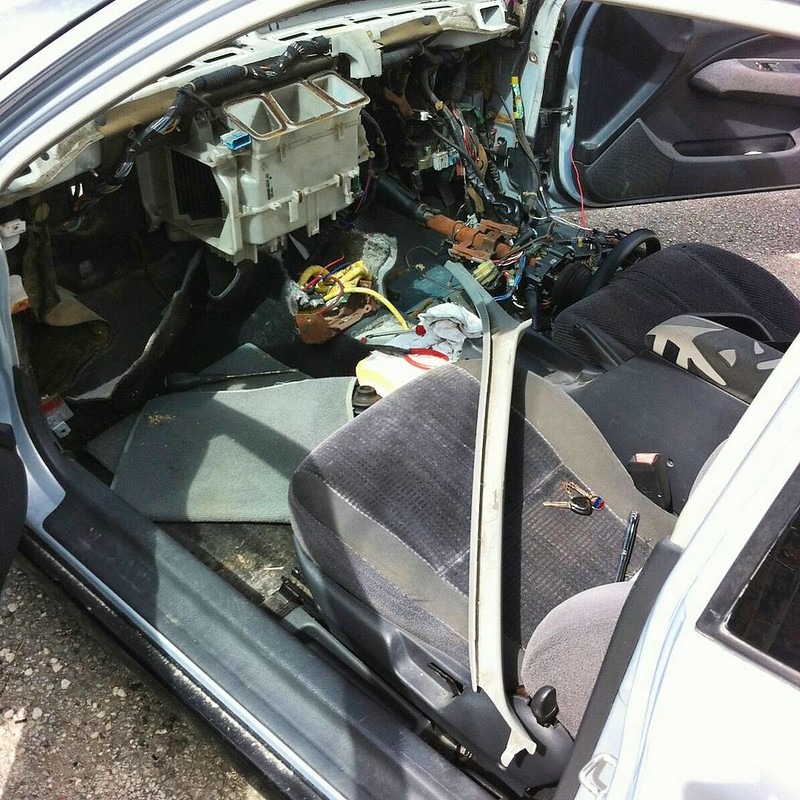
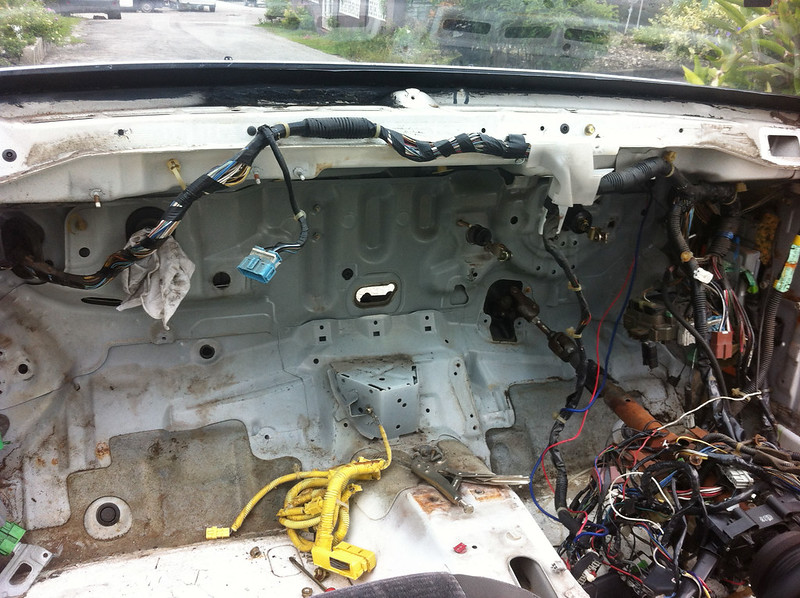
After getting the dash out of the way, next up would be to start removing the interior pieces…

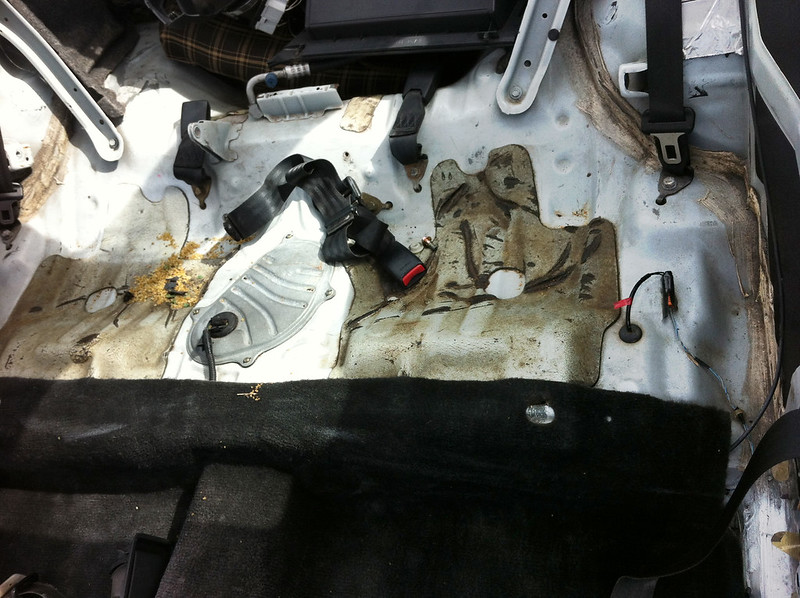
Having removed the front and rear seats, the carpet and seat belts would be the next things to go…
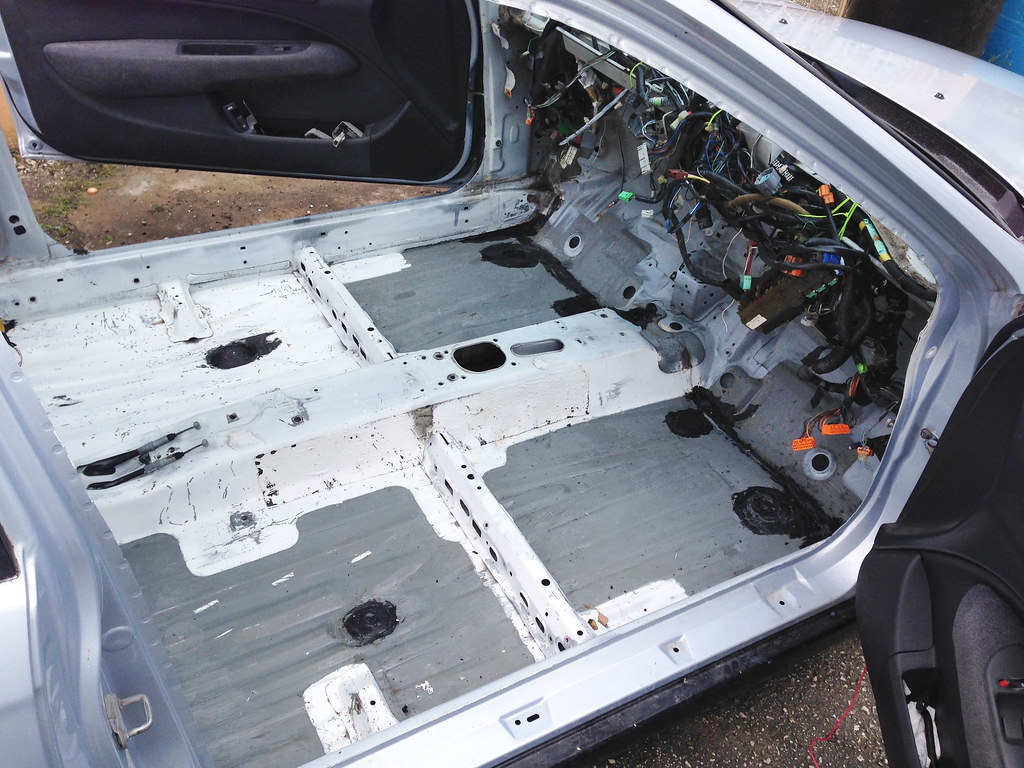
There was one motor I made a clear decision on at this stage, it would be to permanently remove the blower motor and all associated components from the Civic…
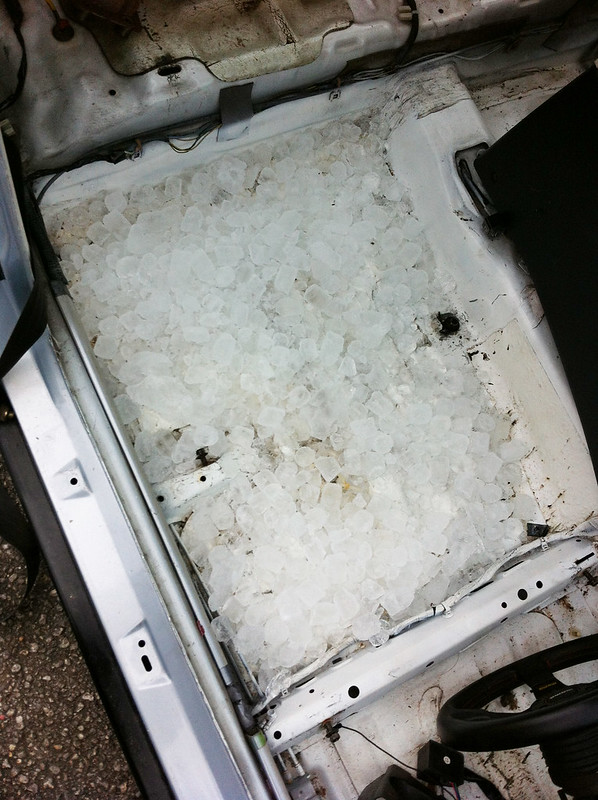
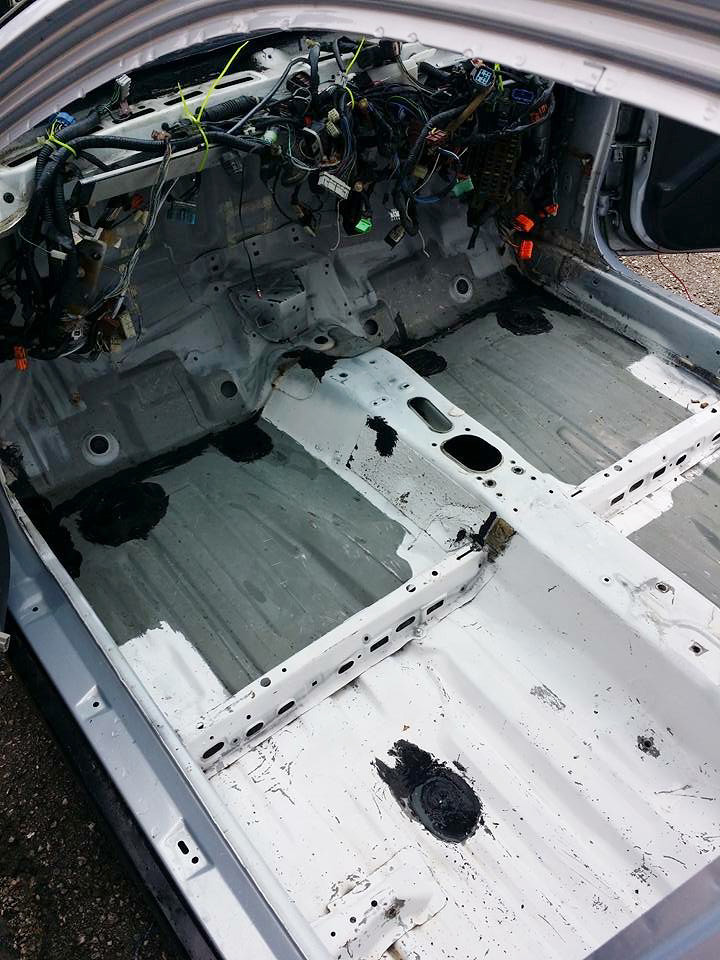
I then went on to test out a theory about the removal of sound deadening and made an attempt with a normal bag of ice…
And in no time I was making steady progress and could confirm that ice helps to speed up the process…
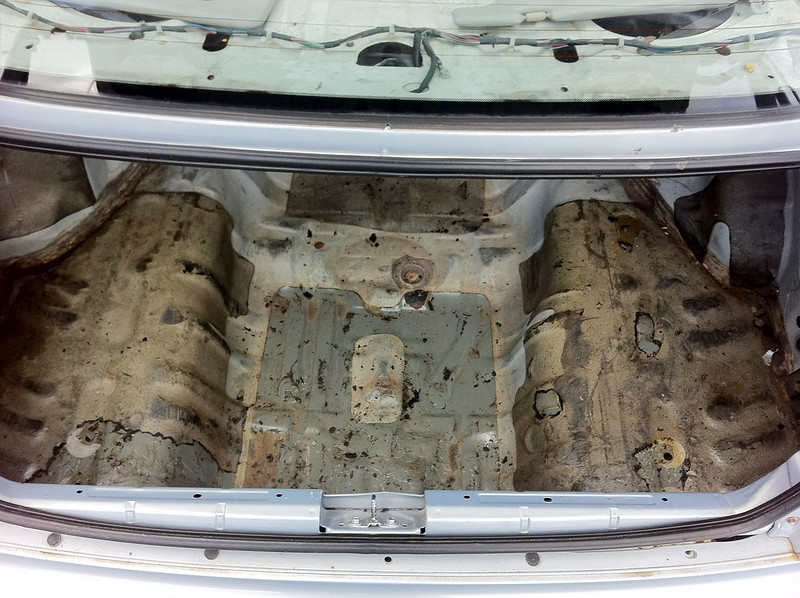
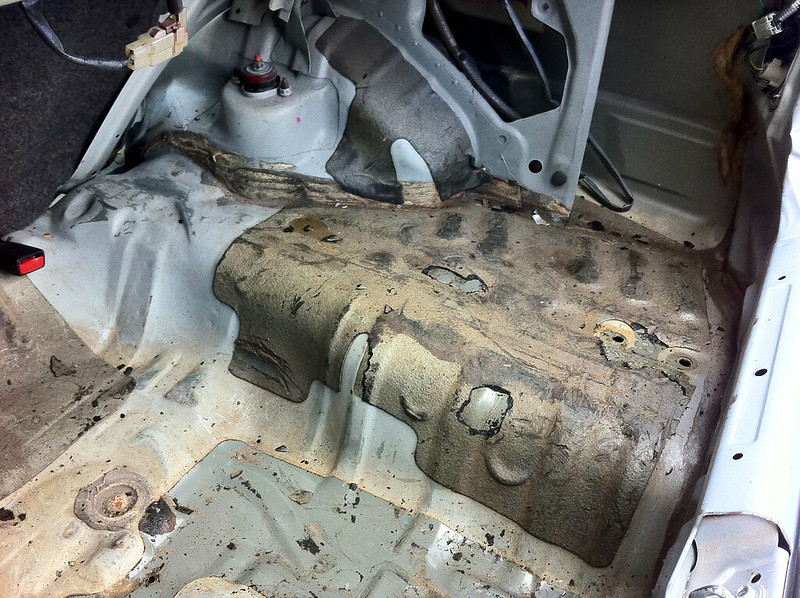
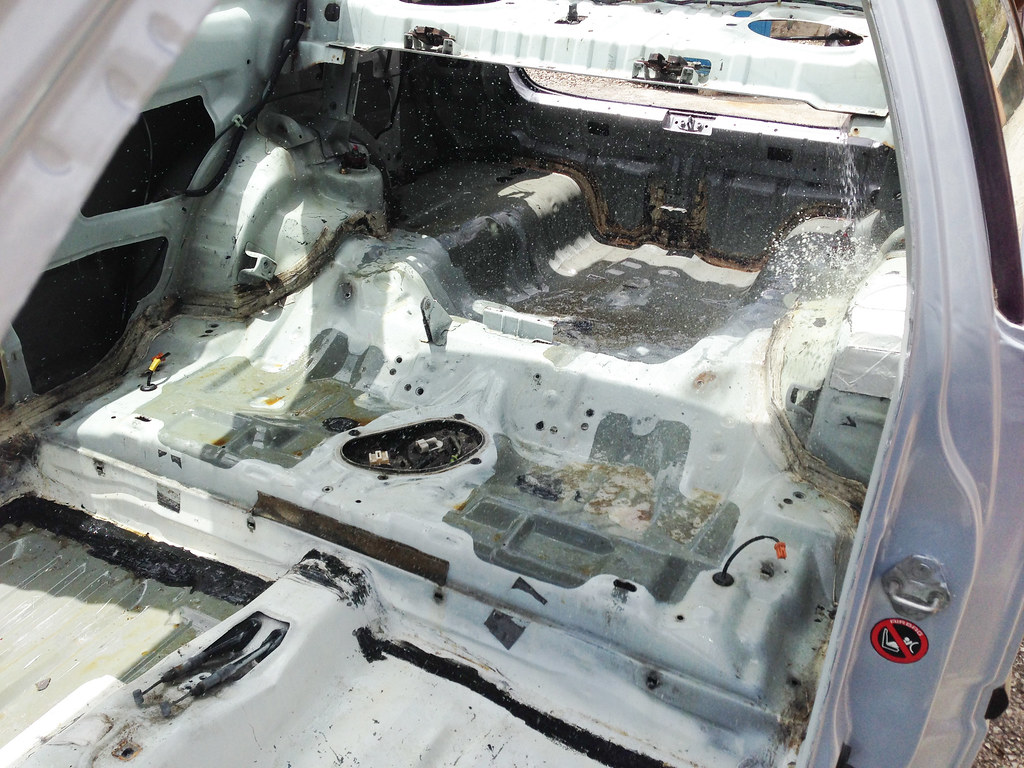
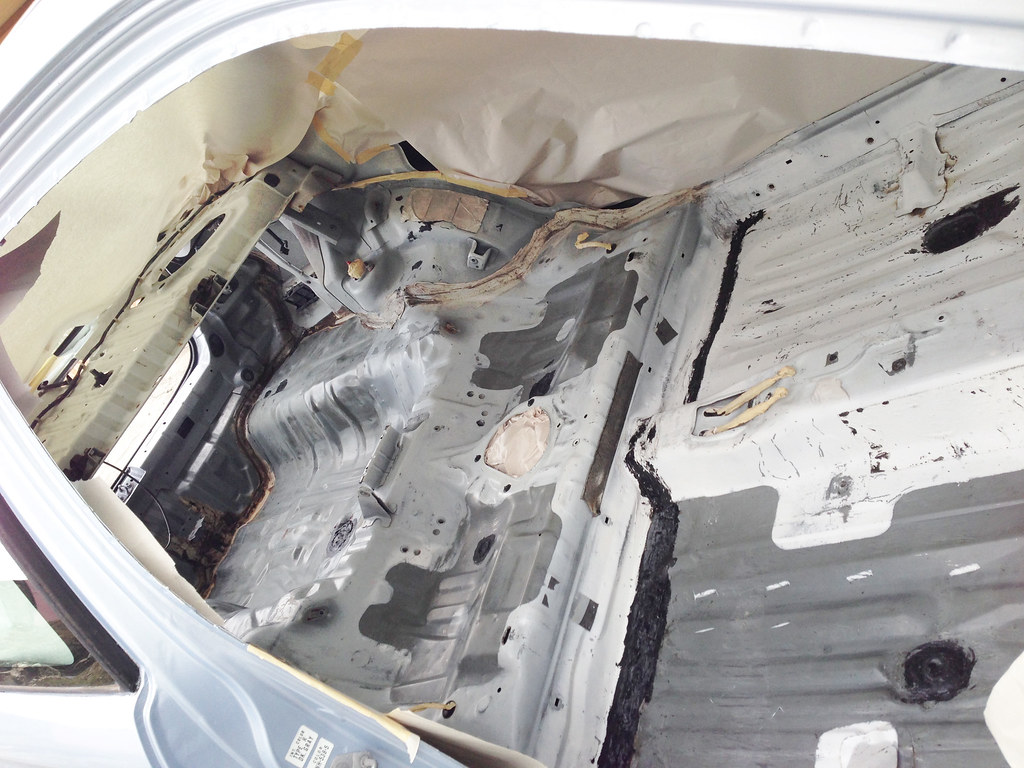
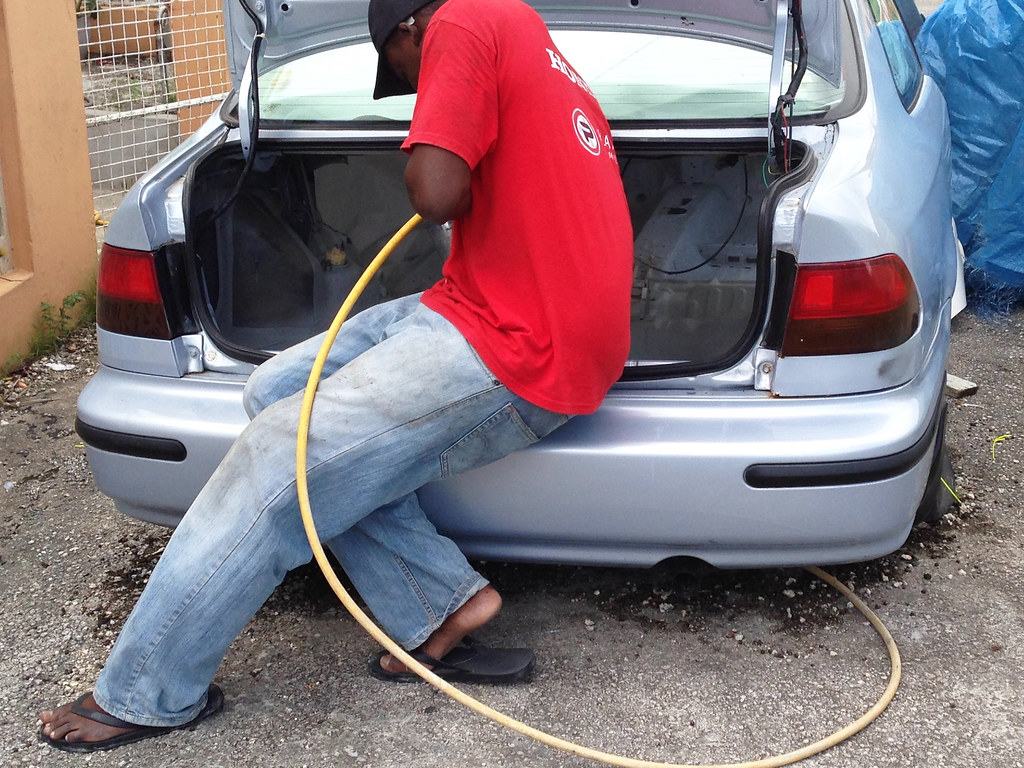
Even with that victory, my work was still cut out for me as I moved to the trunk area of the car…
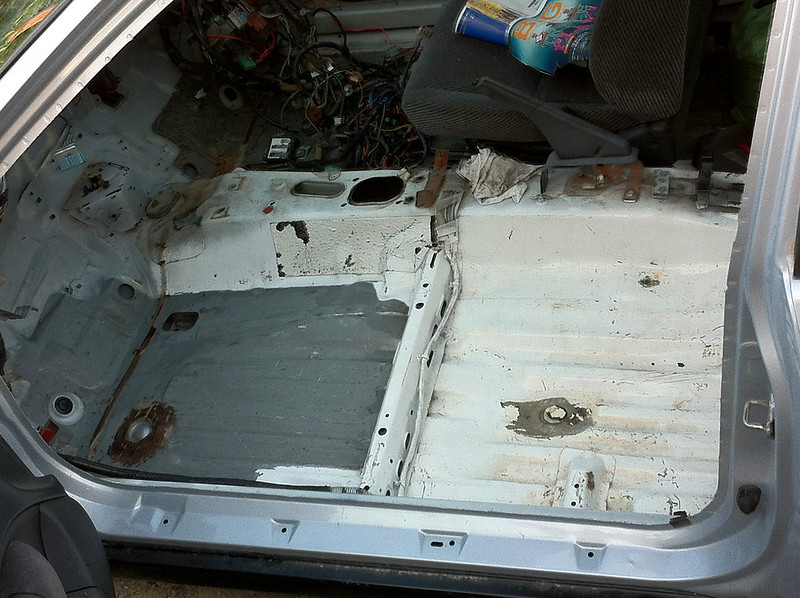
While removing the sound deadening, the bungs in the floor also came up…
I made sure to put them back securely in their locations… This isn’t exactly the best job but it’ll be just fine for the moment…
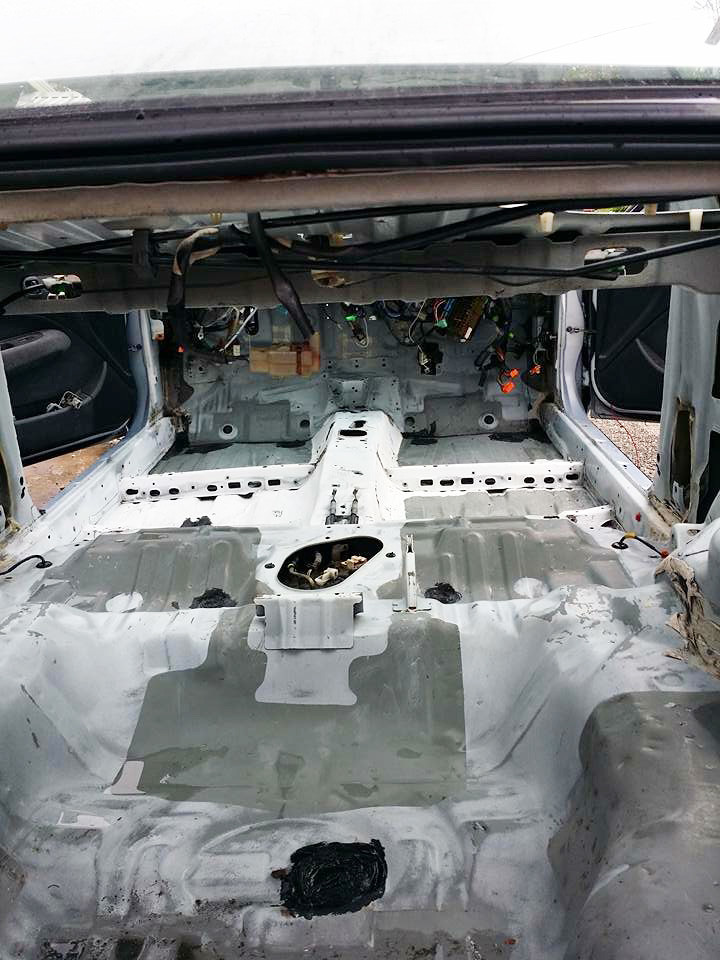
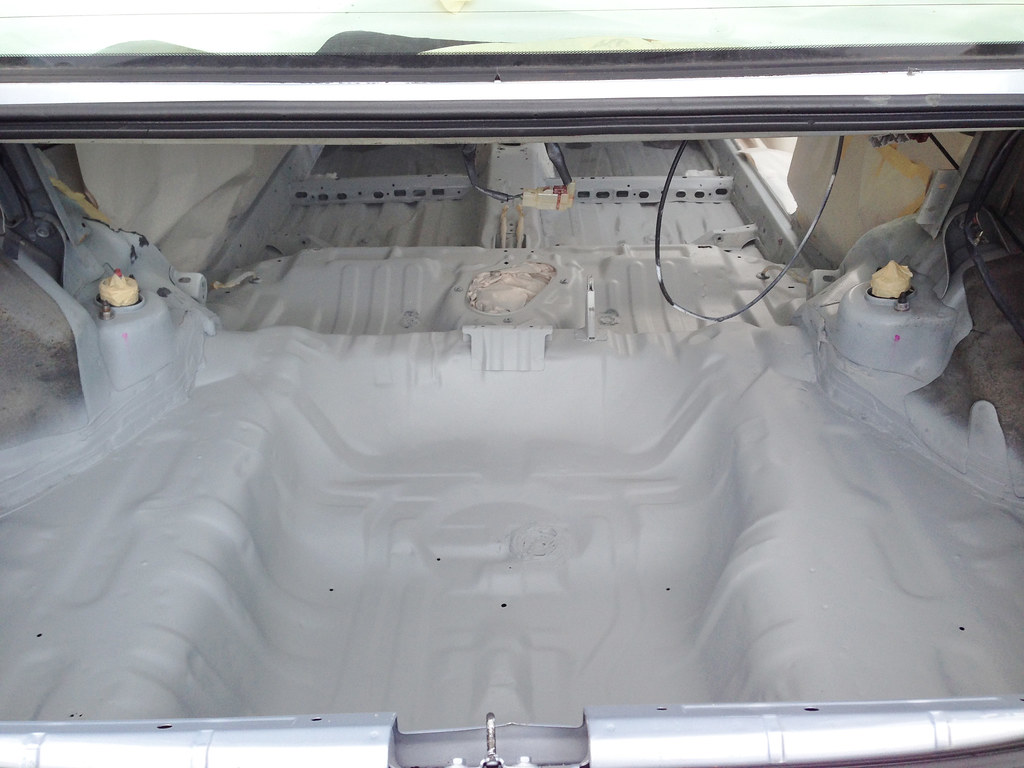
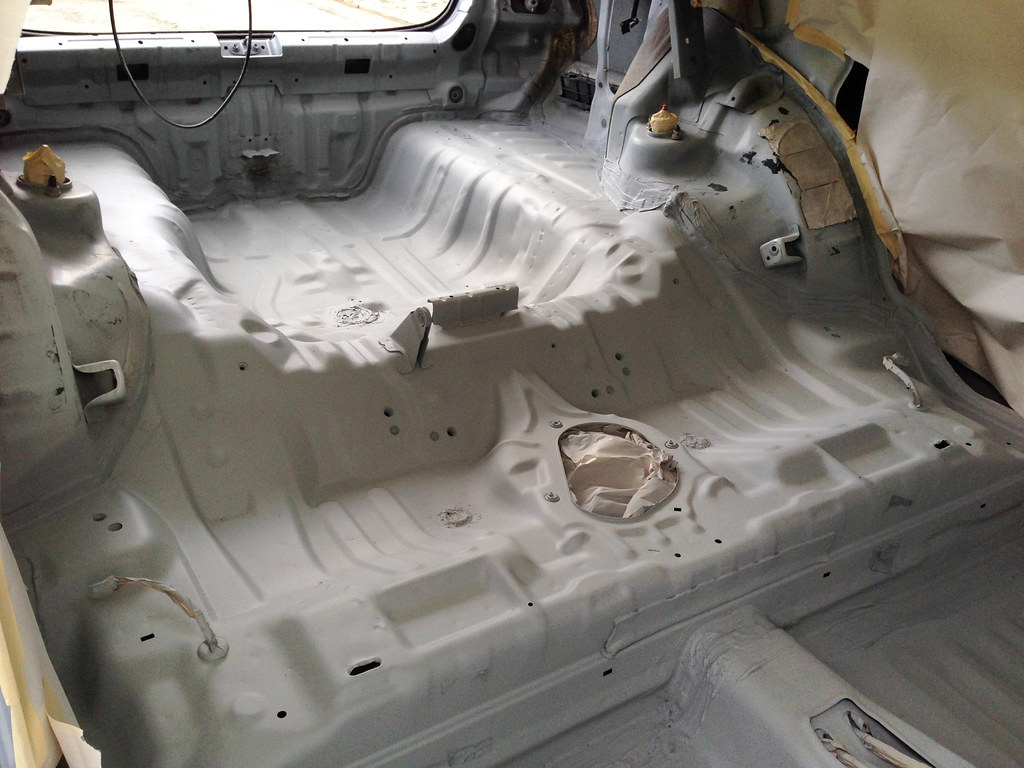
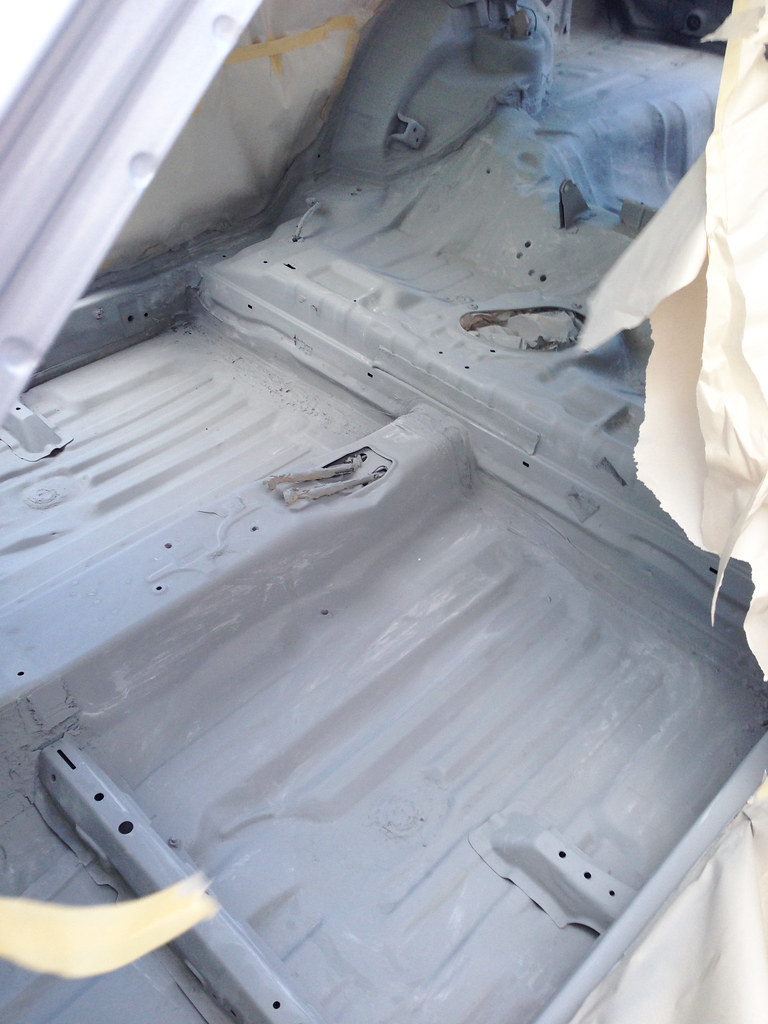
Degreasing and washing down the interior to ensure it is as clean as possible before preparing for the paint stage…

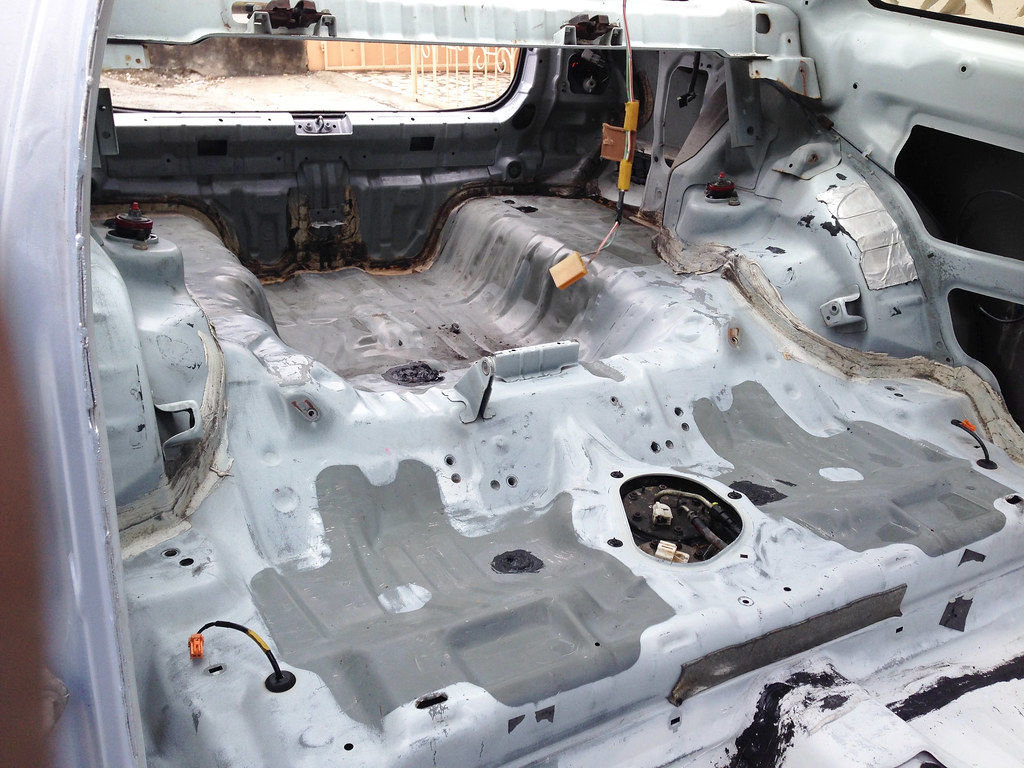
A look at the interior after it was scuffed and cleaned one last time…
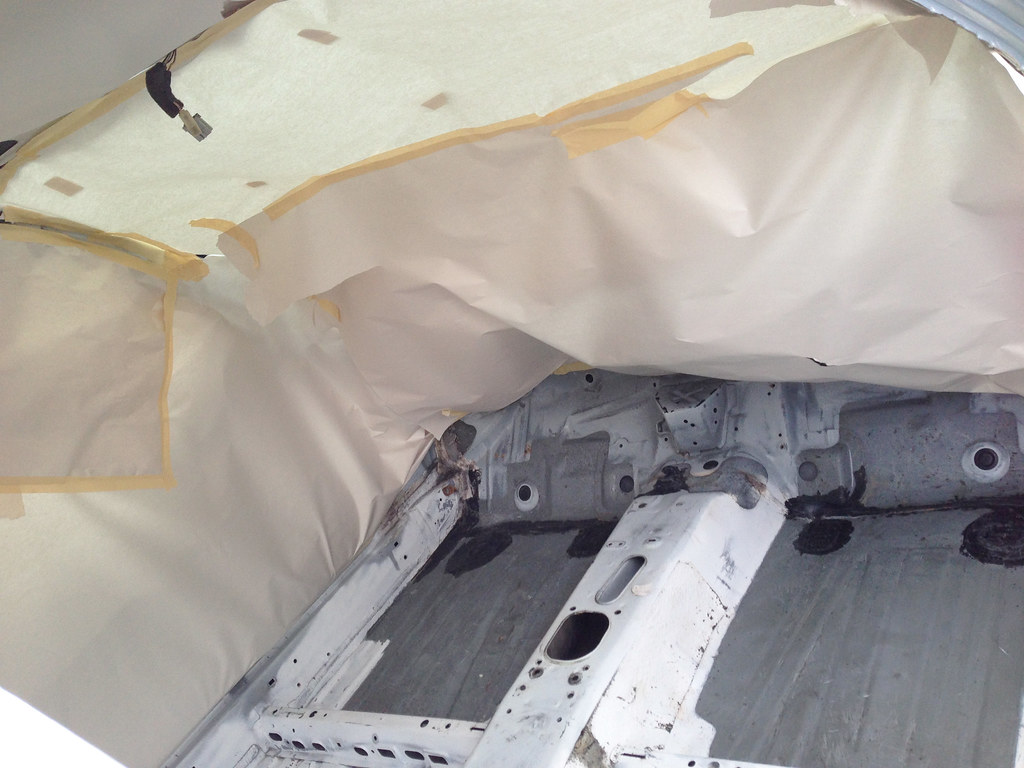
Let the masking begin…
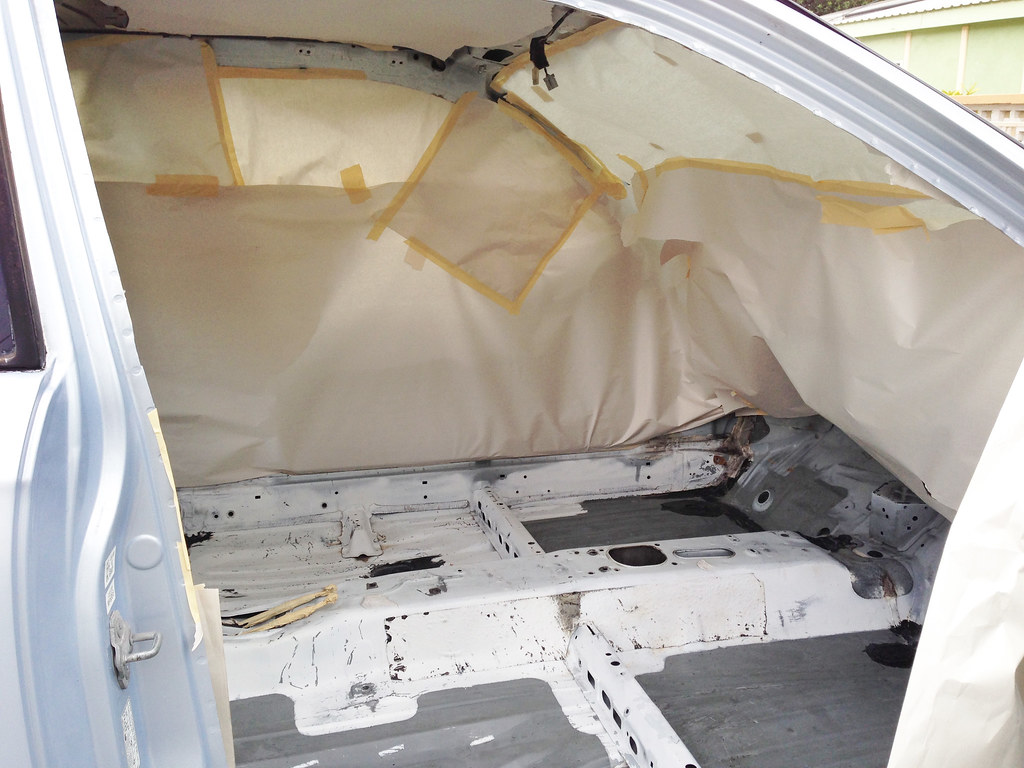
Not exactly the best masking job but it’ll do for now…
With the masking completed it was time to lay down some primer…
Chris about to get started at the back and work his way forward; it just happened to be a coincidence that Chris was wearing a Honda branded shirt from Platinum Motors…
I was able to snap these shots of what once served as the base for the rear seats and the trunk as Chris repositioned himself to tackle the front…

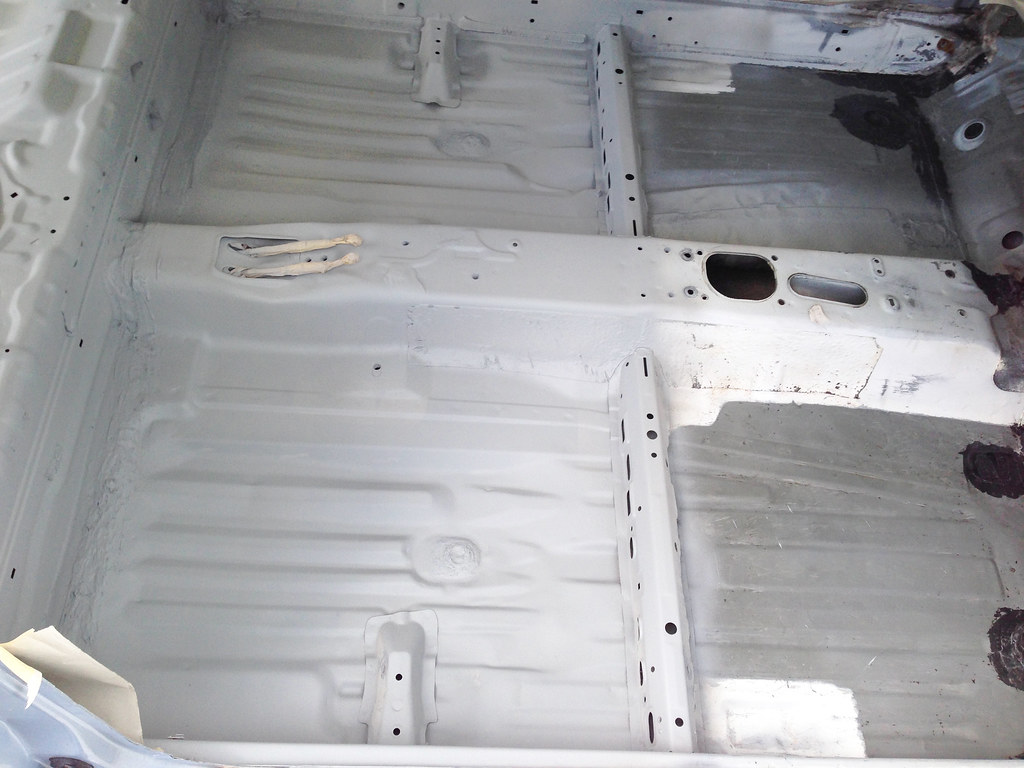
Making some steady progress…

With the interior fully primed, Chris gave it a quick scuff and wash down before moving onto the paint stage…
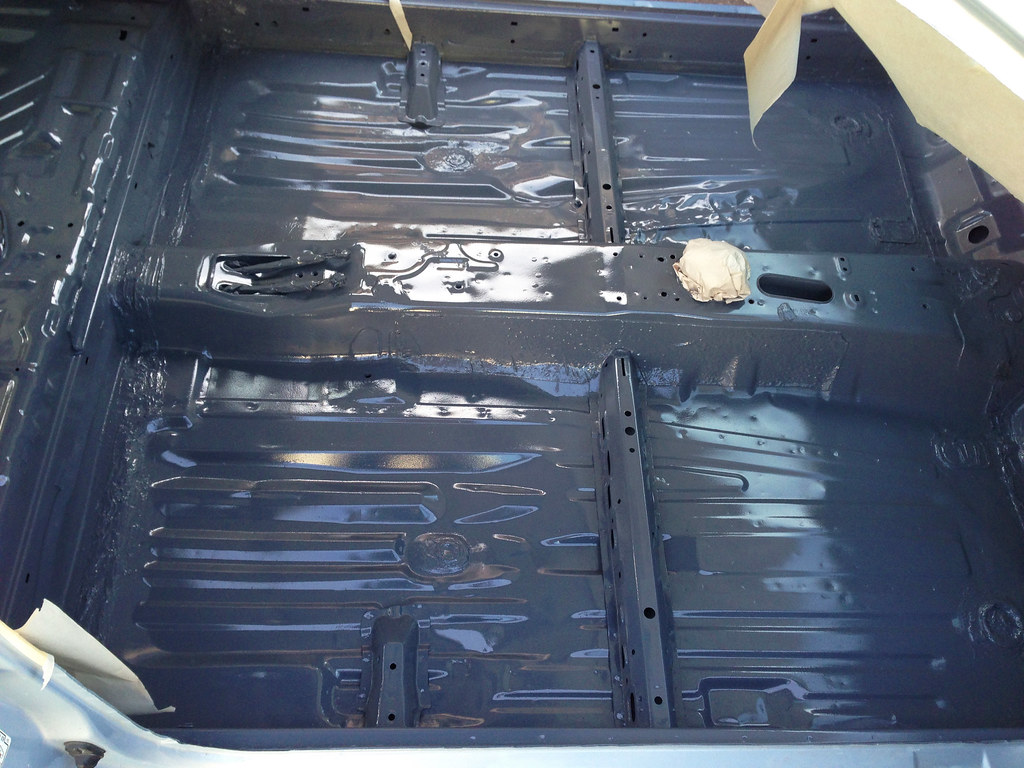
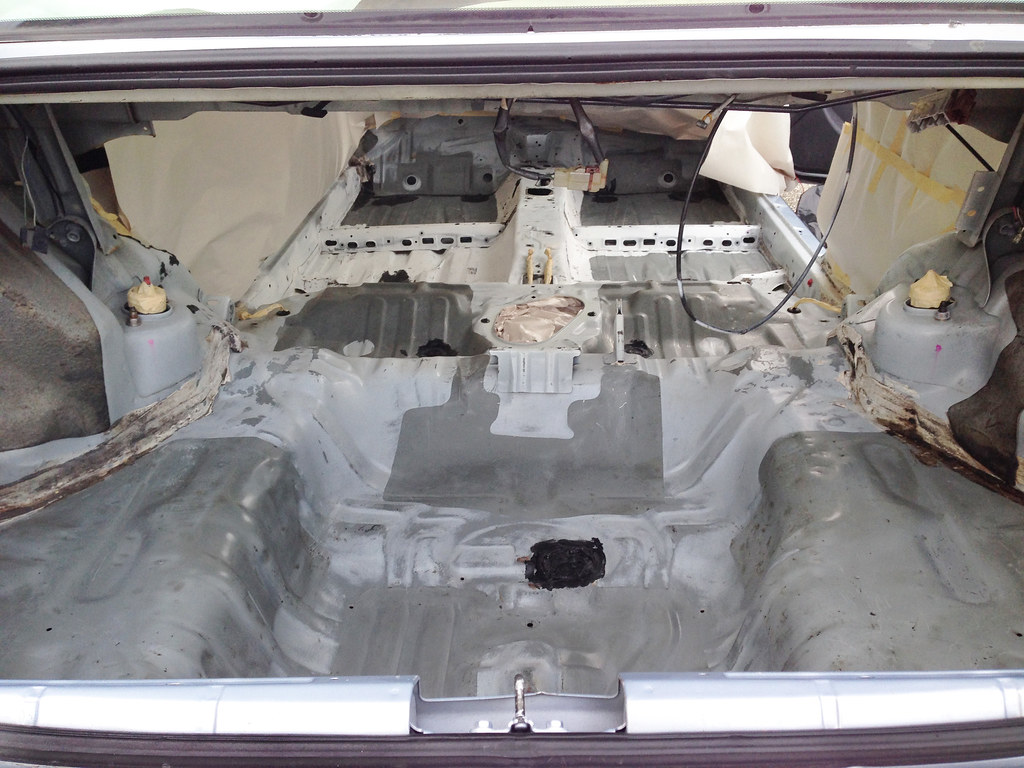
A look at the blown interior…
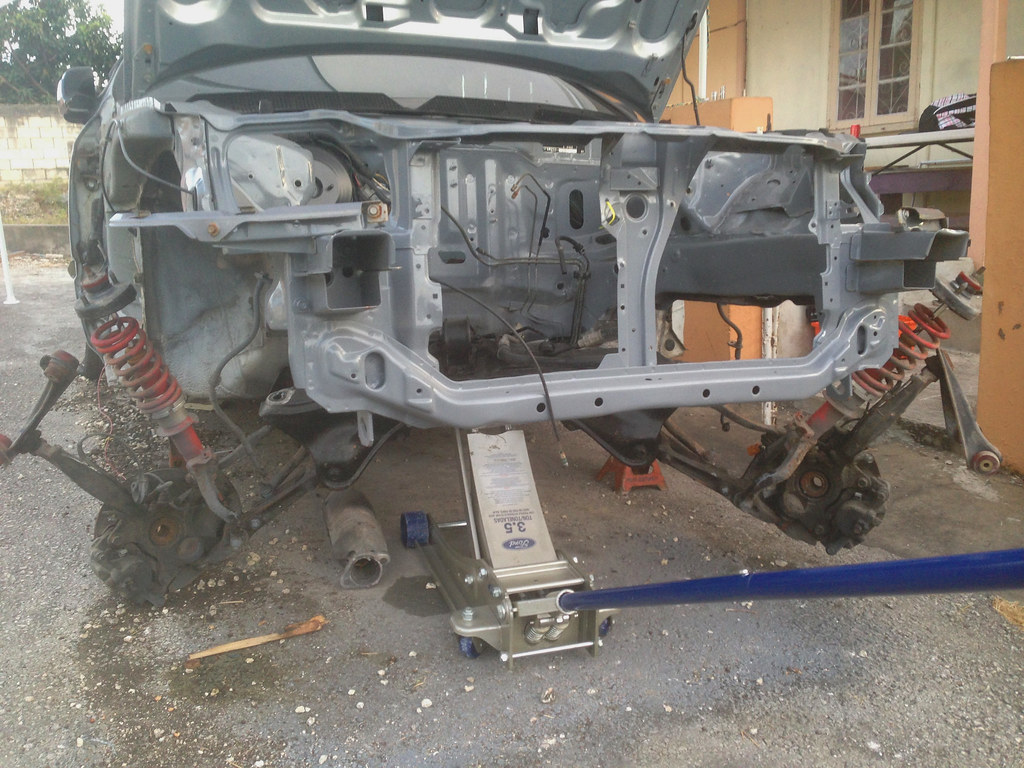
With the car starting to take shape, it was around this time where I needed to finally make a decision where the motor was concerned. After spending hours debating whether to be true to the SOHC and build a turbo motor or start with a B18c GSR motor and build it over time. It was official, I was at the crossroads uncertain of what setup I should go with and at the time a K Series was just a dream as I was on a limited budget. However, for the fun of it I decided to start doing some research; when I started to compare the cost of a B swap built over time verses a K swap I was stunned by the figures. Not only was the B swap going to be more expensive but where reliability was concerned it would suffer. Whereas with the K swap, I would be starting at the level of a modified B Series but with an essentially stock motor while maximizing loads of reliability which was of most interest to me as the car would be daily driven. It was clear what decision I was going to make and I slowly started collecting the necessary parts to complete the swap.
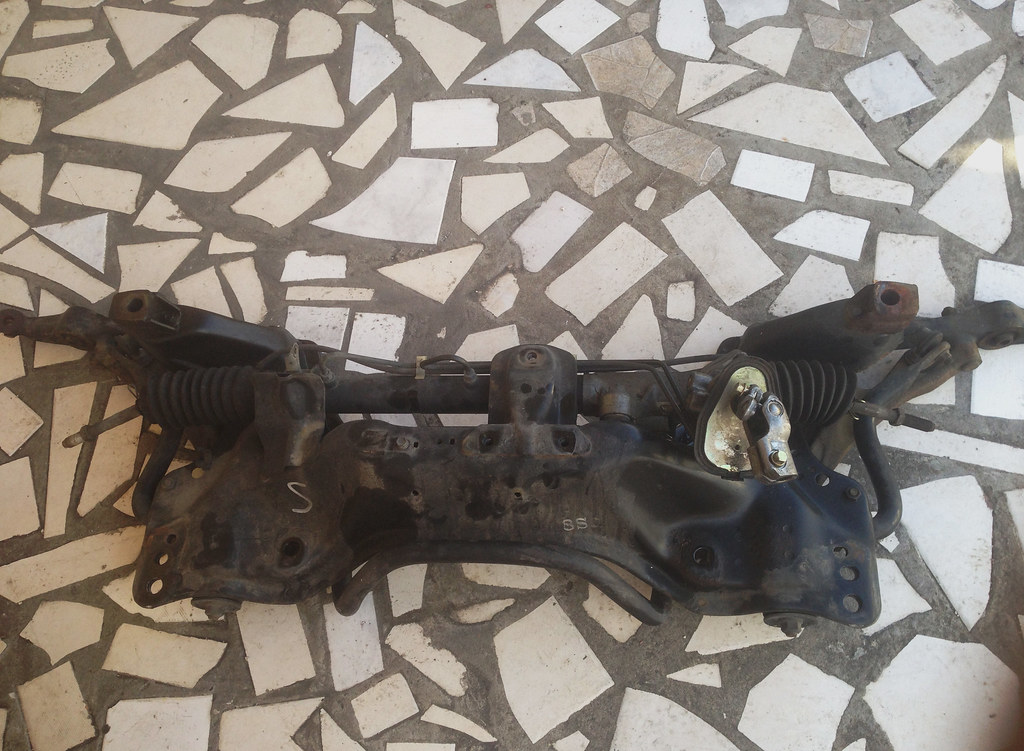
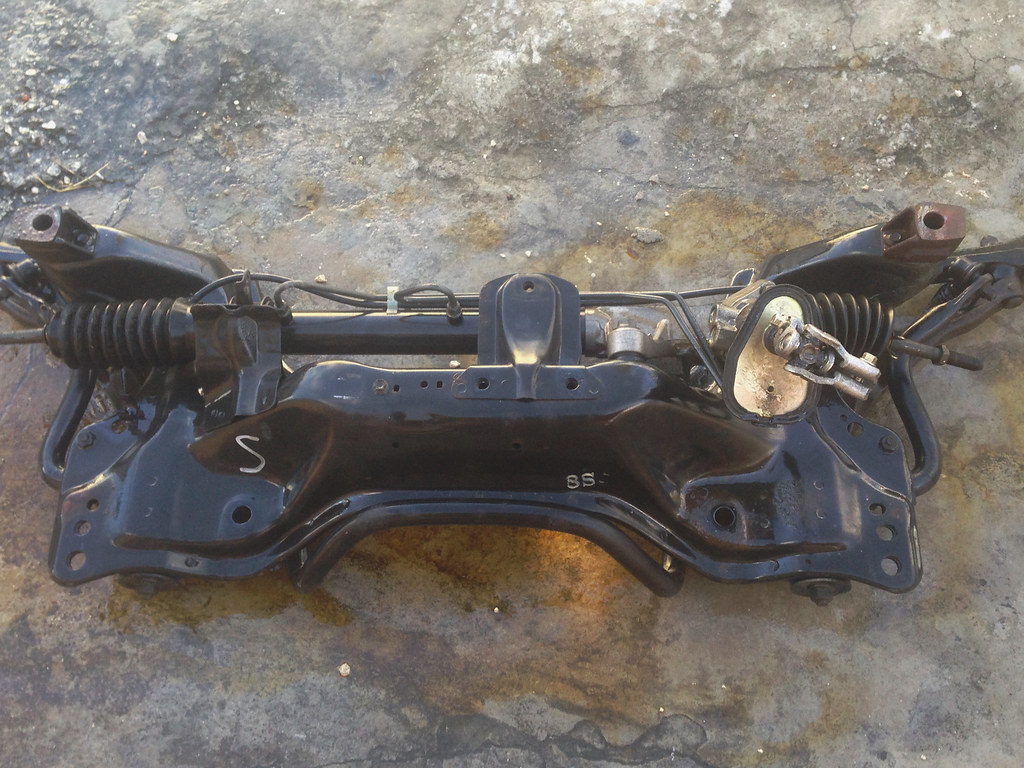
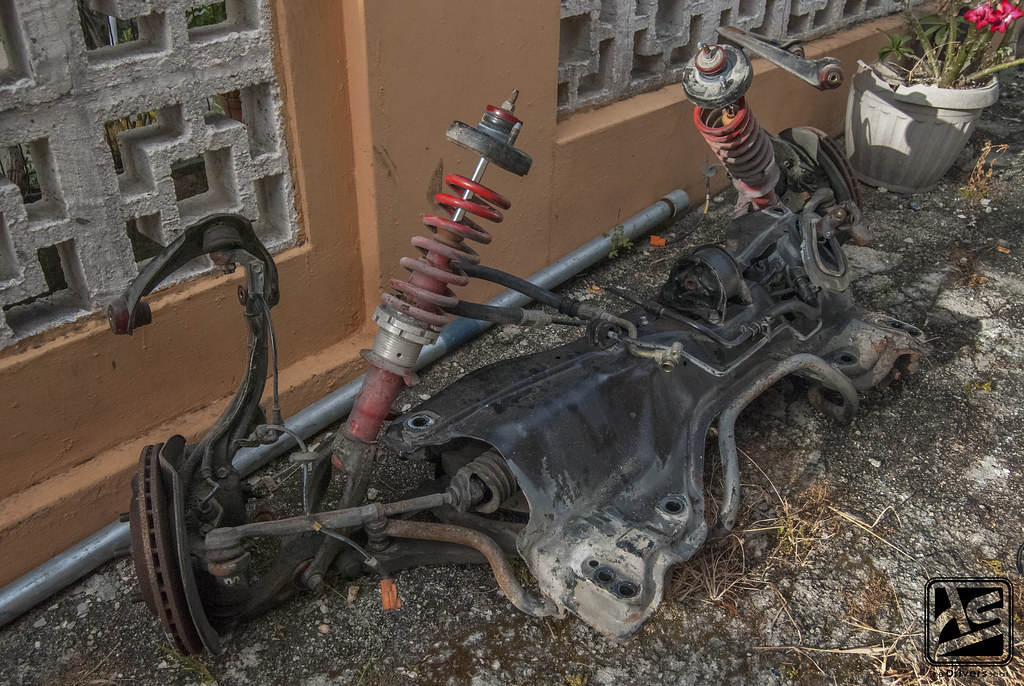
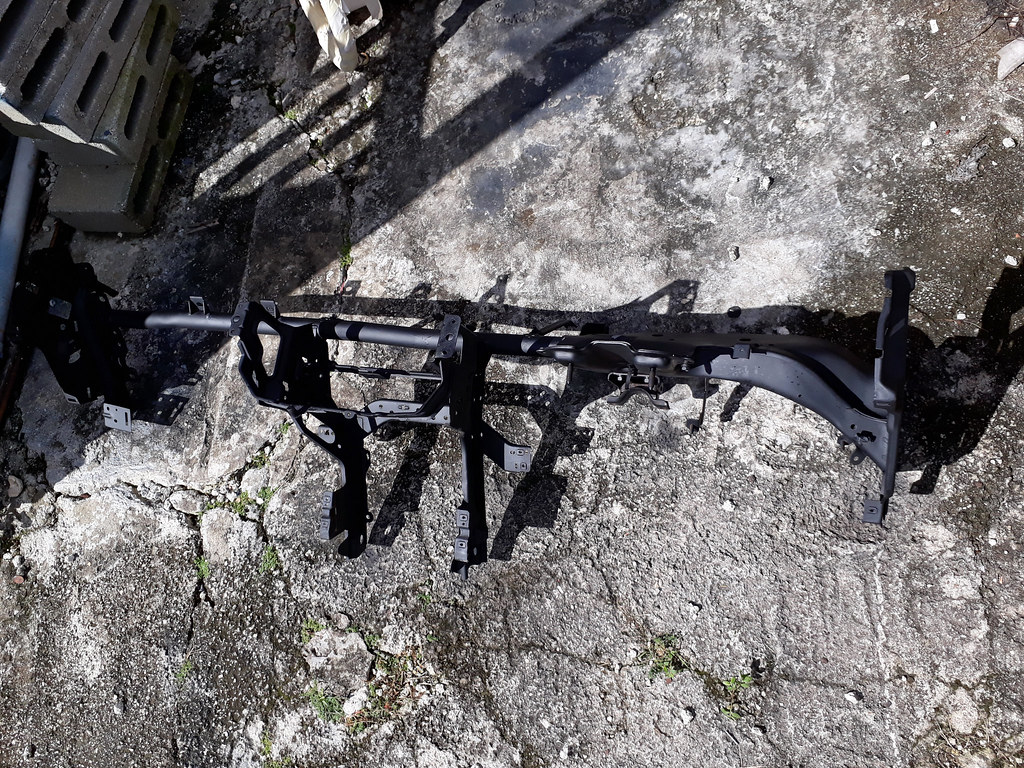
First on the list was a DC2 Type R subframe, steering rack, sway bar and bottom arms. Unfortunately the EK subframe isn’t ideal when doing a K swap due to the number of slight disadvantages associated with the swap. The motor is placed further forward which results in poor weight distribution along with a list of issues with the hood, header, radiator and ground clearances. To top it off, the angle at which the axles sit compromises the strength and could possibly result in a broken axle.
A light wash down before disassembly…
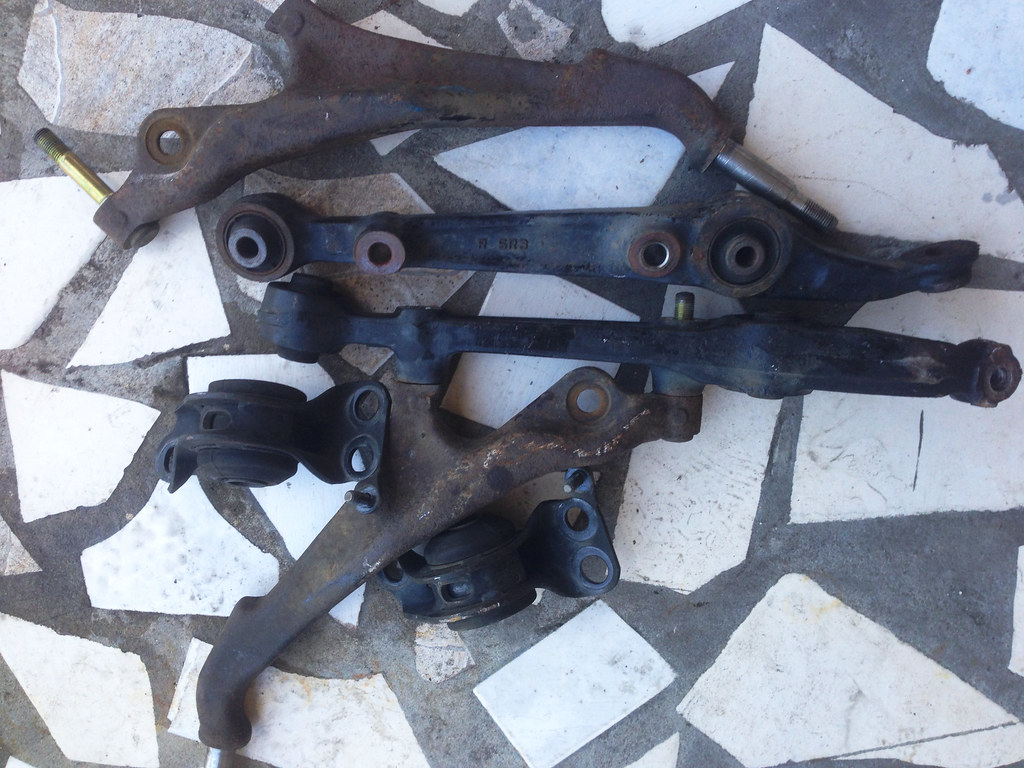
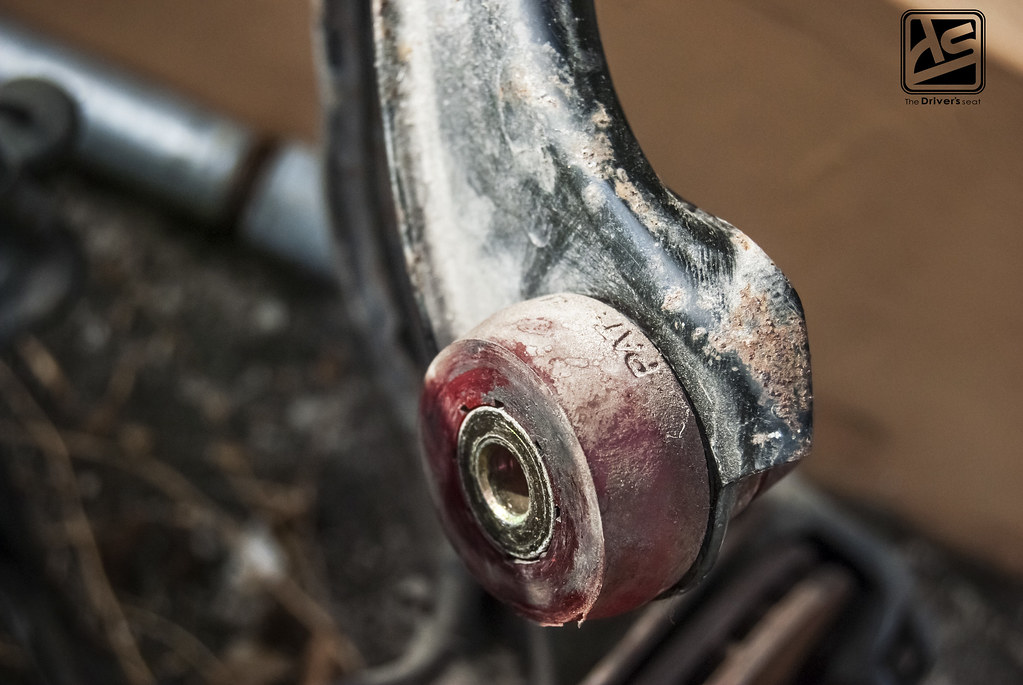
DC2 bottom arms where it was clear to see that some of the bushings had seen better days…
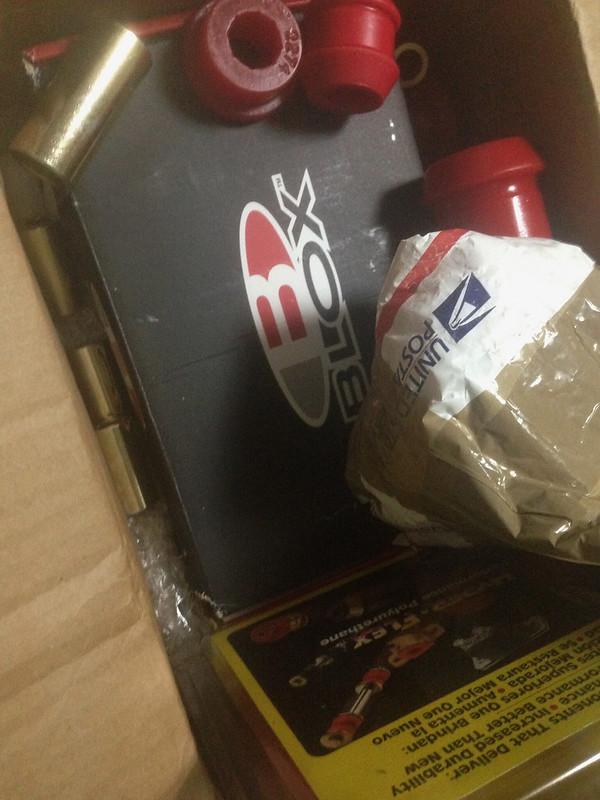
After acquiring the DC2 Type R subframe assembly and discovering the worn bushings. I placed an order for some replacement polyurathane bushings from Energy Suspension. I also picked up a rear camber kit from Blox Racing…
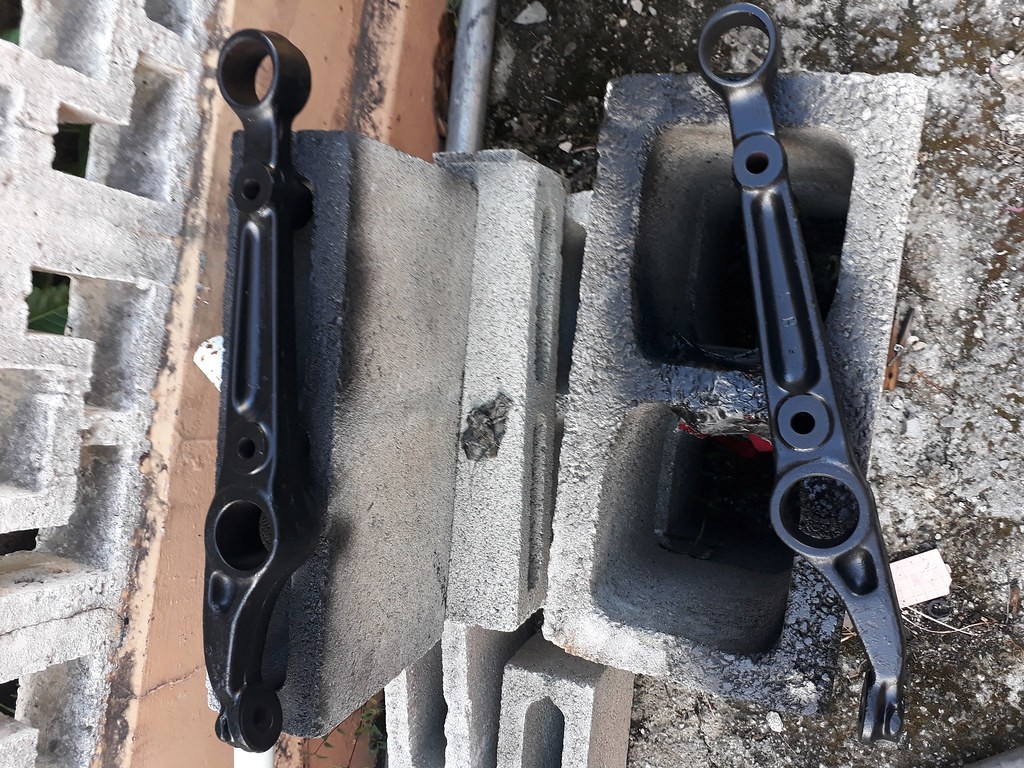
Dead bushings removed and a fresh coat of paint applied…
While thinking about moving forward with the K swap, I thought it would be best to reevaluate a few components on the car as it sat.
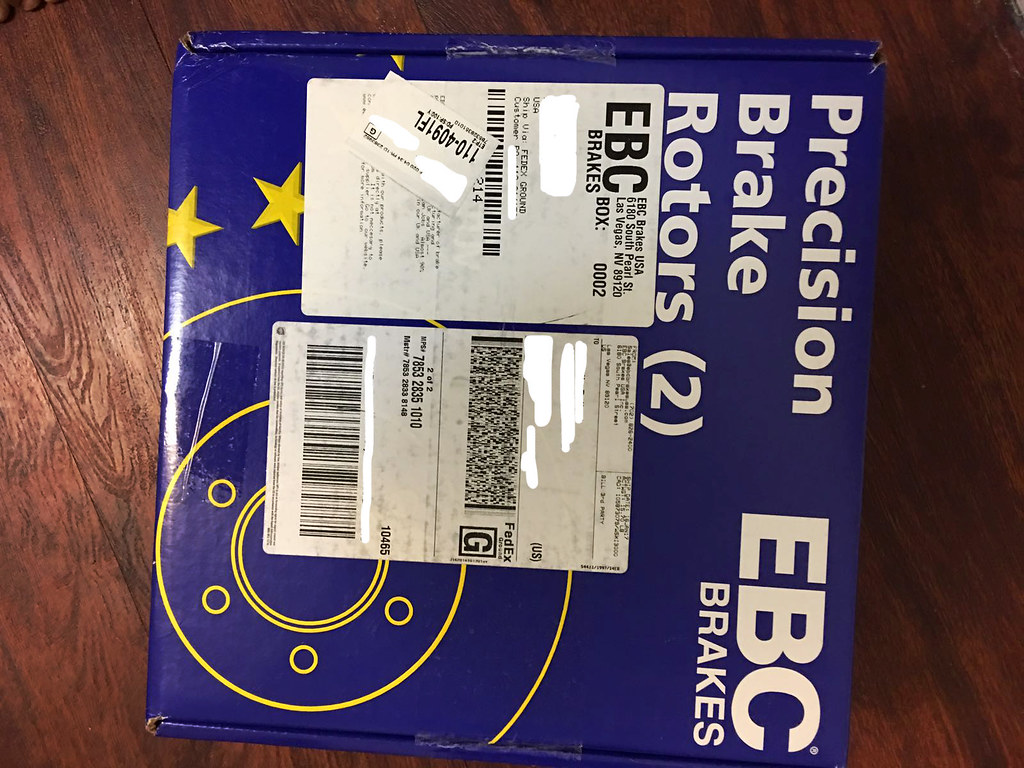
In doing so, I decided to pull the trigger and went ahead and ordered some new rotors from EBC…
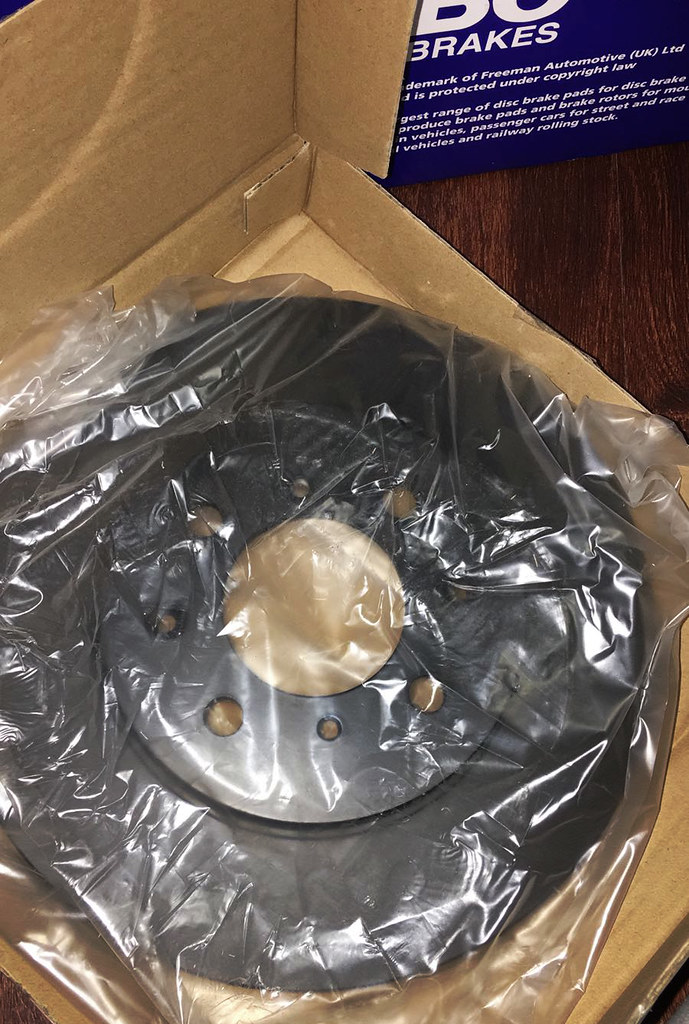
10.3″ EBC blank rotors, which are the replacement size for the EJ8 chassis…
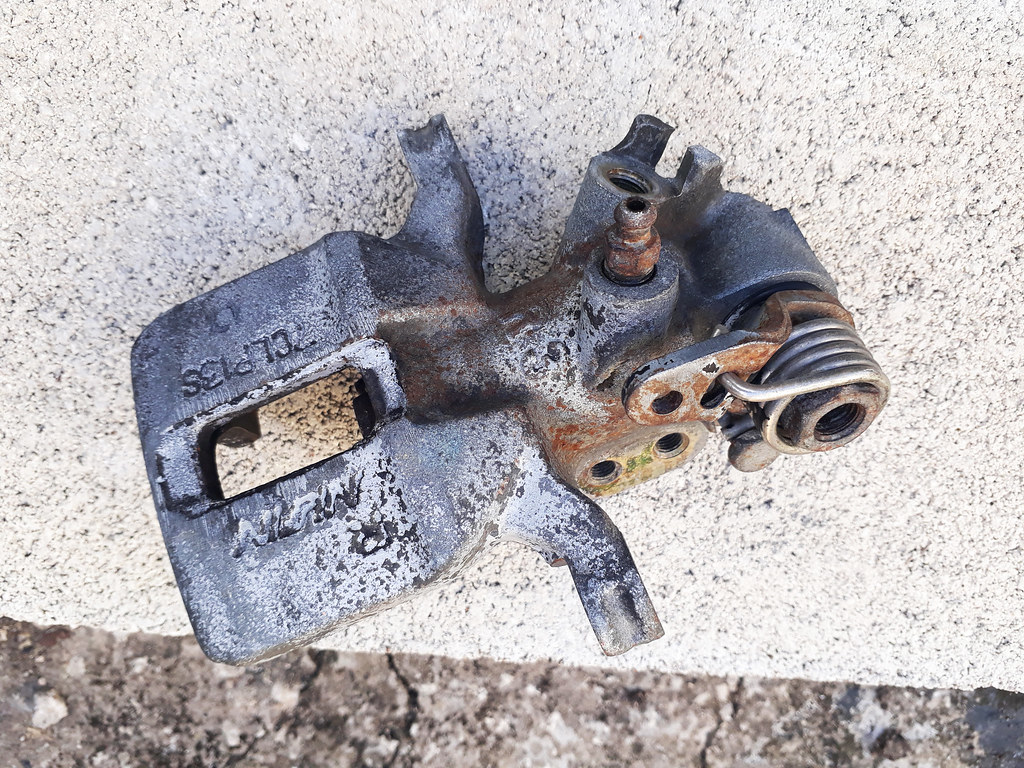
From the factory the EJ8 comes with drum brakes on the rear, I thought it would be best to make an upgrade to rear disc brakes as I plan to take the car to a few track days…

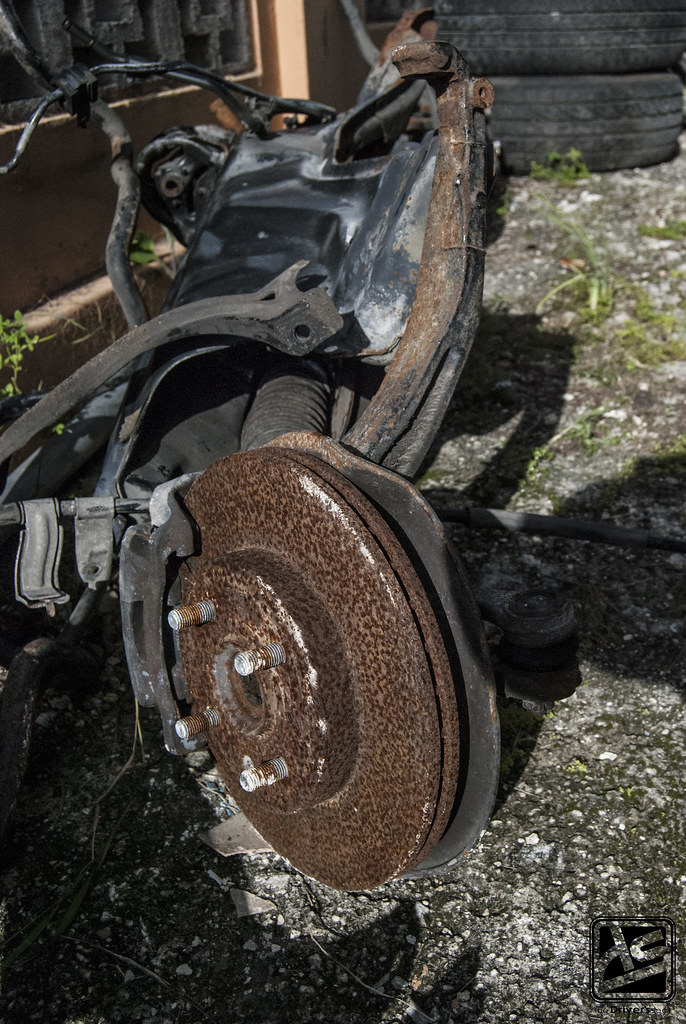
I picked up some DC2 calipers with hopes of refurbishing them and as you can see they desperately need it…
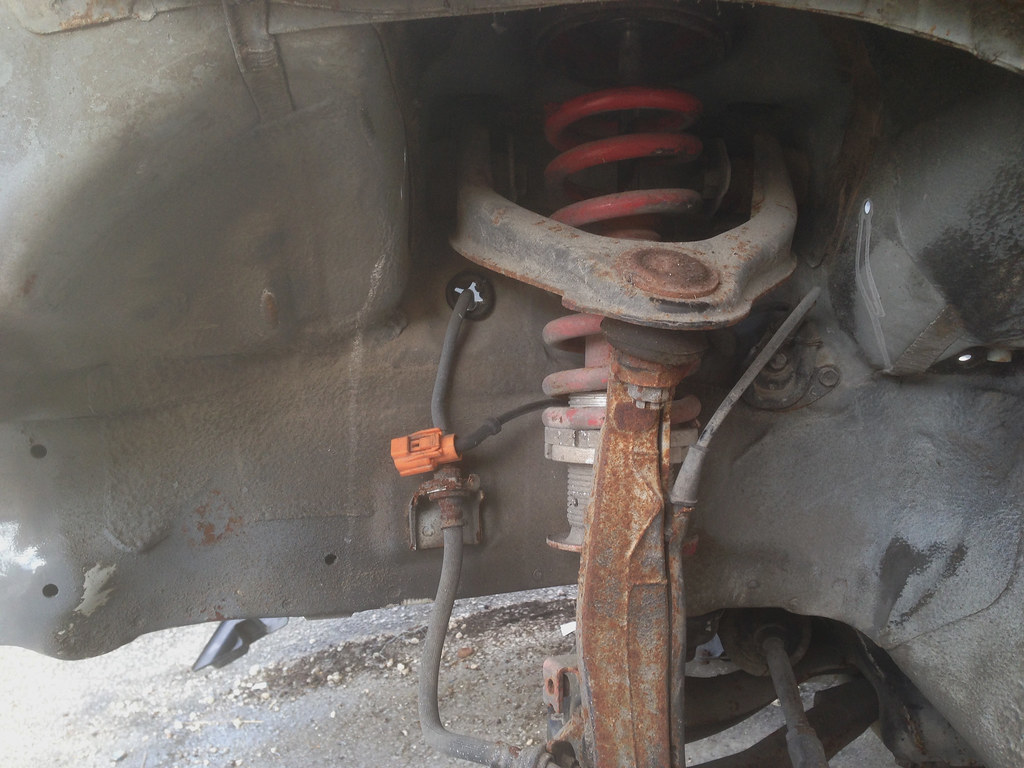
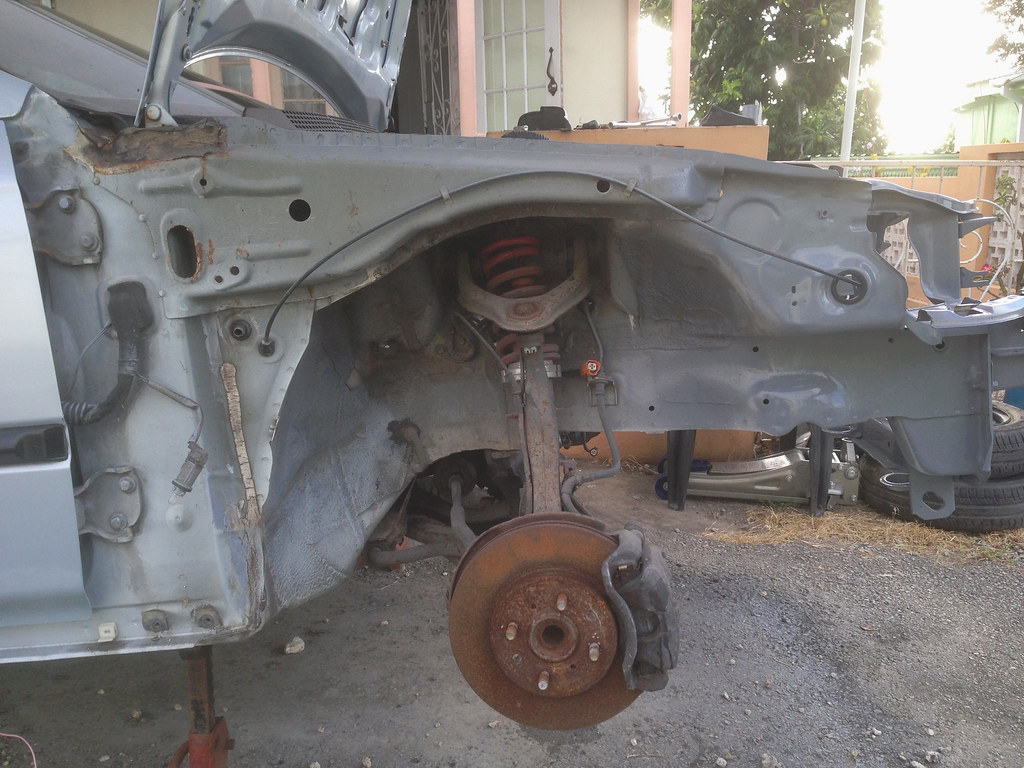
A final look at the EJ8’s front suspension and brake setup…

The removal process went pretty easy with no trouble…
Out and on the ground…
The upper control arms that I was running on the car had already been upgraded to Polyurethane bushings front Energy Suspension back when it was used as a daily…
It was time to got cracking at tearing it apart…
Front knuckle inclusive of brake caliper and rotor separated from the EJ8’s upper and lower control arms…
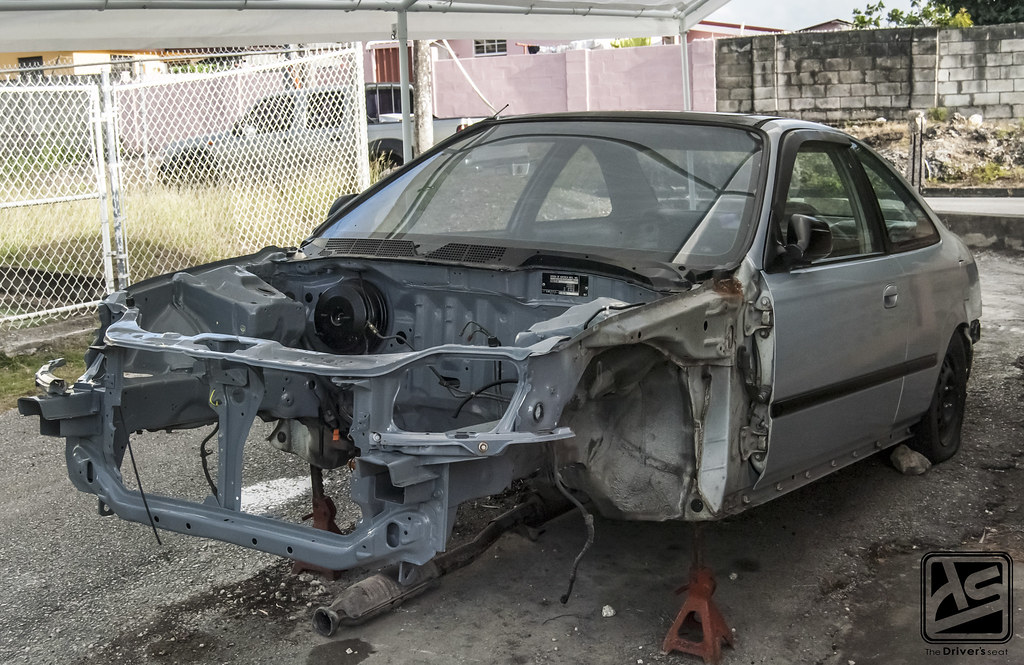
In looking at the naked front end I wondered to myself what have I done. There was no turning back so I pushed on and took a closer look at the front end…
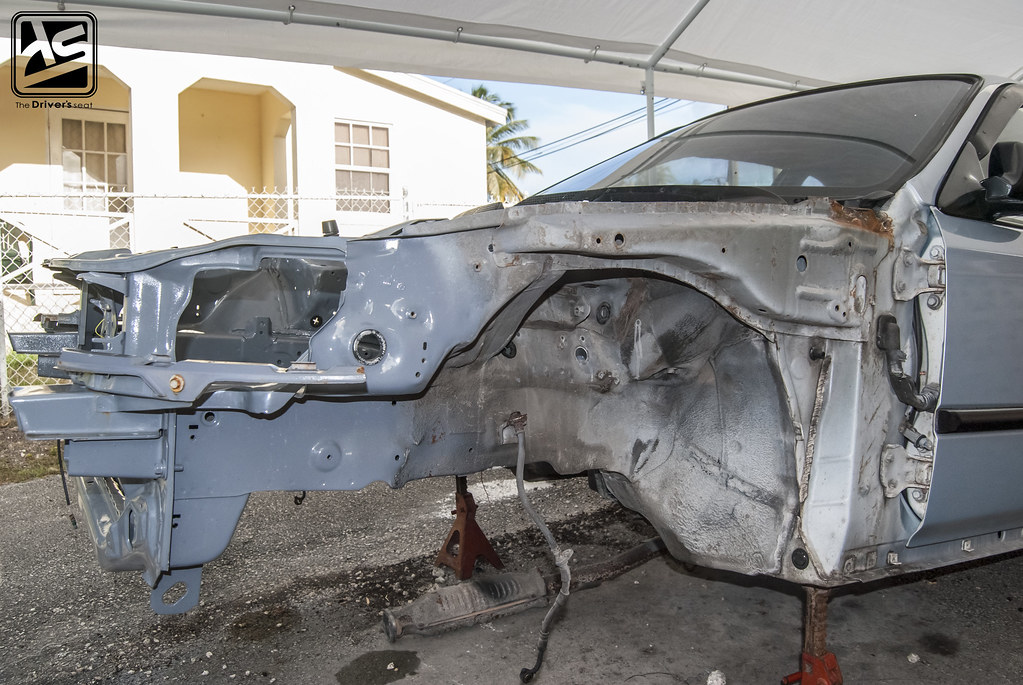

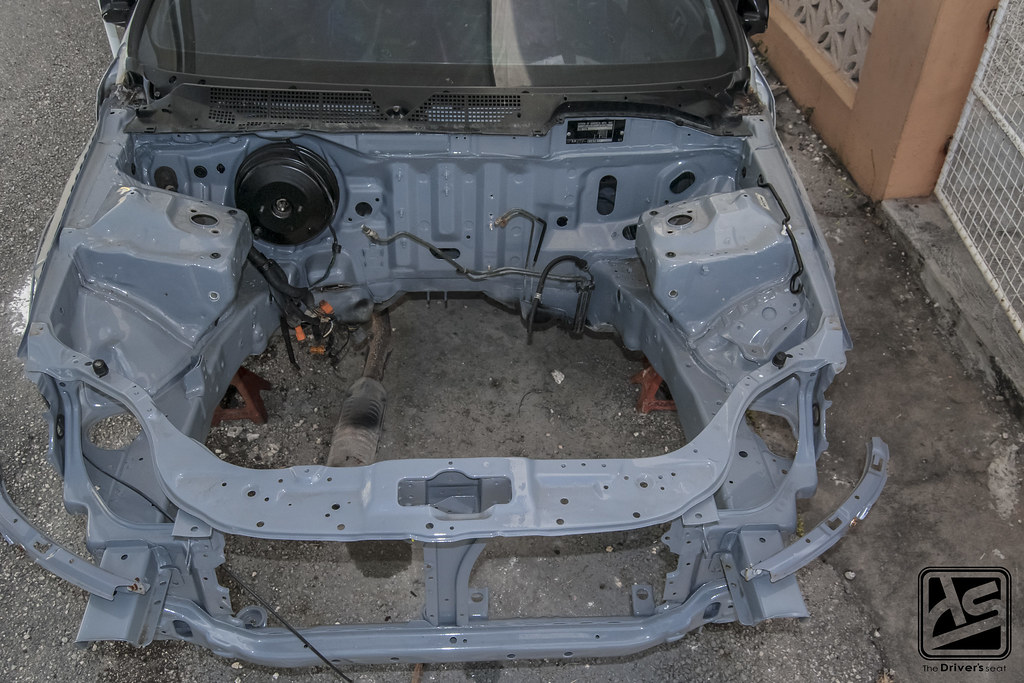
Which was still in relatively good condition given the age of the car…
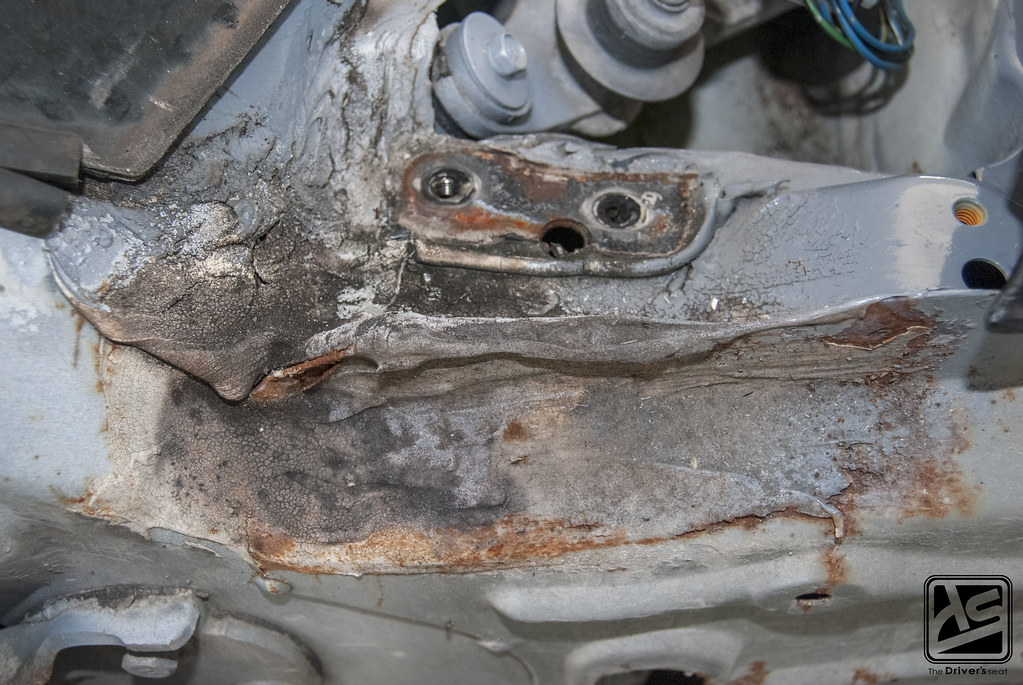
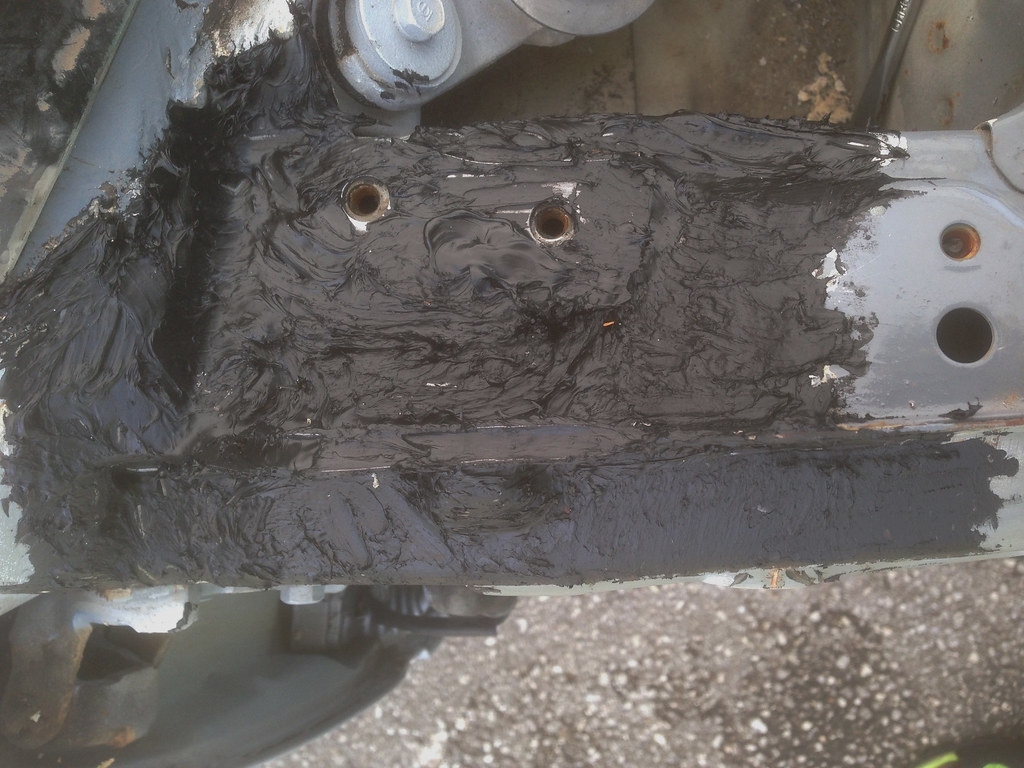
After inspecting some of the sealant it made sense to remove and reapply it in the preparation for the paint stage…
Over time, my scope for the build started to become more intricate and I started to stray from my original plans…
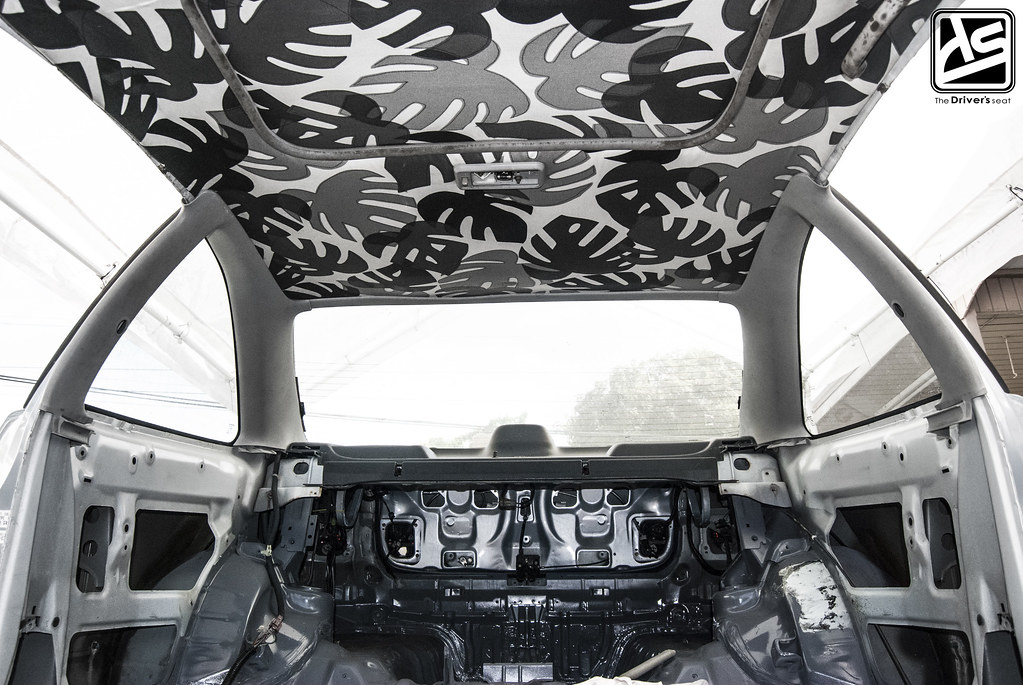
Initially, I had plans on keeping the rear panels but as time progressed my vision for the interior started to change…
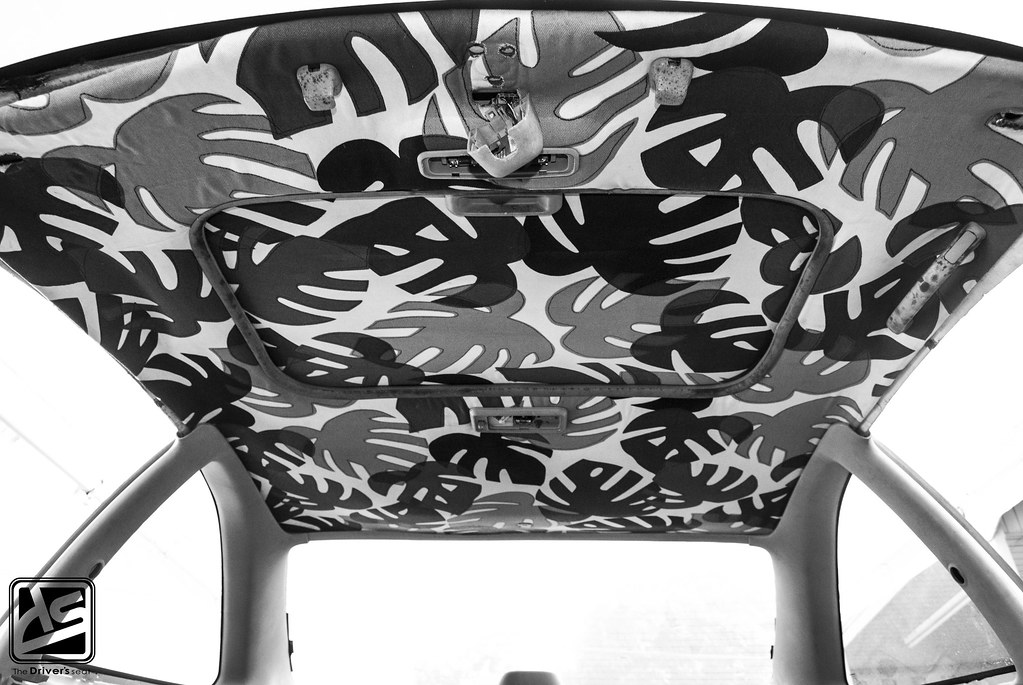
When the interior was torn out of the Civic to have it painted, I spent loads of time on K20.org’s forums. More often than not I saw multiple posts where guys would refresh their headliners. In an attempt to do the same, this is what I came up with…
The more time I spent combing through K swapped builds the more involved I became in the USDM culture…
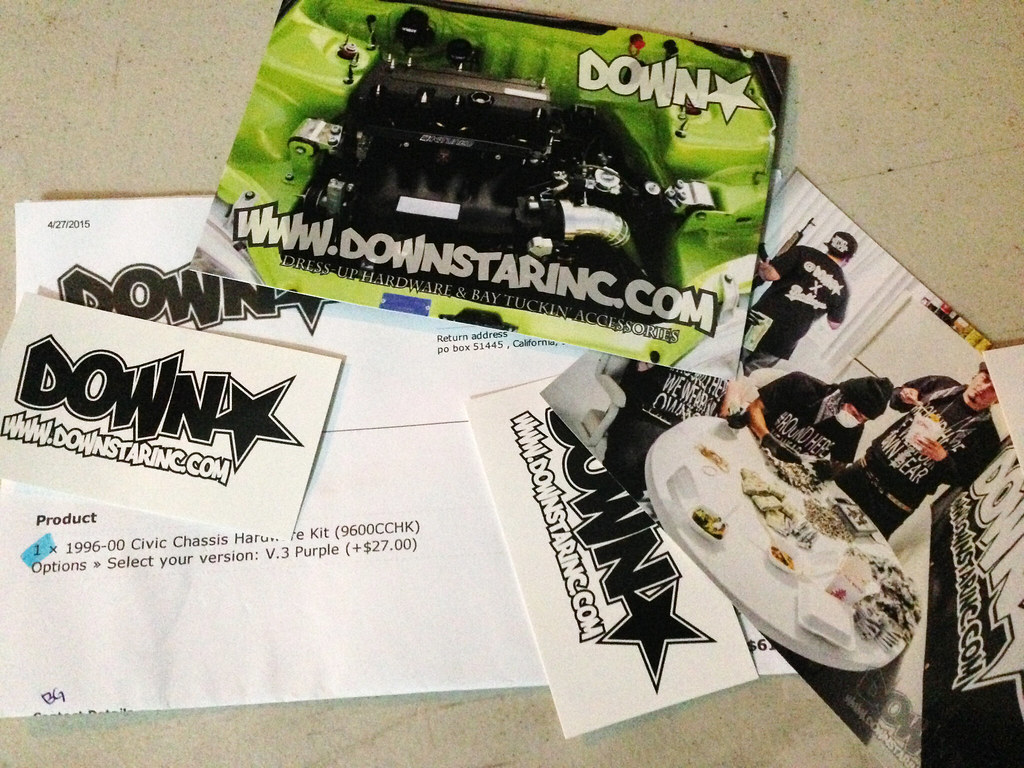
Thoughts of having a K swapped car were now taking some shape and in true USDM style an order was placed to DownStarInc…
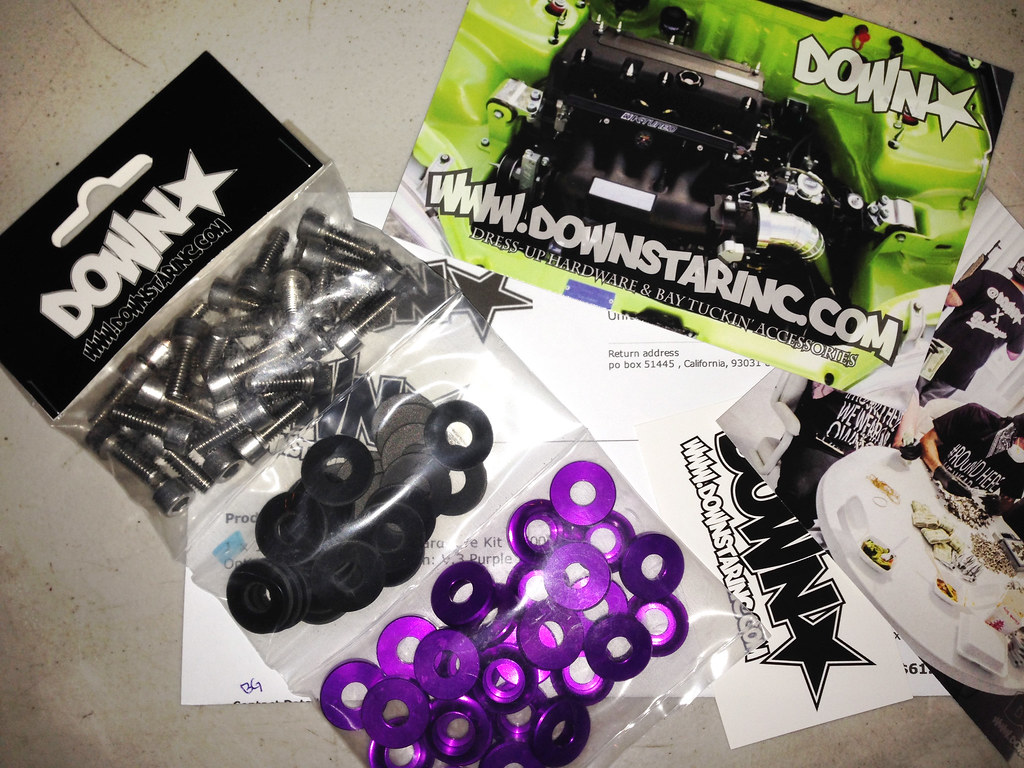
Close up of the Downstar Civic Chassis hardware kit with the V.3 washers in purple…
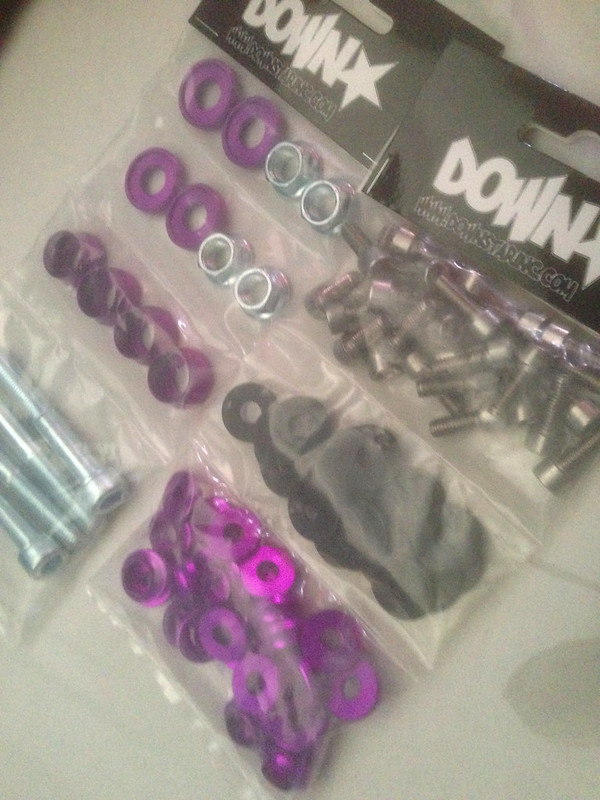
Along with the chassis kit I went ahead and got the upper control arm bolts with the strut tower nuts included…
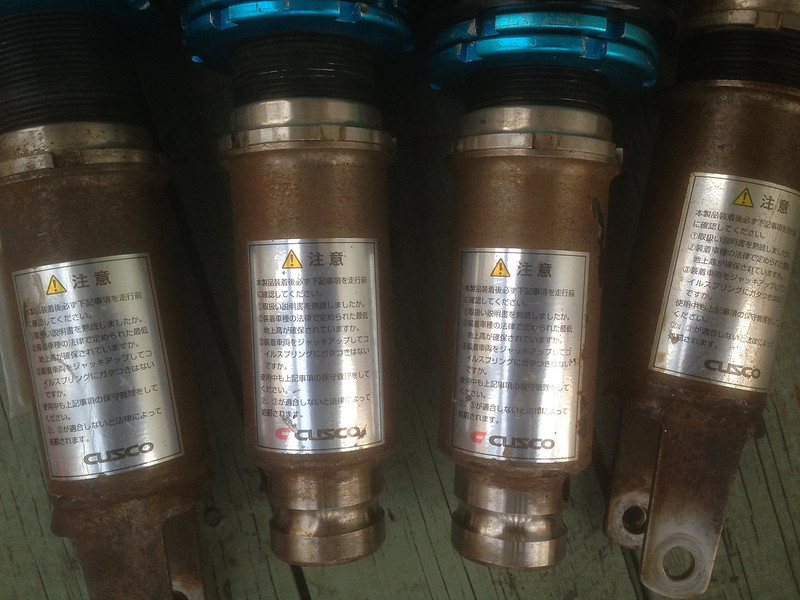

An opportunity arose and I was able to pick up a set of coilovers for the Civic..
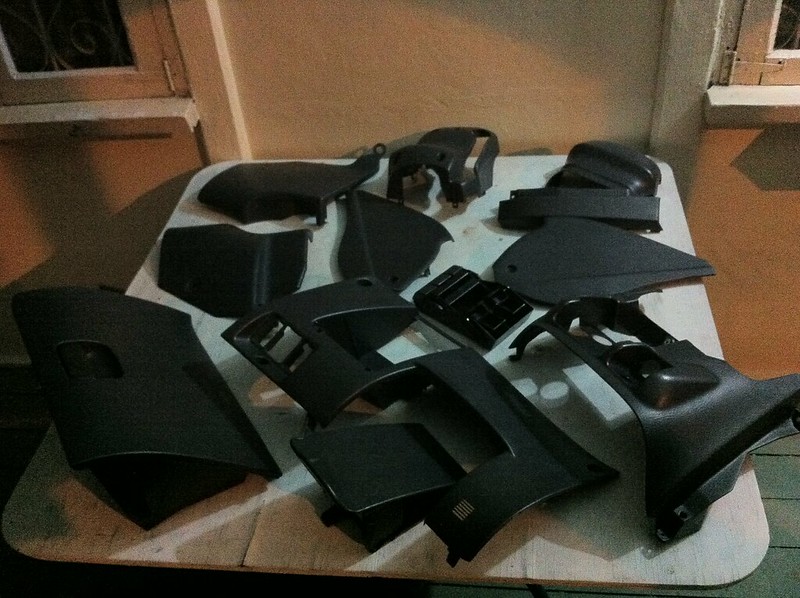
Dashboard associated plastics laid out after a clean…

I couldn’t leave out the remaining interior plastics…
Staring at what was left of the interior I dove further in…

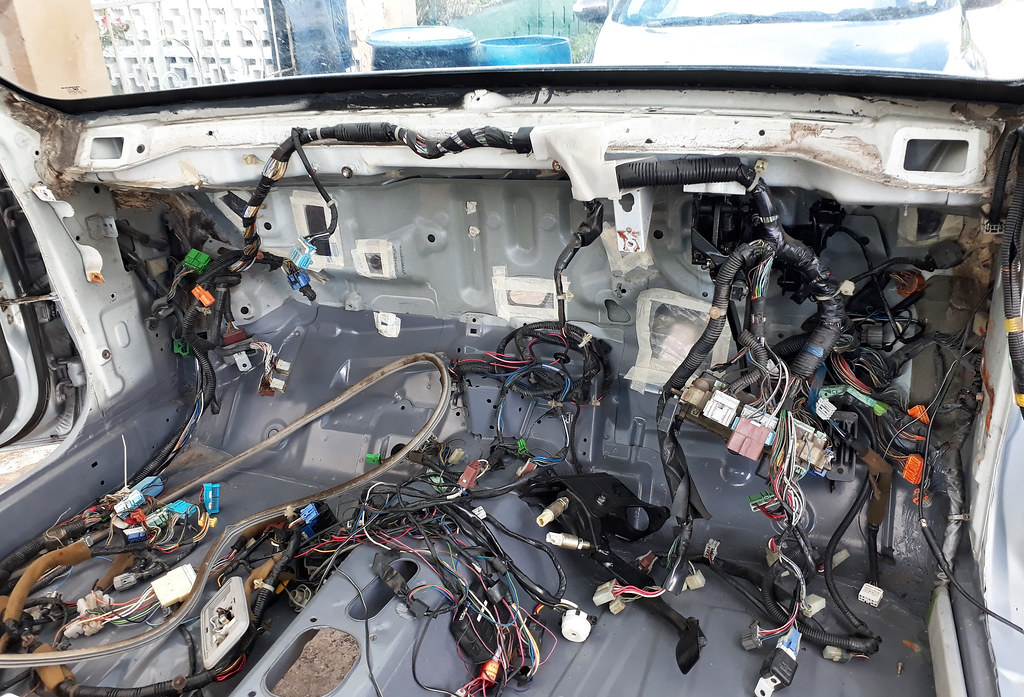
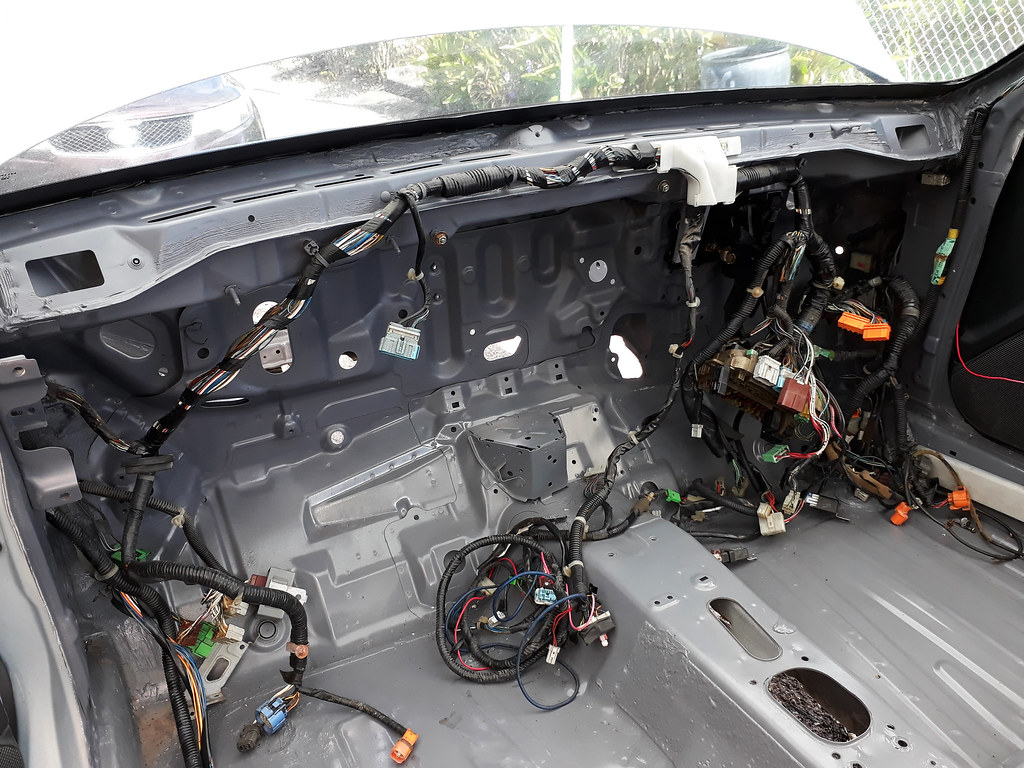
Moving the chassis harness out of the way in the preparation for paint…
Even though it wouldn’t be seen I still felt it was necessary as the car would no longer have a blower motor installed…
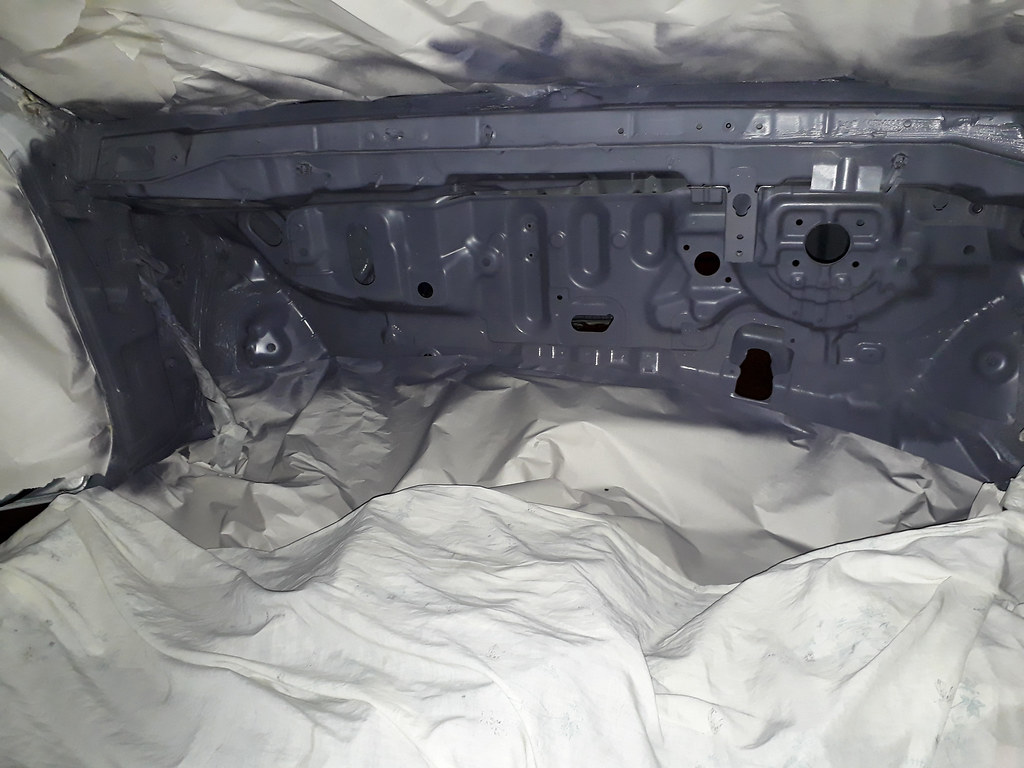
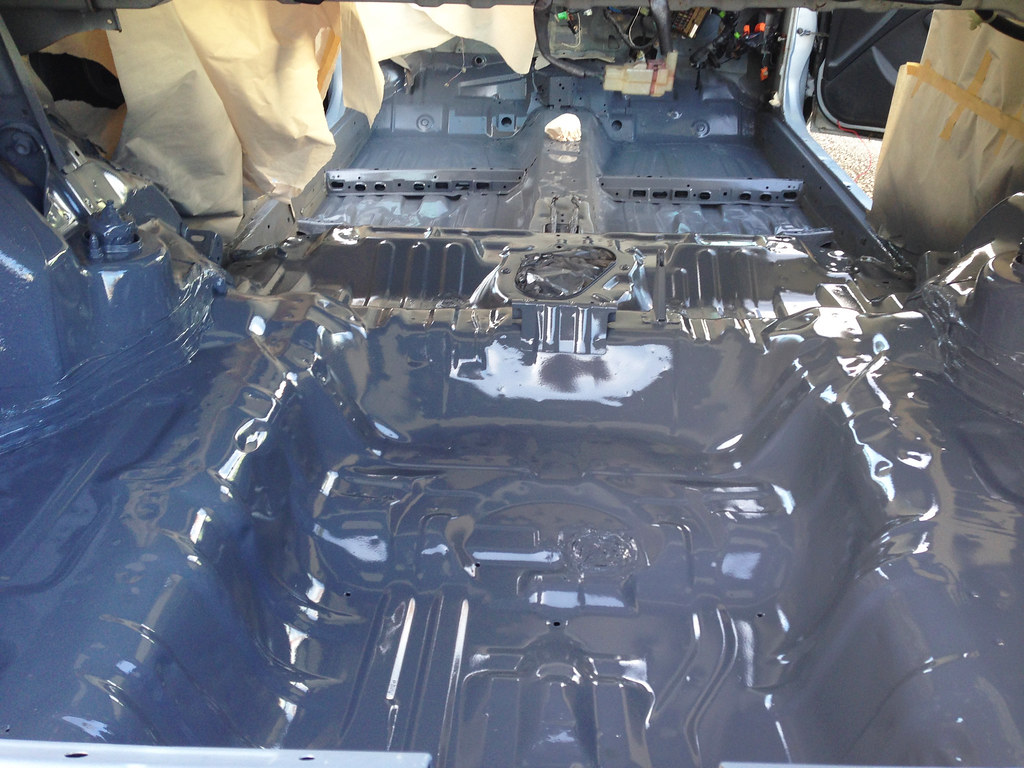
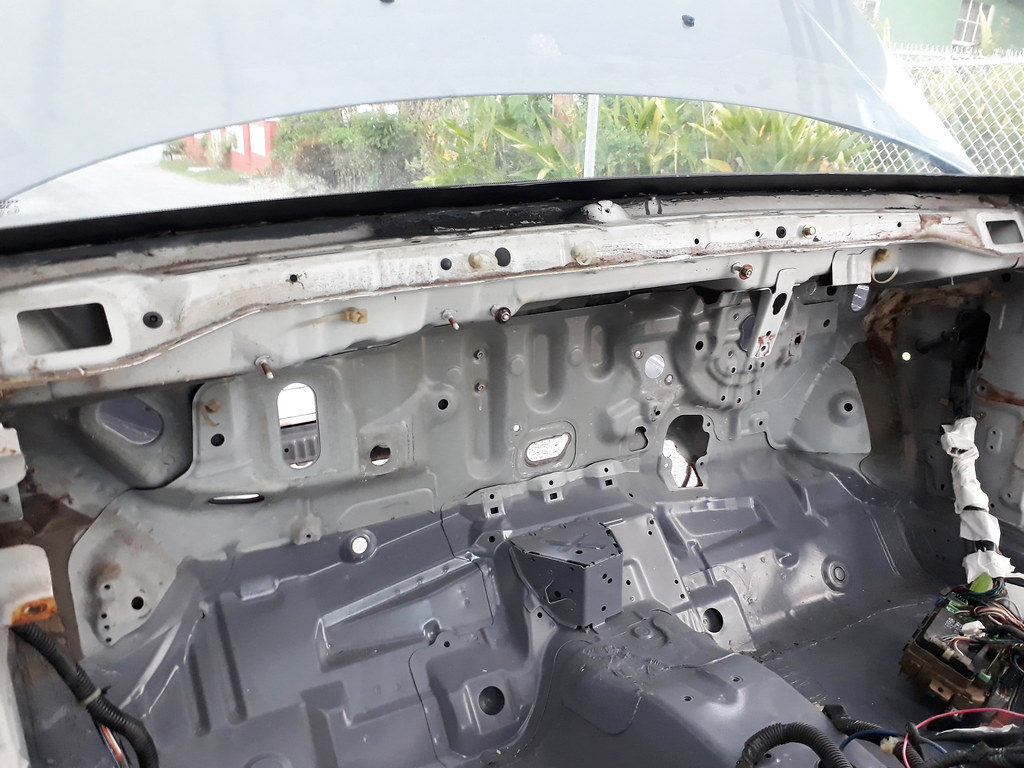
Firewall painted and on to the next…
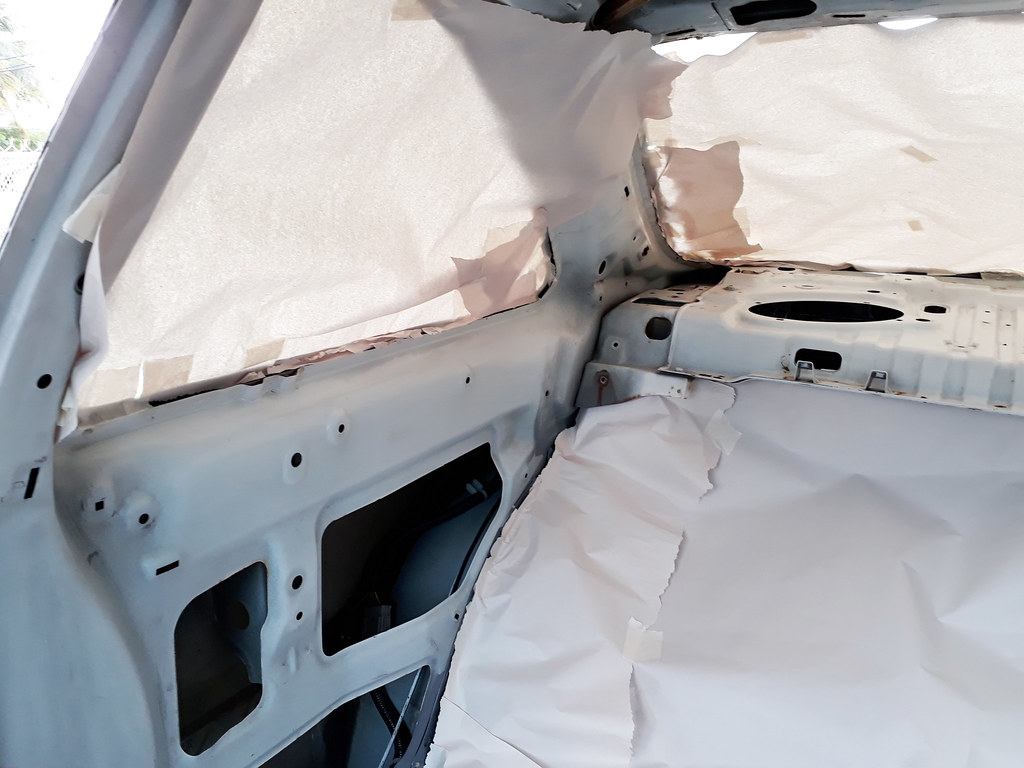
Abandoning my idea to run the rear quarter plastic panels, I would be required to apply some paint to the exposed metal frame…
While i was at it, the dash frame was stripped and received a fresh coat of black paint…
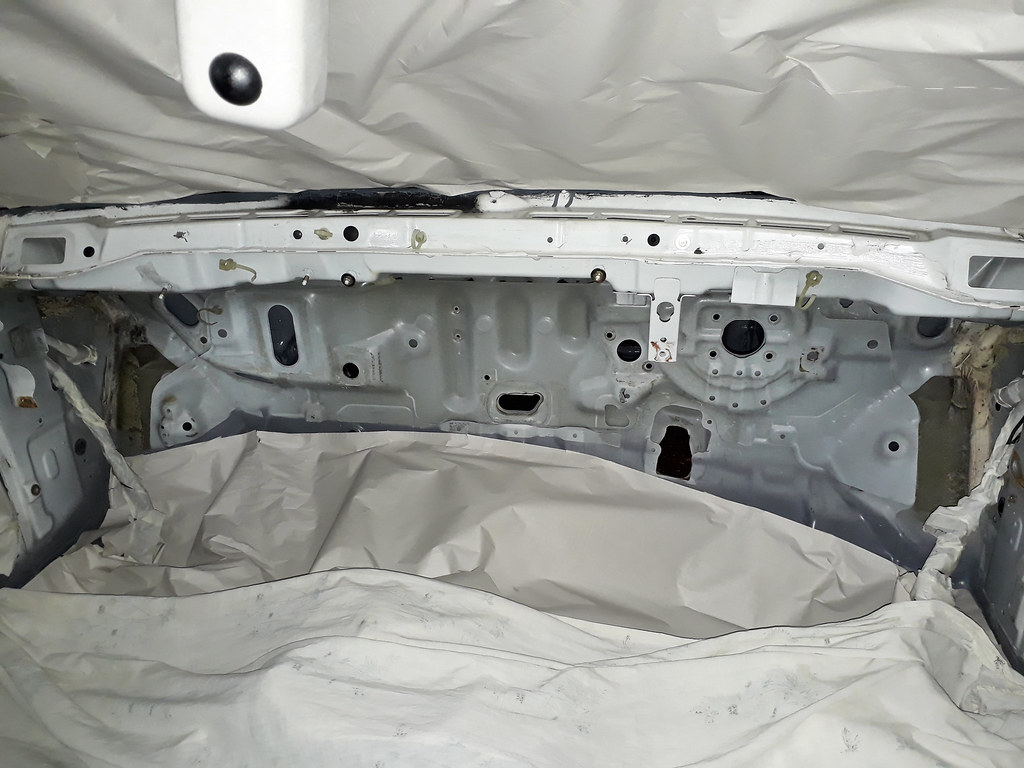
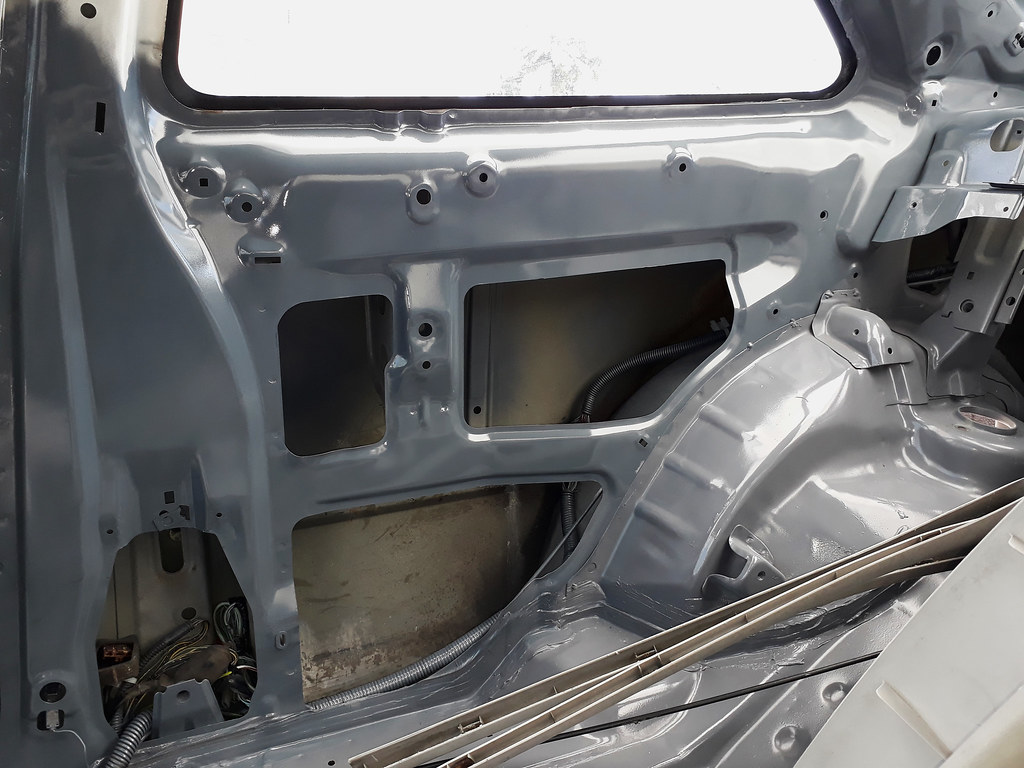
A look at the fully painted firewall with the chassis harness back in place…
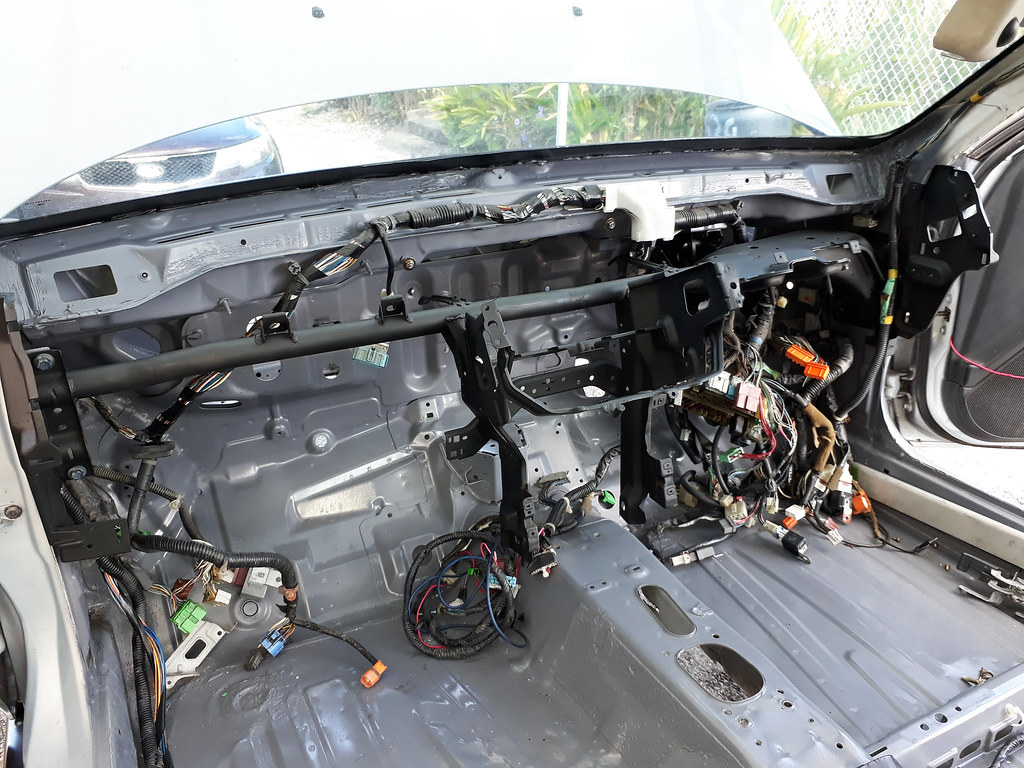
A shot of the recently painted dash frame temporarily mounted…
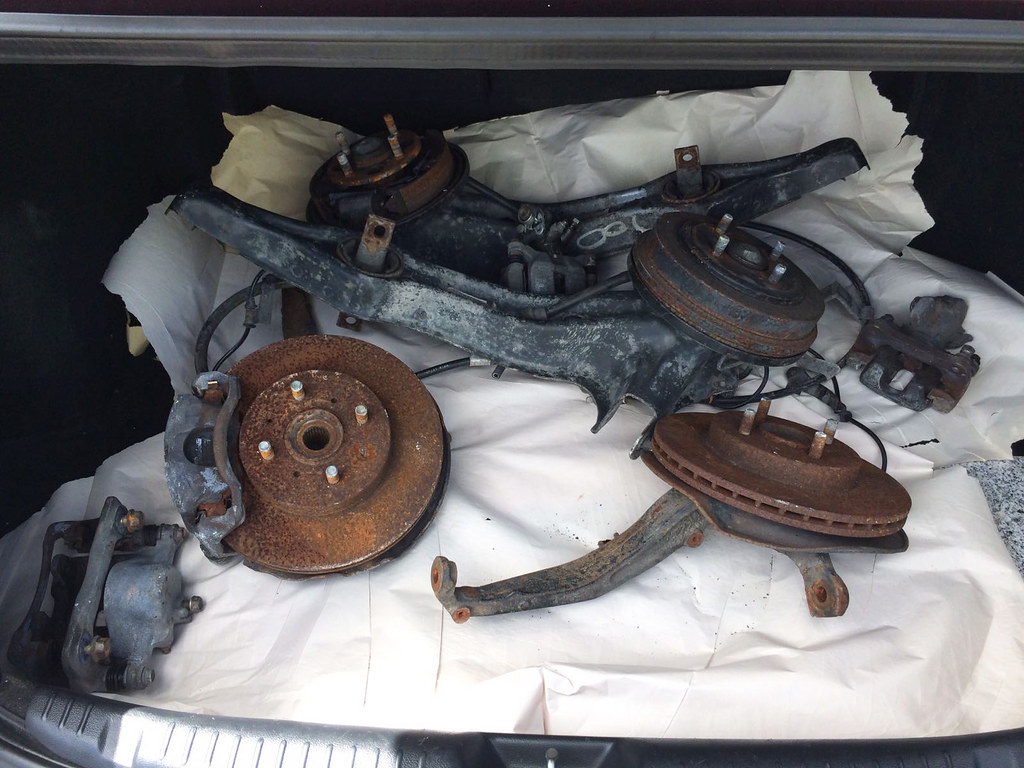
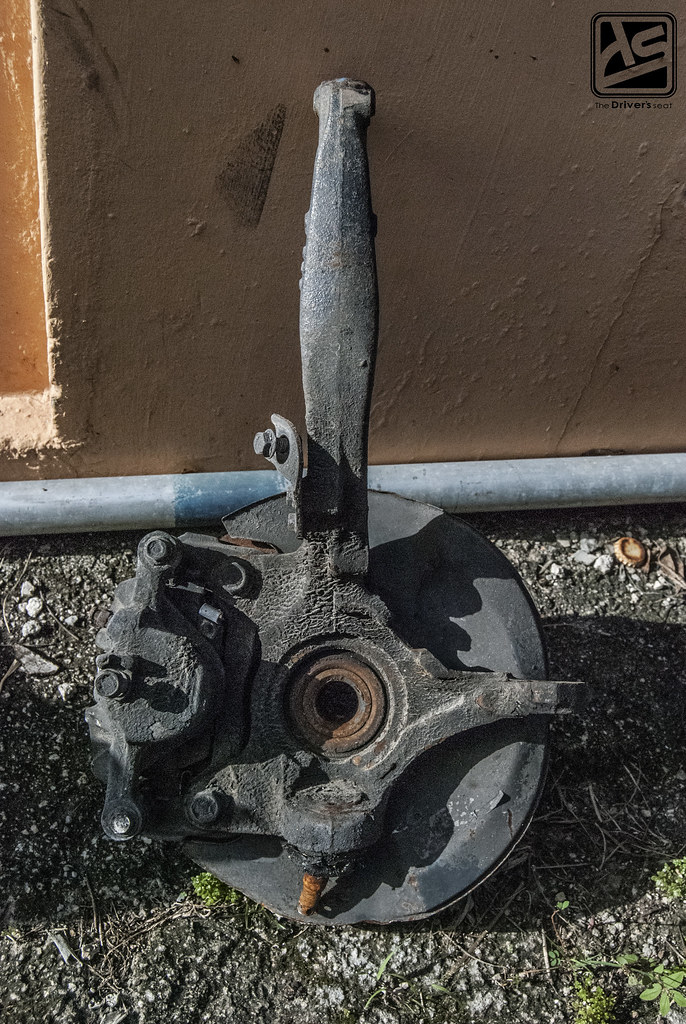
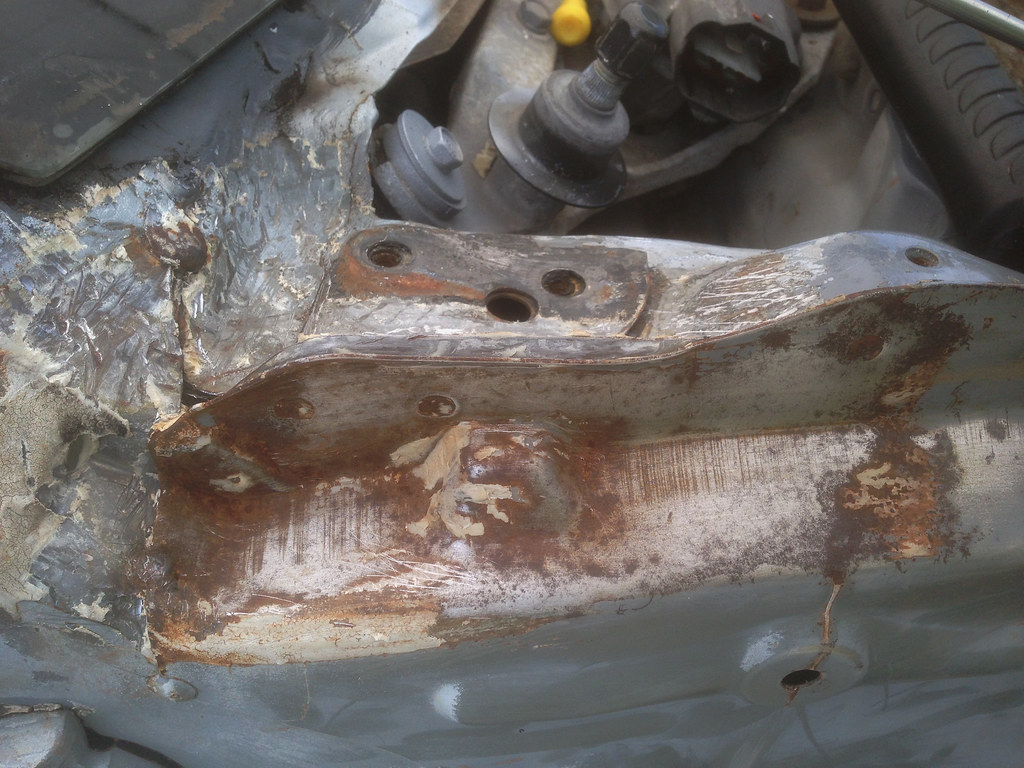
Front knuckles along with the rear trailing arms removed and ready to be disassembled and refurbished…
That’s it for today’s post on Project EJ, thanks for taking a look and I hope you guys enjoyed the update on this build series.

Cant wait to see the finished product bro!!!
Yeah me and you both.