
All-Wheel Drive EG9 Build… Part 2
As much fun as it is during a build, there is no better feeling than knowing you are moments away from completion. Today we take a look at the great amount of progress Bally has made with the AWD EG9. Moving forward with the bulk of the plumbing, fabricating & wiring he has been busy pushing this build to the finish line. We’ll be touching on a few of the major changes since our last post.
For those who may want to view this build from the start I’ve provided the links below:
All-Wheel Drive EG9 Build… Introduction
All-Wheel Drive EG9 Build… Part 1
Now that you guys are caught up, let’s begin today’s post…
As I would have mentioned in a pervious post, the purpose of the Civic is to take over from where the Evo left off. Having a much wider stream of support along with a lighter chassis made it the optimal candidate for this mission. Also, it’s a huge difference starting a build from scratch with a dedicated purpose in mind verses trying to pile things on top of a factory built car.
The aim for the build is to have a car which can compete within the mid 6 sec range with hopes to dial it down to low 6s. If all goes well throughout the development stages & he can achieve a 5 sec pass that would be the icing on the cake. In terms of power, the K series motors have been proven to produce endless amounts of power, basically the sky is the limit. In Bally’s case he is shooting for around 1200WHP however, the car will more than likely race around the 800-900WHP range & ramp in the boost as the traction is available…
Having fitted the motor to the EG9 shell, the real work now began. The Civic would require some much needed fabrication to carry out the task at hand…


Bally was well on his way to transforming the EG9 chassis for drag racing; with these plans in motion the front end was in need of modification to allow for the necessary components to fit…

The radiator support was removed & replaced with a custom fabricated tubular unit that will ultimately house a series of tabs where the much needed components will be mounted to…
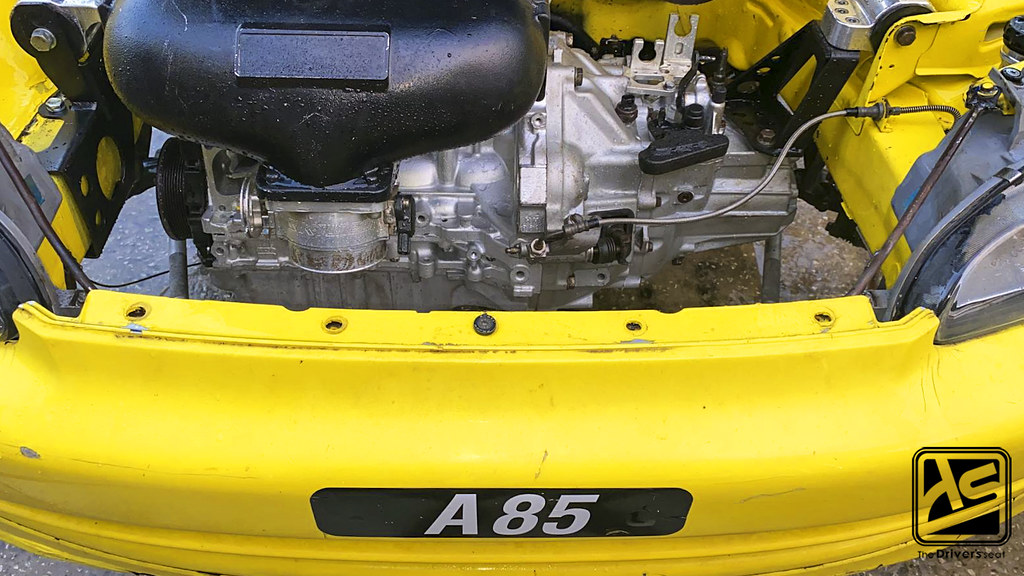
To make life somewhat easier, Bally incorporated the factory bumper support within his design. This allows the front bumper to be fitted just as it would have using the factory hardware…

Varying angles of the front end during the development stages…

A view as things started to come together with the KLM intercooler fitted in place. Also note the factory light mounts were incorporated within the design of the front end…
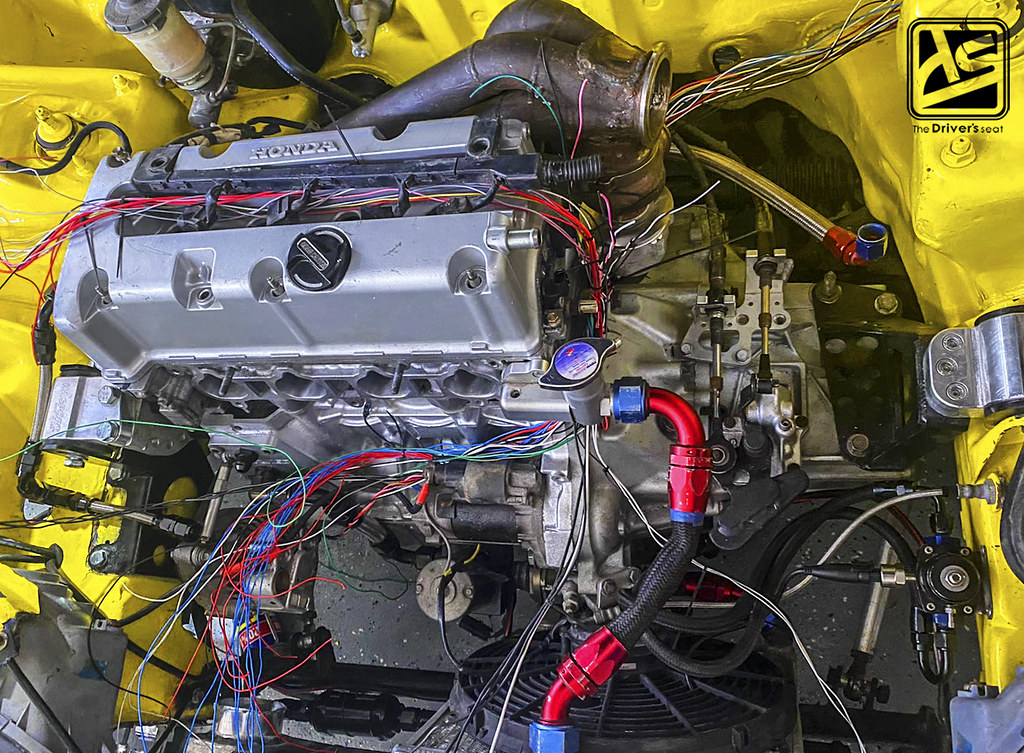
Upon completion of the front end fabrication, Bally then turned his focus towards executing the plumbing on his fuel system…

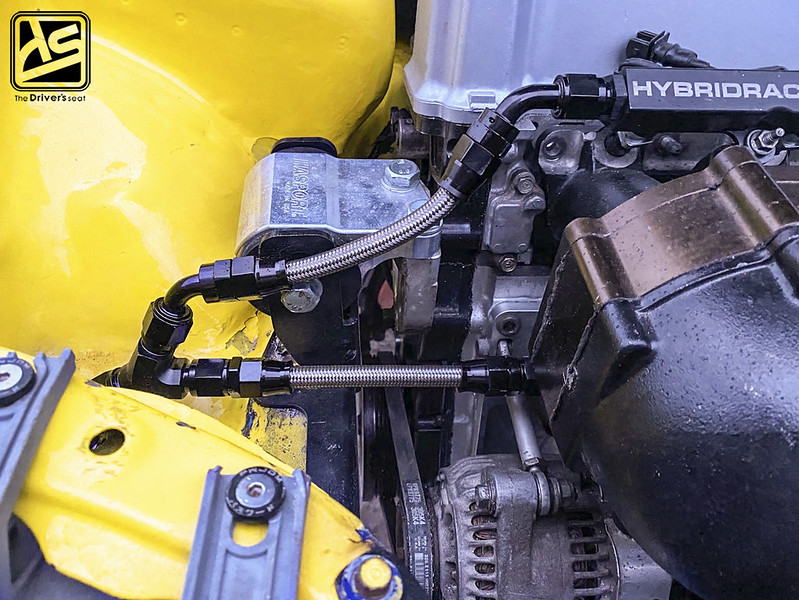
The beauty with the Skunk2 intake manifold is the provisions it has for two fuel rails. This setup was ideal as Bally intends on running 8 injectors, 2150s for the primaries & a set of 1300s for the higher range…

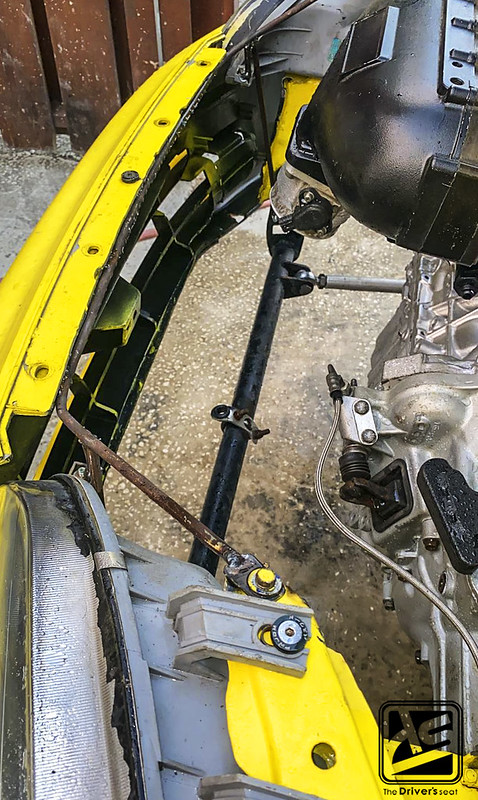
A view from the underside where the remaining components are located. Bally chose to go with a Fuelab external pump & placed a filter on both sides of the pump; one coming from the tank & the another before the rail…

Taking a step back, here’s a look at the completed bay following the remainder of fab work. The tubular front end received a fresh coat of paint & Bally went ahead & mocked up all the components in place…
It was now time to take a turn & start to tackle the wiring aspect of the build…
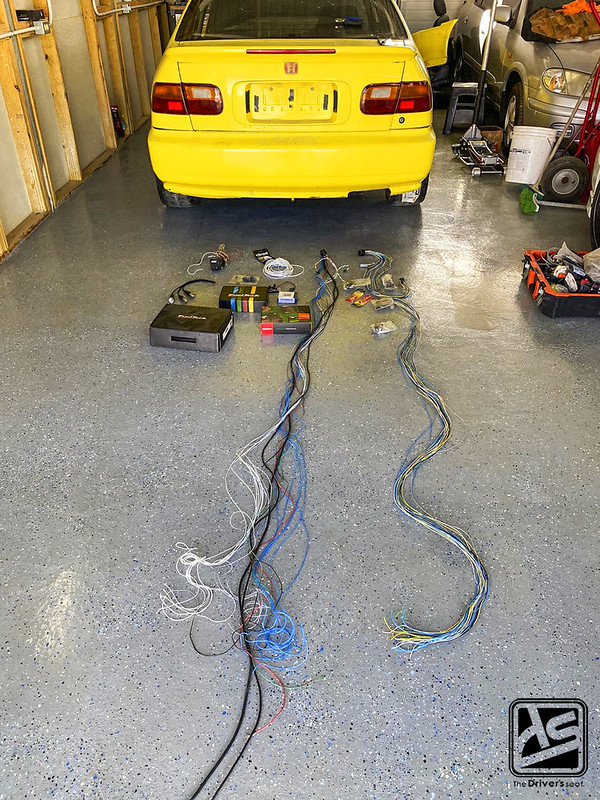
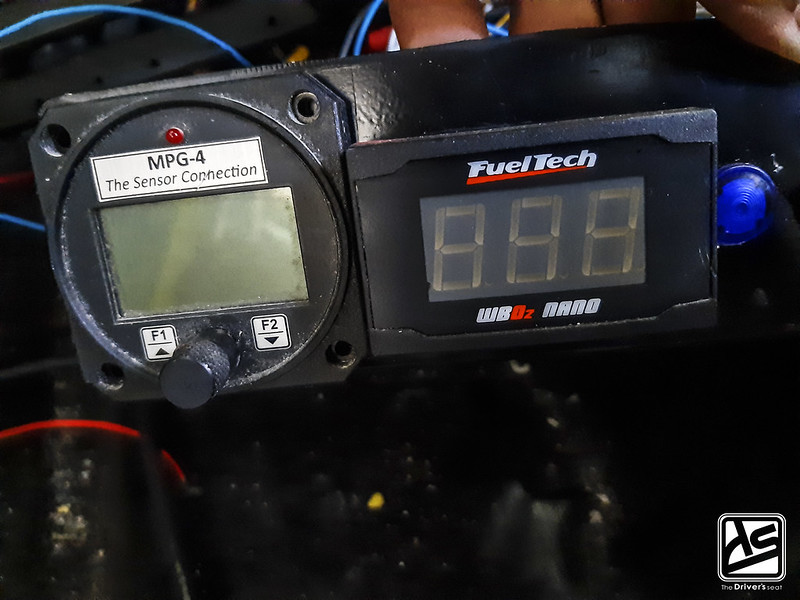
The Fuel Tech unit came with a universal harness to execute varying level of monitoring. Wanting to pay close attention to a number of components, Bally laid out the harness and went to work…
When executing a build of this calibre, its wise to ensure pressures & temperatures are fully monitored. It helps to have a clear understanding of whats going on every step of the way, especially if there is a need to reference any of them at a later time. Bally was headed in the right direction within the engine bay…

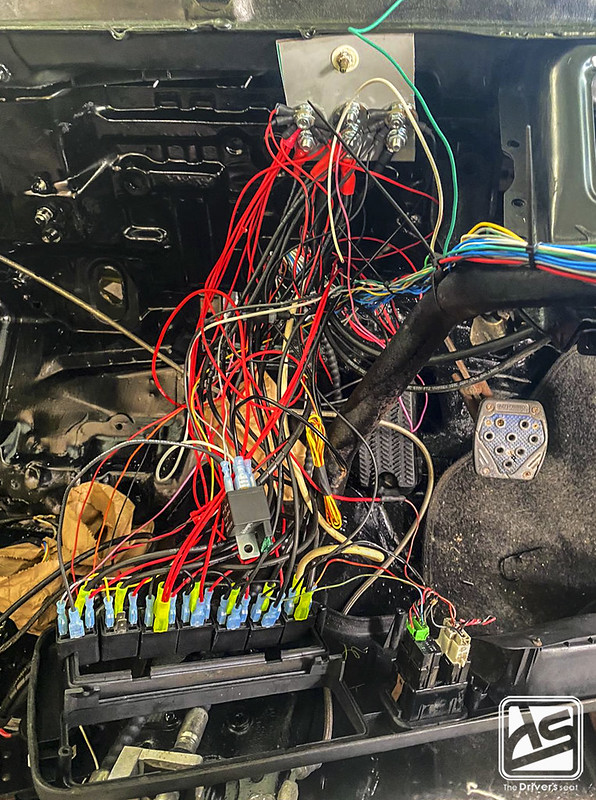
This quickly transferred onto the interior where he began running wires to the switch panel…

All in preparation to fully install the Fuel Tech digital dash unit along with the wideband & 4 channel EGT display…

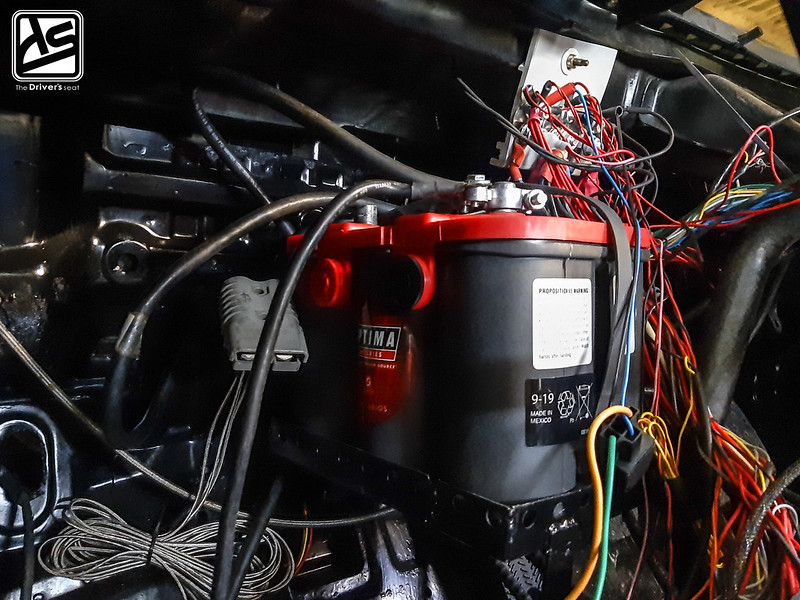
To get things up and running for the time being, Bally went with a Optima battery…
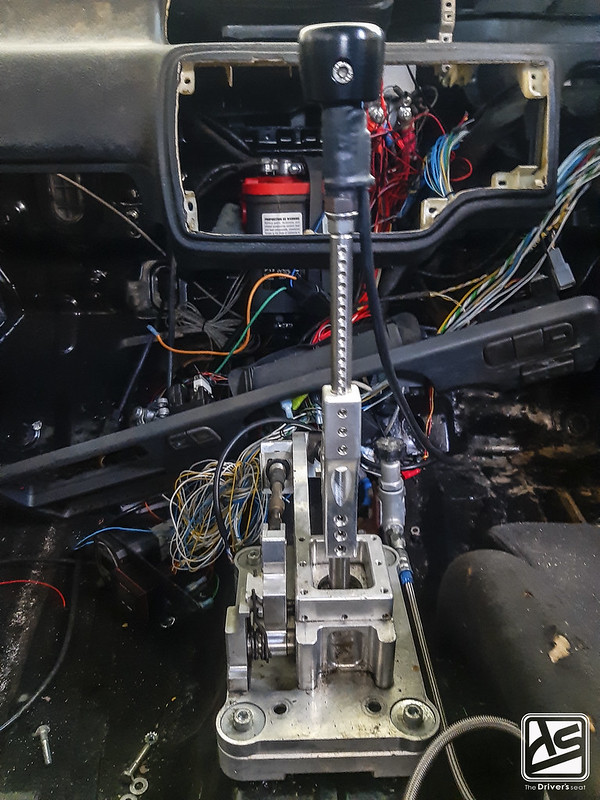

As for the shifting system, a strain gauge was wired in for the flat shift system to work as it was intended to. A signal is sent to the ECU to cut the engine when the gear lever is moved to allow for full throttle shifting…

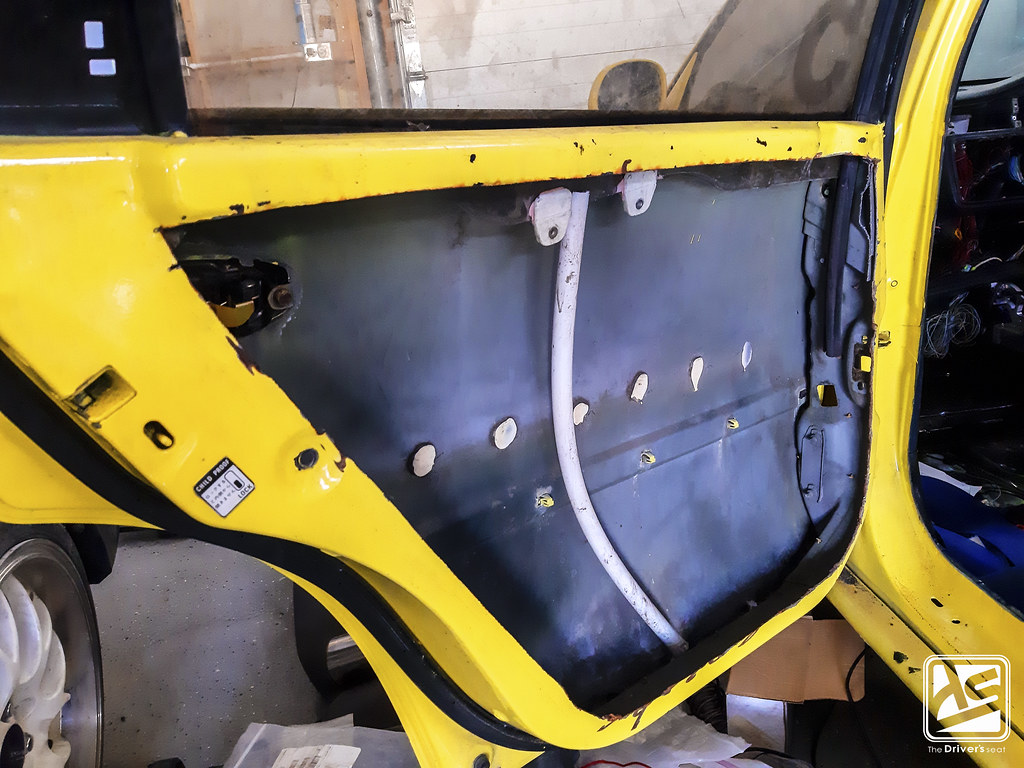
In an effort to shed all unwanted weight, both the front and rear doors were fully gutted…

To close out the suspension setup, Bally opted for a set of Blox Racing Drag Series coilovers. These will help with the initial launch of the car based on the dampening & spring rates that were chosen…
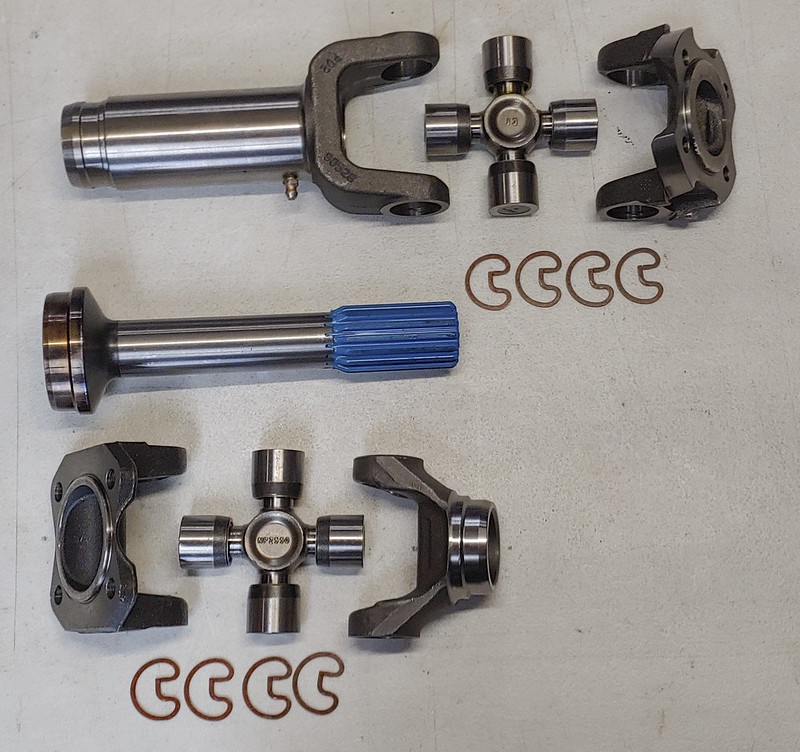
With a lack of parts availability & to cut some cost, Bally opted to go with a Freelander driveshaft for his AWD conversion. In doing this brought about some challenges, but luckily S1 Built has a kit specifically for this setup. This would allow the flanges to bolt directly to the transfer case & to the rear end. Being a pioneer within the community where AWD setups go, this piece was made with drag racing in mind & is the perfect solution when choosing this route…
Bally went head & pushed on with knocking out the remainder of work to be done on the EG9…
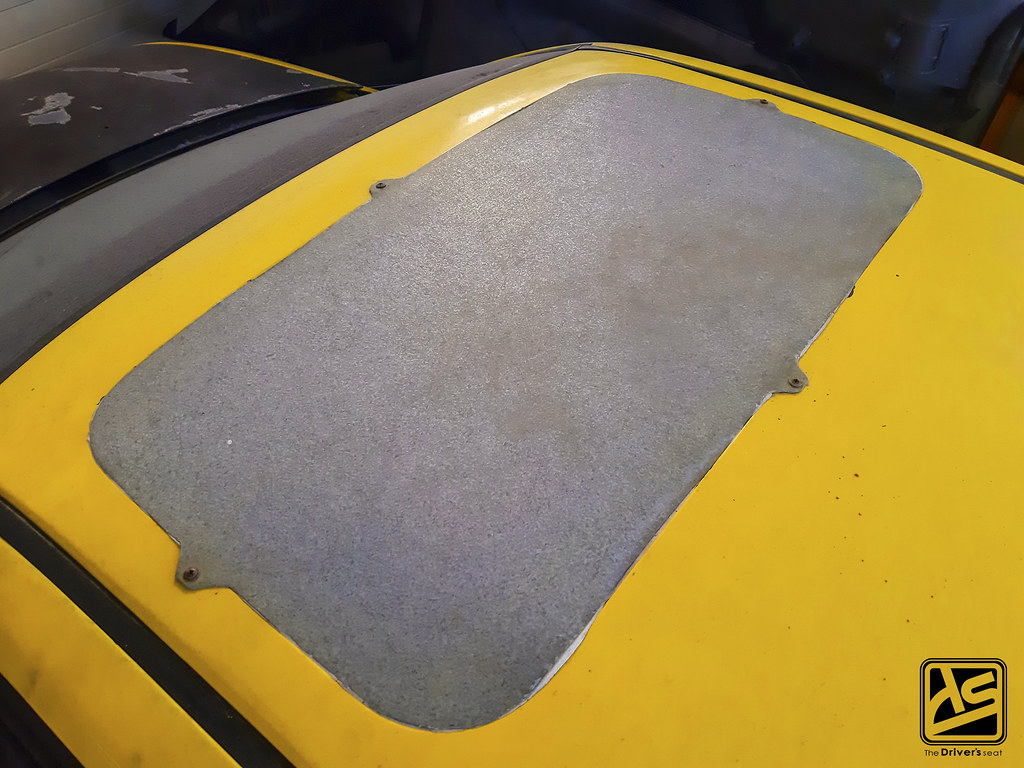
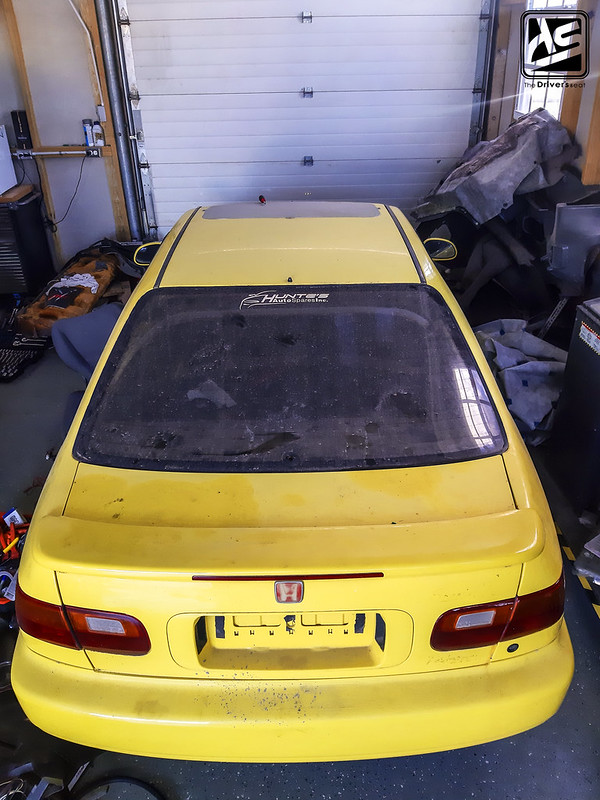
The previously installed sun roof was removed in favor of an aluminum blanking plate to add & additional weight saving…
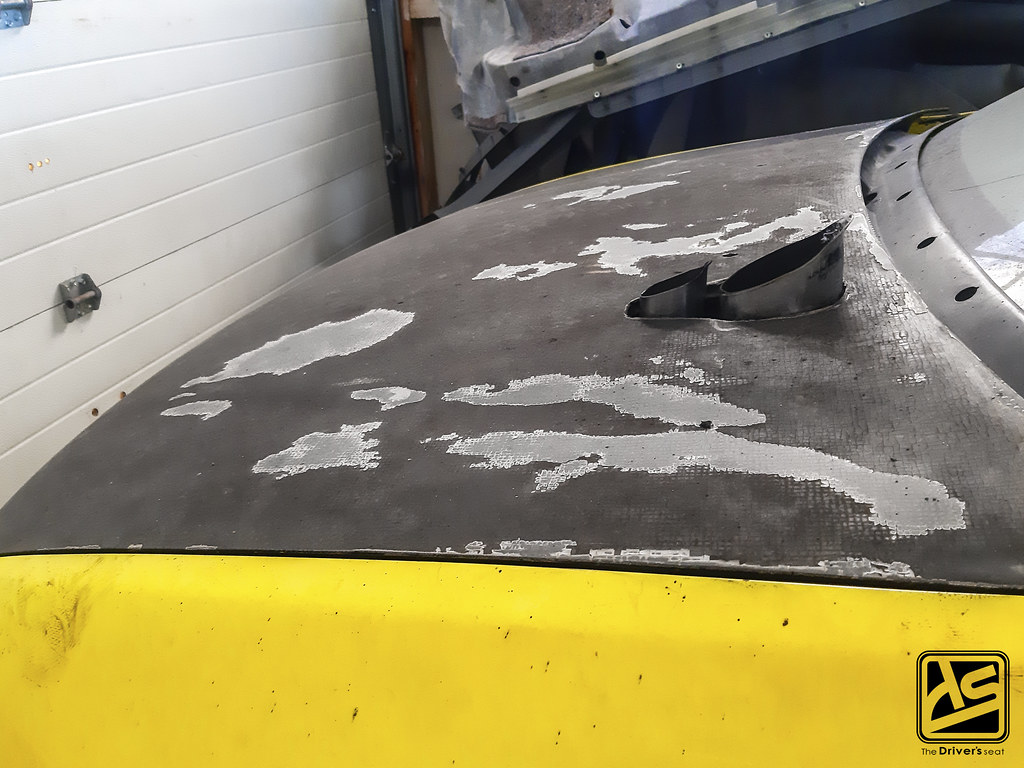

When Bally acquired the shell, it came with a light weight hood which worked out perfectly given the plans he had in store. This made the task of cutting the holes for the exhaust & wastegate dump significantly easier…


The reason behind going with a hood exit was not solely for aesthetics but more from a functional standpoint. In an effort to shed as much weight as possible & for ease of access this setup worked perfectly. In addition to this having the exhaust coming off the turbo straight out the hood allowed for a less restrictive system which will result in higher power gains…

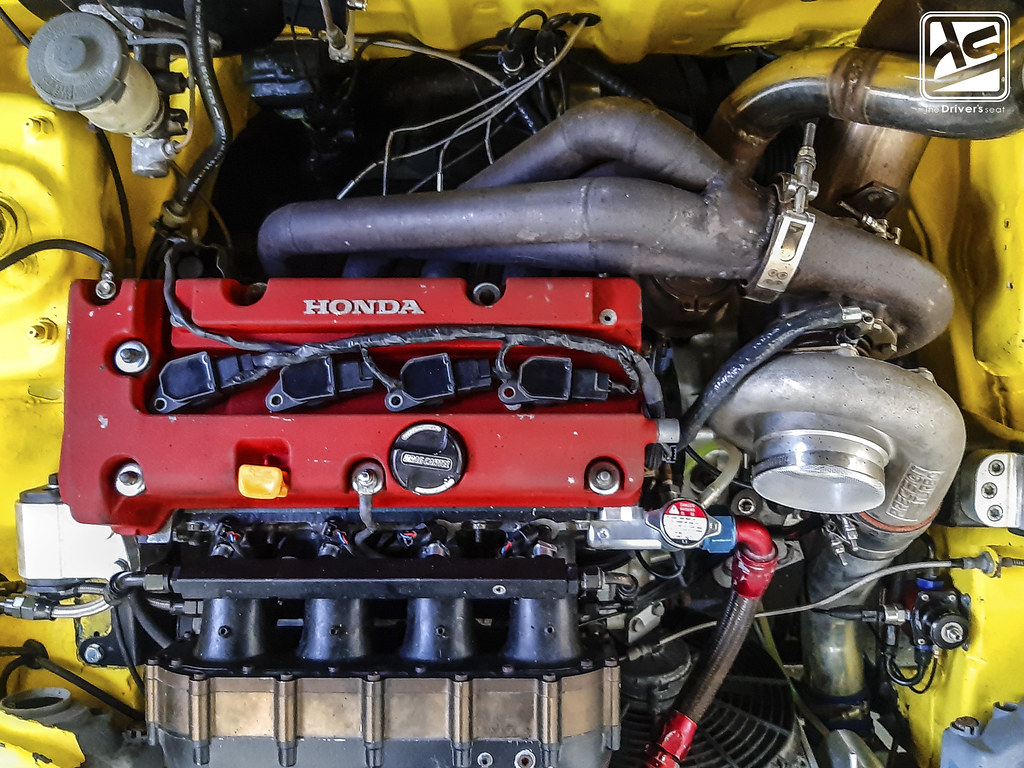
A closer look at the sidewinder manifold which was modified to relocate the placement of the wastegate. Paying closer attention you will notice the addition of a set of thermocouples, these will aid with the monitoring of exhaust gas pressure & temperature…

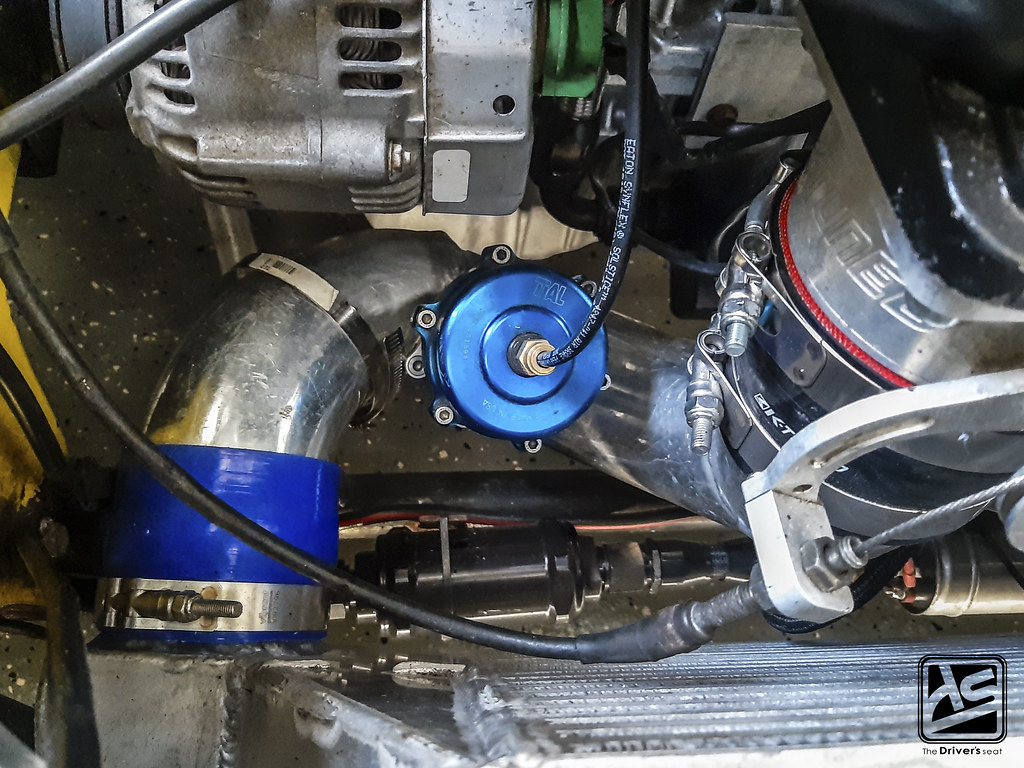
Face to face with the huge Precision 7275 gen. II turbo which now has been fully plumbed with the oil & cooling pipes…

The custom made fuel tank was now fully completed and in place…

Along with that, the Aeromotive fuel pressure regulator had been fitted & plumbed with a pressure sensor to notify him of any irregularities within the system…


This Skunk2 centre feed intake is a beast of a unit and to add on top of that Bally went ahead and placed a 2.0L spacer…
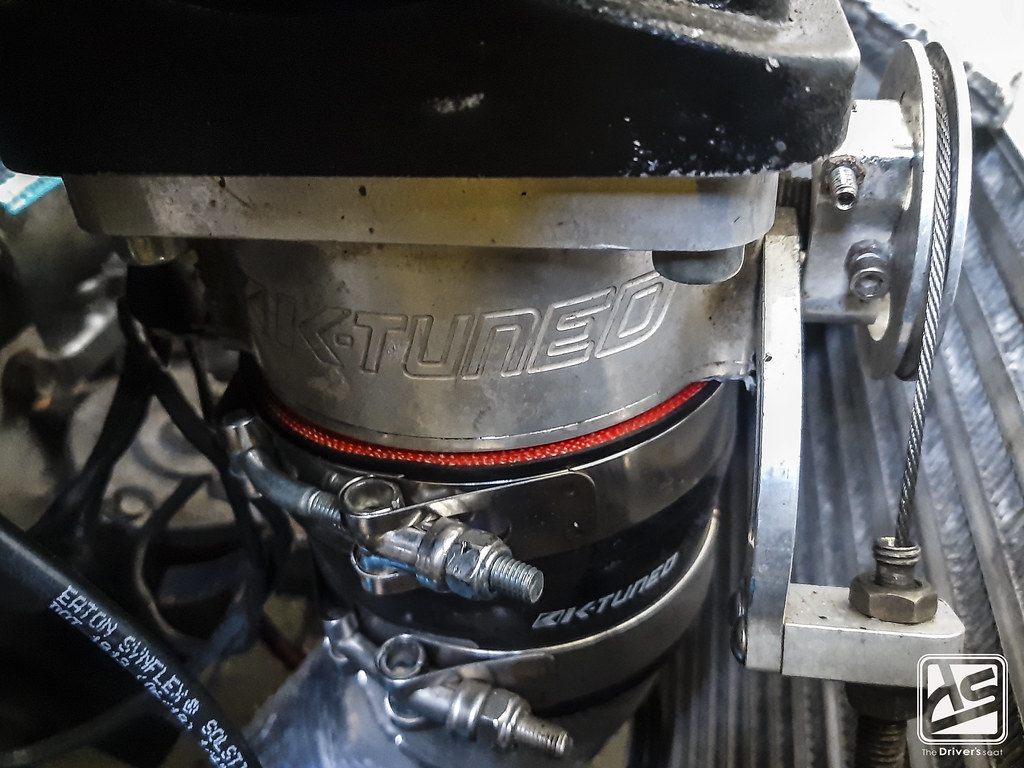
Mounted to this is a K-Tuned billet 90mm throttle body…
Paying closer attention, here you can see the reason behind the selection of the centre feed intake manifold. This unit significantly cuts down the length of piping needed to reach the intercooler…
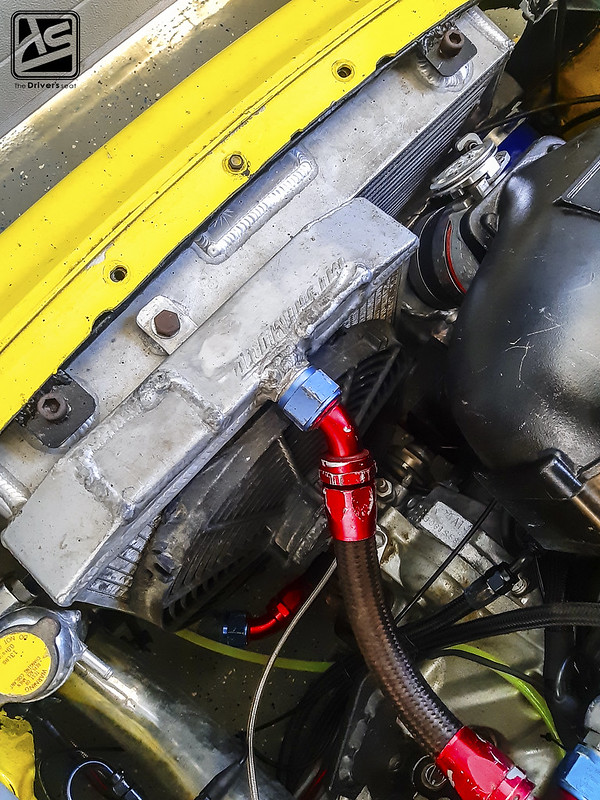
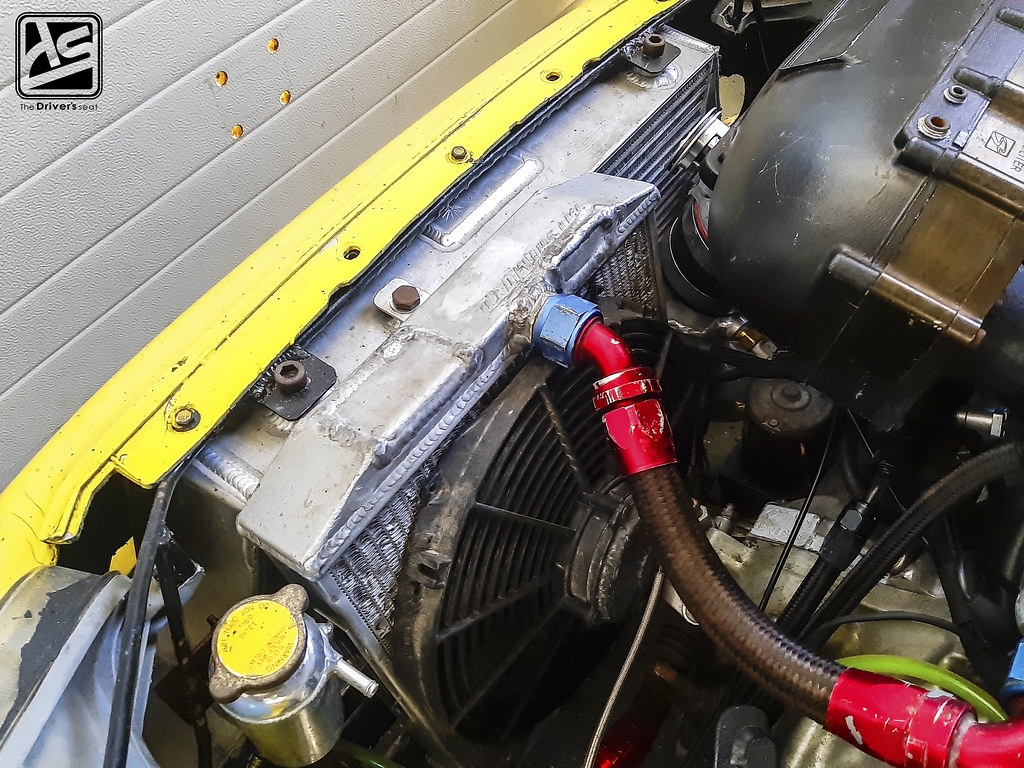
To handle cooling, a triple core, half size radiator was modified to fit neatly between the intercooler & gearbox. With this being a very compact setup, the angle chosen had to allow for clearance on the fuel pump & traction bar…

Given the progress made, Bally was rapidly approaching the next phase of his build. It was just about time to get some power to the Fueltech ECU & fire the motor up for the first time. On that note, I’m going to close out today’s post, I hope you enjoyed it & stay tuned for more to come on Bally’s AWD Civic build…
