Dominic’s KP61 Build… Part 4
I’m back with another great post in this series; the dedication and attention to detail of this build is absolutely stunning. The engine has finally made its way into the bay and no sooner did Dominic started piecing everything back together… I’ll move onto the photos so you can see for yourself…
For those who may need a recap on this build the link to the previous posts is below…
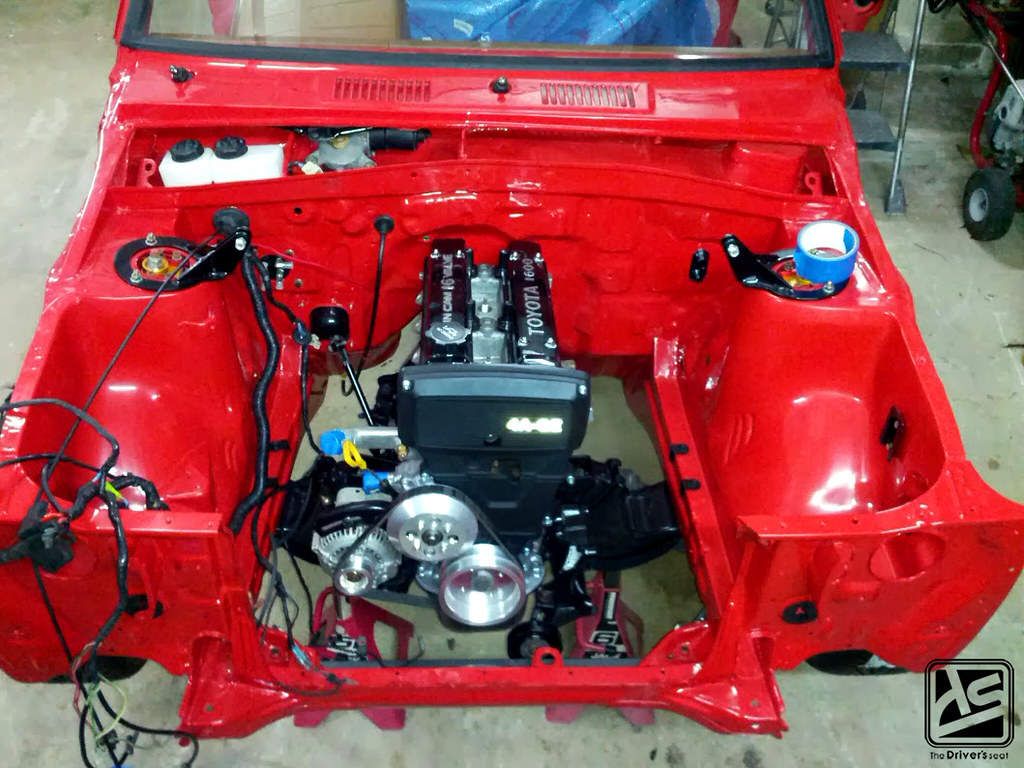
The motor has finally been lifted into its new home…

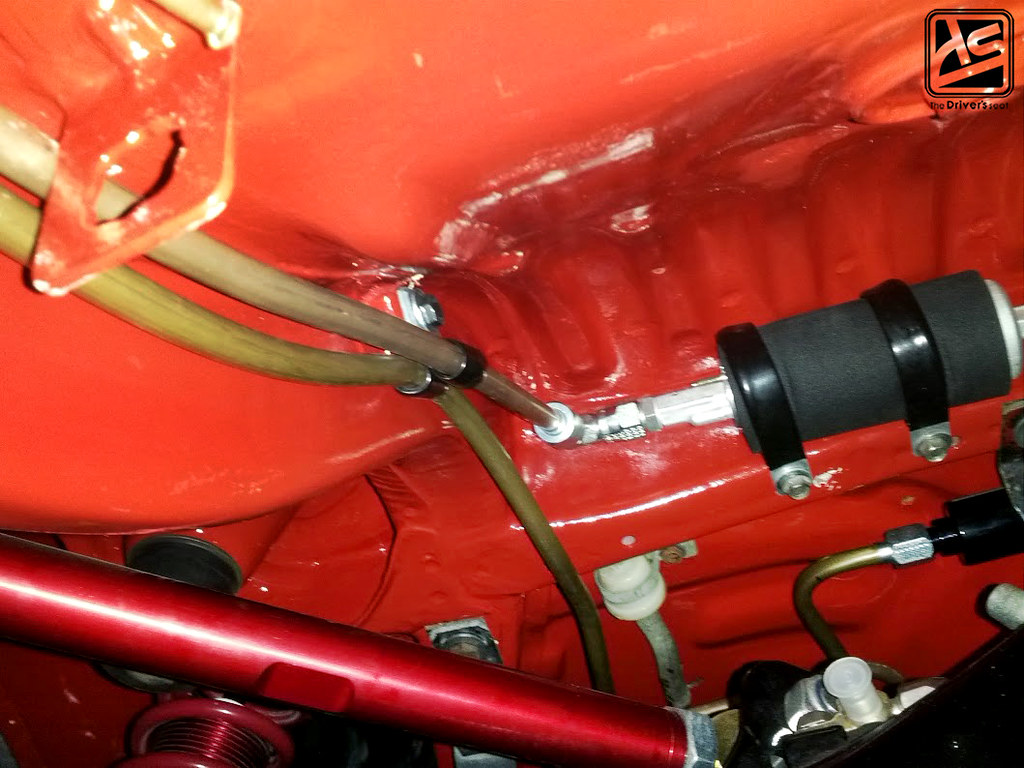
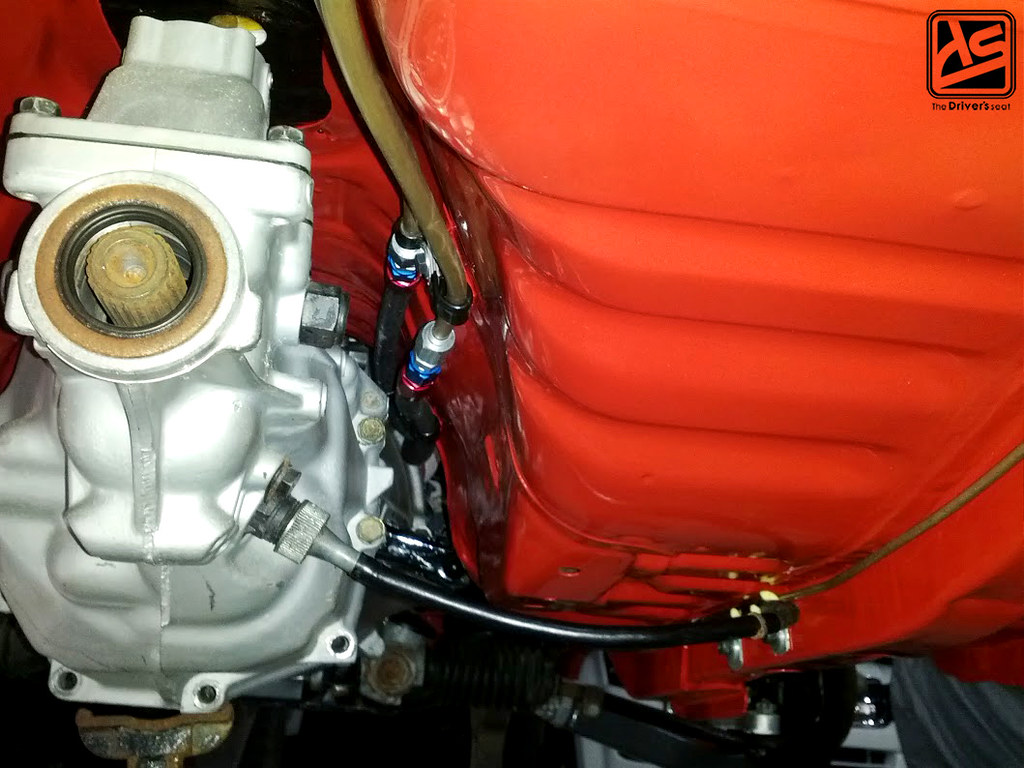
Dominic wasted no time and started running the brake lines…
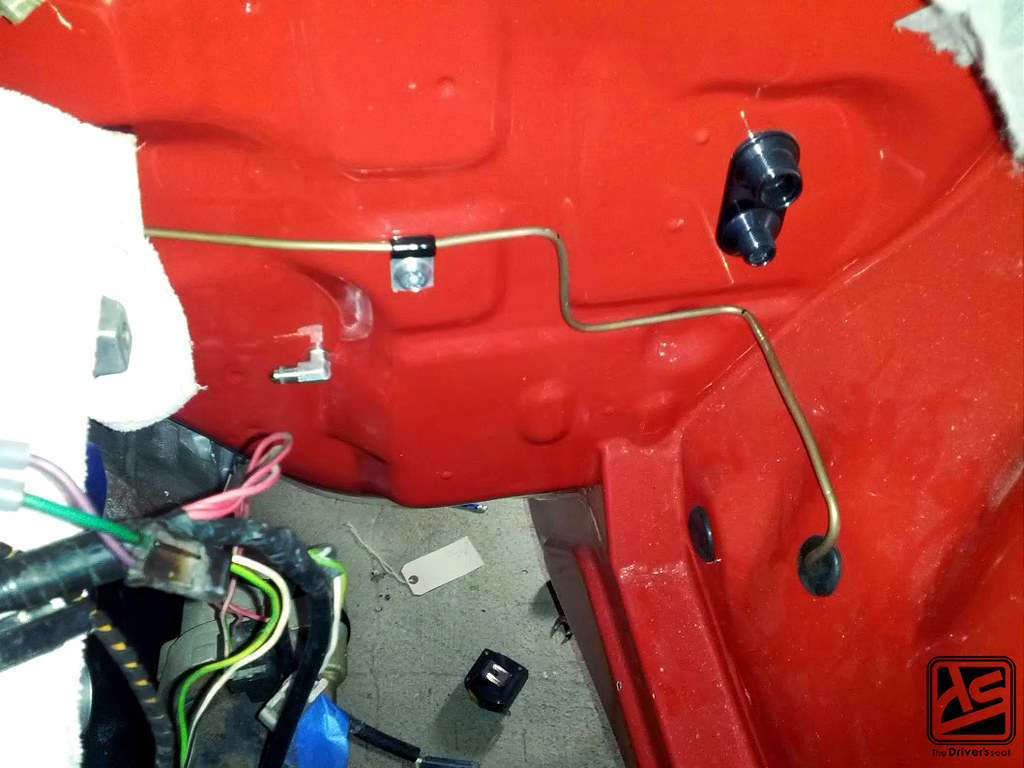
Dominic opted to go with Ezibend copper nickel tube for the brake lines. Largely because it doesn’t rust or corrode and it will basically outlast the car. It’s also very easy to work with, especially when it was time to form the sharp bends he needed.

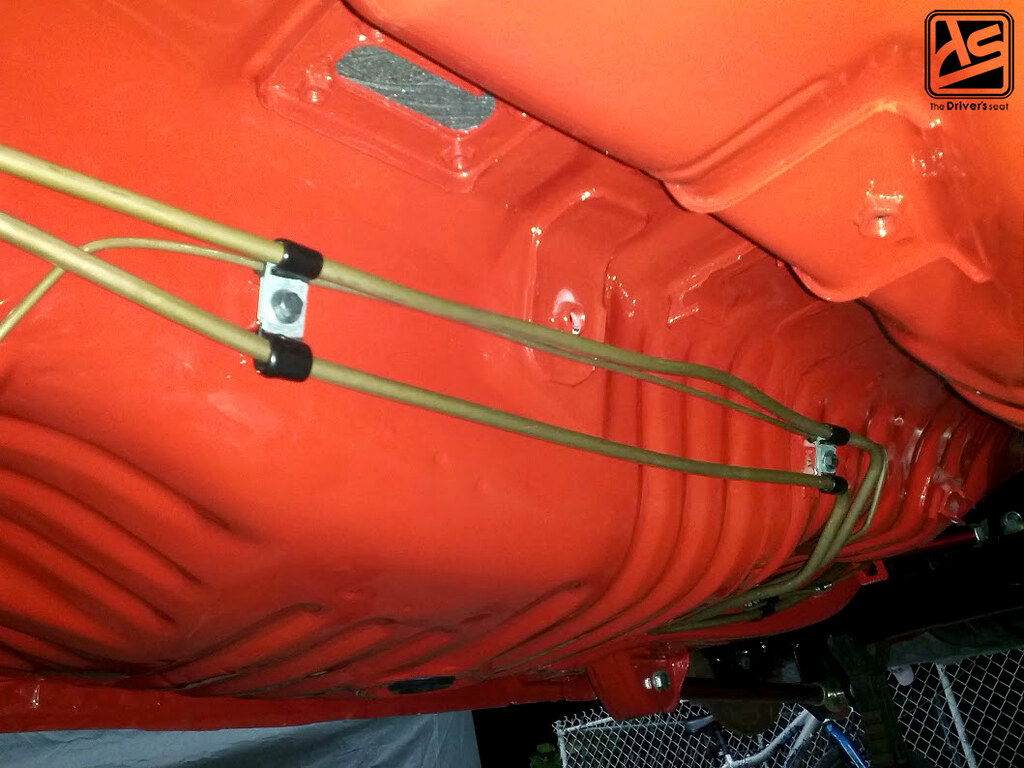
When running lines under the car it was the better choice over a braided line because it would handle the abuse of rocks and other debris. In addition, it flows well with the colour scheme of the build.

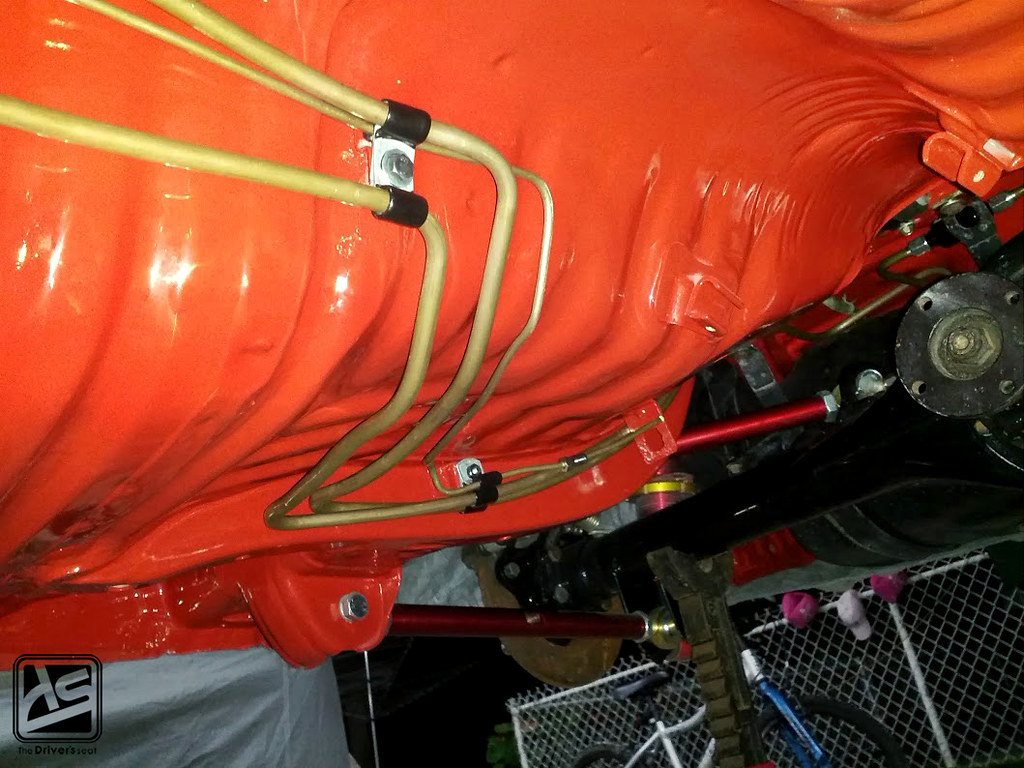
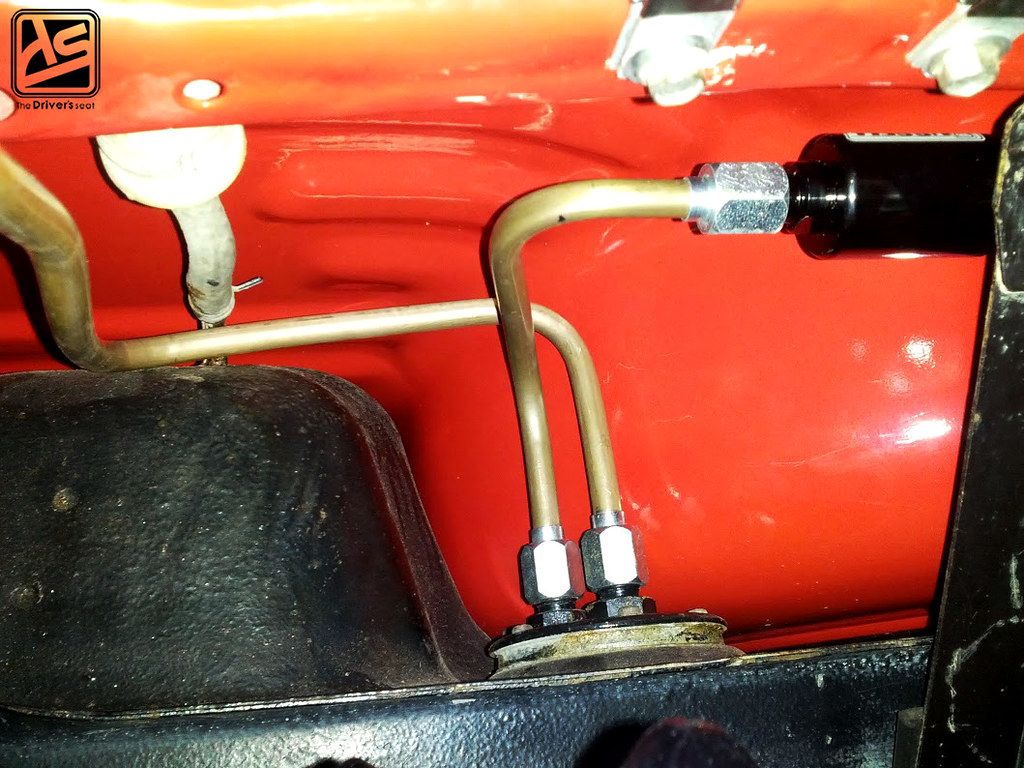
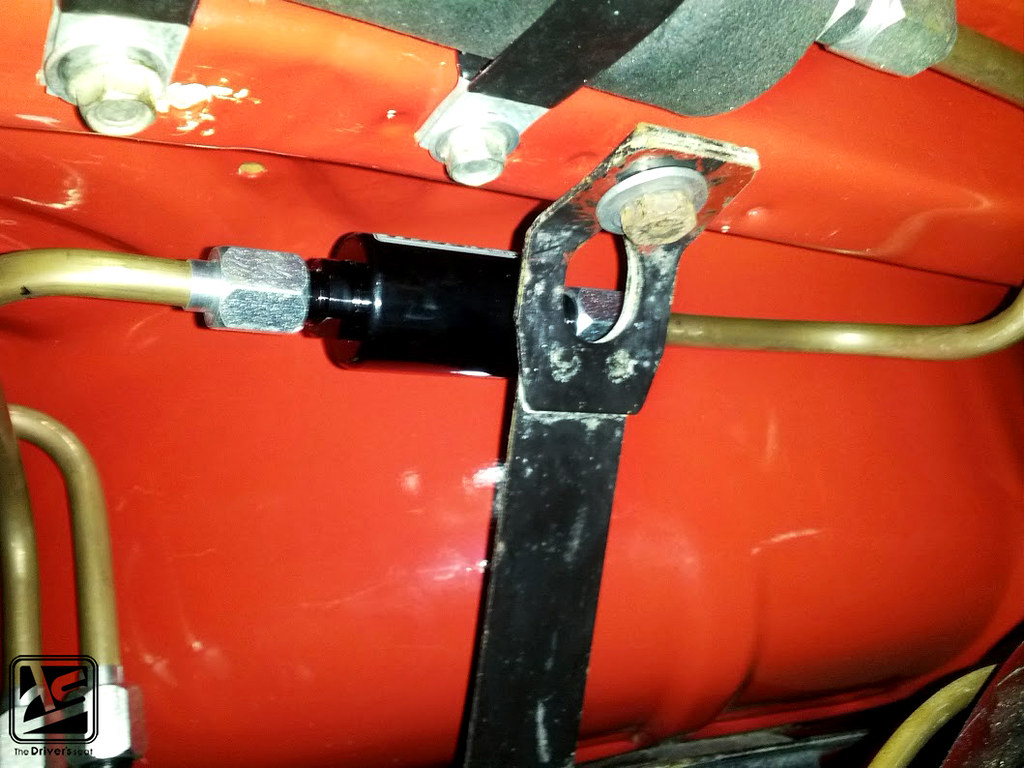
Likewise, Dominic used the same Ezibend tube to run the fuel lines. If any of you guys need more info on this tube or would like to purchase, you can check out S.D.R.R Hydraulics.

Lining up the gearbox…
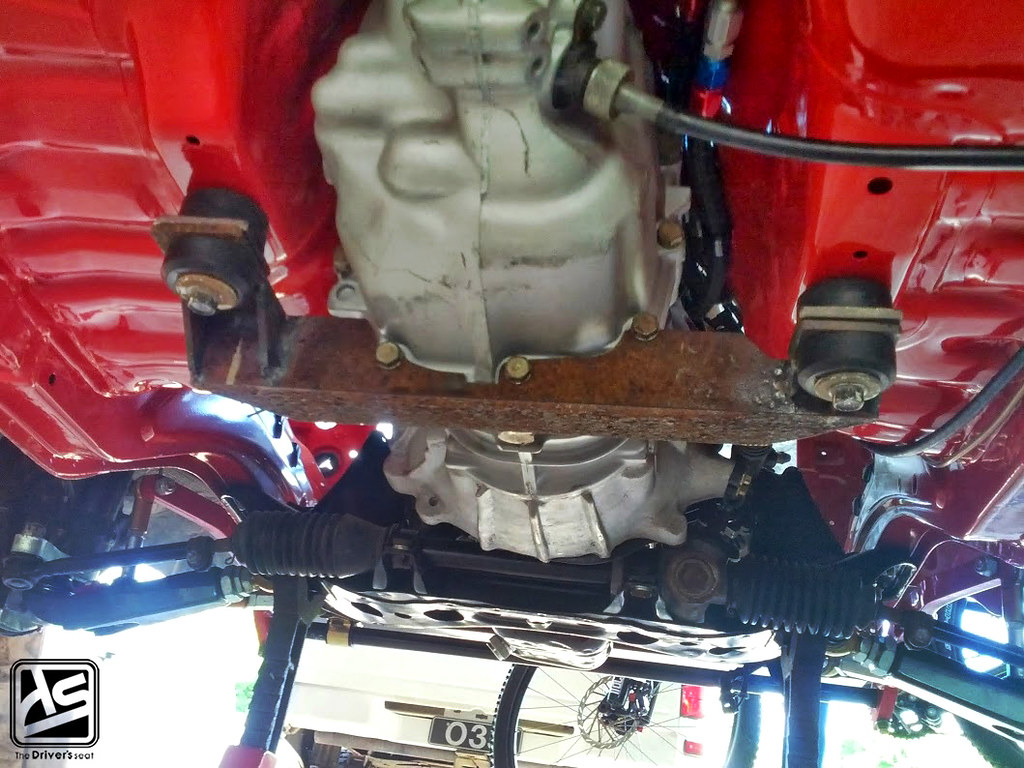
Because the W58 gearbox is a significantly larger than the standard gearbox, Dominic had to custom build a bracket to keep the gearbox in place. In trying to stay within the rules of this build to make it look as patent as possible, he also built it with provisions to fit in the original location of the stock one.
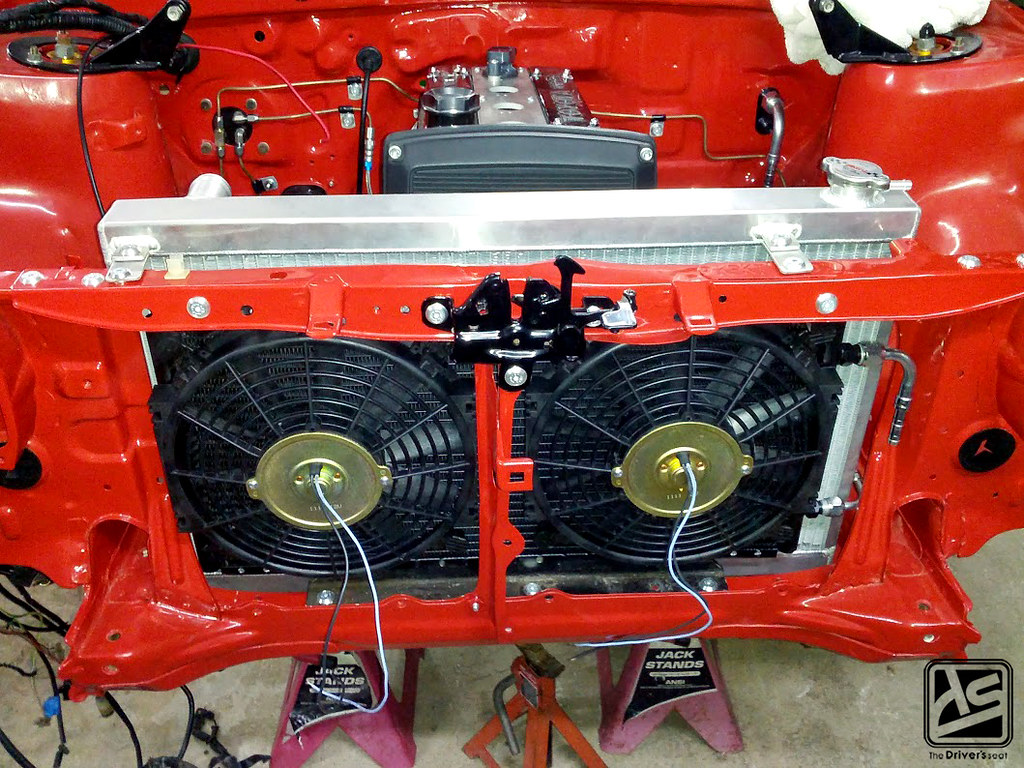

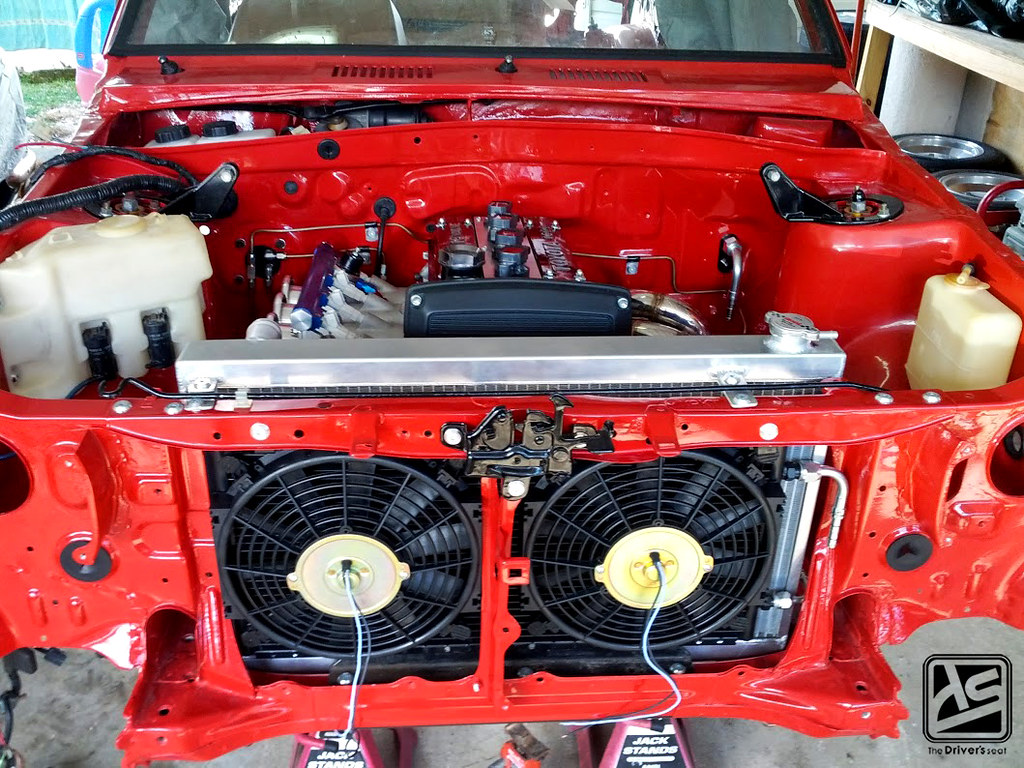
To ensure everything is kept cool, Dominic purchased dual 10″ slim fans…
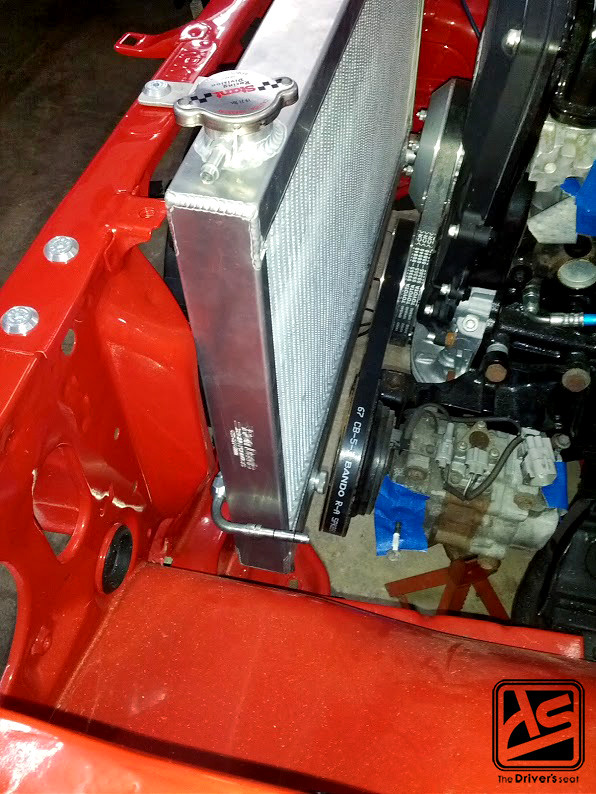
Checking the fitment of the custom made Ron Davis radiator…
Dominic went all out to source original radiator overflow bottle and washer bottle but his search turned up hopeless. He ended up cleaning them as best as he could which in itself was quite a tedious process.
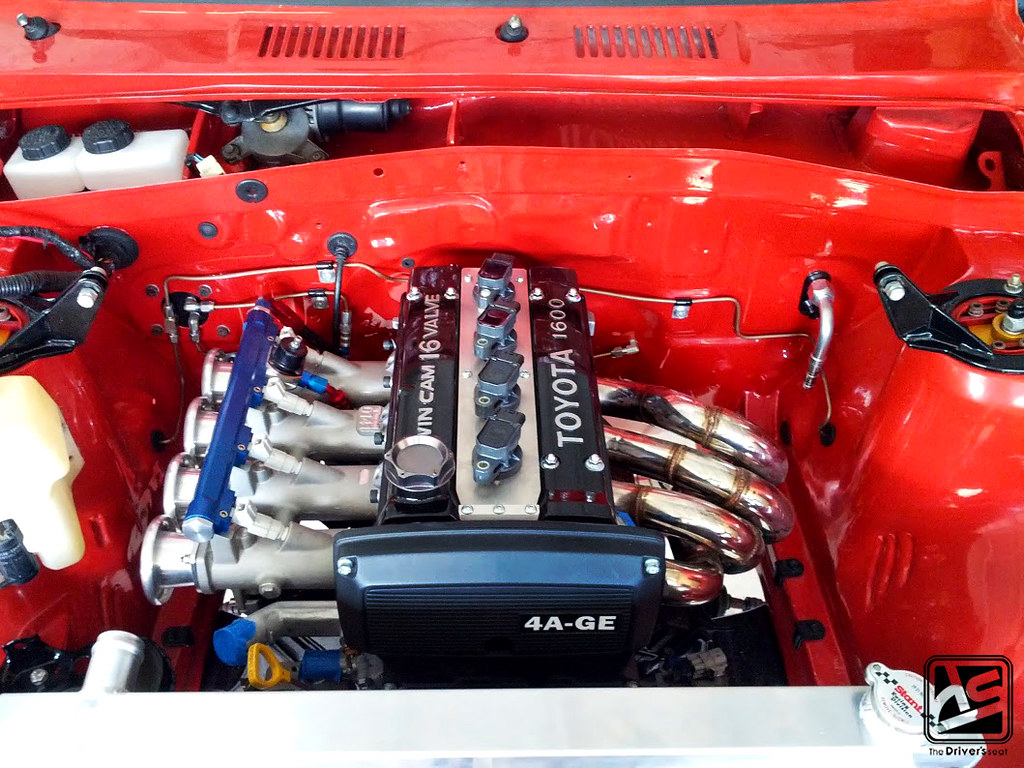
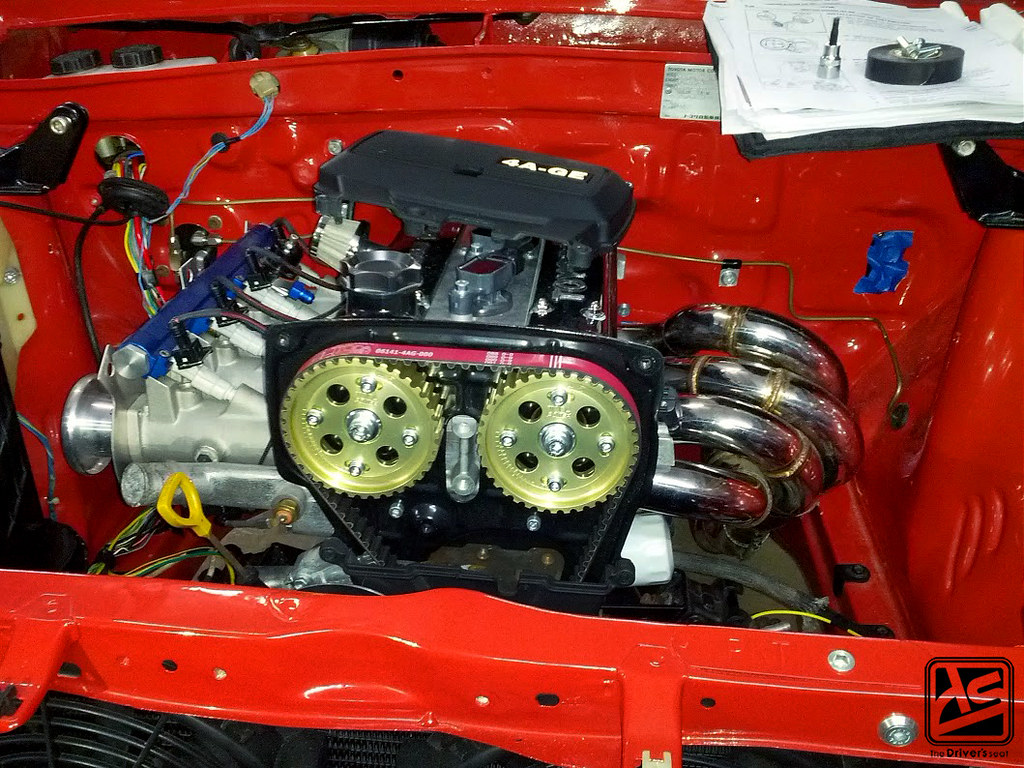
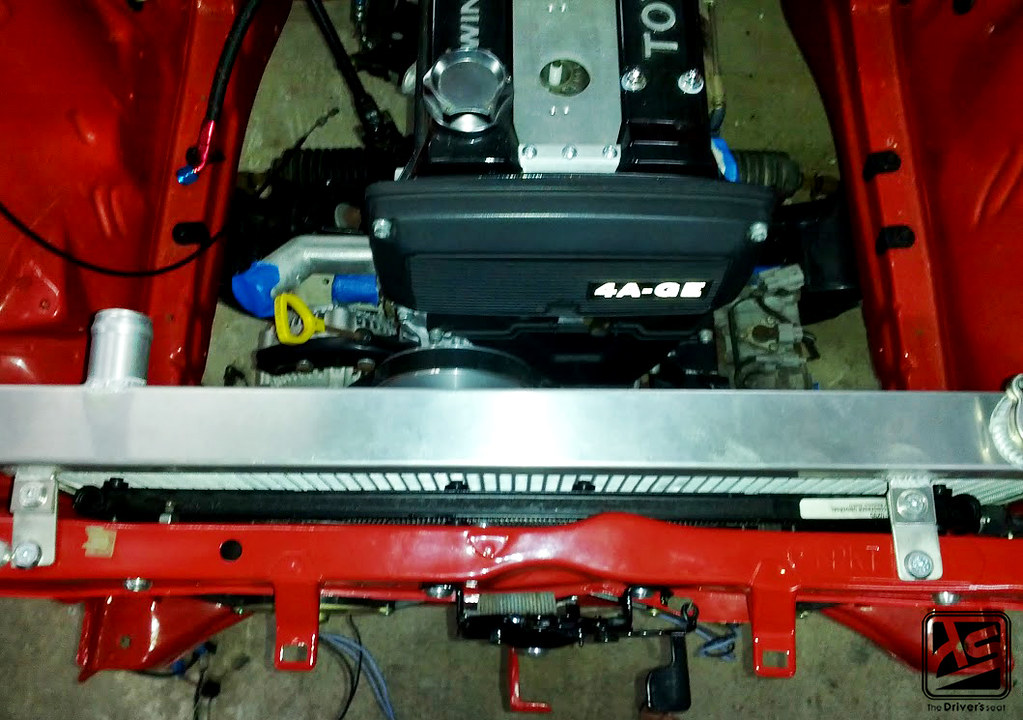
Another shot of the TWM ITB’s and OBX header once again…

A view of the bay as it starts to come together…

As you guys would have noticed by now, Dominic isn’t the one to do anything half assed. For the rebuild it was absolutely important that the tail lights be replaced, this in itself was quite a challenge because finding tail lights were next to impossible. Sourcing a pair proved to be so challenging that Dominic had to purchase them separately from two different countries. Fortunately he was able to source one locally and after hours of searching the internet he was able to locate the other in Belgium.
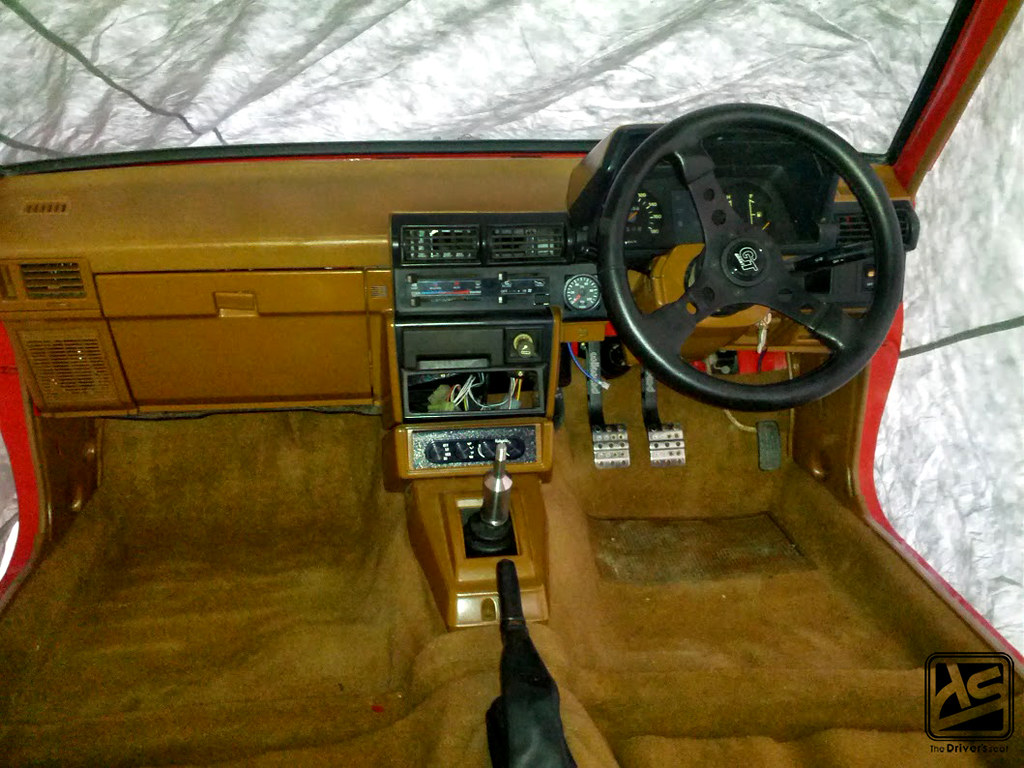
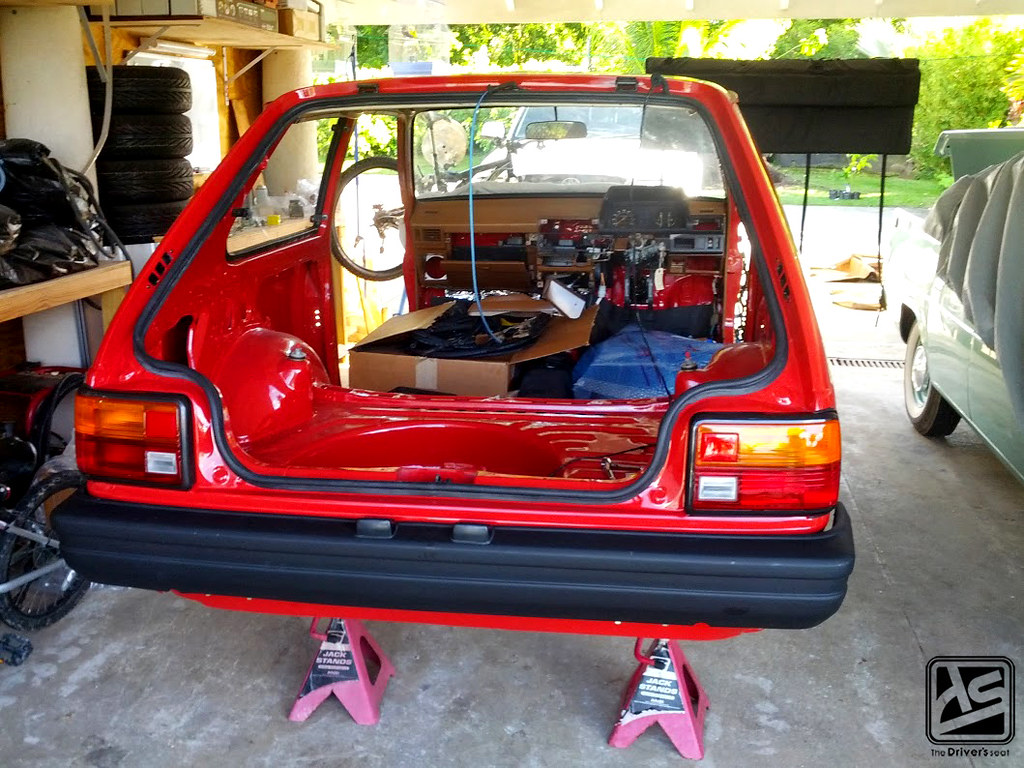
A quick look at the interior as it comes together with the dash fully assembled…
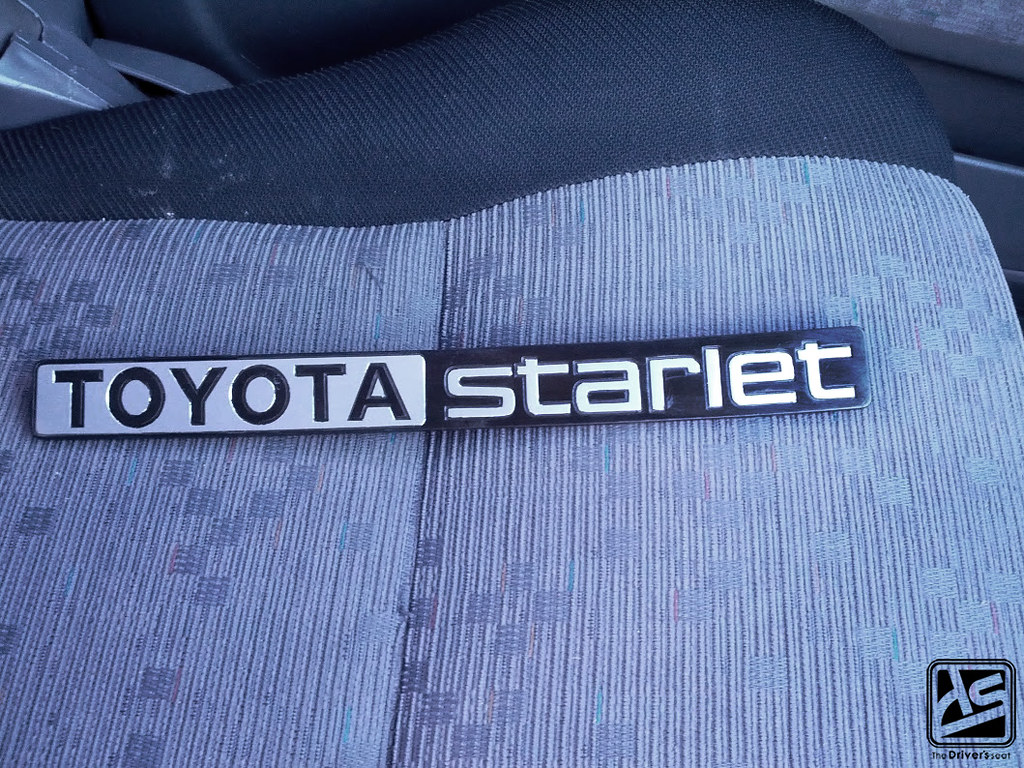
Dominic went as far as to have this original Toyota Starlet badge refreshed…
Being the meticulous guy that Dominic is, there was no way he was going to reuse the old engine harness. And being that it’s a 84 Starlet we’re talking about, he would have to custom build an engine harness. With that in mind he got to work, and here is some of the progress that was made with the coil on plug setup and you can also see the injector harness has been completed.
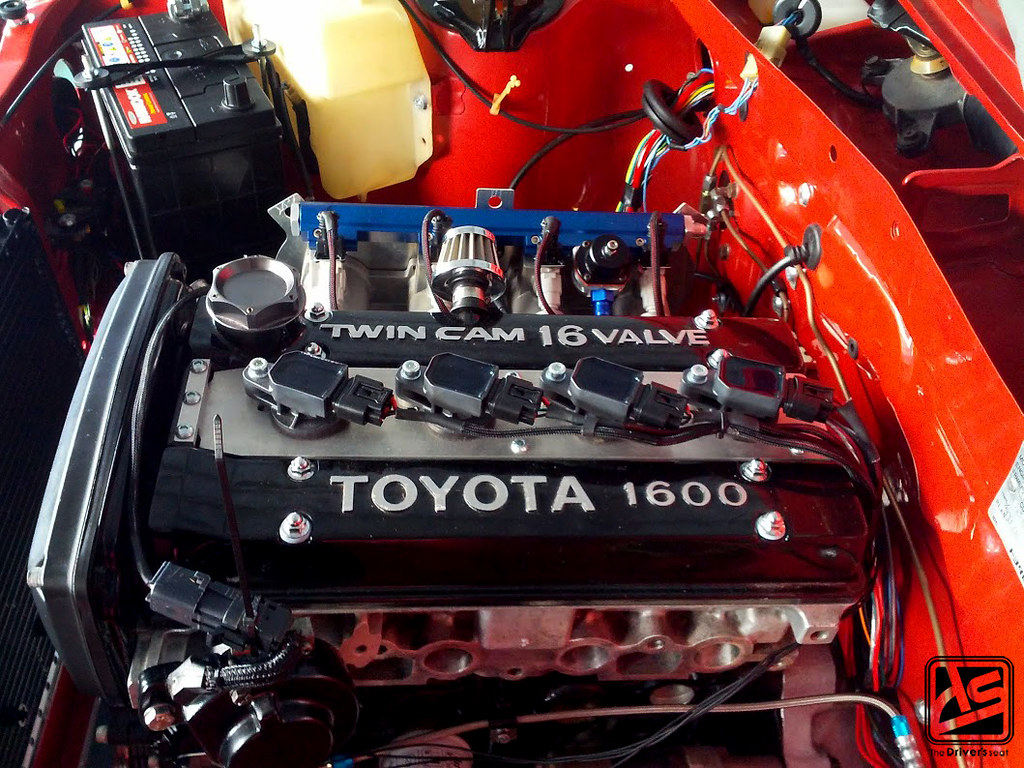
Closing out today’s post with one more shot of the sex that is the engine bay, with the Toda timing belt and cam gears exposed. Thanks for taking a look and stay tuned for the next update…