
Track Bred EG6 Build… Part 4
Today we’re back with another part of Jerry’s Track Bred EG6 Build. Thanks to the guys over at Blueprint Racing for providing us with some photos and a write up on what they got up to throughout the build. Today we’ll get into the other part of the engine build process and show you guys some photos of the car as it starts to take form.
For those of you who missed our first few posts on this project the link is below so you can get up to date.
Not missing a beat, on with the photos…
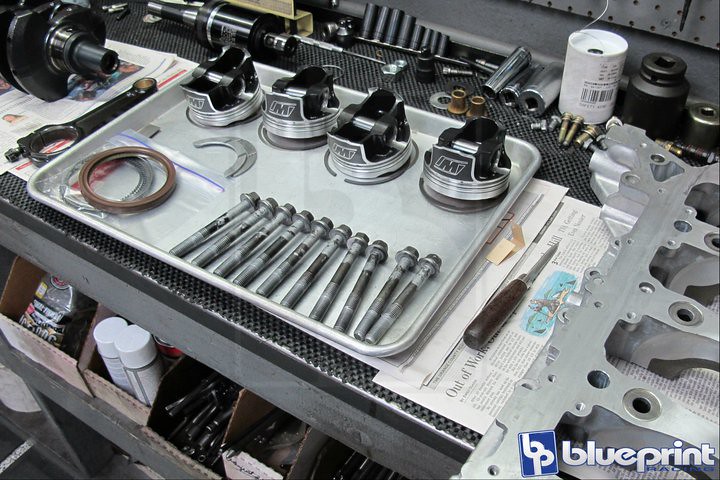
All parts disassembled, cleaned (a finial time), and ready for assembly. The threads of all the bolts are coated in Anti-Seize so we get consistent torque figures.
Torco MPZ and a lot of it! We are loose with that stuff… we actually use more than we sell.
What’s missing in this picture?
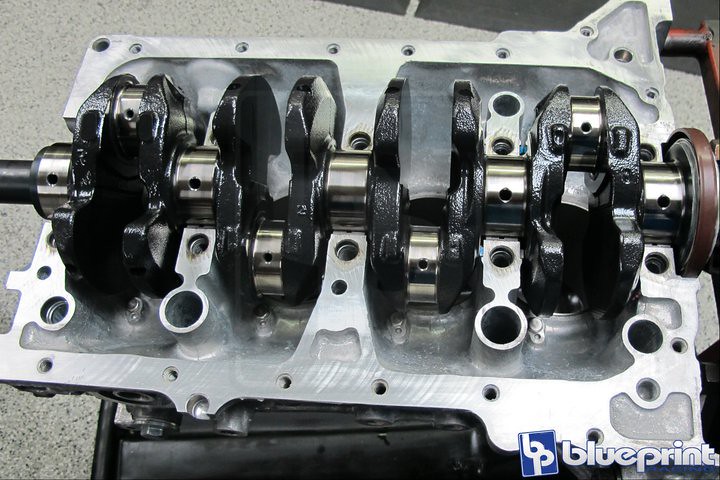
Lightened and Coated OEM Crankshaft going in for the last time.
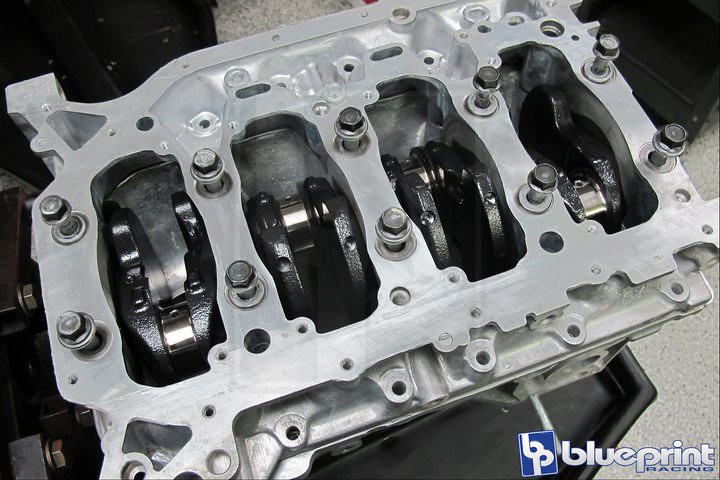
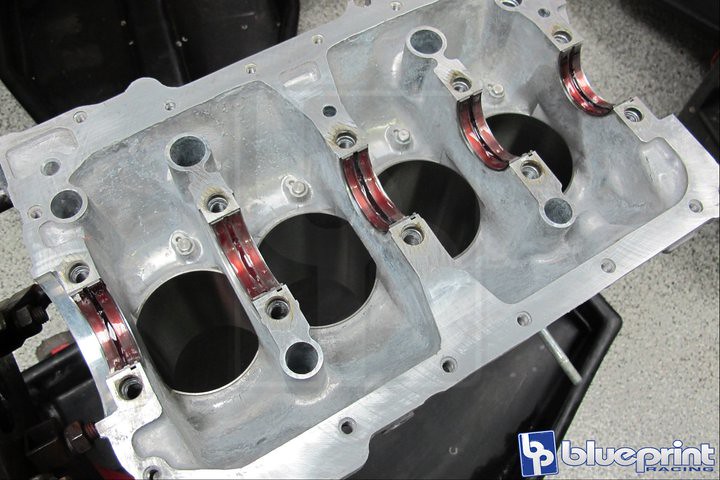
Girdle… check!
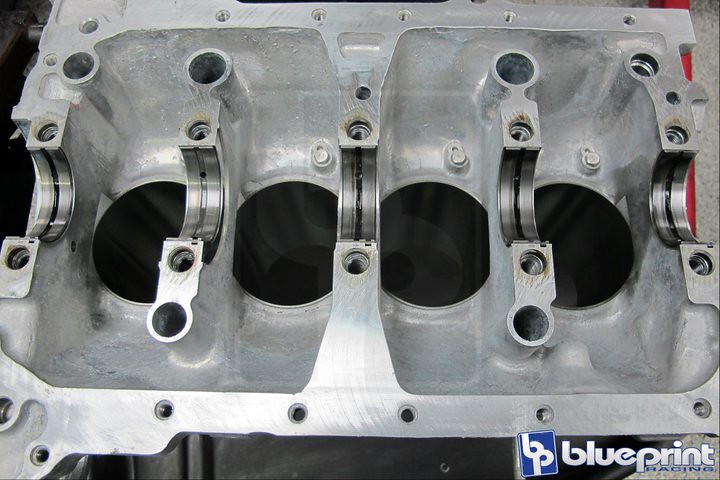
Block is laid horizontally for piston and rod install. Keeps the rod from flopping around and potentially nicking the perfectly polished journals.
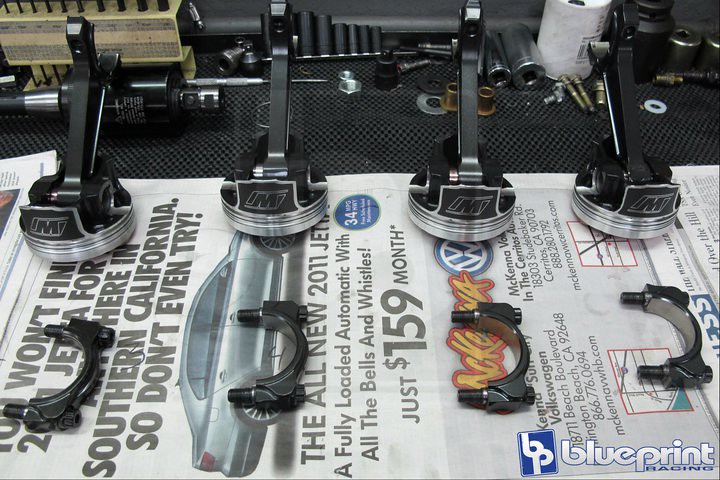
Rod caps removed and bearings installed, awaiting install.
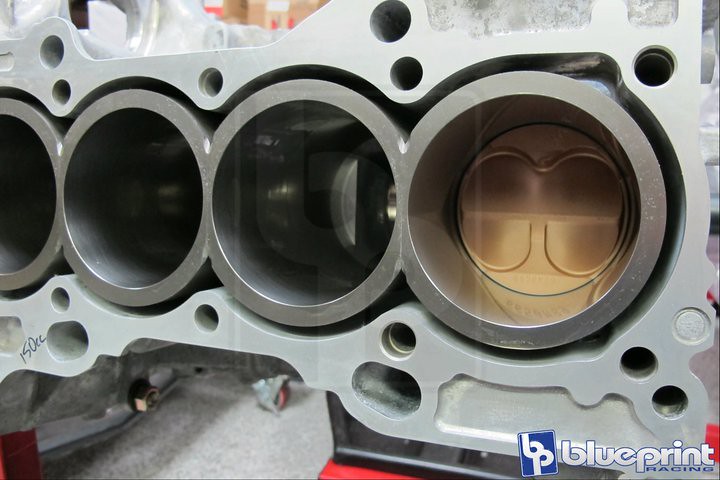
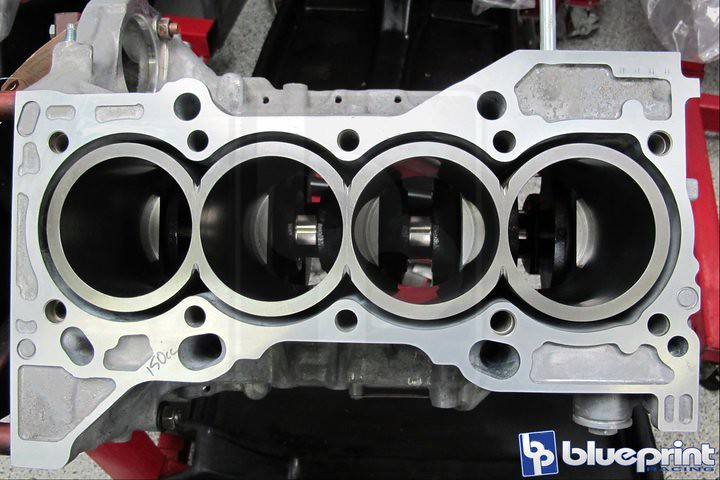
One!

Two!!
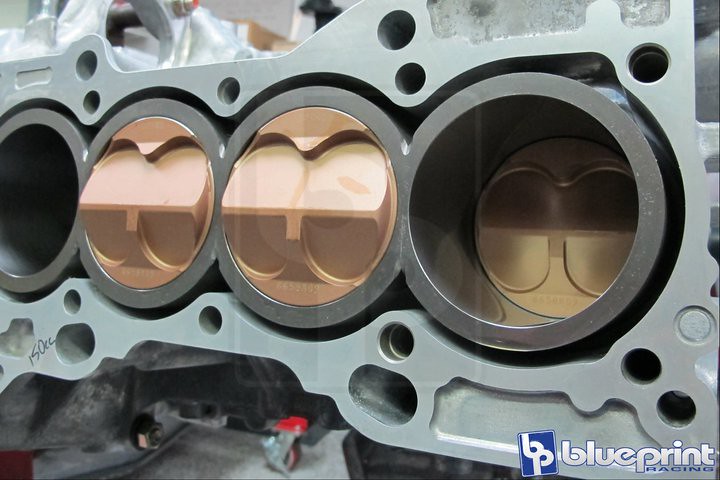
Three!!!
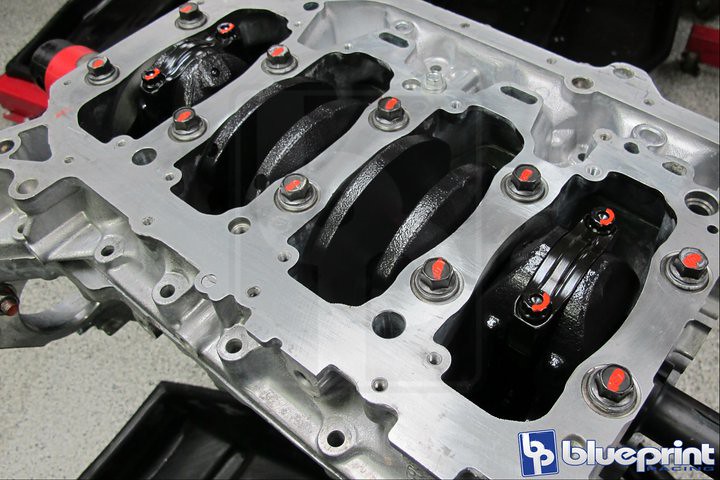
Everything torqued and marked for peace of mind.

BP Head Studs installed.
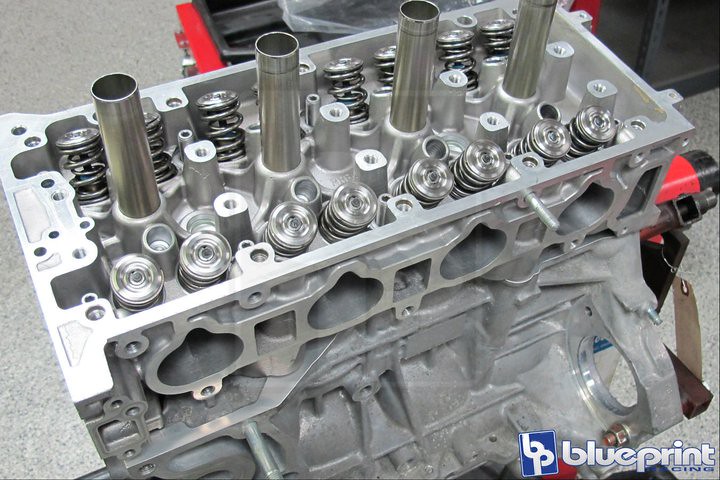
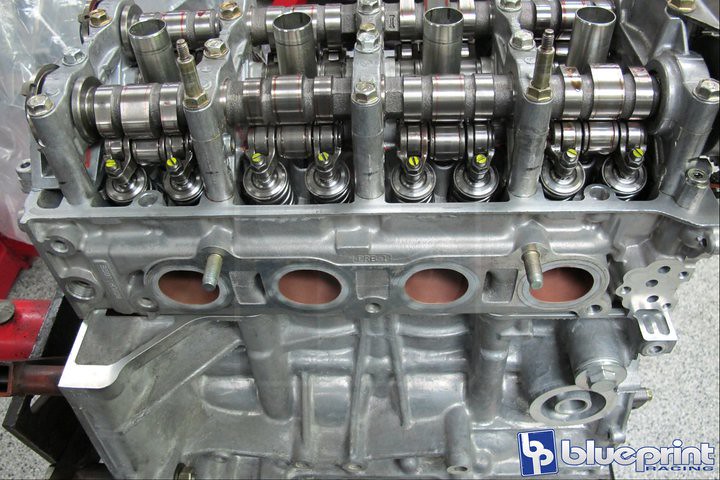
Got Head?
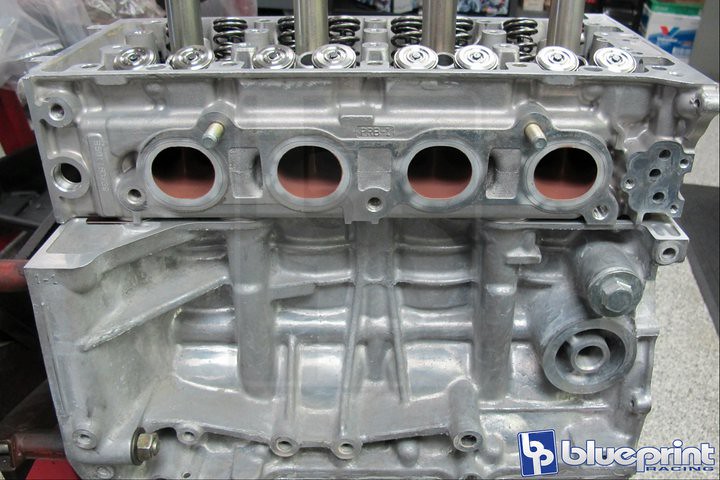
Sexy exhaust ports.
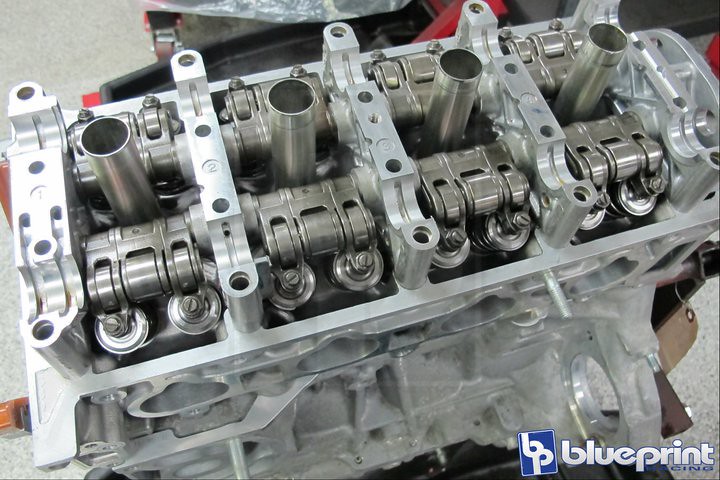
Rockers… check!

Stage 2+ Cams and a new OEM chain installed.

Cam caps torqued and valves adjusted!

By far one of the best built K20’s that has come out of our shop!! This engine has the works… it’s an 86 x 89 12.34:1 with our stage 3 cylinder head package and stage 2+ camshafts. Almost every option we offer went into this bad boy!!

Thermal coated (inside and out) custom SSR 4-2-1 header, BP Vented Valve Cover, and BP Cam Tower Oiling Mod. Just waiting for the Hybrid TPS Sensor and Chasebay’s CM2 harness and it’s on to rule the circuit.
At an undisclosed location….Jerry was busy putting the peices together once again…

A close up shot of those Enkei RPF1, full wheel specs are: 17×9.5 +18 at the front and 17×9 +25 at the back, all wrapped in Hoosier A6 rubber 245 40 and 225 45 respectively.
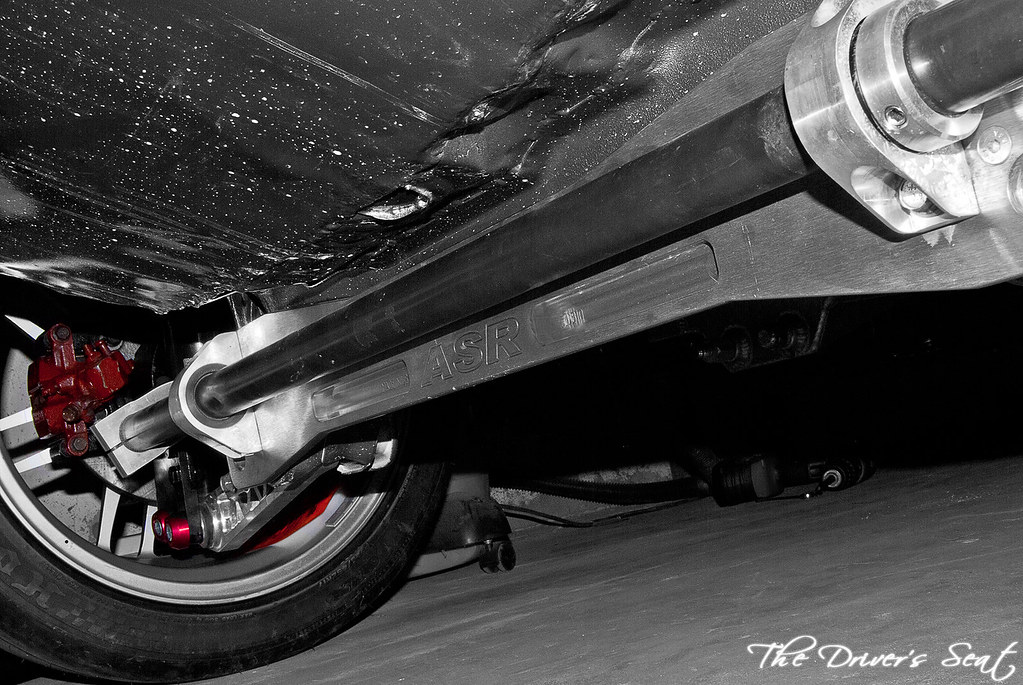
Under body spy shot of the ASR subframe brace and 32mm. hollow sway bar. If you look carefully you can catch a glimpse of the Fuction 7 LCAs with spherical bearings and the ITR Calipers rounding up this setup. With a setup like this, there is no doubt that it will be a force to be reckoned with on the track.
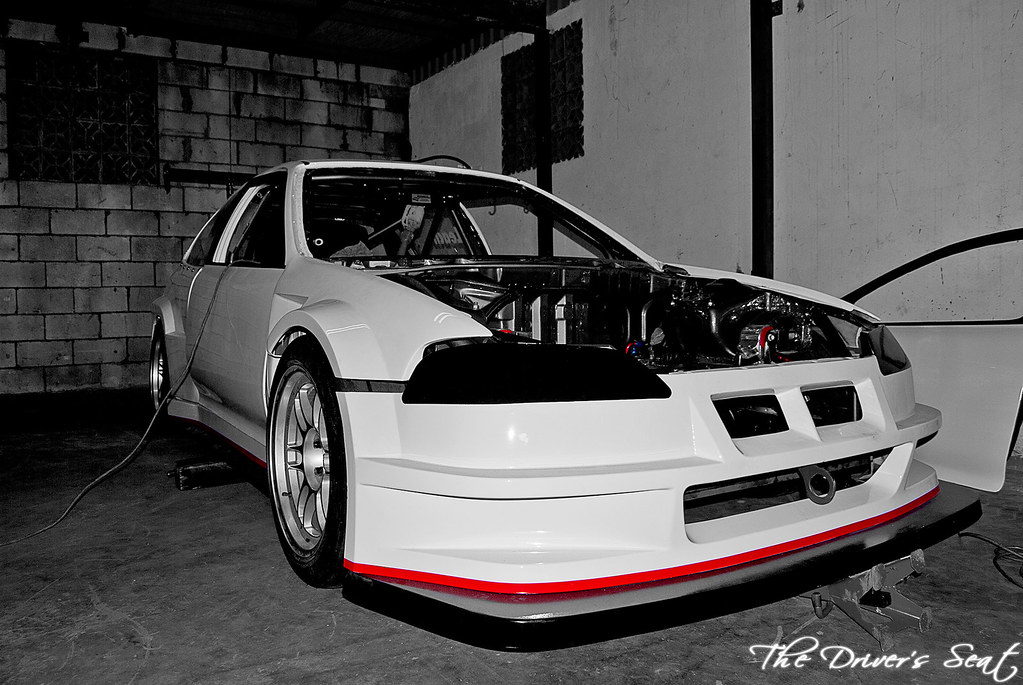
How it all came together…. not bad, not bad at all if we might add…

The bay as it awaits the K-Series motor with Hasport mounts in place and a few AN connections. That’s it for today, thanks goes out once again to Blueprint Racing for providing us with some very valuable information on the engine build process and thanks to you for taking a look, until next time…
Daryl’s Rally K-EG Build… Part 3
Today we’re back with an update on Daryl’s Rally K-EG Build. A significant amount of work was done on the car and in today’s post, we’ll be taking you from the time the first set of paint was blown through to the partial reassembly of K-EG.
As usual, for those who missed out of the previous posts, I’ve included the link below.
Without wasting any more time, let’s get right into it…
Picking up where we left off, here the car sits in the booth, now with the new colour…

Closer looks…

Interior shot…

On the trailer and ready to go…
At home, and now the work begins…
Gold heat reflective film being installed to the firewall. This is used to help reflect engine heat and is capable of reducing up to 90% of radiant heat away from the firewall. A good investment as it can get pretty hot during a rally stage. And might I add it looks damn good too…
All old bushings were ditched and replaced with more up to date Hardrace counterparts…
Ceramic coated exhaust manifold…
New Galway Carbon navigator foot rest…
Shot of Russell installing the new Galway Carbon interior panels…
Underbody view where you can see another shot of the partially heat wrapped header along with a ST Egineering front sway bar with Hardrace bushings…
Another quick underbody shot of the back of the engine block with a view of the genuine Honda oil filter and AN connections…
Sponsor wrapped tailgate mated to a carbon fibre duckbill spoiler, temporarily leaned up next to a bunch of gas cans…real racing is done here…
Rear shot as the car sits on jack stands, you guys can see the freshly powdercoated suspension pieces in-place…

Brembo 2 pot calipers and 280mm. rotors with Feredo pads. You can also see the Hardrace camber kit bolted to the freshly powercoated trailing arm.
Here you guys get a better look at the Proflex coilovers, Brembo 2 pot calipers and the powdercoated suspension pieces…

Taking care of brake duty at the front end are Brembo 4 pot calipers and 300mm. rotors bolted to Hardrace camber kit and Proflex coilovers…
Chromoly roll cage…

Really liked the addition of the Galway Carbon panels….

As it all comes together… Galway Carbon navigator foot rest and driver side foot tray. Willwood pedal assembly and reservoirs bottles being mounted in place. Carbon fibre center console in place awaiting the installation of the dash to complete the puzzle. You guy can also see the Hybrid Racing shifter and GRP 4 Fabrications hydraulic handbrake…
That’s all for today, thanks for taking a look and be sure to stay tuned for our next update….
