
Leon’s K-Swapped EK4 Build…Part 2

Welcome back to the site, Today I’ll be bringing you an update on Leon’s K-Swapped EK4 build. Leon was in an unfortunate position after damaging his motor, although this wasn’t quite how he approached it. Leon saw it as an opportunity to take a step back and assess certain aspects of the current build. With this heightened sense of focus it allowed Leon to change things with a bigger goal in mind. Being an avid fan of time attack and paying close attention over the last few years, Leon would have gained a greater appreciation for the EK4 chassis. With that in mind, his desired direction for the build is now to function as a street car but also to be able to live out his track day aspirations.
Today we get into the tear down process along with some of the much needed changes that will transition Leon’s goals into a reality.
For those who may want to view this build from the start I’ve provided the link below:
After discovering the damaged motor, Leon wasted no time and sourced a replacement. I would have mentioned in the previous post that Leon picked up a JDM K24A. Upon sourcing and receiving the most important component for the EK’s rebuild, Leon could finally dig in and make some of the changes he’s been longing to for quite some time…
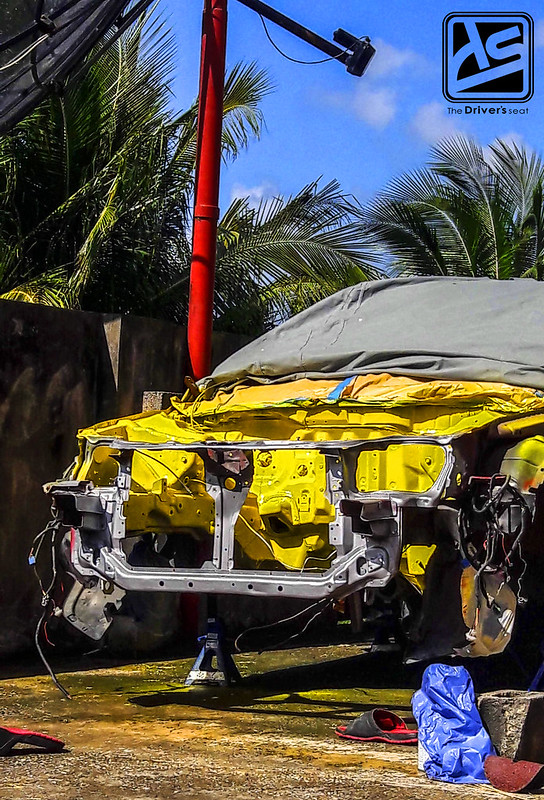
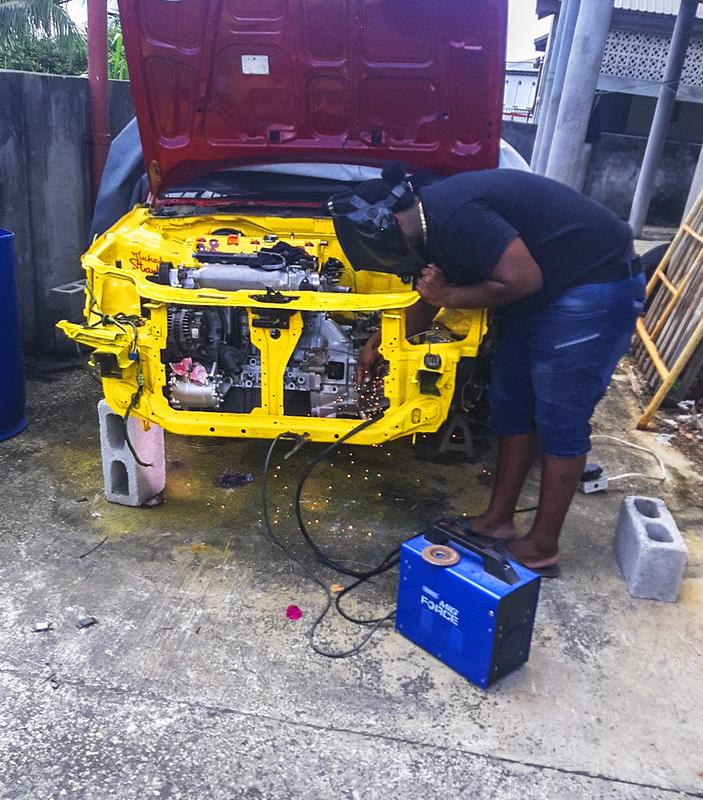
Having the motor out gave Leon a great opportunity to refresh the engine bay. This had been high on his to do list even before the motor issues…
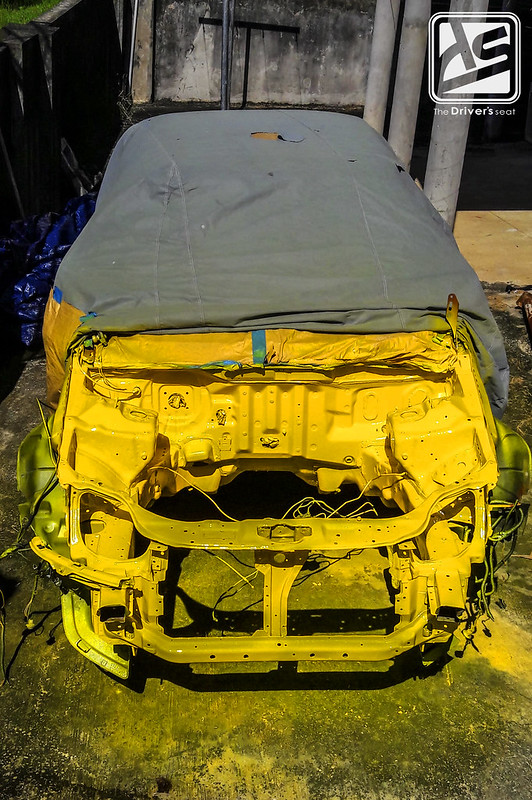
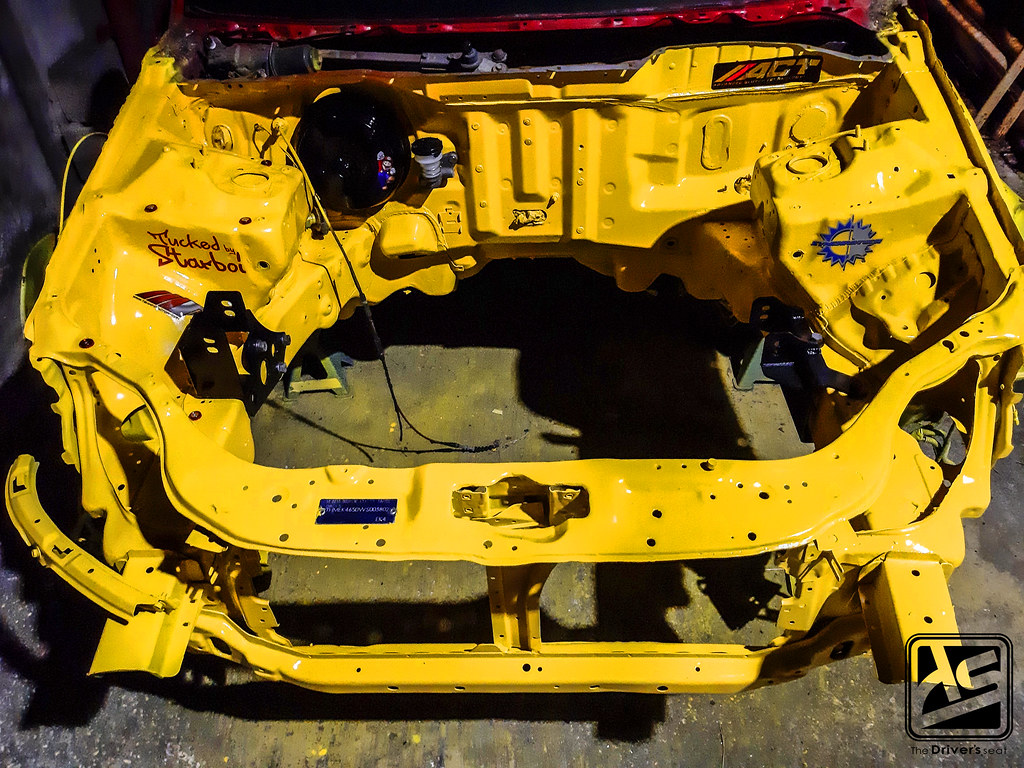
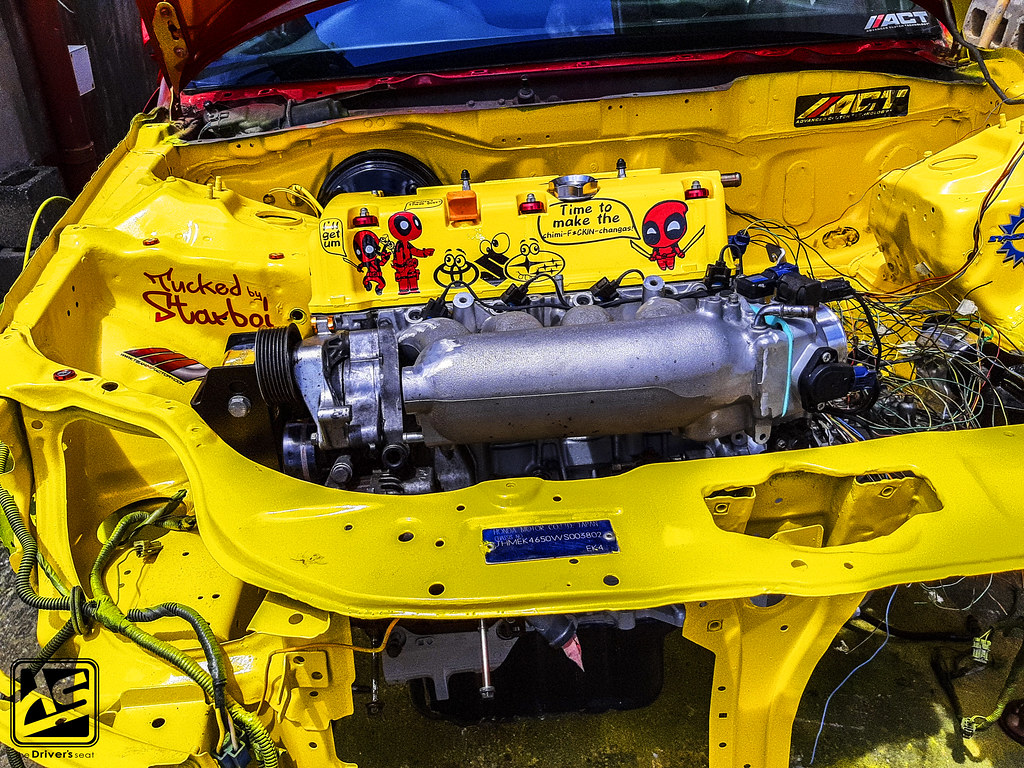
Wanting to mix things a bit he went with a yellow bay to align with the colour on the Willwood calipers…
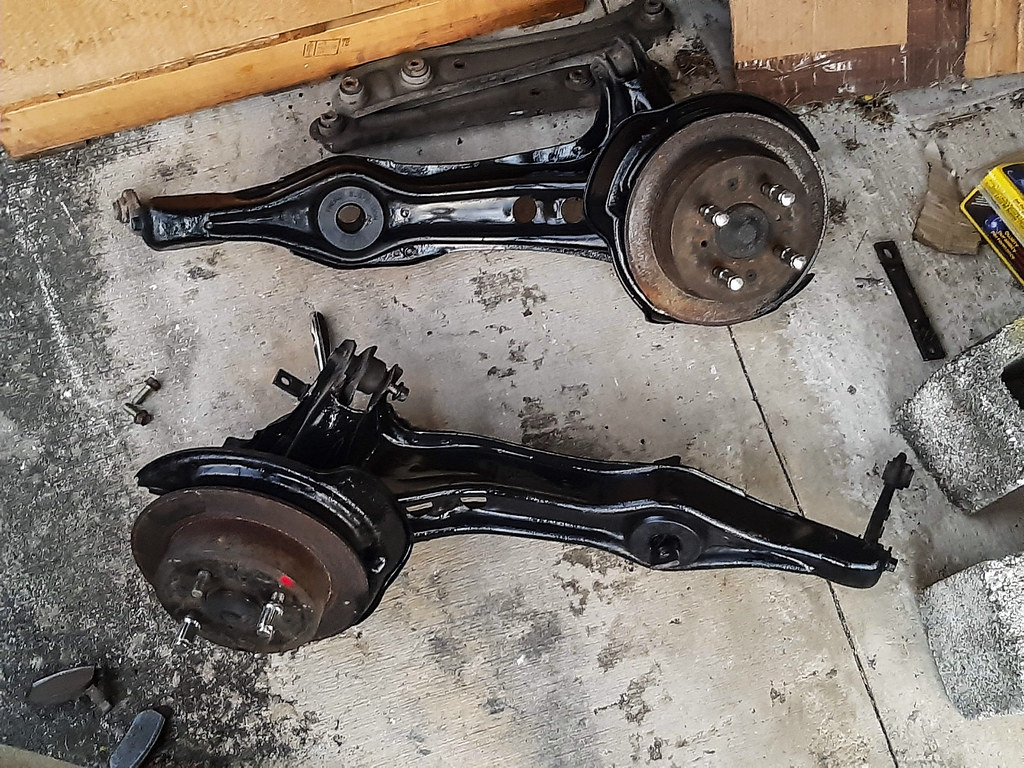
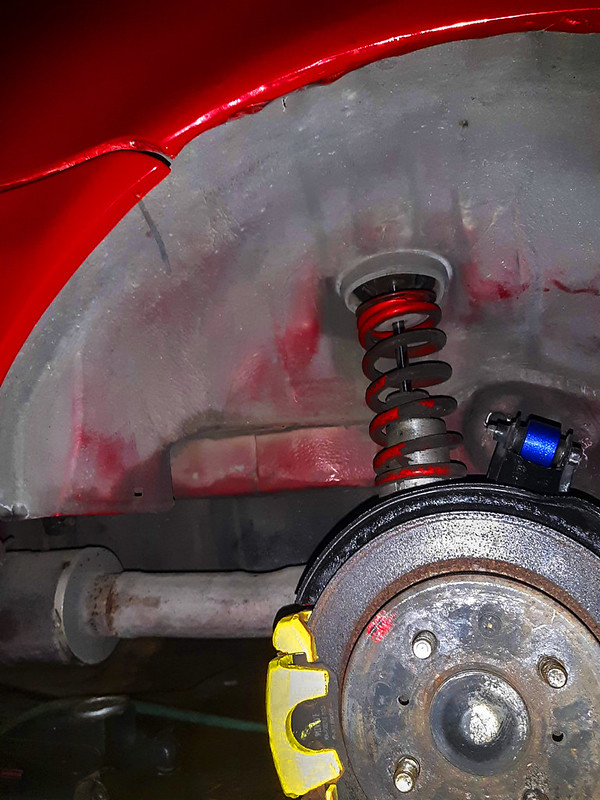
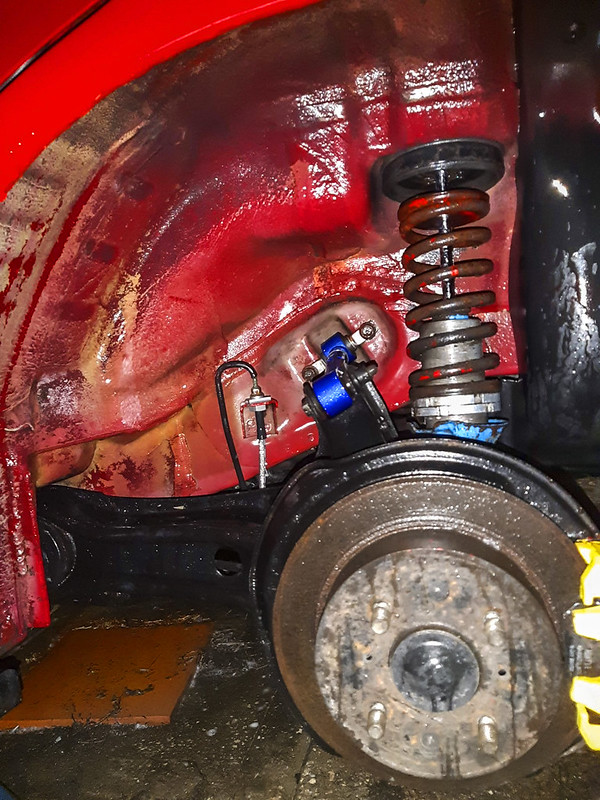
While removing the motor and preparing the engine bay for paint, Leon took the time to inspect the front suspension. This revealed a series of worn and damaged components which prompted him to take a thorough look at the rear of the EK4…

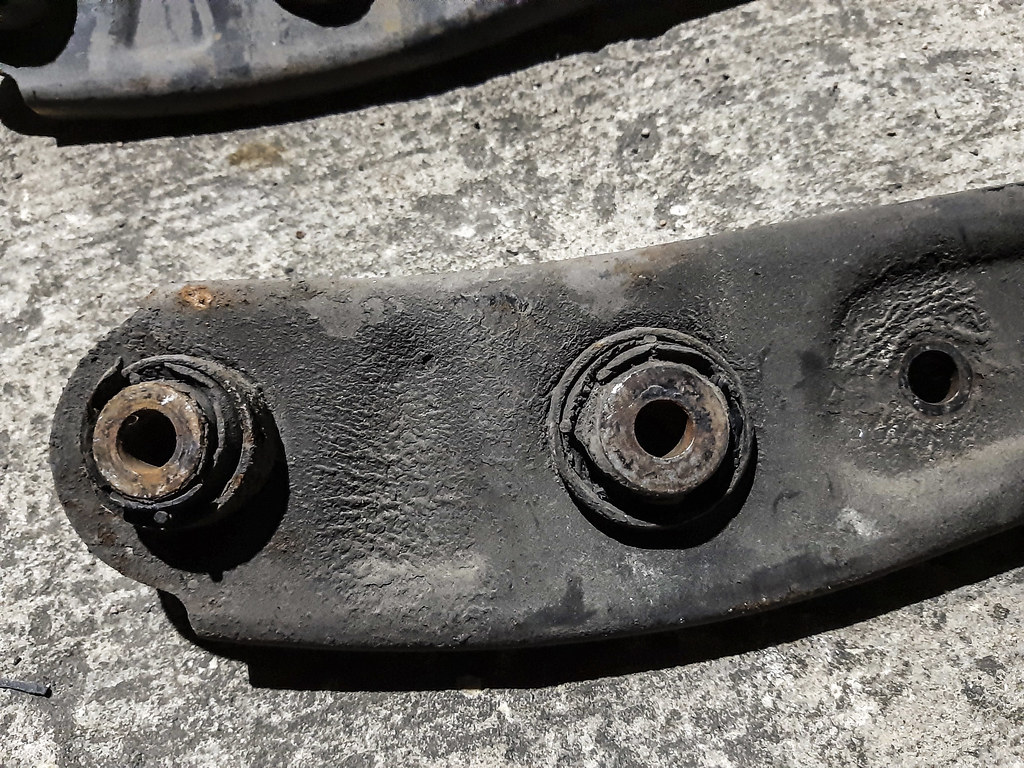

As he suspected, the rear suspension required revamping…
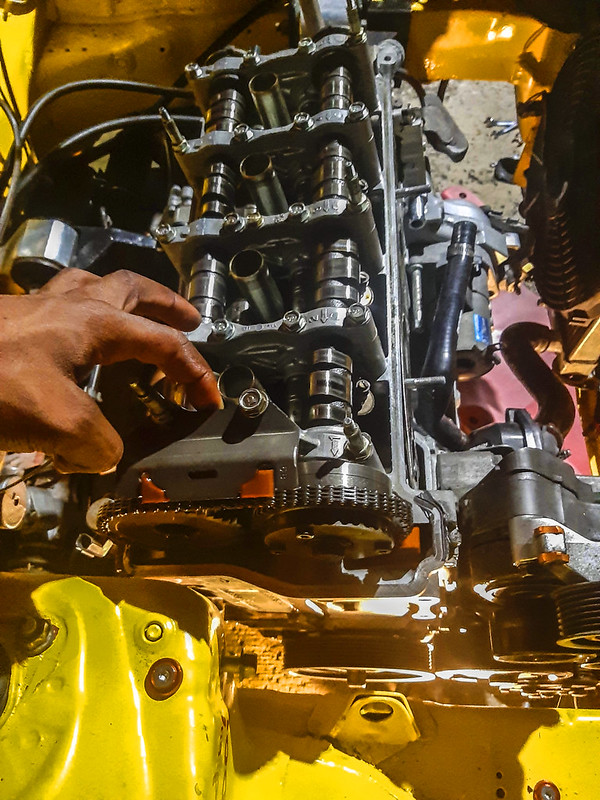
Leon then moved onto inspecting the drivetrain; with the gearbox removed from the motor he was able to get a closer look at the components…

This revealed a worn and cracked throwout bearing…

Leon did have some good news though, the ACT clutch and pressure plate still showed signs on life and will be used on the new setup…
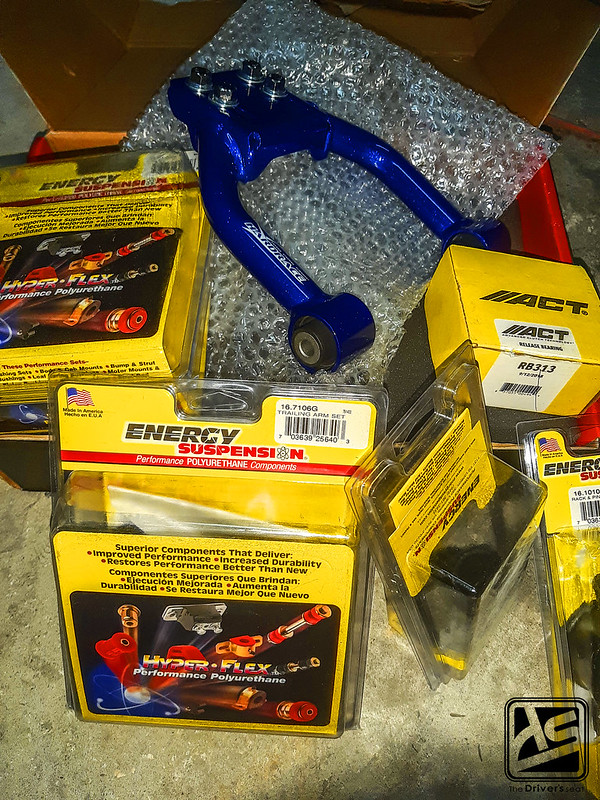
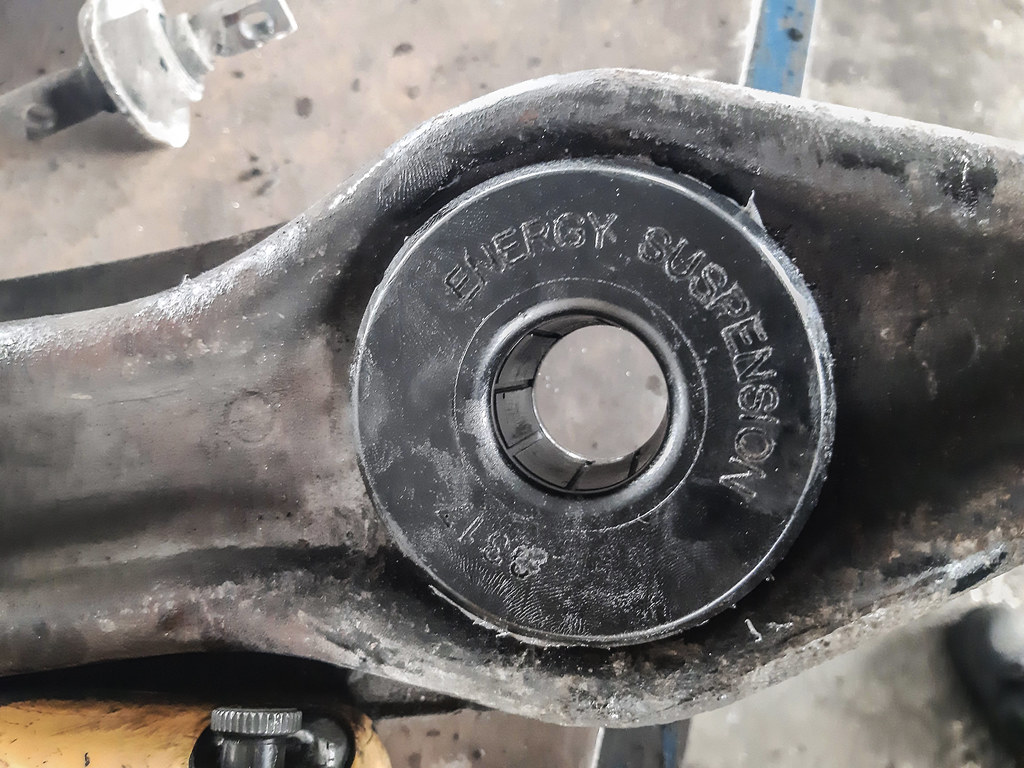
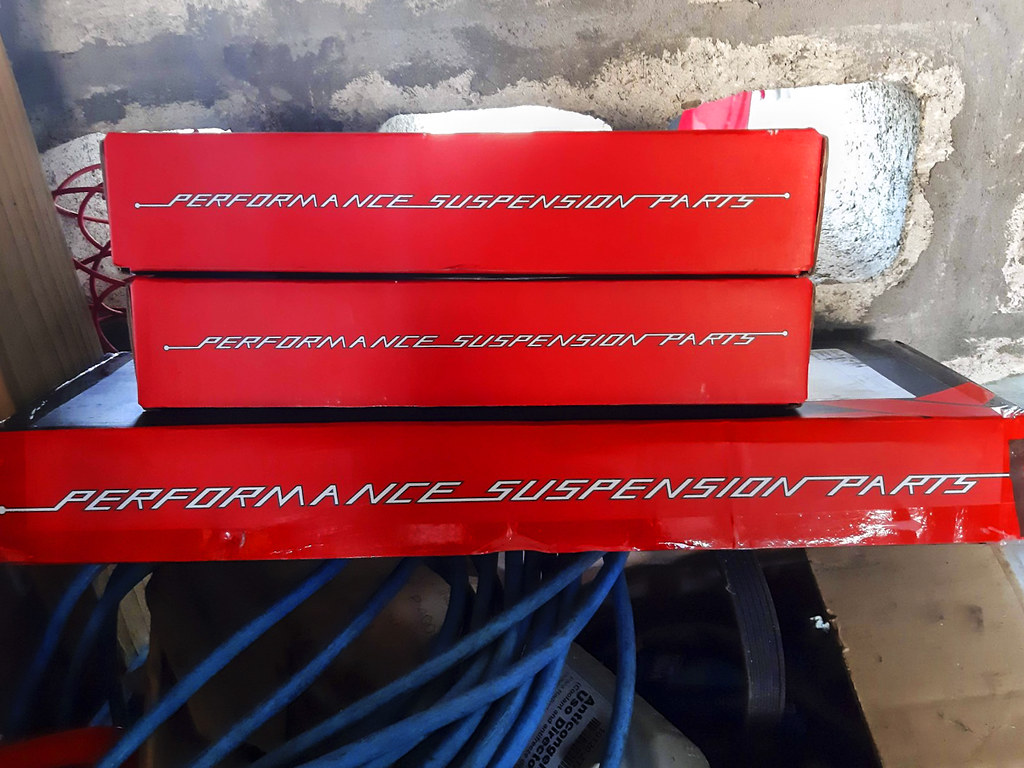
Leon’s first shipment had arrived carrying the necessary replacement parts. He went with Energy Suspension for his trailing arm bushing replacement, along with the front lower control arm bushings. Although they make replacement bushings for the upper control arms, Leon opted to go with the Hardrace Performance camber kit to aid with dialing the alignment for when he does hit the track. The last piece in this batch of items was the ACT throwout bearing…
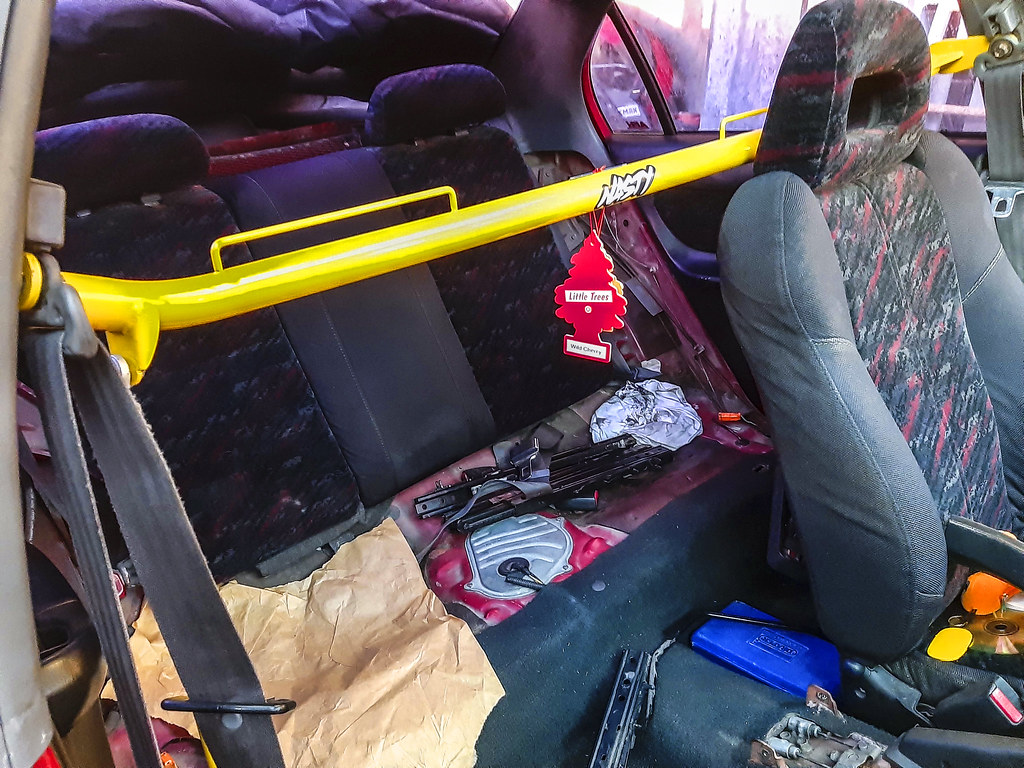
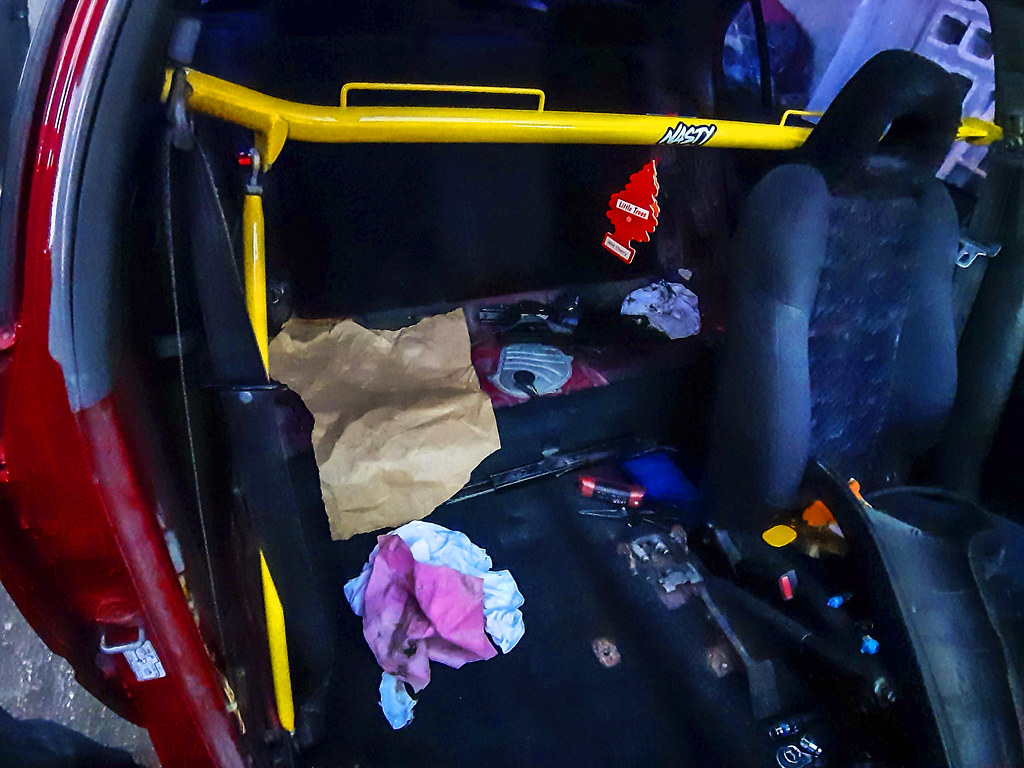
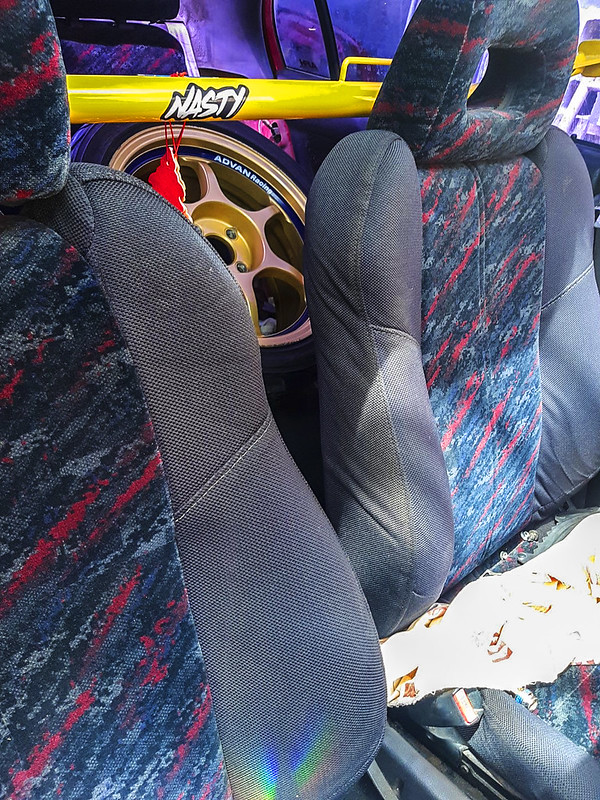
Although Leon only had the OEM SiR seats, he couldn’t pass up on this BWR harness bar. With plans to to purchase a set of full bucket seats this unit will serve great purpose…
Now in possession of the parts, he went to work on installing the trailing arm bushings…
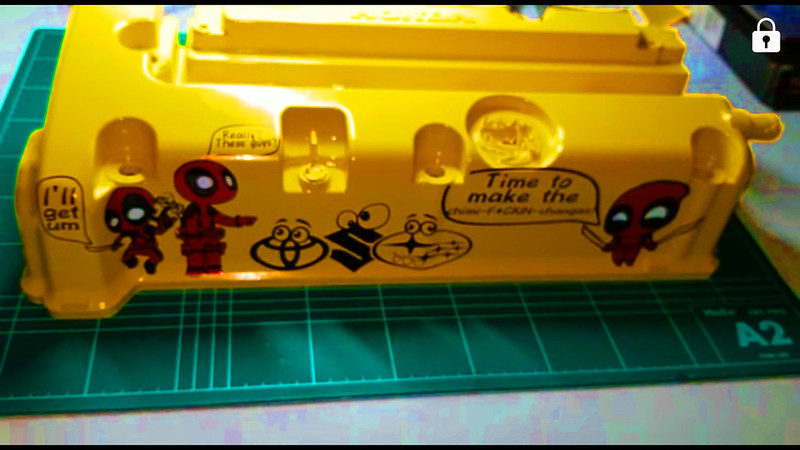
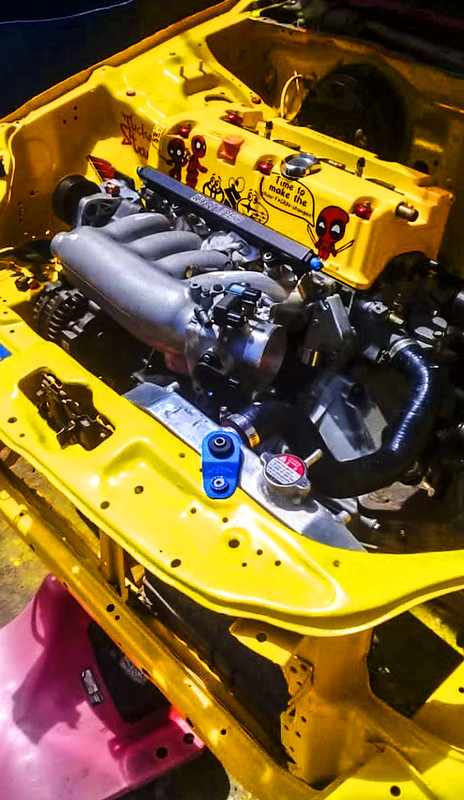
Leon wanted to switch it up in relation to the valve cover and with a concept design in mind he consulted Andrew. The valve cover was sent to Chis Auto Paint where it received a fresh coat of yellow and then sent to Drew for him to apply the finishing touches with the Deadpool theme. Following this, it returned to Chris where several layers of clear coat were applied. Leon was more than satisfied with results…

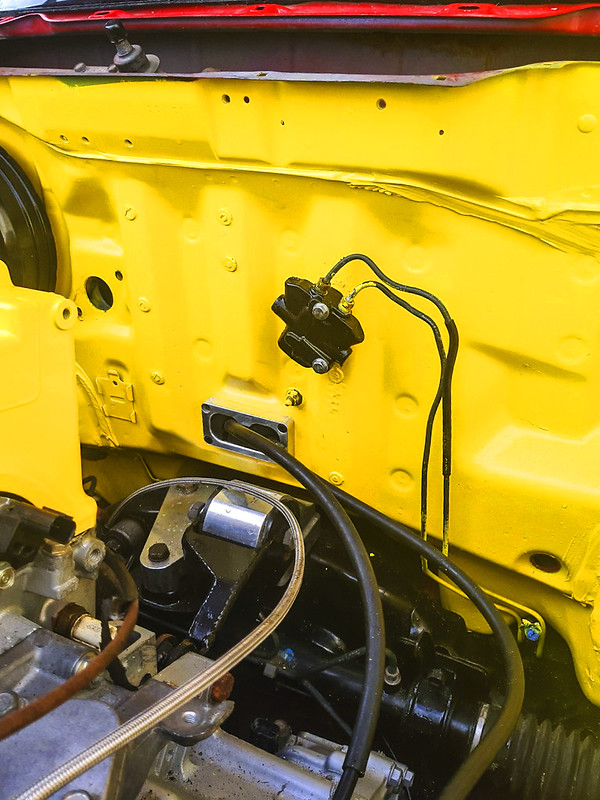
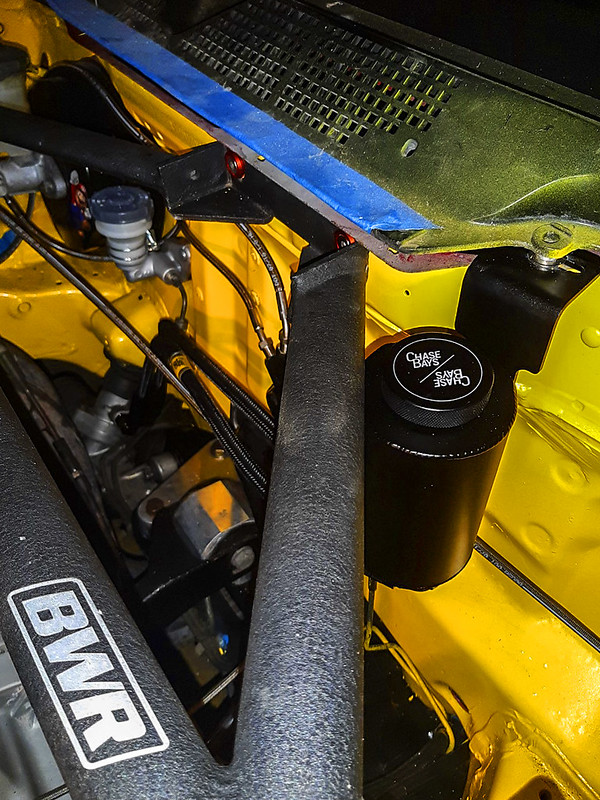
Having details at the forefront along with function, Leon wanted the engine bay to stand out. After the necessary research, he placed an order for a Blox S2000 clutch master cylinder along with their firewall spacer. The main advantage with this unit is the positioning of the reservoir bottle, which is placed on the actual cylinder as opposed to the OEM Civic unit which is remotely mounted to the shock tower. Next up was an order placed with Speed Factory Racing for a few goodies that will improve the shift feel. The first item is their drag spec shifter spring kit which delivers a more positive shift feel. These springs are said to be 200% stiffer over OEM and can be felt with the force at which the shifter recentres. In addition to the drag spec shifter spring kit, the heavy duty detent springs are recommended to fully enhance and improve the shift feel. These springs are over 80% stiffer than stock and deliver a ratcheting feel when the gear is selected. The final item pictured is the K-Tuned thermostat housing plug, this allows you to delete the heater hose pipe and blank it. This would be ideal for Leon as the car will be more track focused and less daily driver…
A look at the engine bay as it starts to come together, with the brake booster and Blox master cylinder test fitted along with the Hasport engine mount brackets…
The direction in which Leon plans on taking the car, a few additional part had arrived from Hardrace…
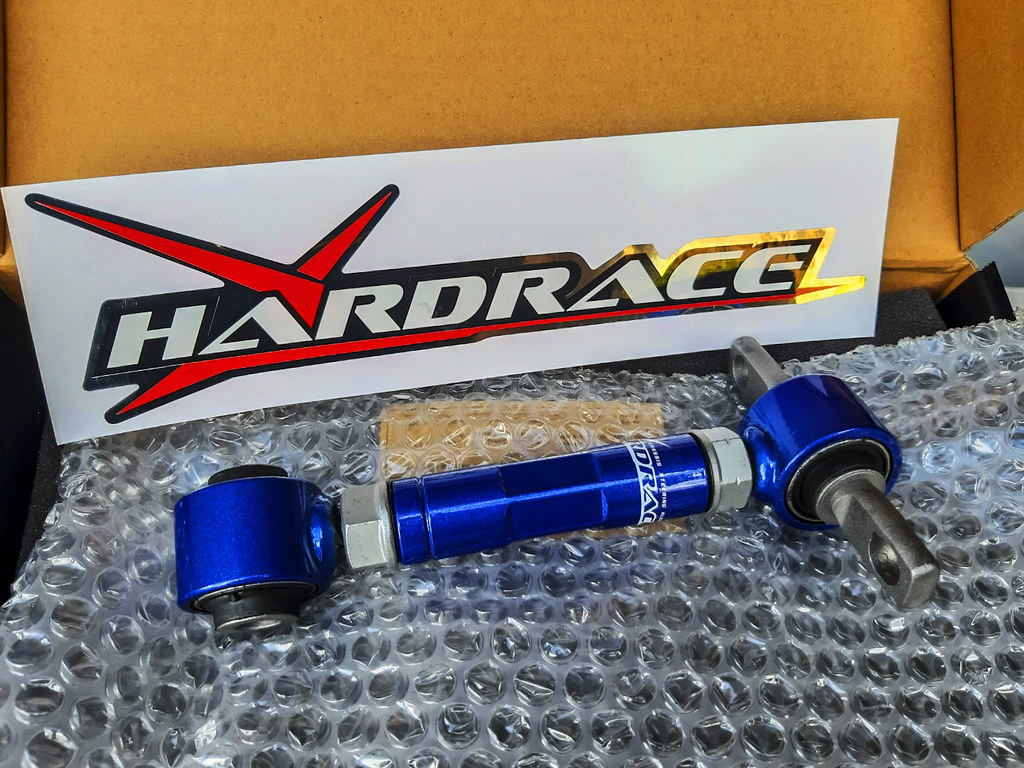
Already having purchased a front camber kit, Leon extended the adjustability in the rear as well…

In addition, an adjustable toe kit to fine tune the alignment as best as possible was also purchased…
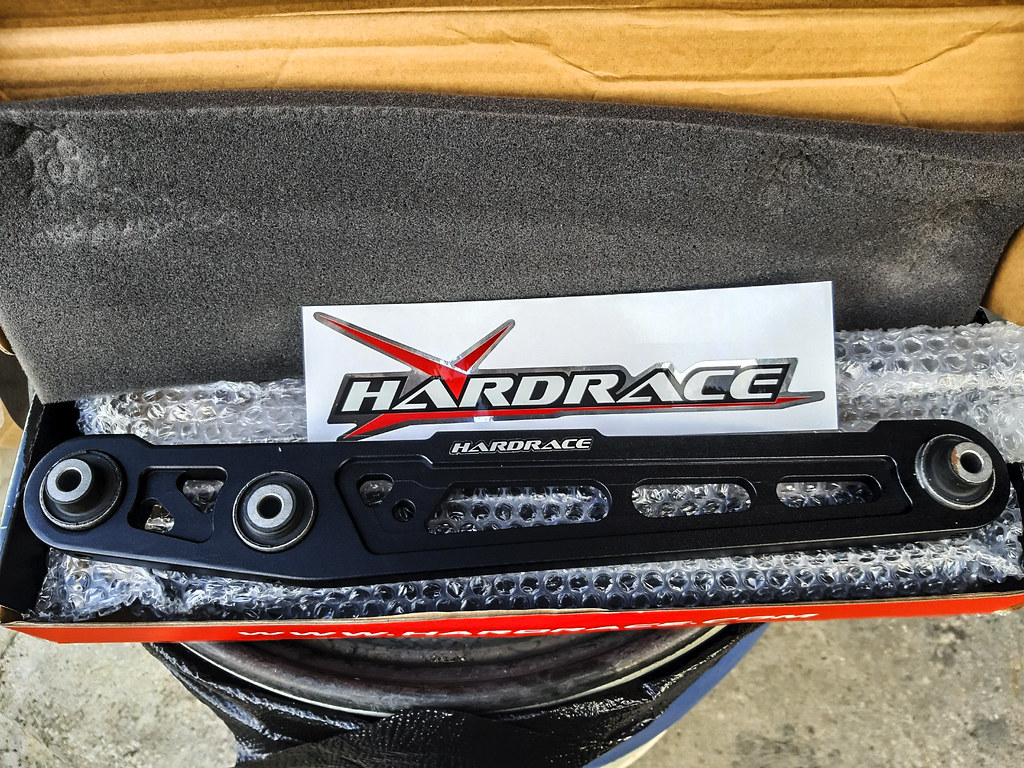
While shopping at Hardrace he opted to pick up their rear lower control arms to close out the remainder of the suspension work…
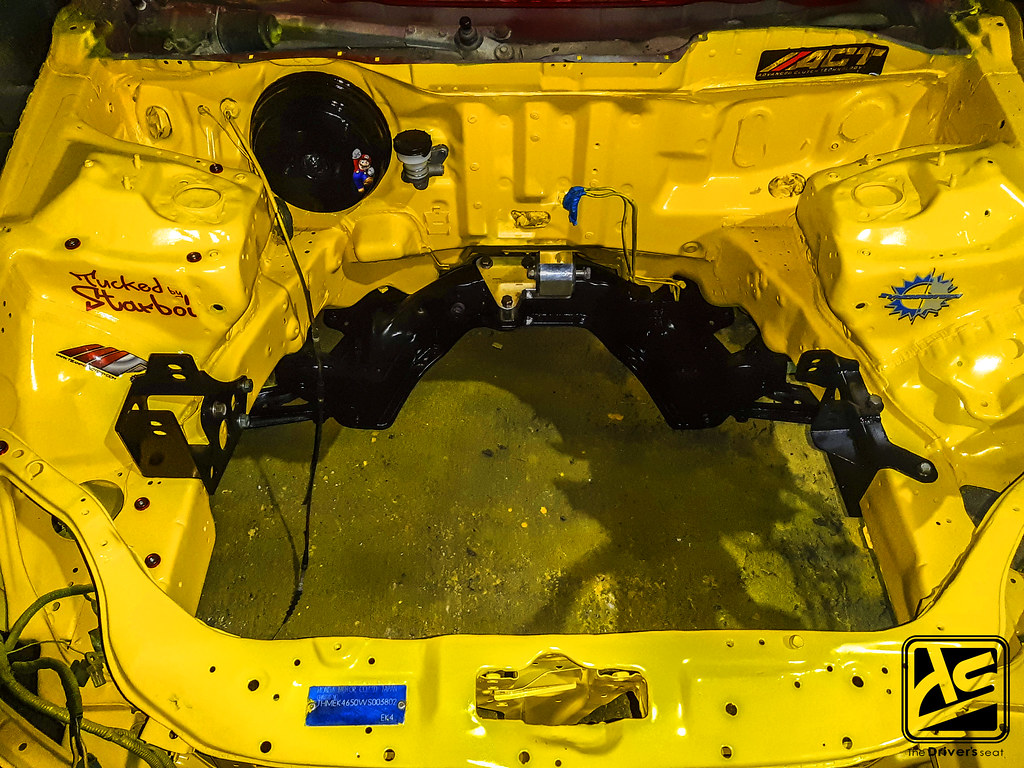
After finishing up the bushings for the lower control arms, Leon went ahead and fitted the subframe to the EK4. Finally the bay was just about ready to receive the K24 swap…
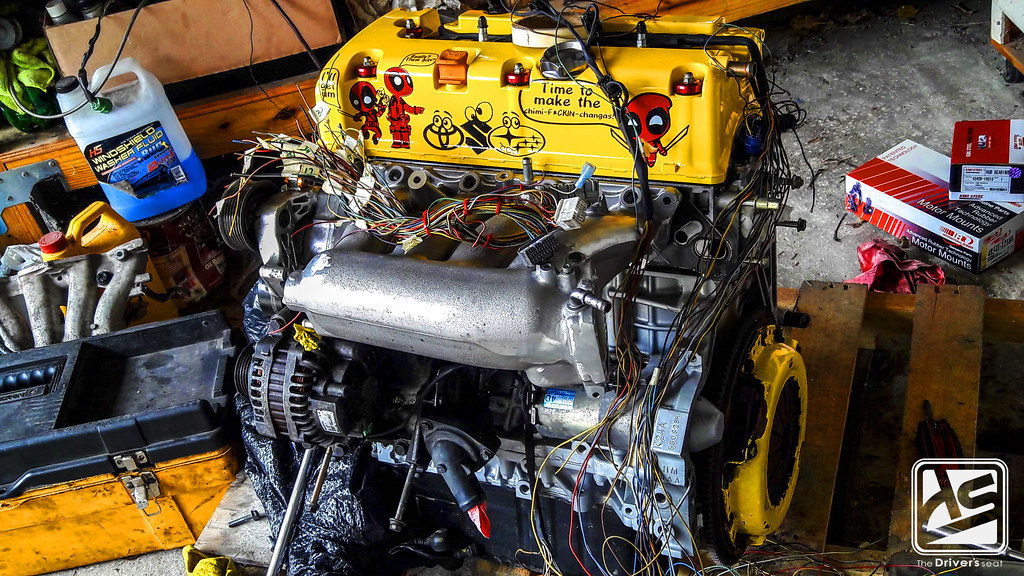
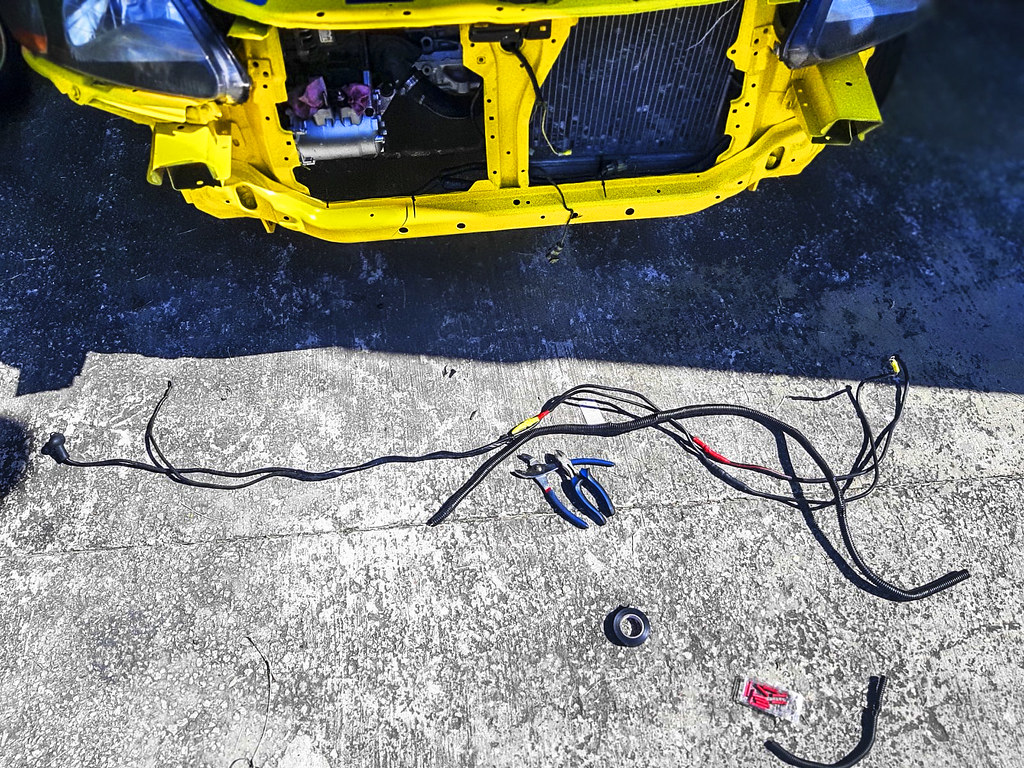
Leon already went ahead and swapped out the stock manifold for a RBC upgrade. The next stage was trying to sort through the custom tucked engine harness while the engine was on the ground…

The upper coolant neck on the K24 needed to be drilled and tapped for Leon to get an accurate coolant temperature reading…

In between the wiring, Leon was able to fit the ACT clutch and pressure plate…
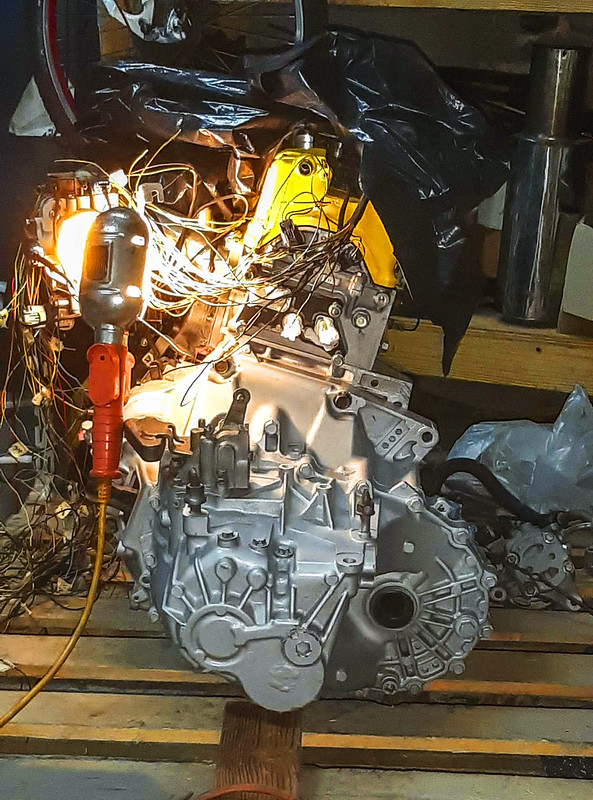
Back on the details; while the gearbox was removed, Leon cleaned it up and applied a fresh coat of paint before mating it to the K24 long block…

With everything bolted together Leon wasted no time and lifted the motor into the dormant EK4 chassis…
Previously, Leon started work on the trailing arms by installing the Energy Suspension bushings. It was now time to finish them with the Hardrace items that arrived and bolt everything to the EK4…


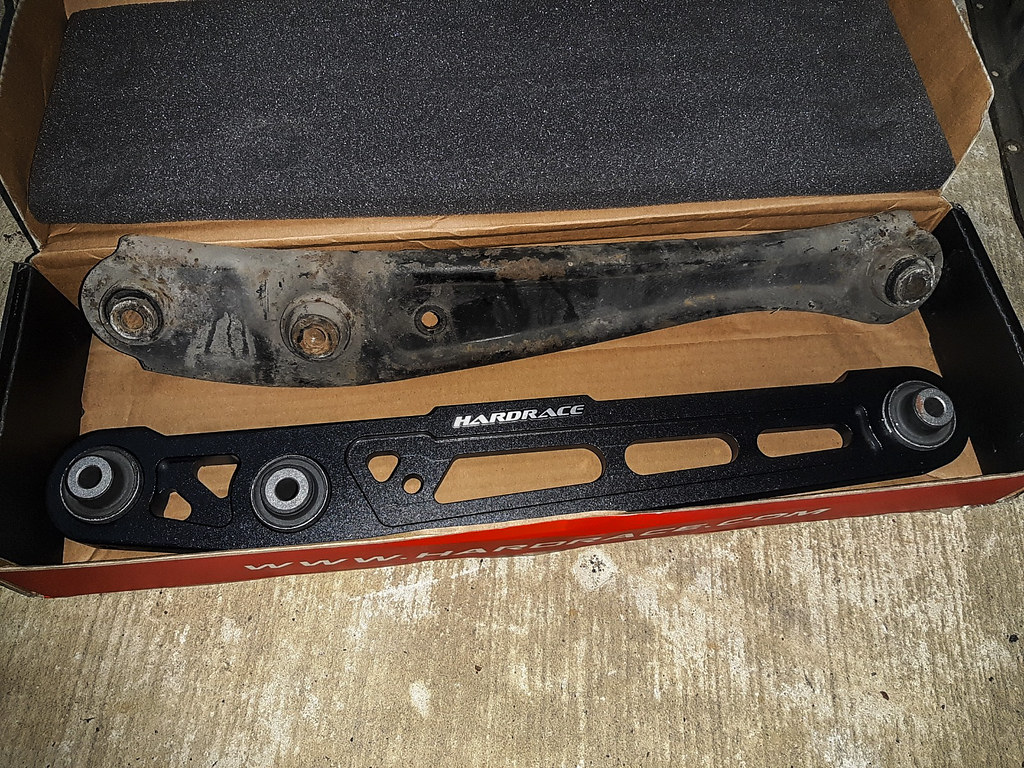
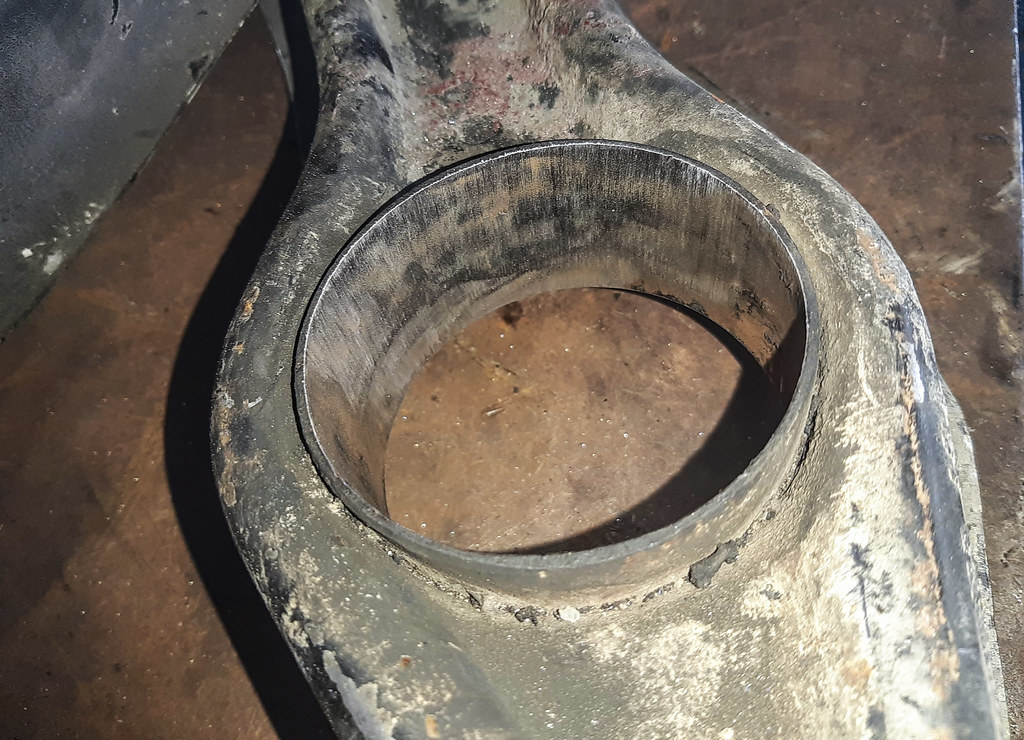
A quick comparison between the worn arms and the Hardrace replacement…

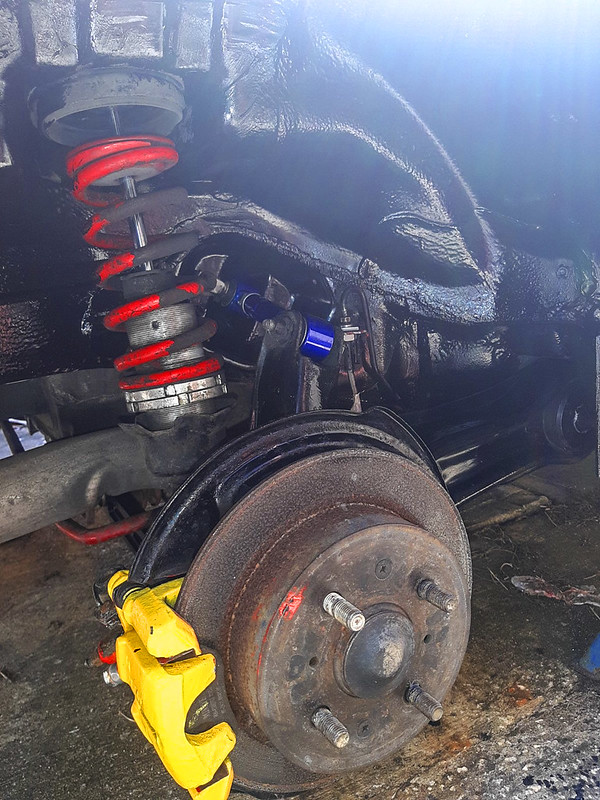
Both camber and toe arms fitted to the trailing arms along with the freshly painted rear calipers…
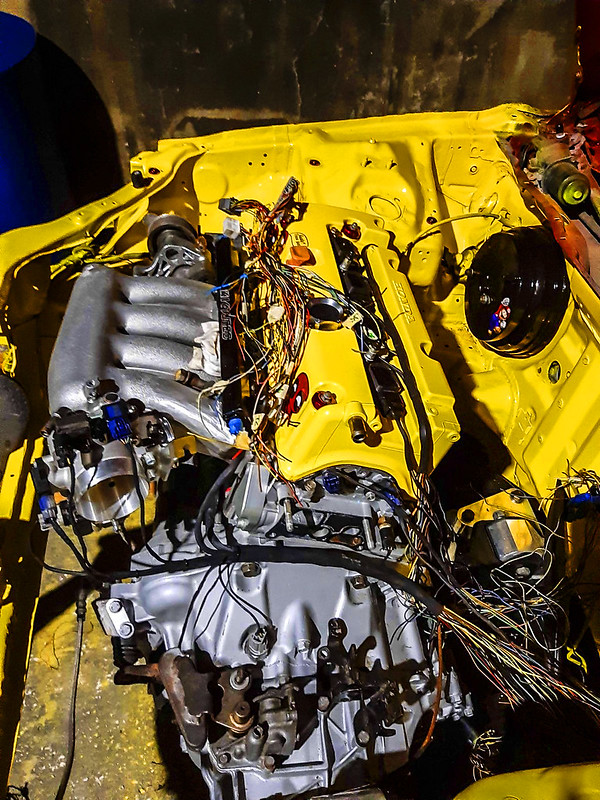

A view of the motor assembly in place as the guys worked on completing the engine harness…
Rico Weld doing some work on the car’s front end. Leon needed to have the radiator mounting points adjusted…
Everything went smooth and he was able to fully mount the radiator in place. Things were going as planned and Leon was starting to see his vision come to life with the vast majority of parts fitted within the bay…
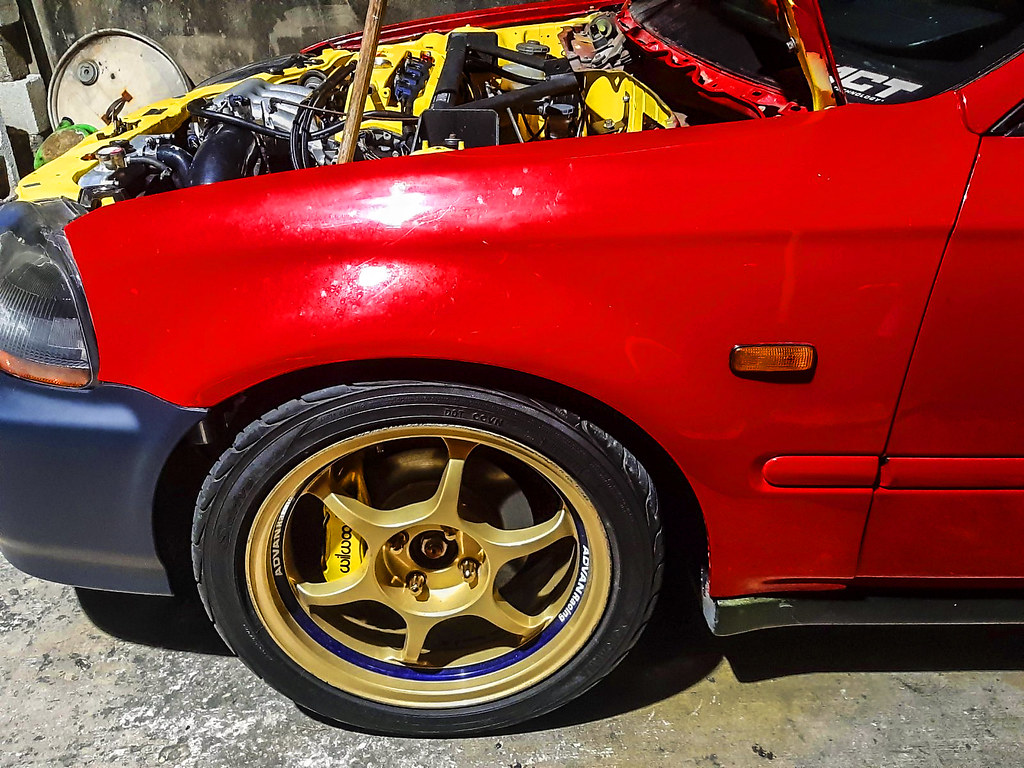
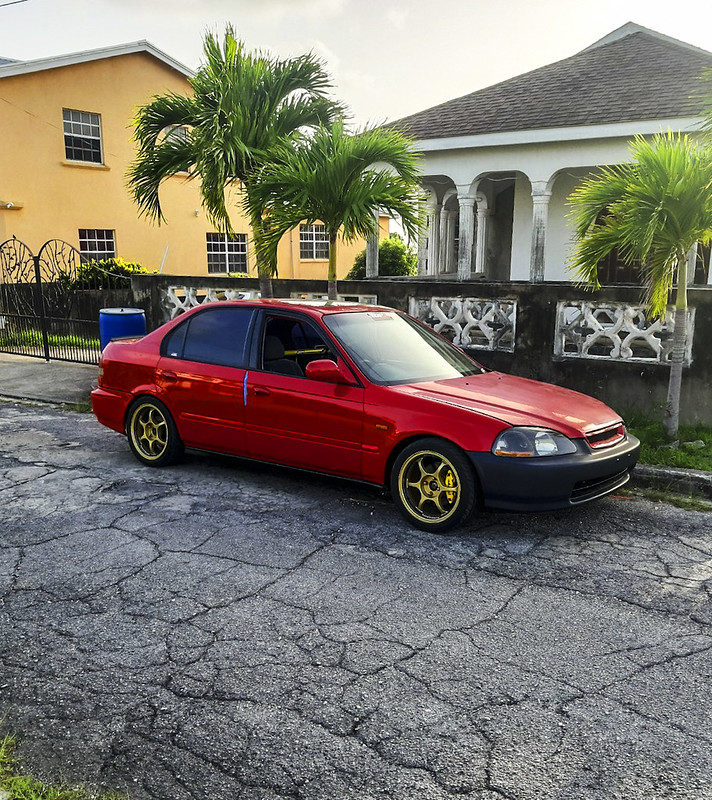
Shortly after, Leon stumbled upon a deal he couldn’t refuse. One of Leon’s all time favorite wheels are Advan RGs, so naturally when the opportunity arose for him to get a set, there was no way he was going to pass it up…

With the wheels in his possession, this was enough motivation for Leon to have the final pieces fitted. He went ahead and knocked out the remaining suspension work necessary to get the car on the ground…

Once that was out of the way, Leon was able to test fit the wheels…

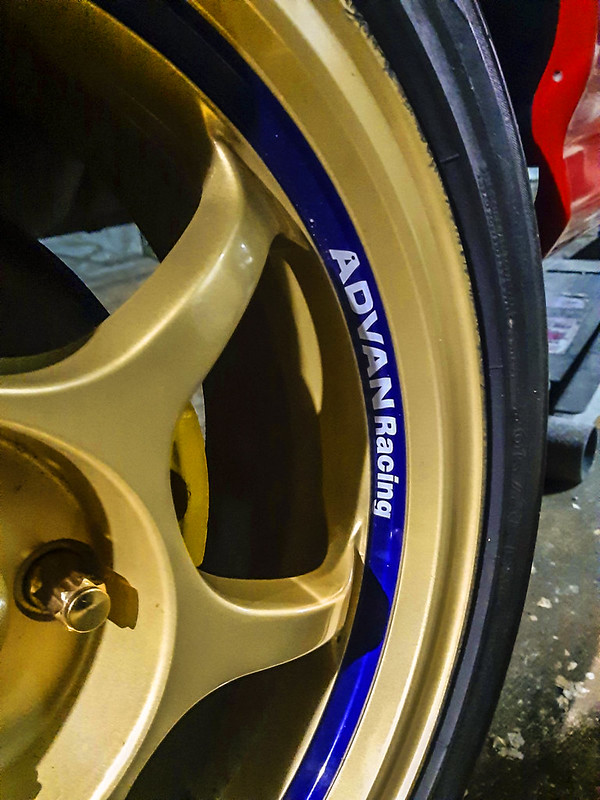
They are Advan RGs in a 16×7 +31 offset wrapped in 205/45/16 Yokohama S Drive rubber…
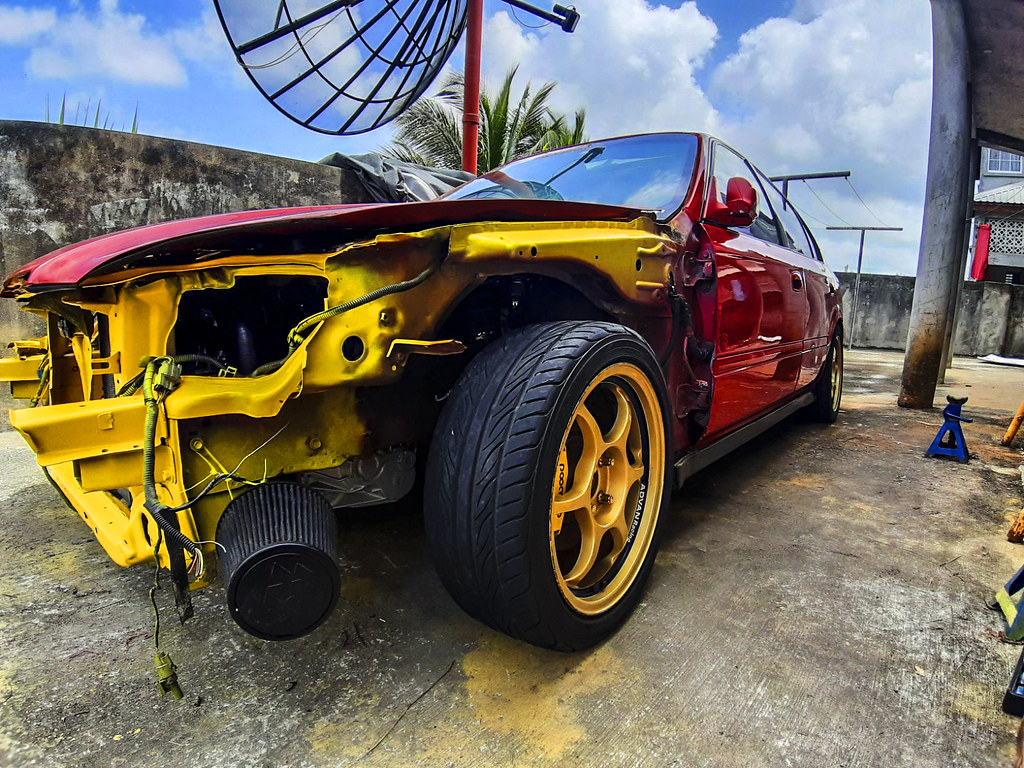
It was a long time coming for Leon to have it on a full set of wheels. This was a big step although there was still a vast amount of things to be sorted…

It was time to start dealing with some things on the interior…
Bent on the finer details within the bay, Leon installed the shifter cables along with the K-Tuned shifter cable grommet…
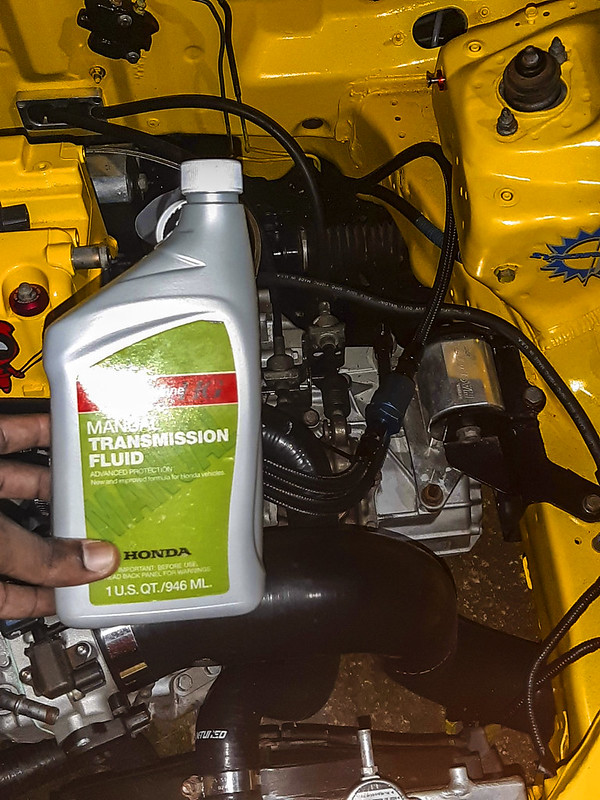
To finish the remainder of the drivetrain, Leon went ahead and topped up the gearbox with some MTF…
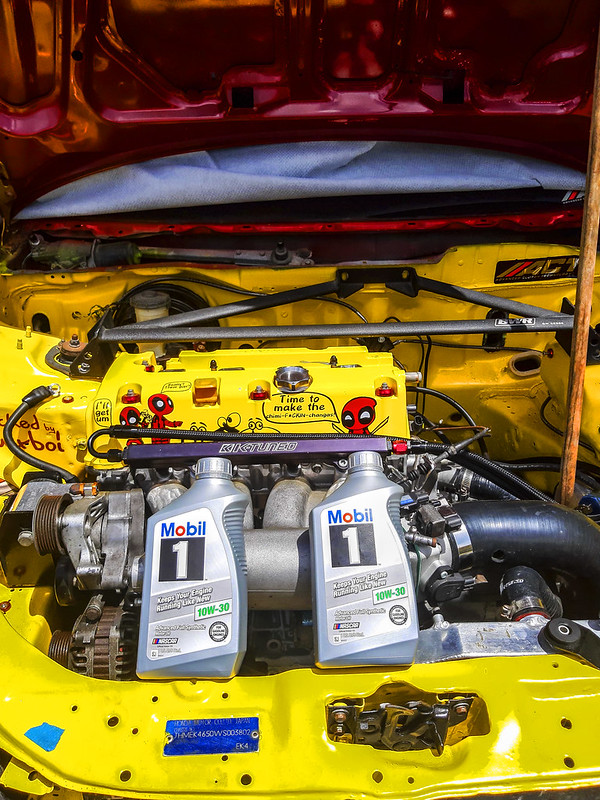
While he was at it, the new motor hadn’t received any fluids as yet, so he took this time to fill it with some Mobil 1 10W-30 fully synthetic oil…
The final set of wiring to be taken care of is the charge harness…

Leon was trying to make the bay as tidy as possible, during the paint process the ABS unit was ditched from the braking system. The unit stopped working for quite some time and Leon took this opportunity to upgrade the system. A custom set of of brake lines would be required moving forward; Leon quickly took the necessary measurements and headed to S.D.R.R to have them made…
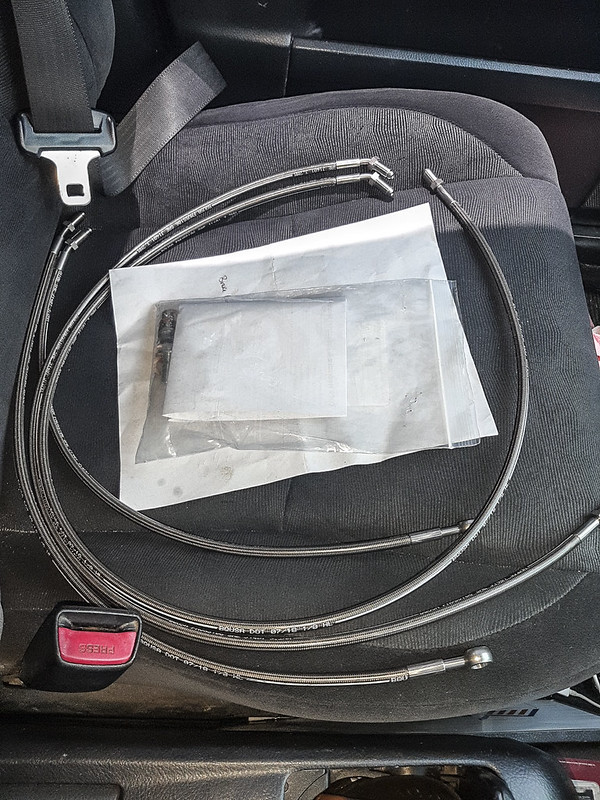
As always S.D.R.R delivered and the lines came out looking exceptional. Leon went with a steel braided line with a black resin coating. These lines will definitely freshen up the bay and also serve great purpose for when he decides to hit the track…

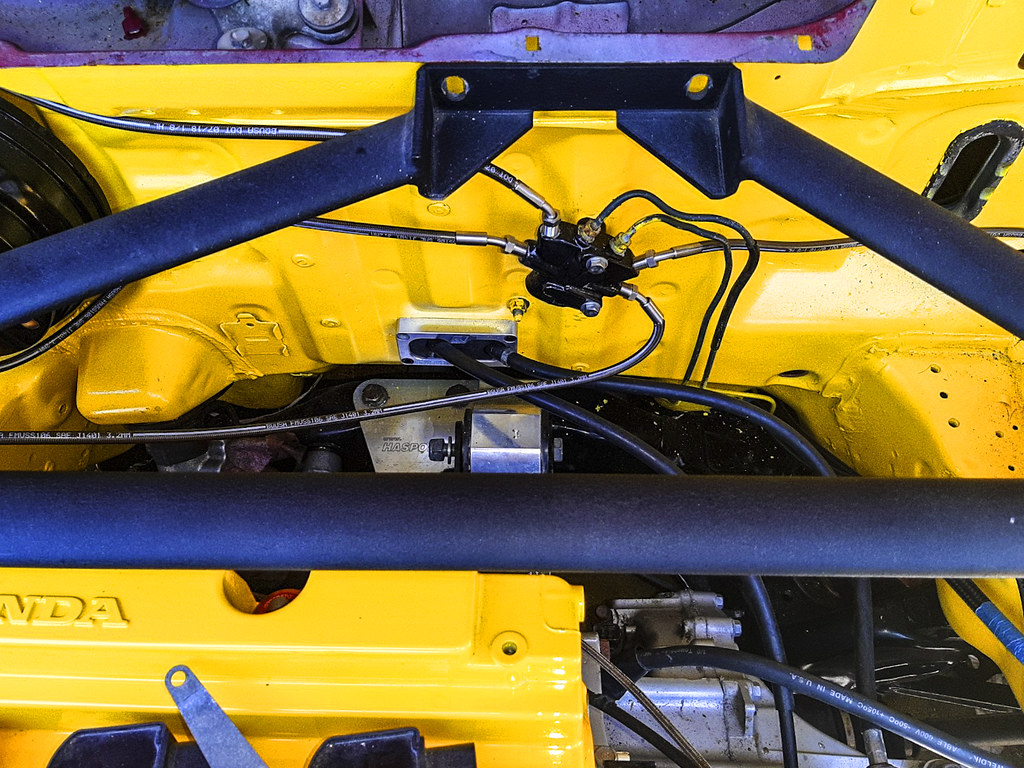
A quick and easy install of the lines using a factory proportioning valve…

Taking a step back revealed the mostly complete engine bay; the vast majority of components had made their way within the bay. Leon was definitely happy with the progress made thus far…


With the interior still torn apart, Leon decided to take this time to freshen up the dash frame…

A look at the K-Tuned intake manifold adapter and bypass hose connected to the thermostat housing…
Unfortunately in the midst of things going so well, Leon had a slight complication. He was noticing a pool of coolant escaping from what appeared to be the back of the motor…


Upon further investigation Leon figured out the reason behind the leak was the K-Tuned adapter…


Although Leon already would have installed shifter cables, it was solely for aesthetics. He had placed an order for a set of Hybrid Racing cables and was patiently awaiting their arrival…

When purchasing a set of Hybrid Racing cables, their upgraded transmission gear selector springs are included in the package. These are similar to the Speed Factory Racing shifter spring kit he would have previously installed…


A look at the new cables fitted; these were the last pieces necessary to complete the drivetrain…
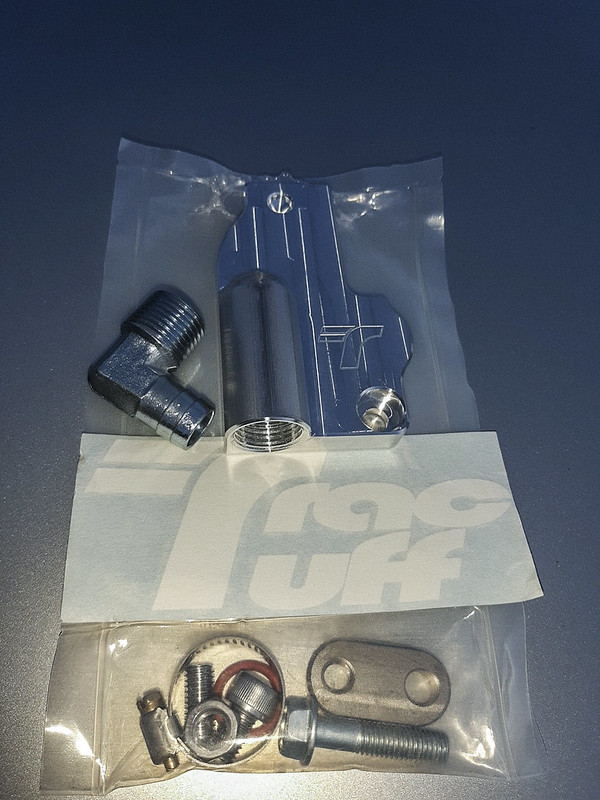
Having encountered the problem with the K-Tuned adapter, Leon placed an order to have it replaced with a Trac Tuff unit. These are said to be the best on the market which made it an easy decision for Leon…


Side by side comparison of the Trac Tuff unit verses the K-Tuned one…
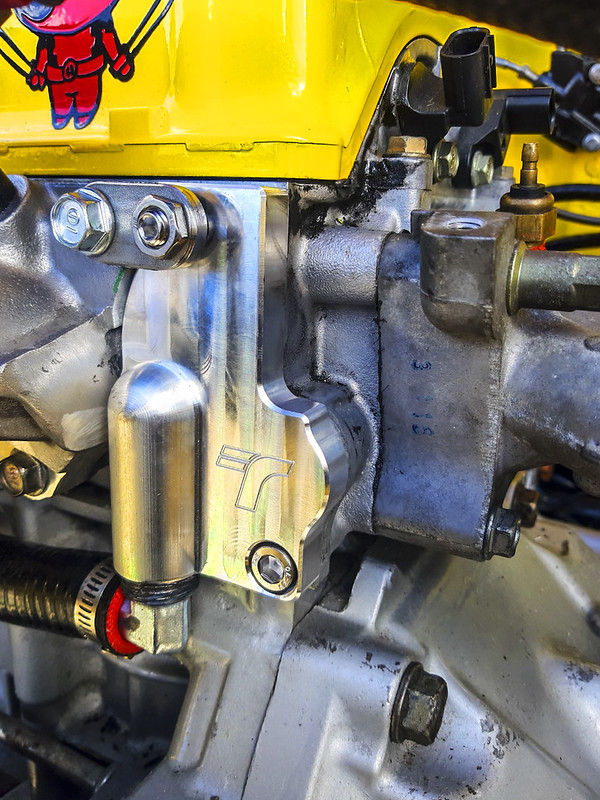
He wasted no time and had the billet aluminum piece fitted to the head…

In the spirit of buttoning up everything in the coolant department, Leon took this time to swap out his radiator fan for a high flowing Spal unit…
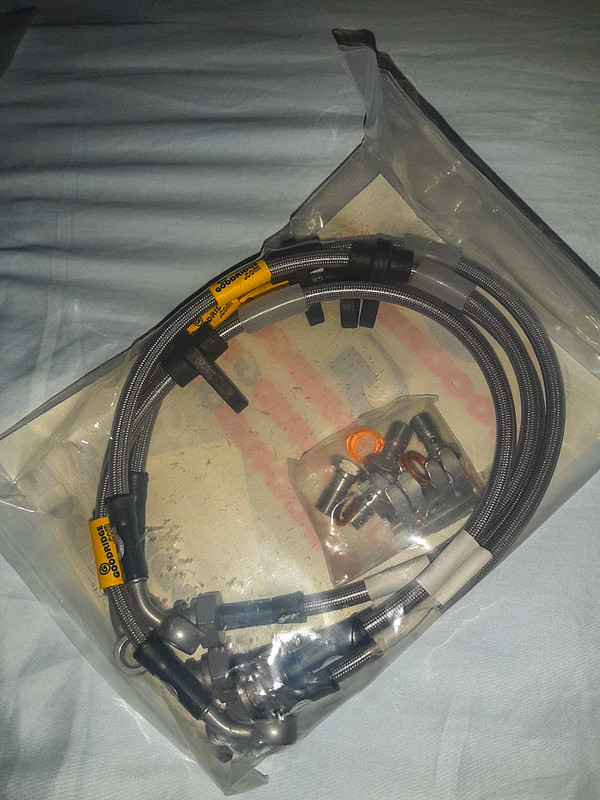
Also arriving was the final piece to the braking system. A set of Goodridge steel braided lines for both the front and rear…
After fitting the brake lines, Leon decided he would have under the fenders throughly cleaned…

Although it was a very tedious process, Leon went ahead and applied some undercoating to both the front and rear under fenders…

Leon made sure to bring the undercoat up to the seam which meets the engine bay…

As the days went ahead the to do list grew shorter and the engine harness was just about in the final stages of completion…

Arriving right on the time was a set of Fuel Injector Clinic 775cc E85 compatible injectors that will be used…
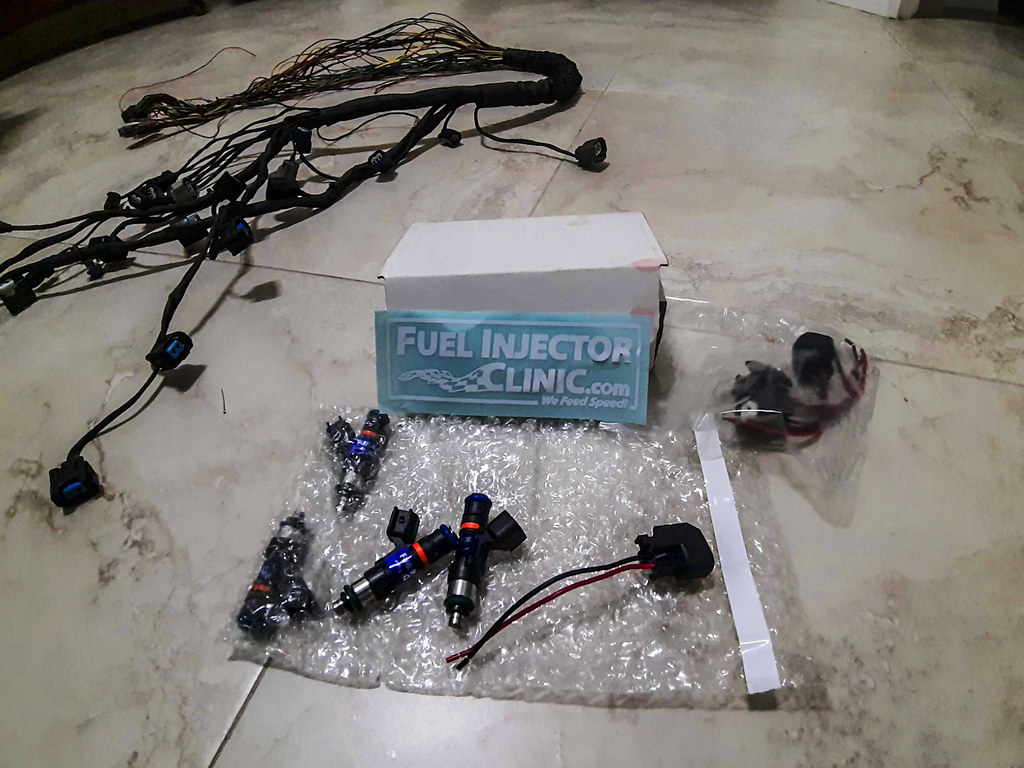
The injectors arrived with pigtails which would require wiring to the DC5 engine harness. With this out of the way the harness would be complete and ready to be fitted for the final time…
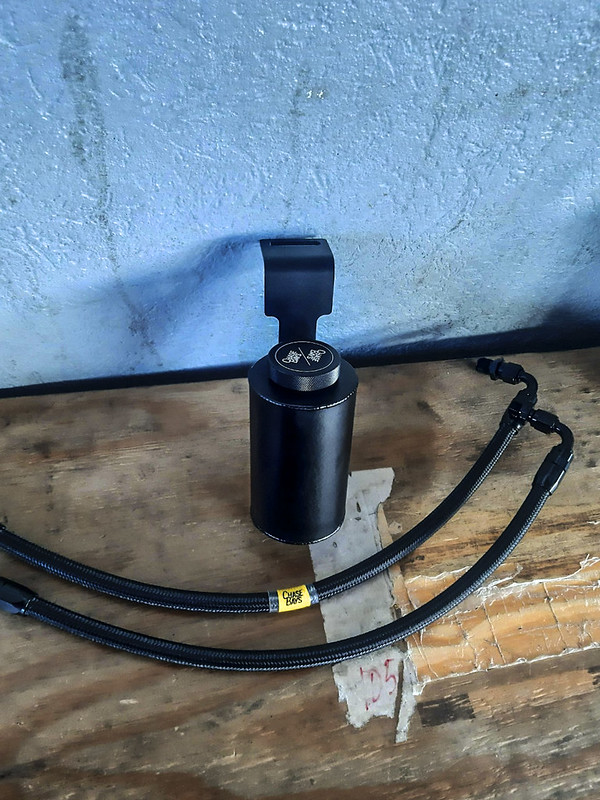
Leon was able to get his hands on a Chase Bays power steering delete…
This unit is said to prolong the life of the steering rack by allowing it to be properly lubricated and also providing a way for it to vent while eliminating any pressure within the system…

Having completed the harness it was time for Leon to swap out the stock injectors…

With the install on the FIC injectors going smooth, Leon was in a good place. He had basically reached the end of the component refresh portion of his build. The most challenging was the bay, after receiving a fresh motor Leon paid close attention to detail all the way through to deliver what would be his reimagined engine bay vision going forward. A great comeback after having a damaged motor and seeing several stages of frustration throughout the process. Leon cleared his mind and focused on the tasks at hand. In doing this, the entire chassis received the necessary attention with the a full rework of the suspension components. As the end drew near, Leon was ready to tackle the last and final hurdle…

The car was just about ready to hit the streets after he fitted the remaining body pieces together…
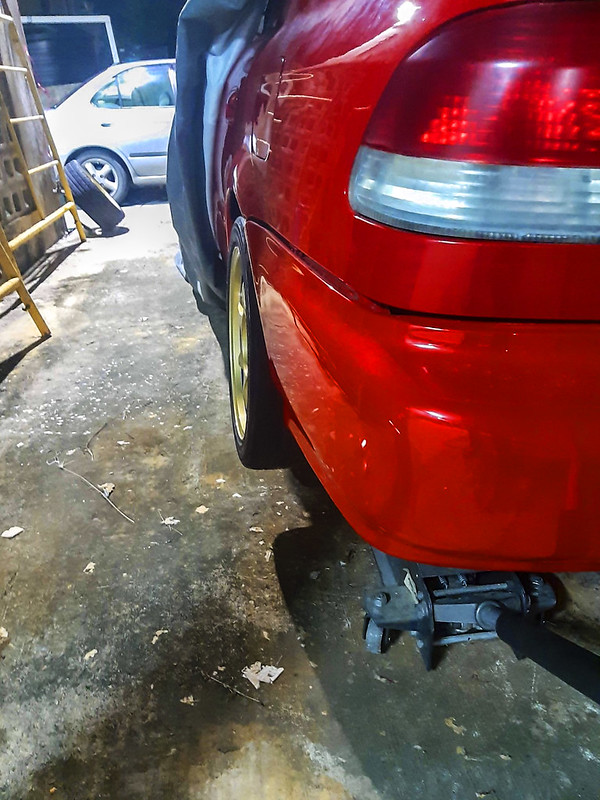
Thus far Leon was bent on a makeover and that also extended to the exterior of the car. With the likes of a fresh rebuild from top to bottom, he was not about to leave the previous styling intact. The first thing to go was the front bumper, which was swapped for a one without mouldings…
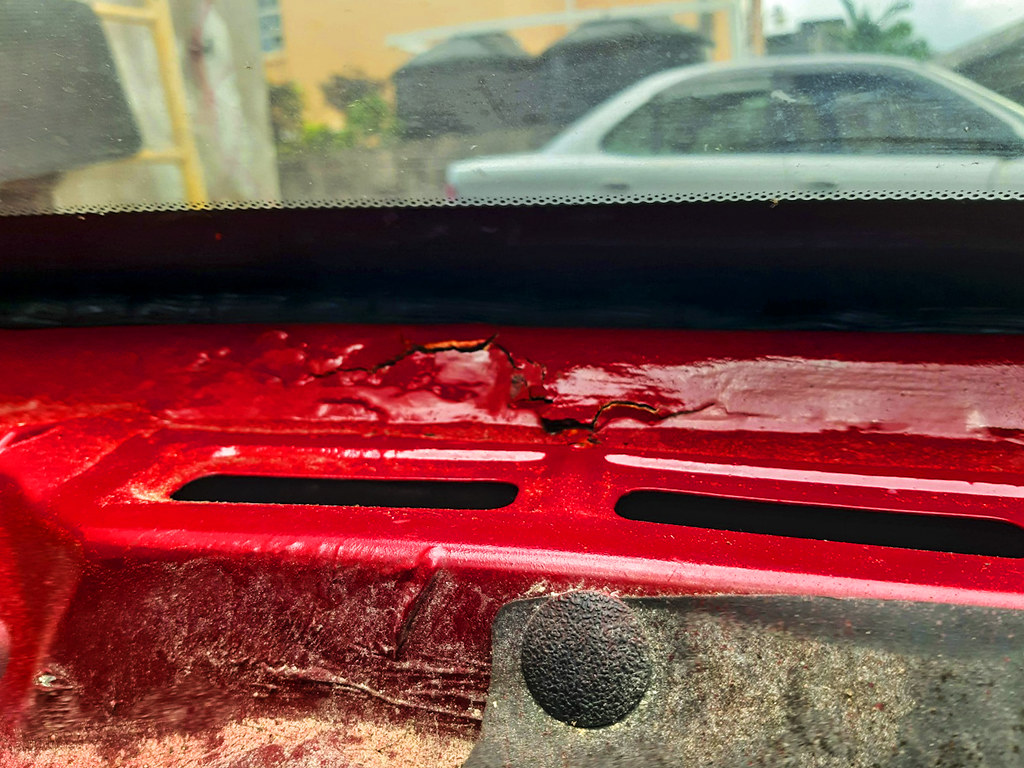


Throughout the rebuild process the car started to show some signs of rust. The many years of natural wear and tear was starting to make an appearance. So the next stage was basically inevitable; Leon contacted a bodywork guy to have these rusted areas addressed before they get out of hand…

Upon securing a time slot, the car was collected to be dealt with…
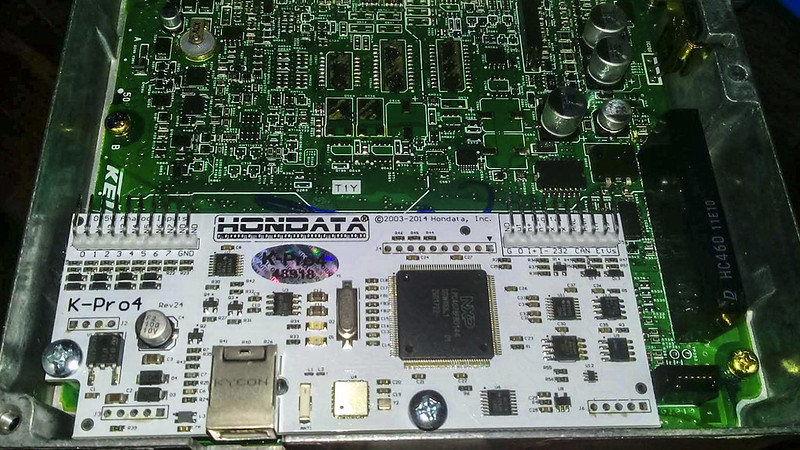
Previously, Leon had a Hondata Version 3 but unfortunately the case was damaged. Not holding back thus far, he took the opportunity to upgrade to a Version 4 board. The unit had finally arrived which would be great for when the car returns from body work.
That’s it for today’s post, thanks for taking a look at Leon’s K-Swapped EK4 build. Stay tuned for more to come on this build as it progresses.
