
Sol’s AE86 Build… Part 2
Even though I’m focused on bringing new content of upcoming builds throughout the island; there are some builds which have been stagnant, and a prime example of this is Sol’s AE86 Levin.
Sol has spent a significant amount of time between updates not only building but also driving several of his many projects that have came and gone since. Having a build that was and still is very dear to him results in the process being a bit more time consuming. One can speculate by saying this is partially due to wanting the execution to be absolutely flawless. Being one of the few builds with sentimental value, the decision making evolved over time and by extension caused the plans to follow suit. Sol is constantly discovering new ways to present what is felt when thoughts arise in relation to AE86 chassis; and its legendary status not just on an international level but more so from a personal standpoint. The 86 Levin was the car that drove his passion for motorsport and Sol maintained that the execution not only had to be aesthetically pleasing but also functional. In the past Sol has been through a host of reliability issues and determined not to go back, he wanted to make sure it will be strong enough to take the abuse that will be coming its way.
Along with the amazing restoration job the guys at Corbin’s Garage did on his Supra there were other reasons as to why he chose them. Renowned across the island for predominantly dealing with older Toyota chassis in regards to producing well balanced performance cars; ranging from street to circuit to rallying and being extremely successful within their disciplines. These were the guys Sol needed to aid him in bringing his goal of a reliably built, well balanced car to fruition.
Having selected what in Sol’s mind were the perfect guys for the job, we’ll be taking a look at some of the crucial work they put in while preparing the chassis for the profound motor plans.
For those of you who are interested in the background story and wanting to follow this build from the beginning, I’ve provided the link below:-
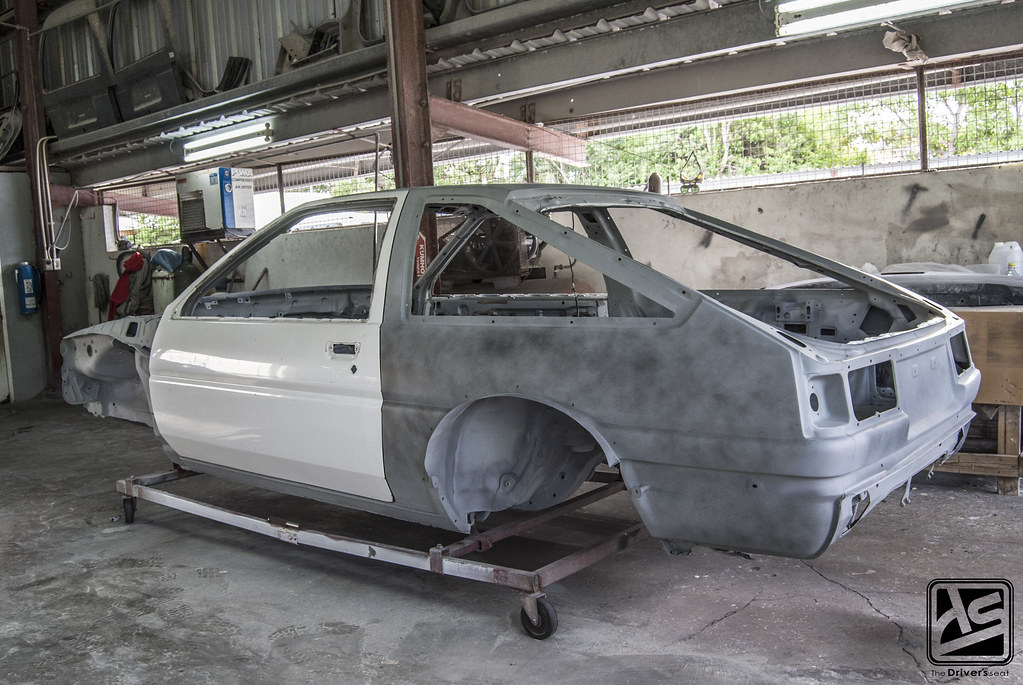
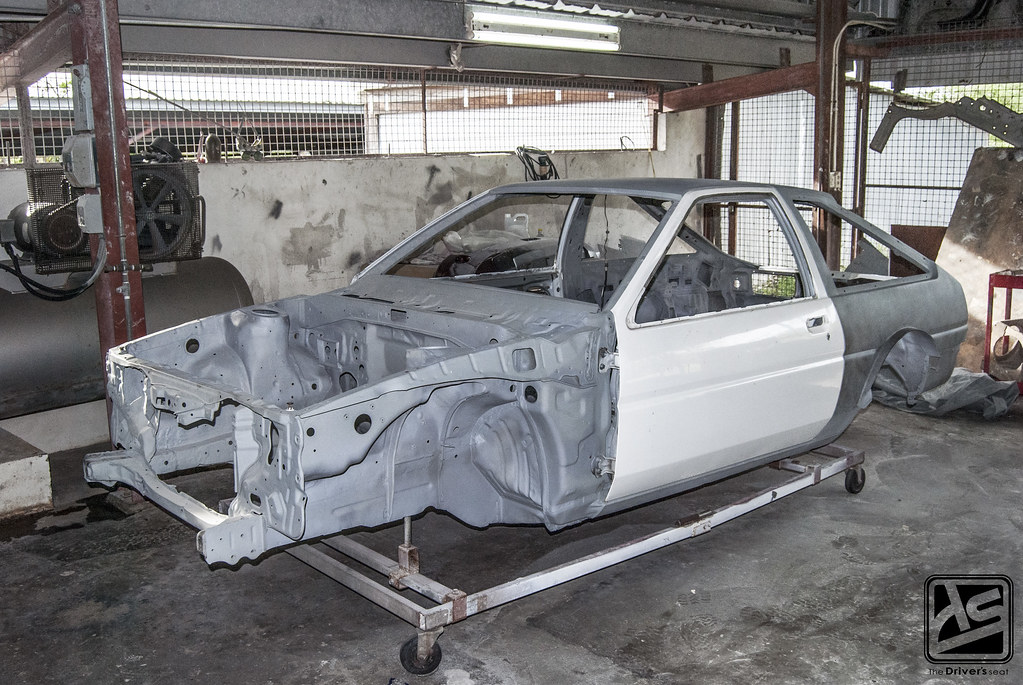
Picking up where we left off over at Corbin’s Garage, the test fitting on the CBY bodykit was successful and the guys pulled the car apart in preparation for the next phase…
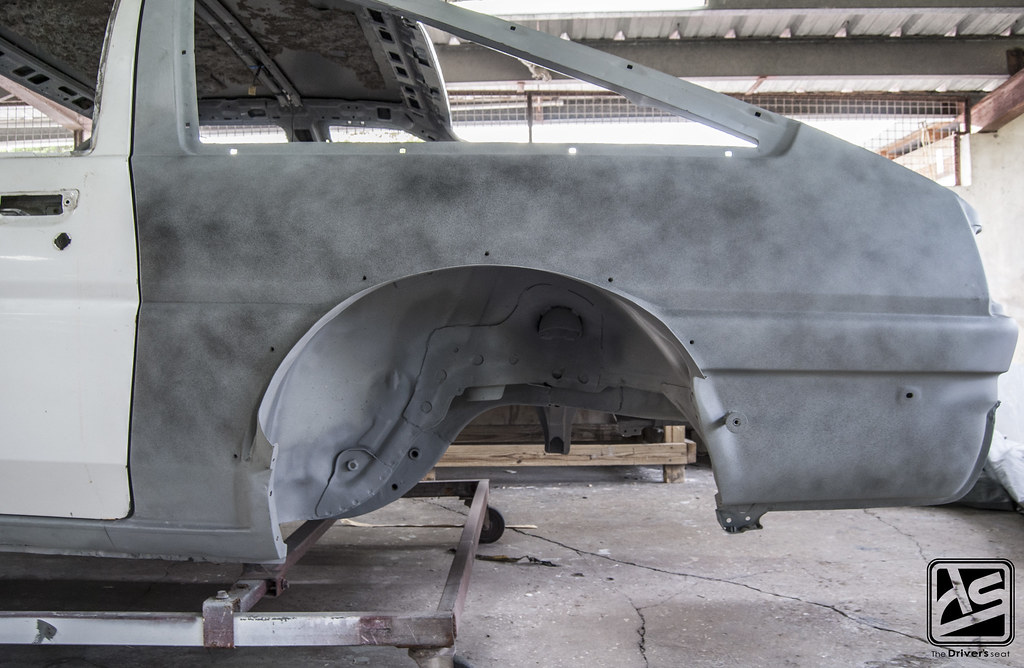
A look at the rear arch which was cut and extended to fit flush with the CBY fender flares…
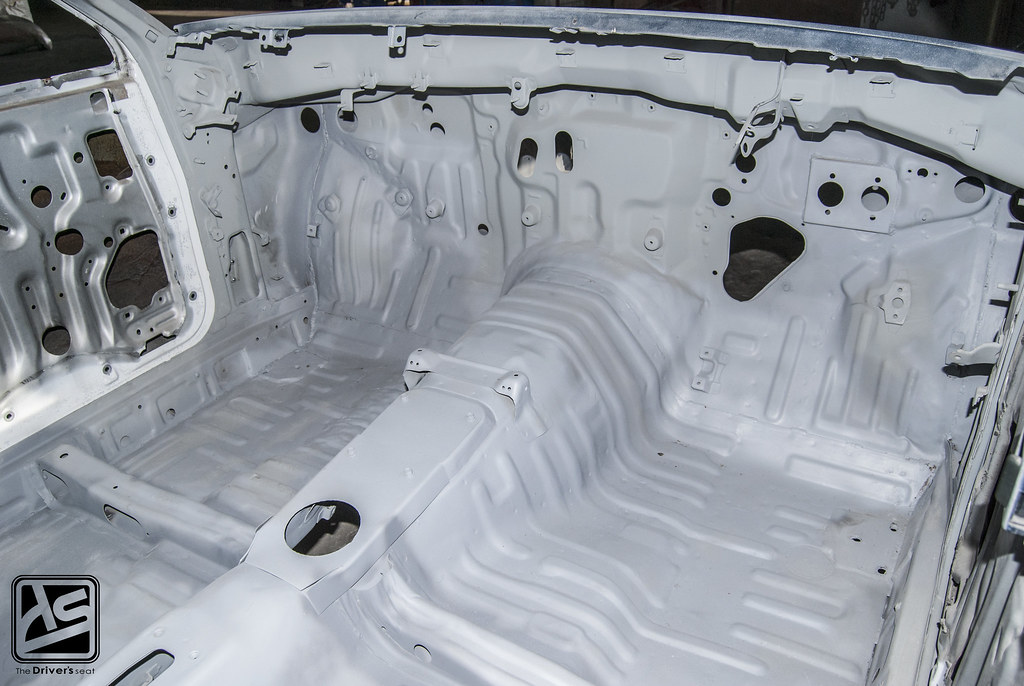
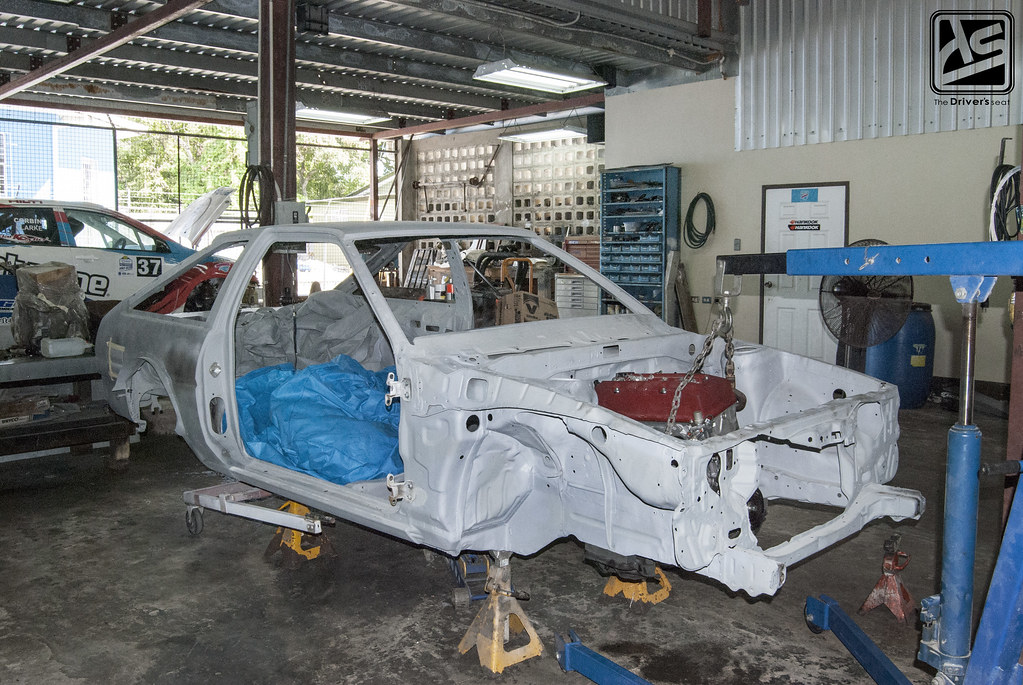
A look at the gutted and primed interior along with the naked front end of the AE86…
Those who were following from the beginning would have seen the car with a SR20DET conversion. Sol has several plans for the car moving forward, firstly it must be able to maintain the ability to drive on the street similarly to how it once did before. However, he would also like to attend some track days and intends on drifting the car as well. In having the car torn completely apart the guys started doing some research on the necessary upgrades for the SR20 that would allow for the plans ahead. Upon doing the research, he discovered the SR20 platform proved to not only be quite costly but also to have questionable reliability. Not wanting to be back where he initially started, Sol was now on the hunt for an adequate motor package…
Around this same time Sol owned a Honda S2000 and had a spare stock F20C lying around and began some research on what would be necessary to execute the conversion along with the pros and cons associated. His main focus was reliability, and already owning the S2000 he was familiar with the characteristics of the motor. Digging a bit deeper would reveal there were several swap kits available for the AE86 chassis, making the decision unanimous. Alas plans would be back on track with his halo car as he placed a few orders to begin the conversion…

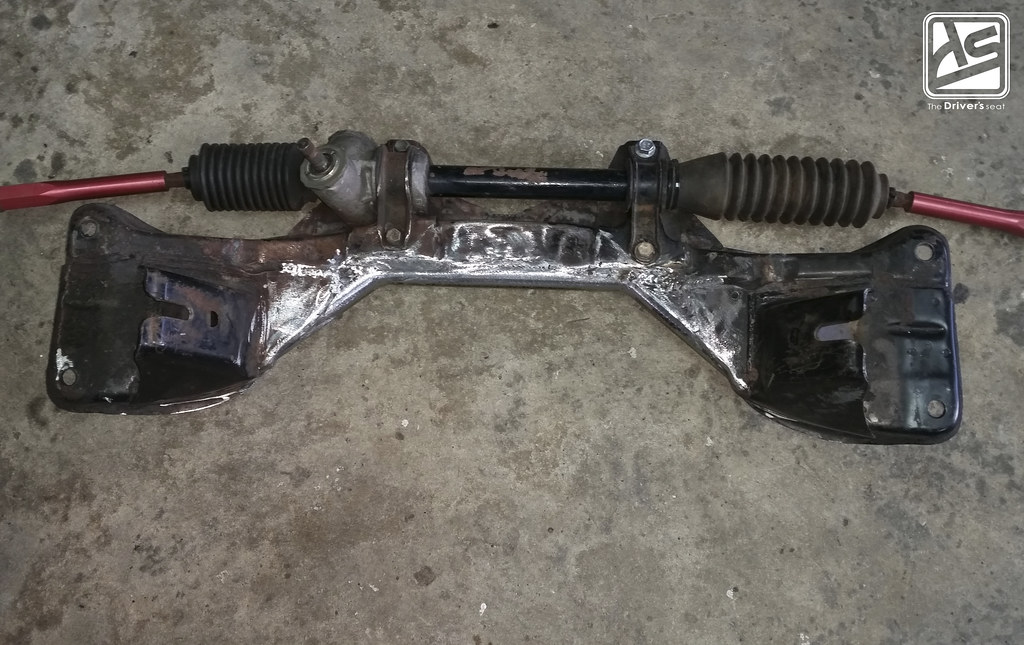
It wouldn’t be as simple as bolting on a few extras, the factory AE86 subframe would require some modifications to execute the F20C swap…

One of the key pieces to the conversion is the subframe spacer kit from JSP Fab…
For optimal positioning on the motor, the subframe would also require some structural modifications…
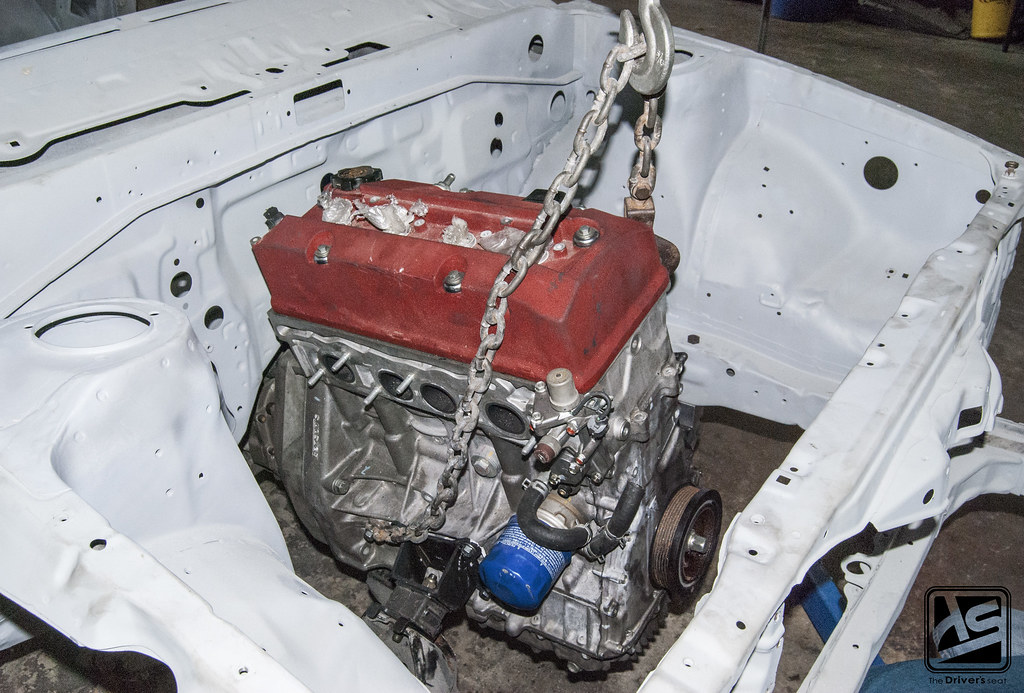
As the guys prepared the chassis for the F20C motor, the plans changed once again. Unfortunately the S2000 was involved in an accident at the track and Sol was uncertain on the plans for it. A decision was made to remove the motor and gearbox assembly as it would be perfect for the Levin project…
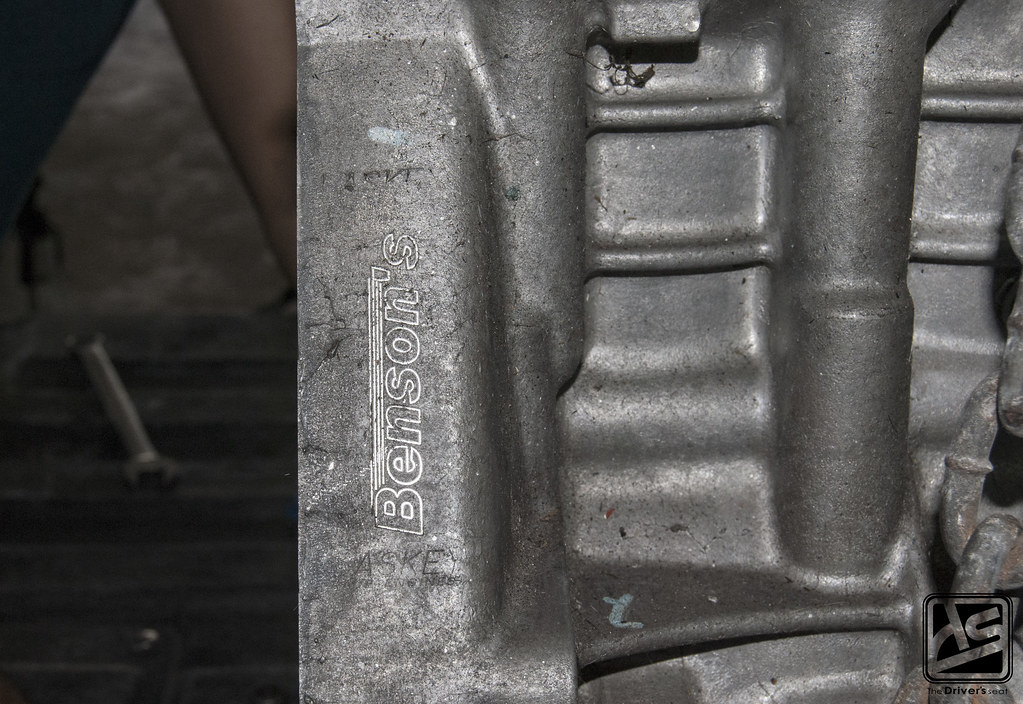
The S2000 was previously supercharged with a built F22C Laskey Racing motor with Benson sleeves. Things were looking good for the AE86 with the addition of a built bottom end capable of 750hp. The guys loaded up the swap and headed over to Corbin’s garage; where they can do some test fitting in order to begin the fabrication process on the subframe and any additional components…
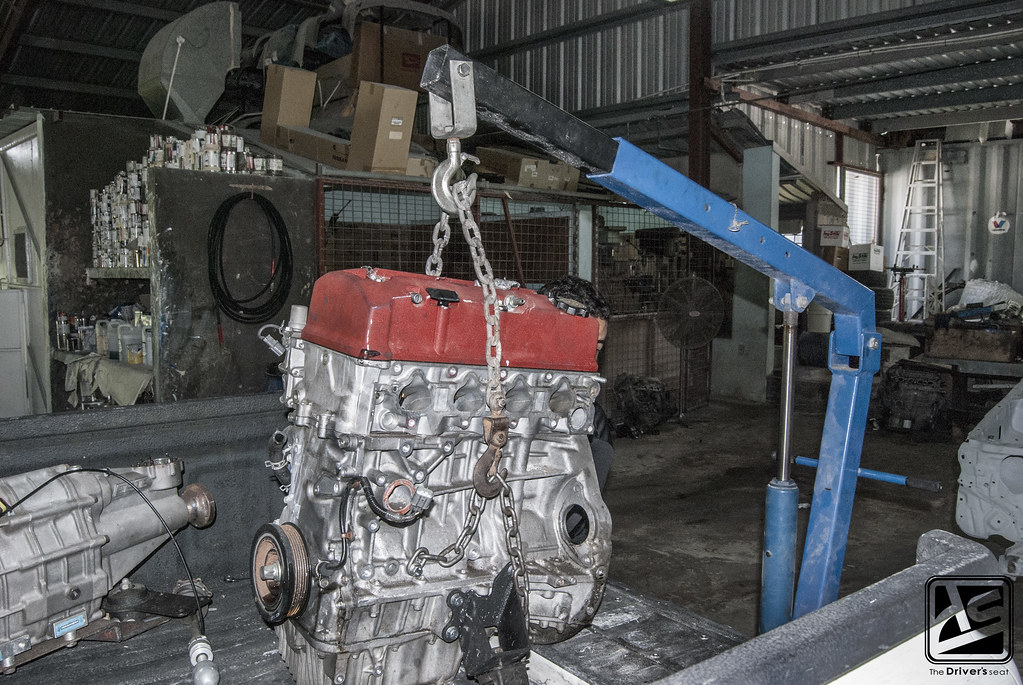
The Laskey F22C motor being removed from the truck for test fitting…
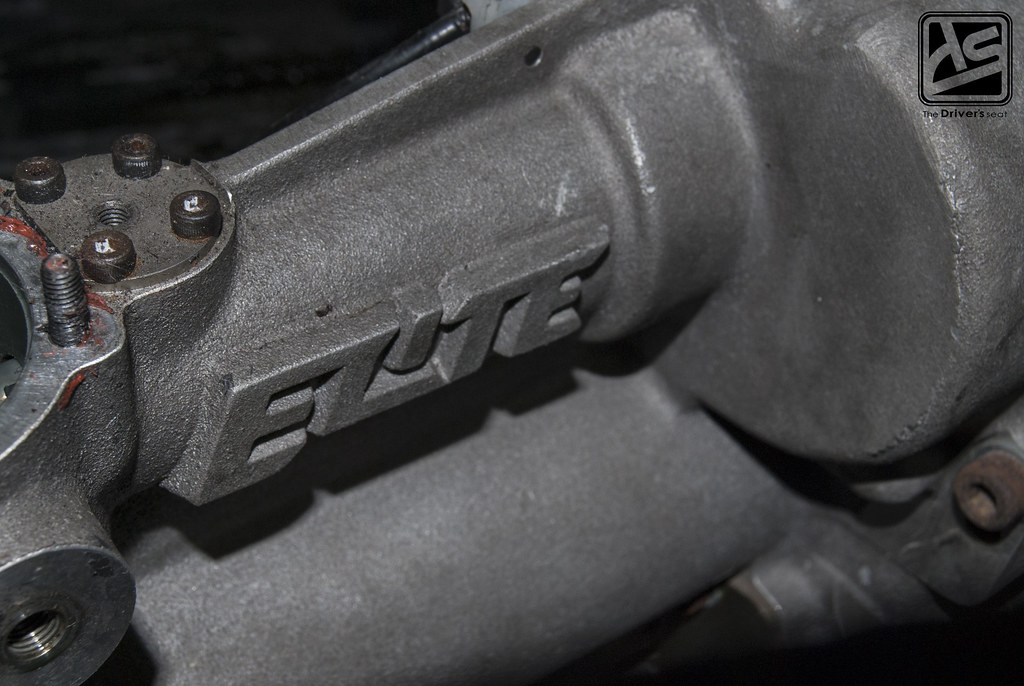
Previously the guys were having some gearbox issues after they put the supercharger on the S2000. After breaking a few of them they opted to purchase a Elite Racing IL300 sequential gearbox with a custom input shaft…
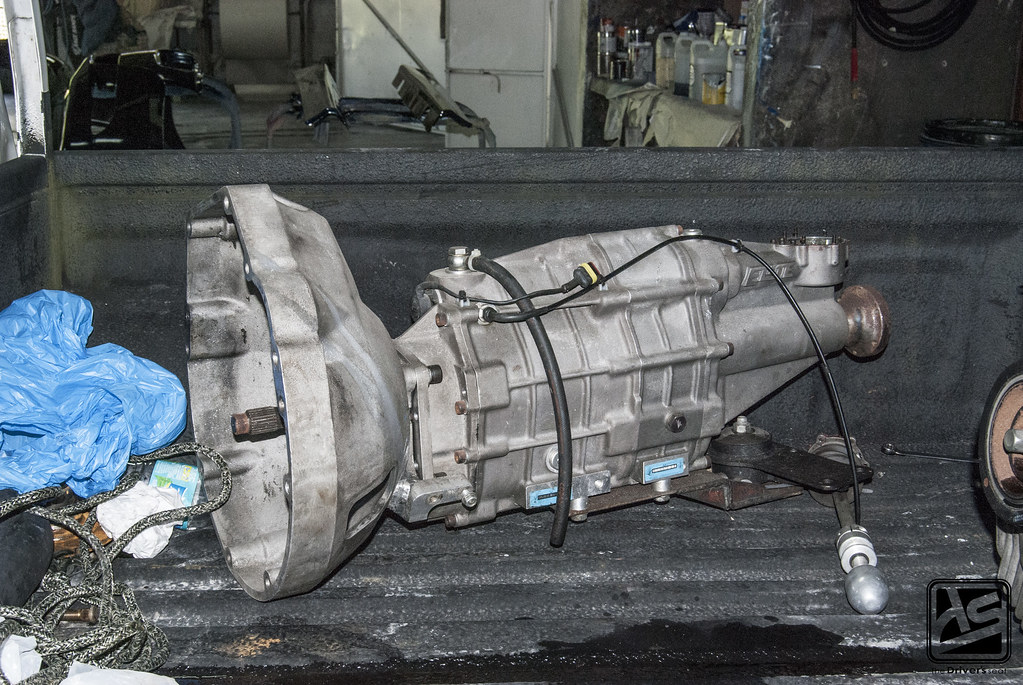
In addition to this, a bell housing to adapt between the gearbox and motor was purchased. The guys thought, given the purpose of the build this gearbox would be the perfect match…

A close up on the sequential shifter…
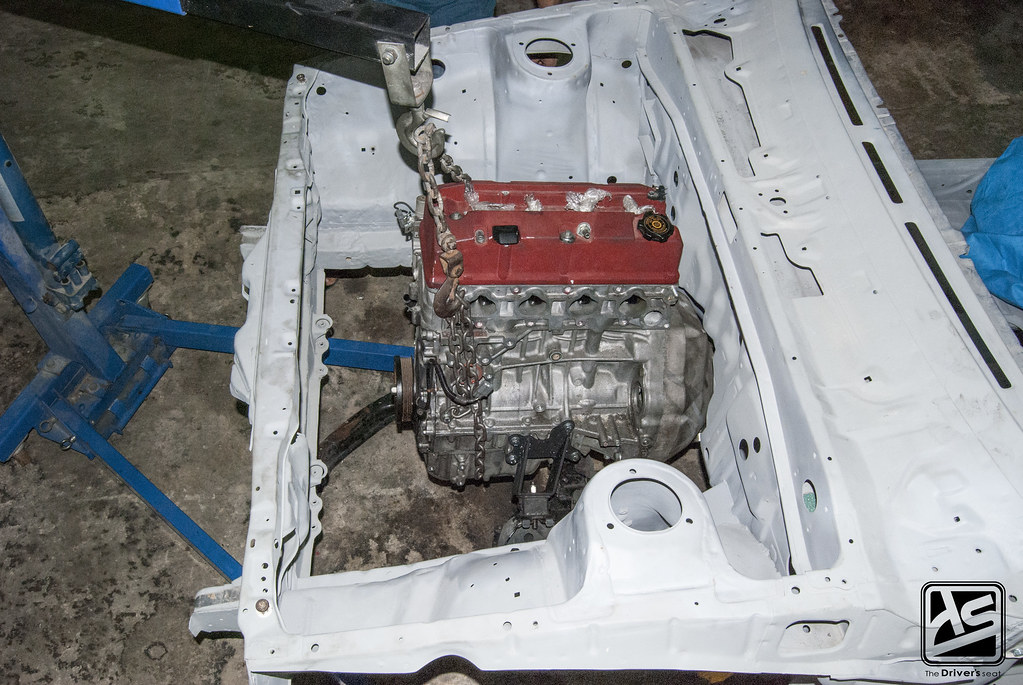
After some very skilled maneuvering, the guys were able to get the F series motor and Elite Racing gearbox fitted within the bay…
Taking a step back to soak in the dream as it started to come together…
Having driven the S2000 with the supercharger, Sol still wasn’t quite satisfied with the performance. With this build he opted to take things to another level and pair the motor with a turbo to adequately suit his power goals…


The guys turned to JSP Fab once again and purchased their turbo manifold with a 4 bolt turbo flange and a v-band wastegate flange…


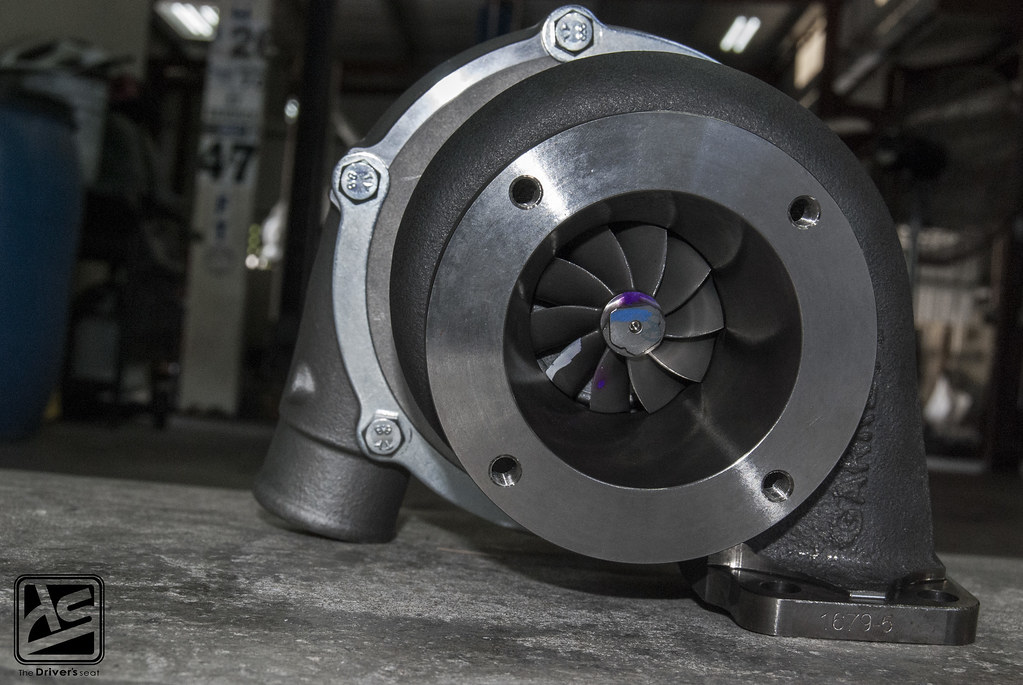
The turbo of choice was a Garrett 3076, this would be great for response while still being able to deliver the power the guys are chasing after…

With the motor in the bay the guys couldn’t resist test fitting the JSP Fab manifold and turbo setup…
The test fitting was extremely useful for the guys at Corbin’s Garage and they immediately went to work on getting things in order…
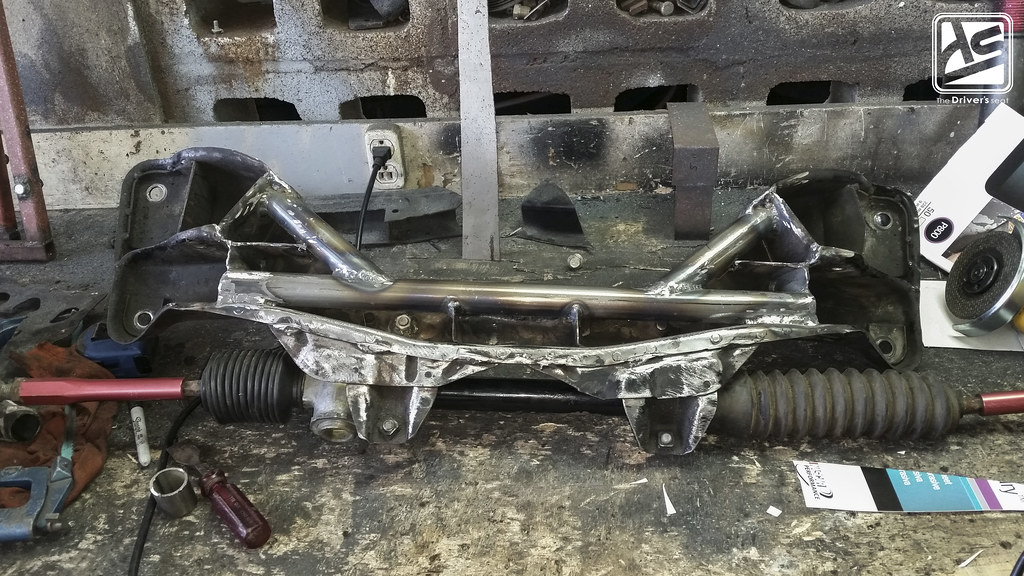
Having the motor in place, the guys took the necessary measurement and began the fabrication process on the subframe. After finalizing the shape required to house the F series motor, the factory unit would now require reinforcement. Some steel tubing was added to the underside and plated for additional stability…
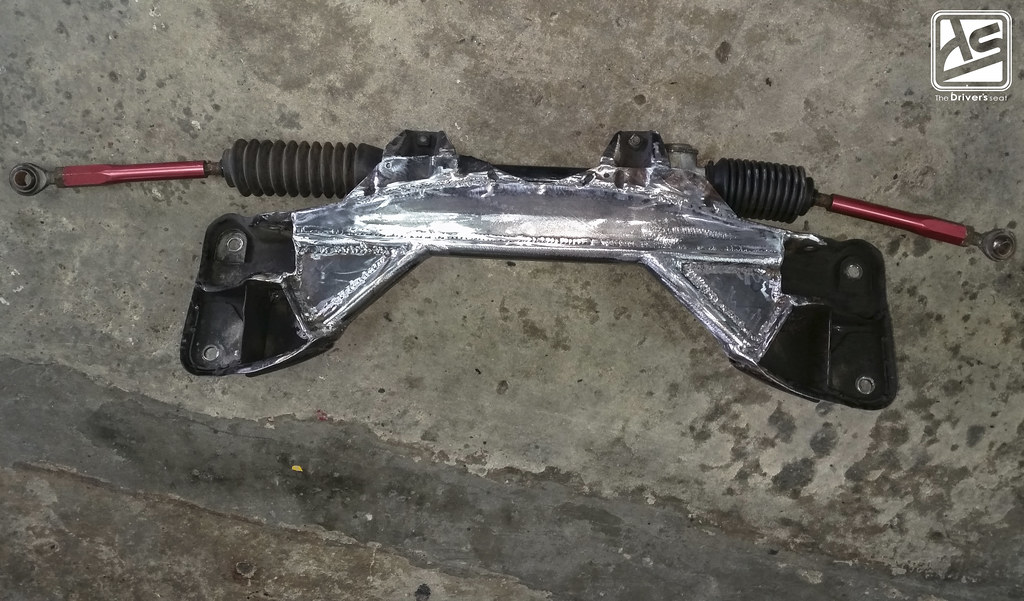
A look at the completed subframe after being boxed both top and bottom…
The guys bolted up the subframe to ensure the fitment was ideal and there weren’t any clearance issues between key components. Confirming that everything was successful, it was time to tackle the next task at hand…

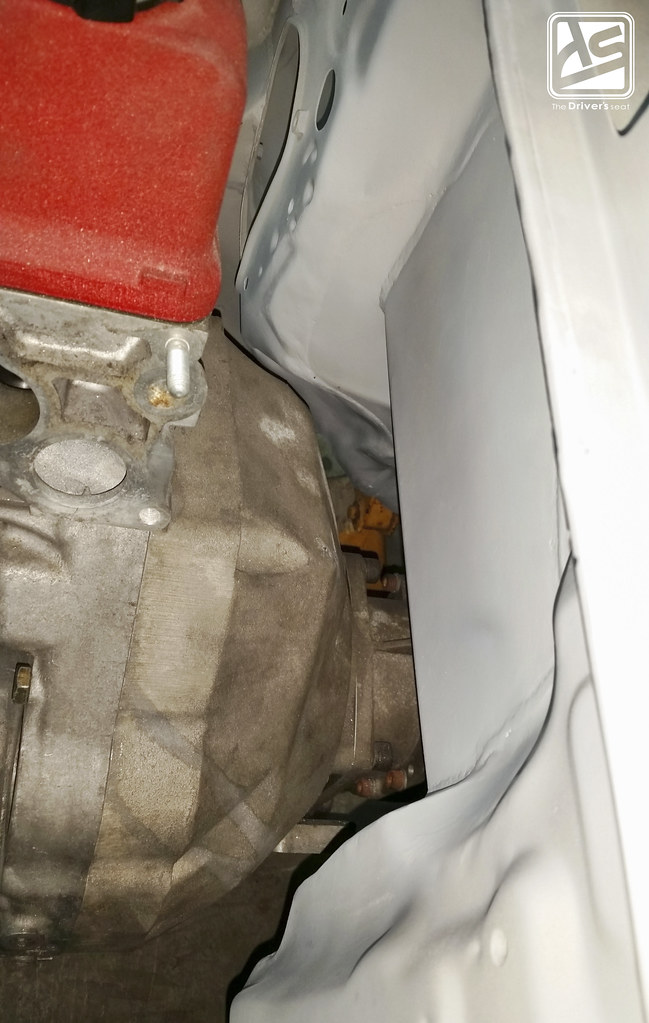
When the motor and gearbox assembly was initially fitted, there were loads of clearance issues with the factory tunnel and the Elite Racing gearbox…
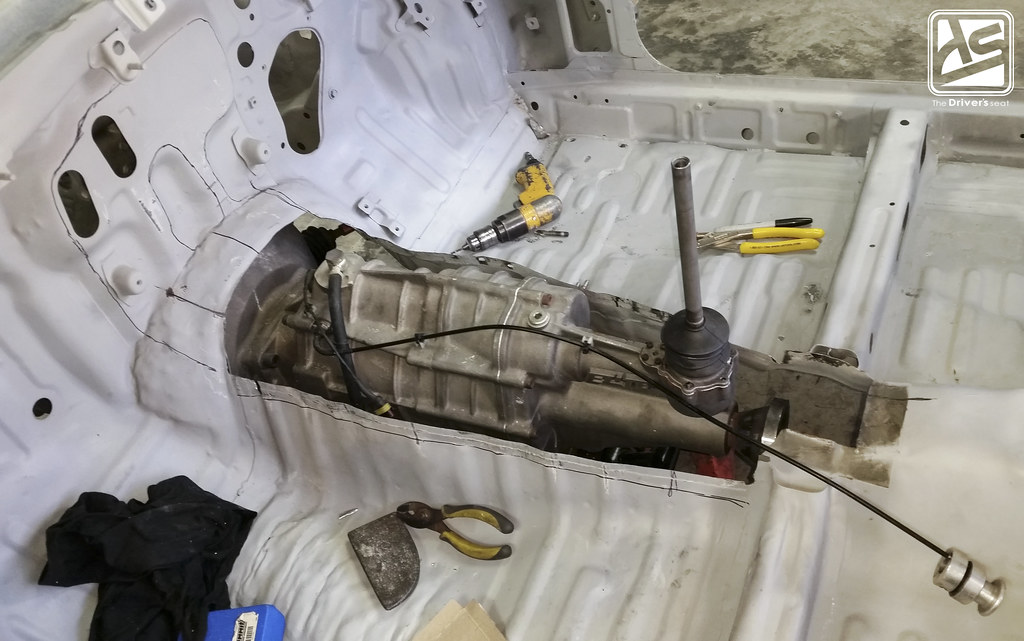
Given the level of modifications required, a decision was made to remove a large portion of the tunnel and redesign it around the gearbox…
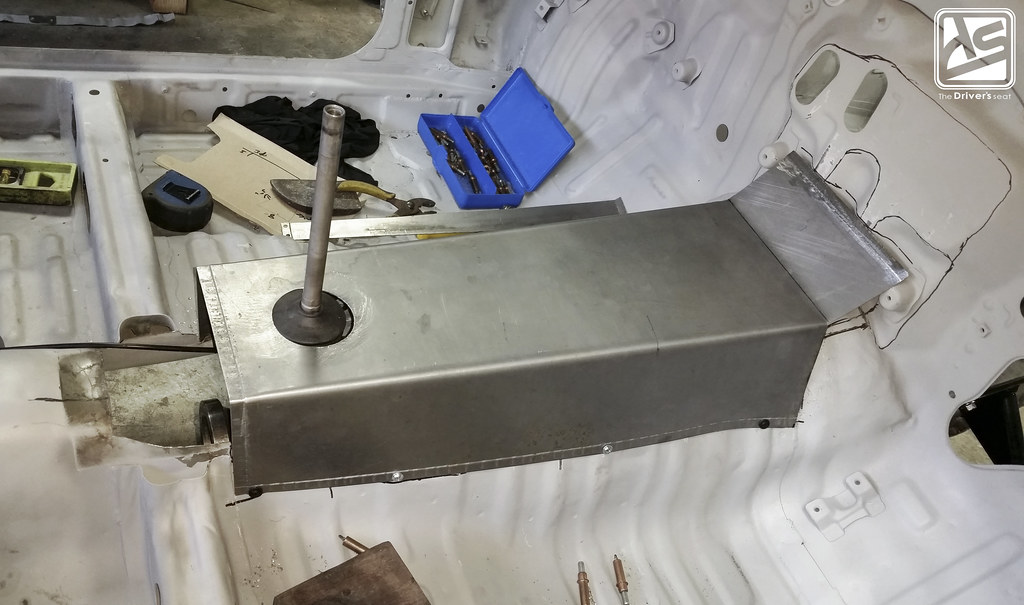
With the shifter mounted in place, the fabrication process began…
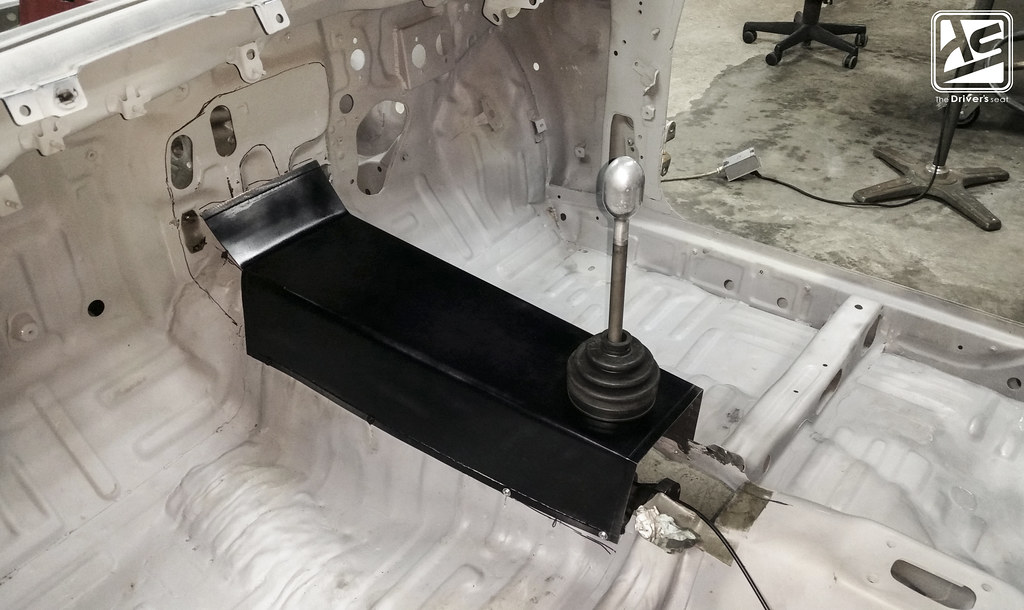
As things started to take shape, the guys went ahead and applied some paint to the first portion of the custom tunnel…

Having confirmed the shifter location during the beginning stages of the tunnel modifications, the motor and gearbox assembly was removed. With them out of the way the guys could begin work on cutting the firewall and the remainder of the gearbox tunnel…


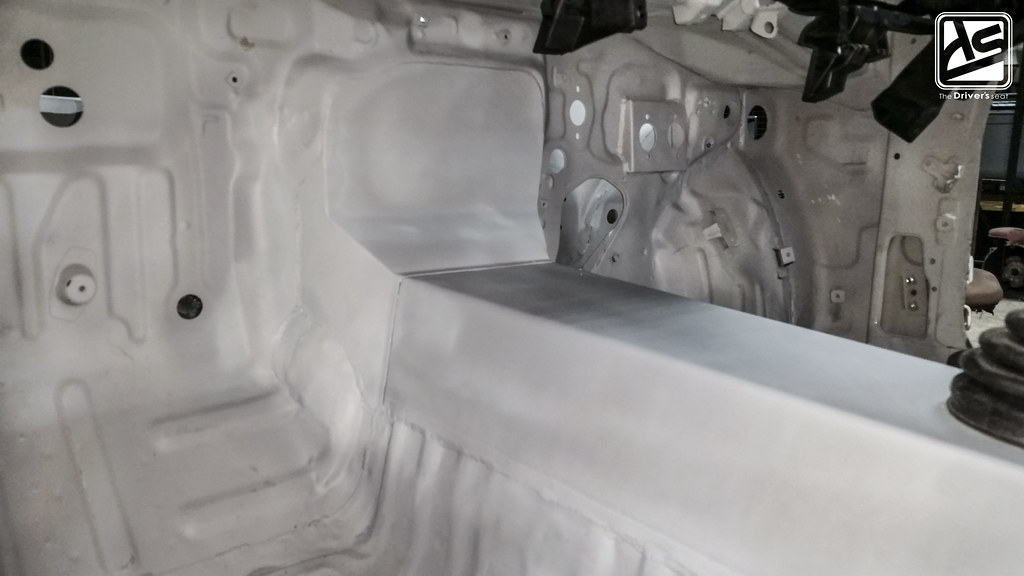
A view from the interior where you can get a better look at just how much of the factory tunnel and firewall were removed, to ensure the ease for installation and removal of the motor when necessary…

A closer look at the replacement for the firewall and tunnel as the guys rounded the edges to ensure proper fitment prior to welding it in place…


Wasting no time the firewall and tunnel sections were welded in place and the motor assembly was fitted to confirm the additional clearance that was gained…

Taking a look from the interior where you get a better grasp of how it came together…

The true test would come when fitting the remainder of the interior together…

As I mentioned prior, Sol would like for the car to still maintain somewhat of a street presence, and in doing so the factory dash will remain in place. As to the true testament of the quality work Corbin’s Garage executes, there was zero fitment issues while installing the dash…
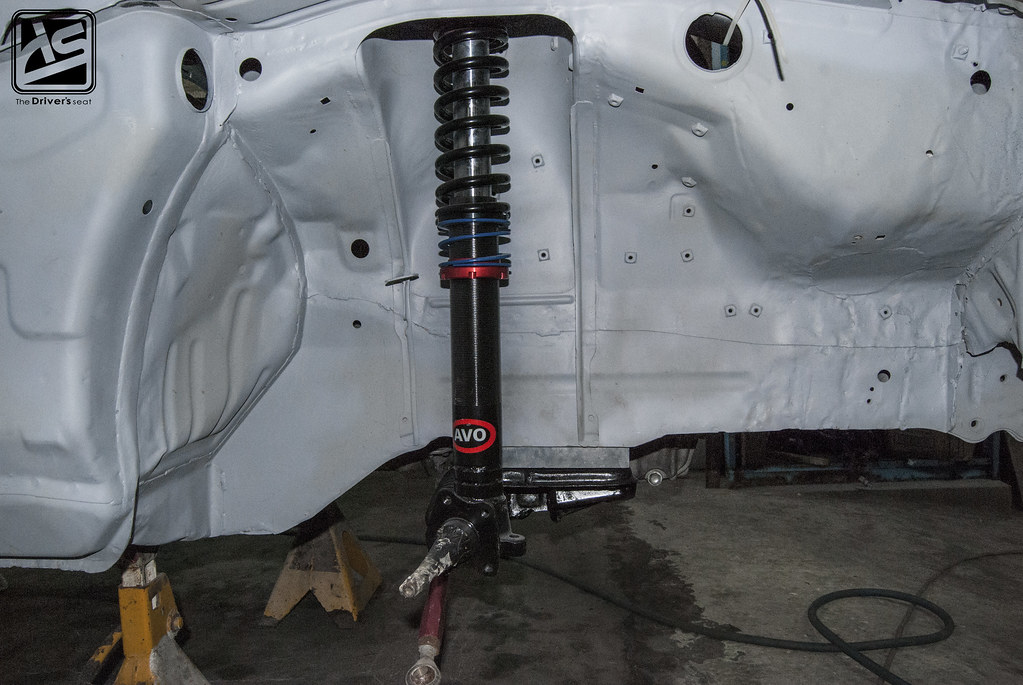
A point to note; the car previously sat on Techno Toy coilovers but with the build direction changing over time, some upgrades were necessary…
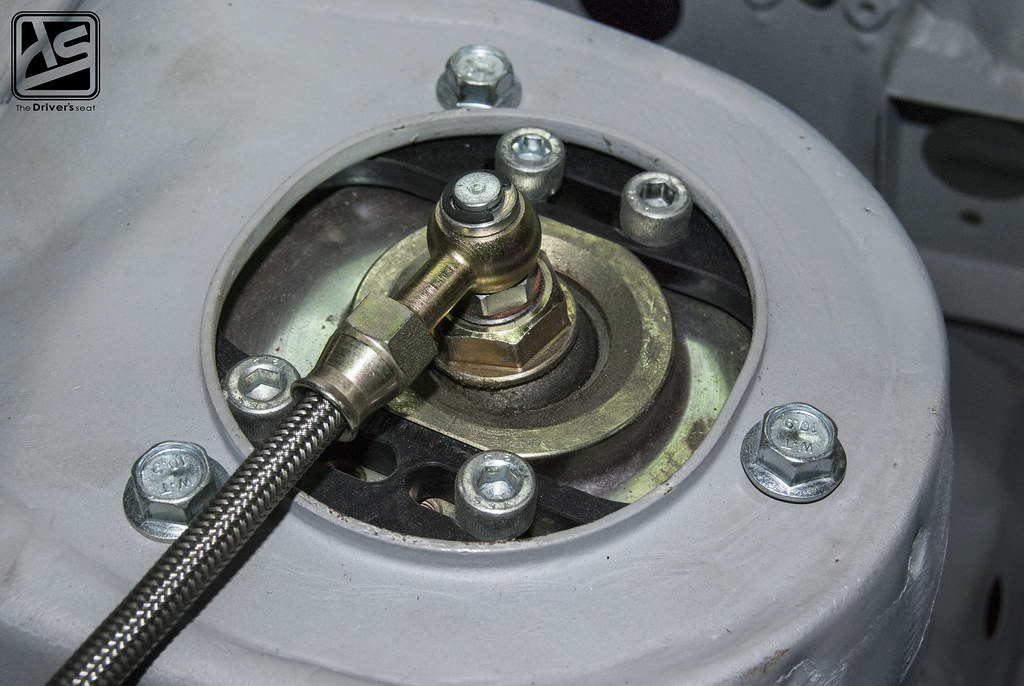
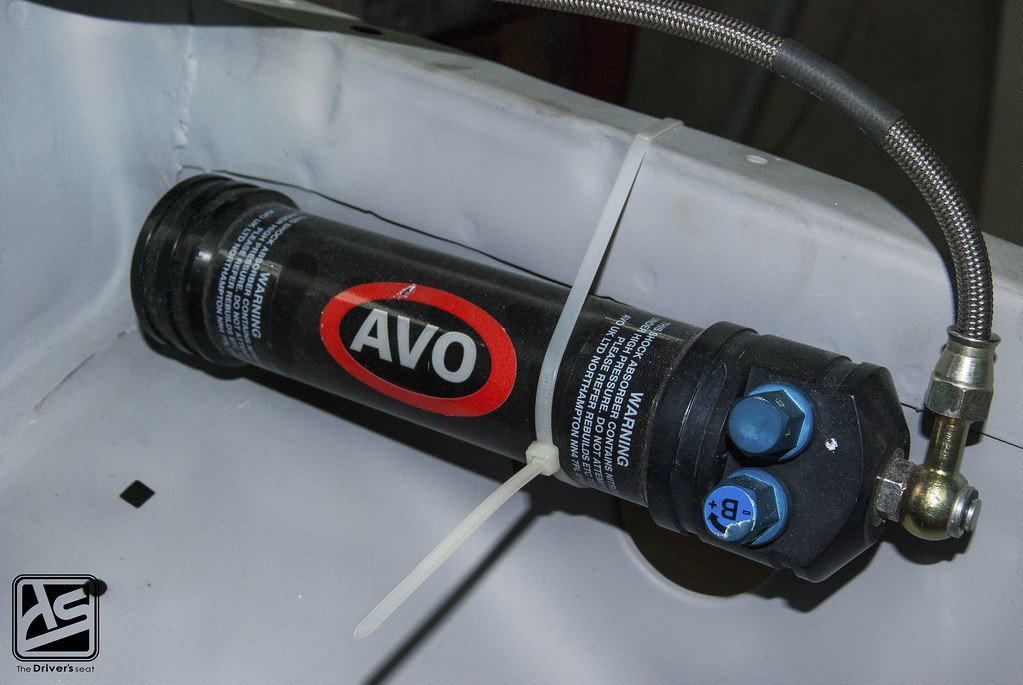
The car is intended to be used on the street, but Sol wanted to make sure when he did carry it to the track he wouldn’t lack any performance where the suspension was concerned. A decision was made to go with a set of custom built AVO R3 coilovers. These units offer a three way adjustability of compression, rebound and high speed bump control and were built around the purpose the car will be used for…
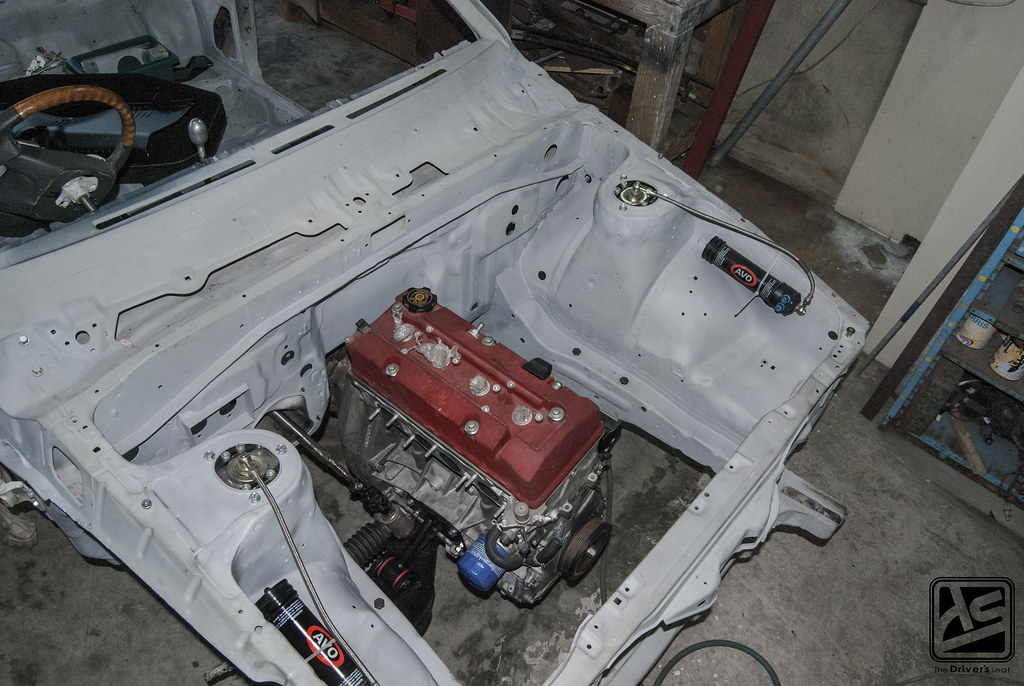
Aerial shot taken of the motor assembly fitted for the final time…

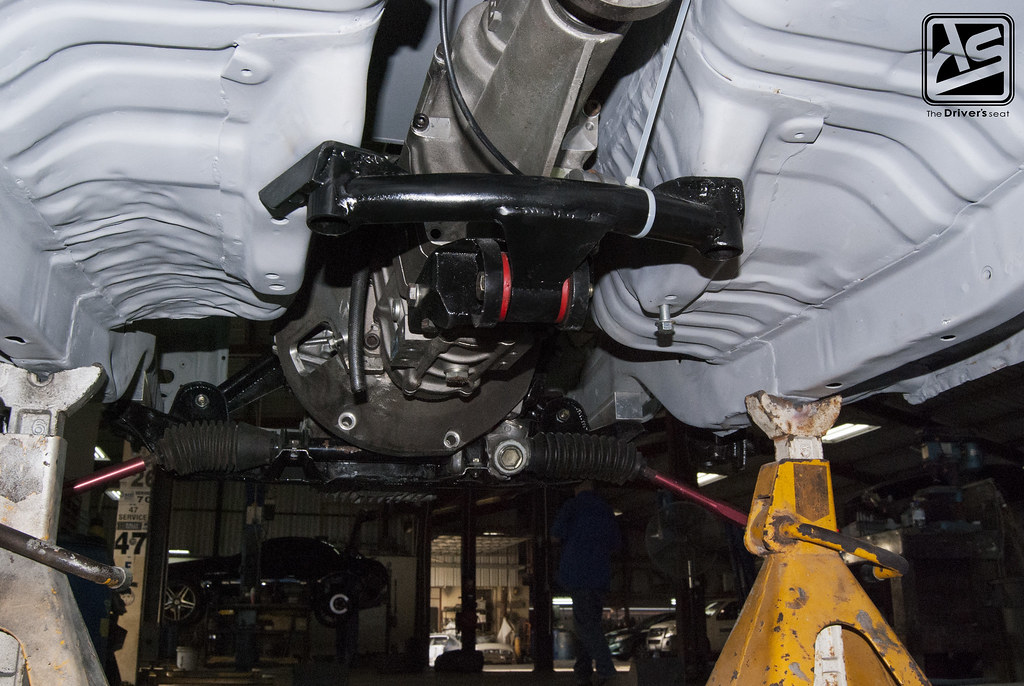
The guys really went to work on the fabrication in getting this entire assembly together. Paying close attention you will notice the steering column has been fitted to the rack…
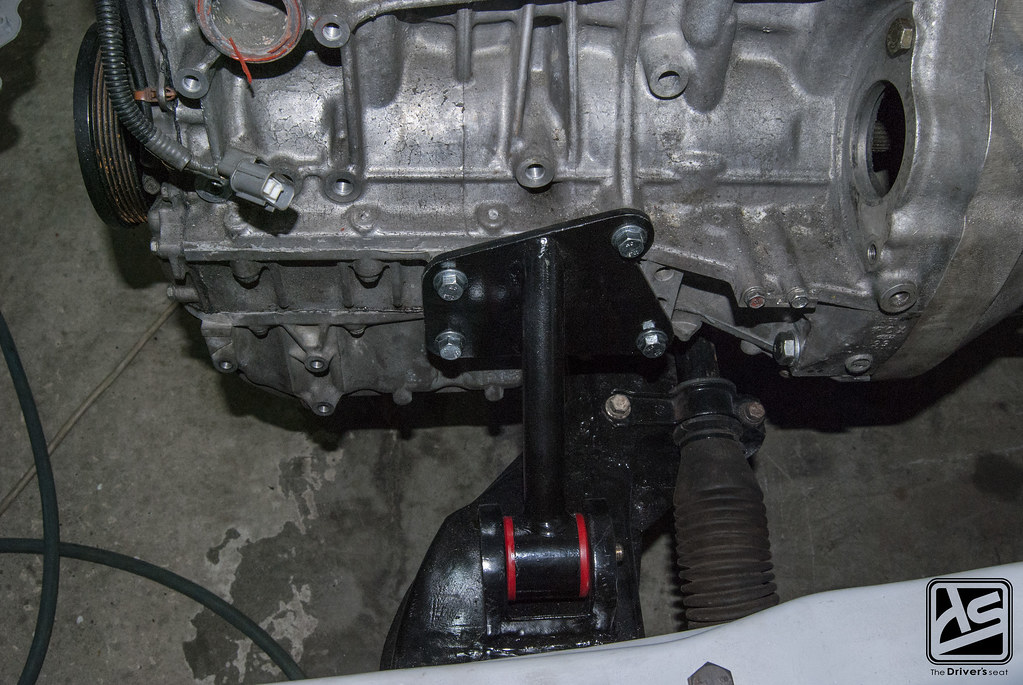
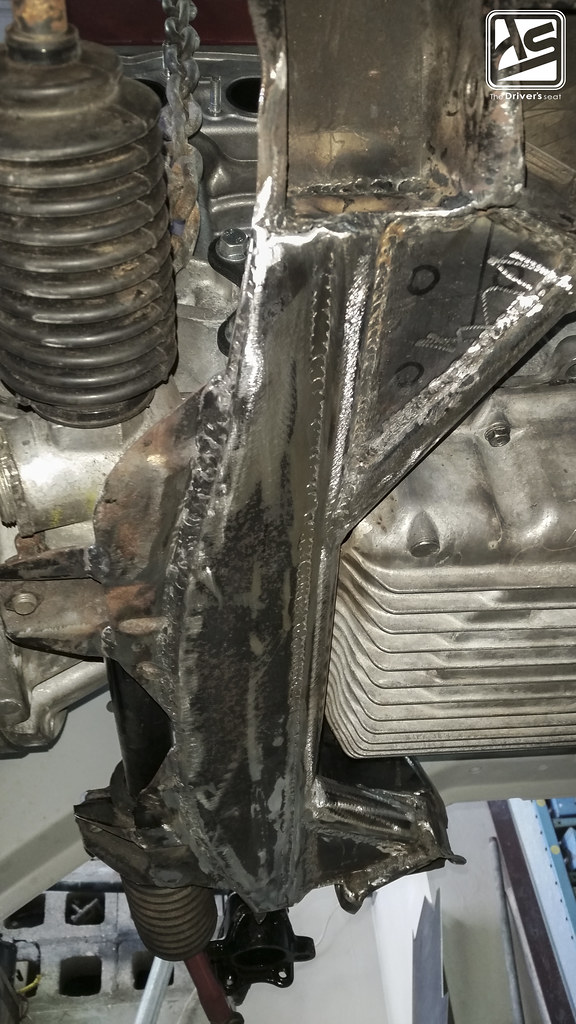
Typically the swap kits found available often reuse the OEM 4A-GE mounts. Given the application the car will be used for, the guys at Corbin’s thought the factory mounts wouldn’t be adequate enough to handle the abuse and opted to fabricate a more durable version…
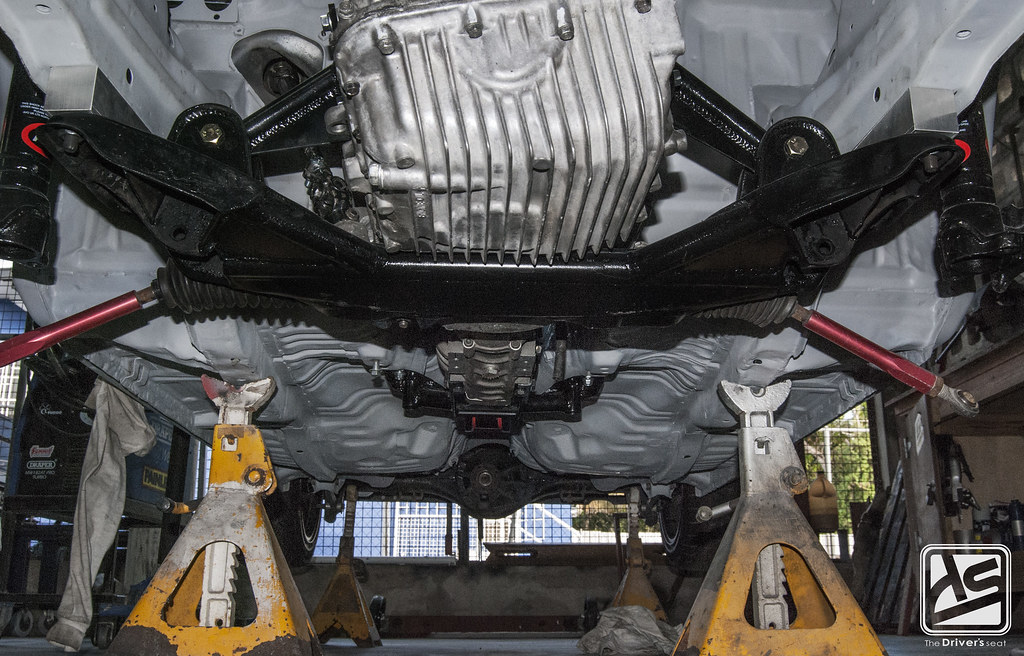
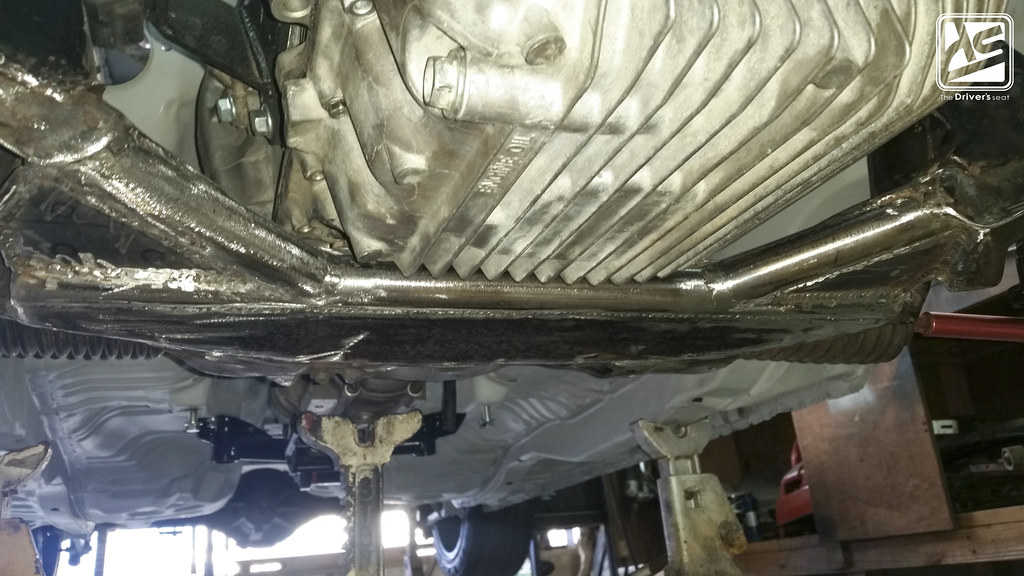
A quick look at the underside of the AE86 where the subframe and engine mounts have been coated in black similarly to the factory units…
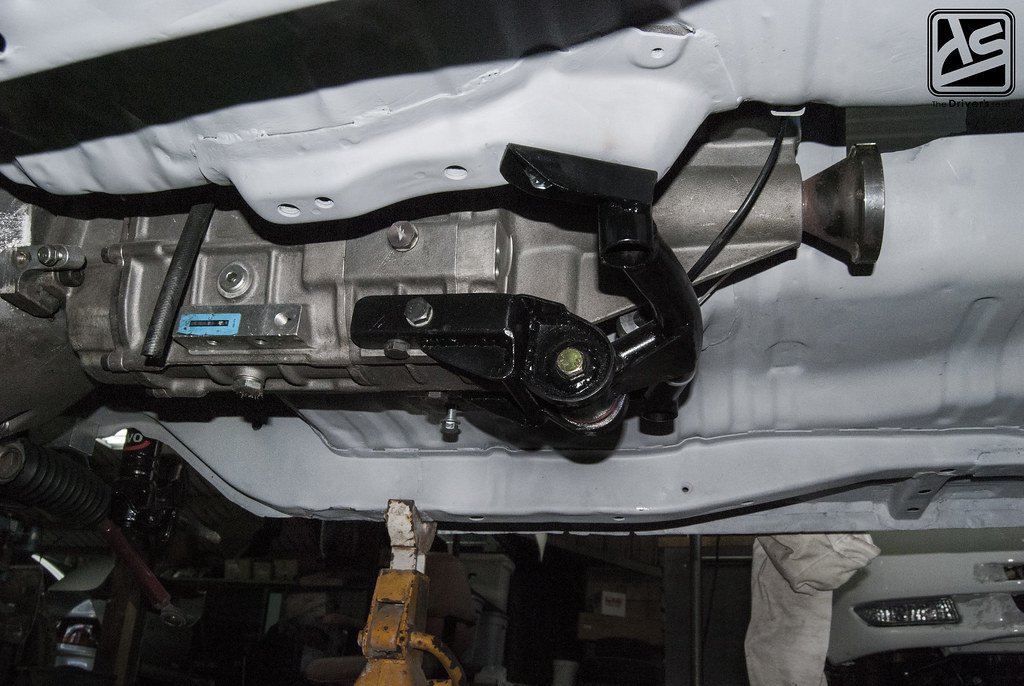
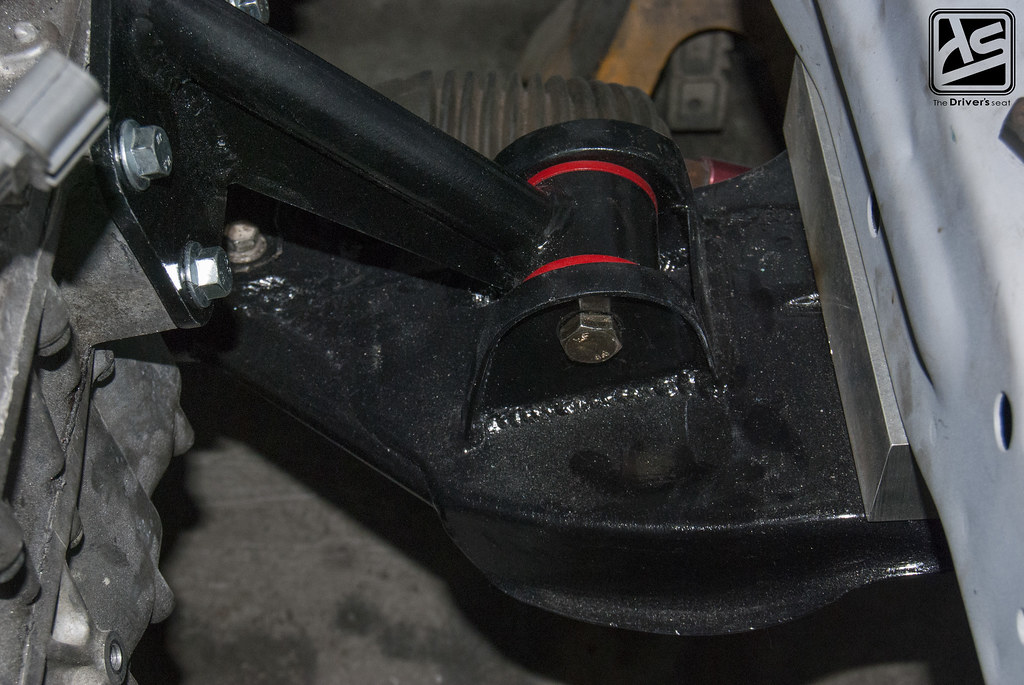
In addition to the engine and subframe, the gearbox required a custom fabricated mount as the factory one wouldn’t allow for the Elite Racing unit…
Not wanting to go over aggressive on the setup the guys made sure to add a mount insert to absorb some of the vibrations…
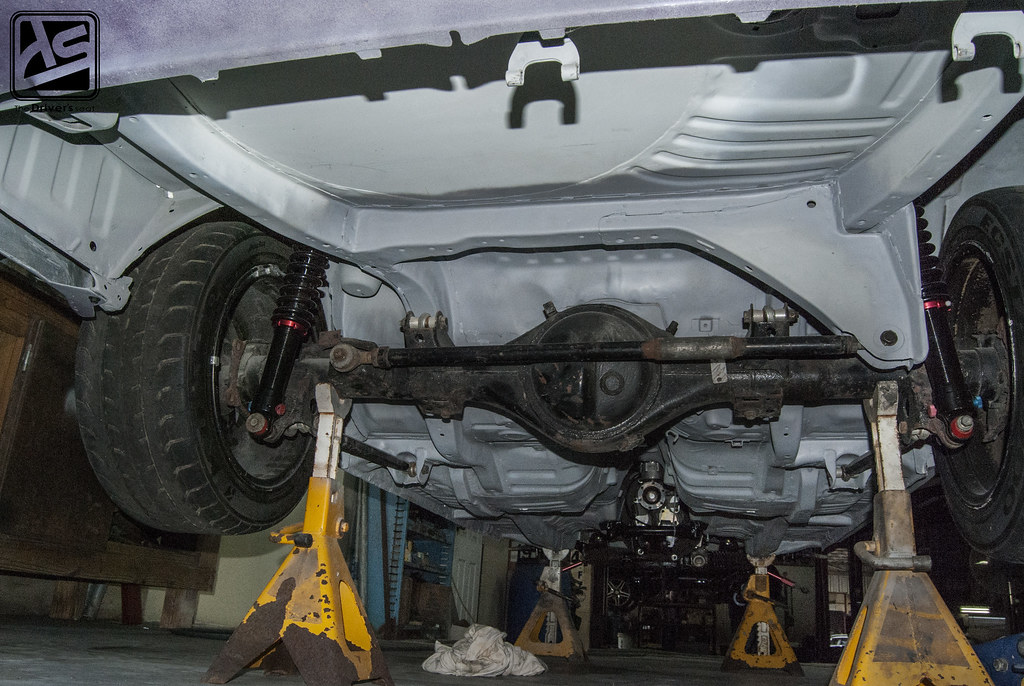
Wanting to be sure the entire driveline is capable for the plans ahead, the factory AE86 rear end was swapped out for another factory unit. Still sticking within the Toyota family, a unit that can be found on the Celica Supra was chosen with some additional upgrades. The rear end was fitted with a TRD 2 way LSD and Weir Performance upgraded axles…
Needless to say, Sol is a huge fan of the classic JDM styled AE86 builds of the past. When the time came to select a wheel package it was a no brainer…
He went all out to land a set of RS Watanabe R-Type wheels all the way from Australia, with specs of 16″x9″ -13 for the front and 16″x9.5″ -19 in the rear…

Over at Corbin’s Garage with the suspension bolt up the car was able to roll around…

The guys went ahead and fitted the doors, rear flares and bumper…

A partial side profile with the RS Watanabe wheels fitted with a set of Toyo R888 rubber…

It was time to begin the next phase in development on the AE86 chassis…
The final portion of the tunnel needed to be completed…
Given the modifications to the dated chassis, the drive shaft will now also be significantly bigger than the factory unit and due to the rear end upgrade, it made sense to widen the tunnel in the process…
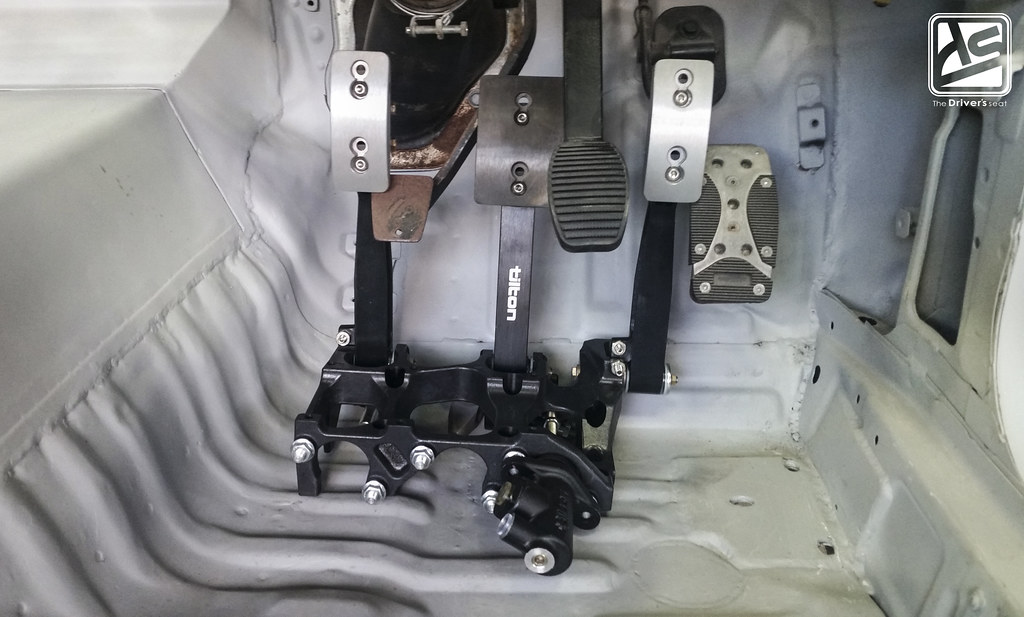
The guys decided to take things a step further as the seating position will more than likely change; and opted to incorporate the use of a Tilton Engineering floor mounted pedal assembly…

Upon finishing up the tunnel fabrication, it was immediately onto the next item on the list in having the chassis prepared for the upcoming plans…
From the initial post on this build I would have showed you guys a Cusco bolt in cage that was purchased for the car back when the SR20DET swap was in the process of being executed. Since then the build took a turn in a completely different direction that required additional fabrication where strength was concerned. In regard to safety the bolt in cage would be adequate for both street and track day use. However, given the point in which the car was at, they guys assessed the situation and thought it would be best to go with a full cage. This would be the only limiting factor which would prevent it from competing in any of the motorsport events on the calendar. Additionally it would also add a level of safety and rigidity that the Cusco unit wouldn’t be able to provide…
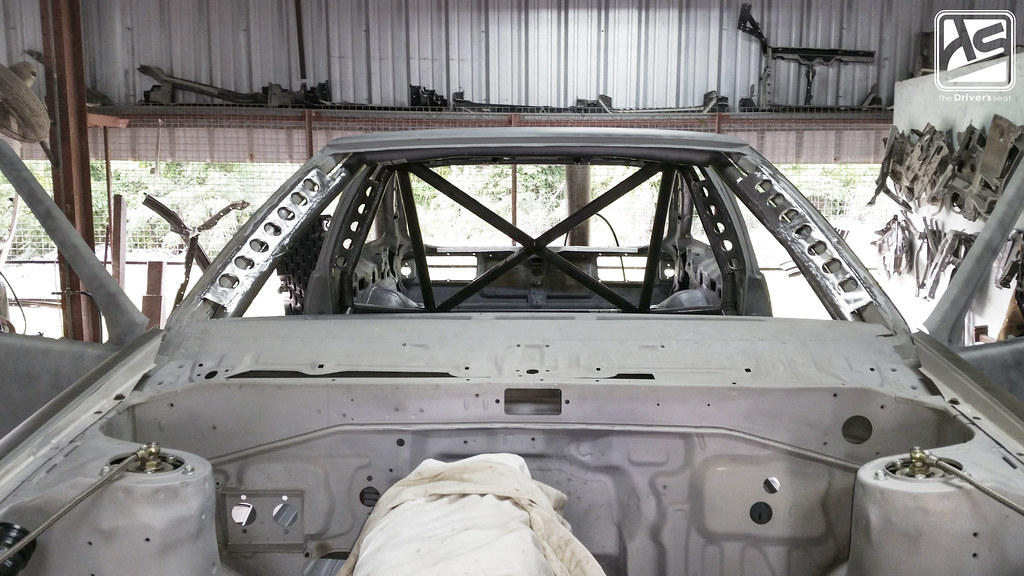
An order was placed with Custom Cages to have one of their multipoint units supplied for the AE86 chassis…

A close up on the famous gusseted A pillar braces which tie the cage into the structure of the car…


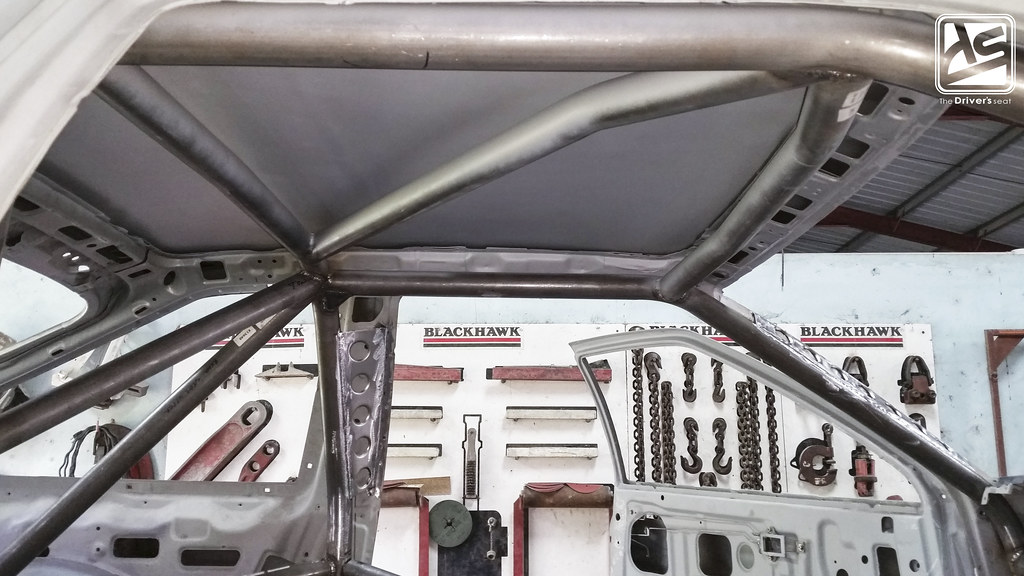


A few shots of how the unit came together…
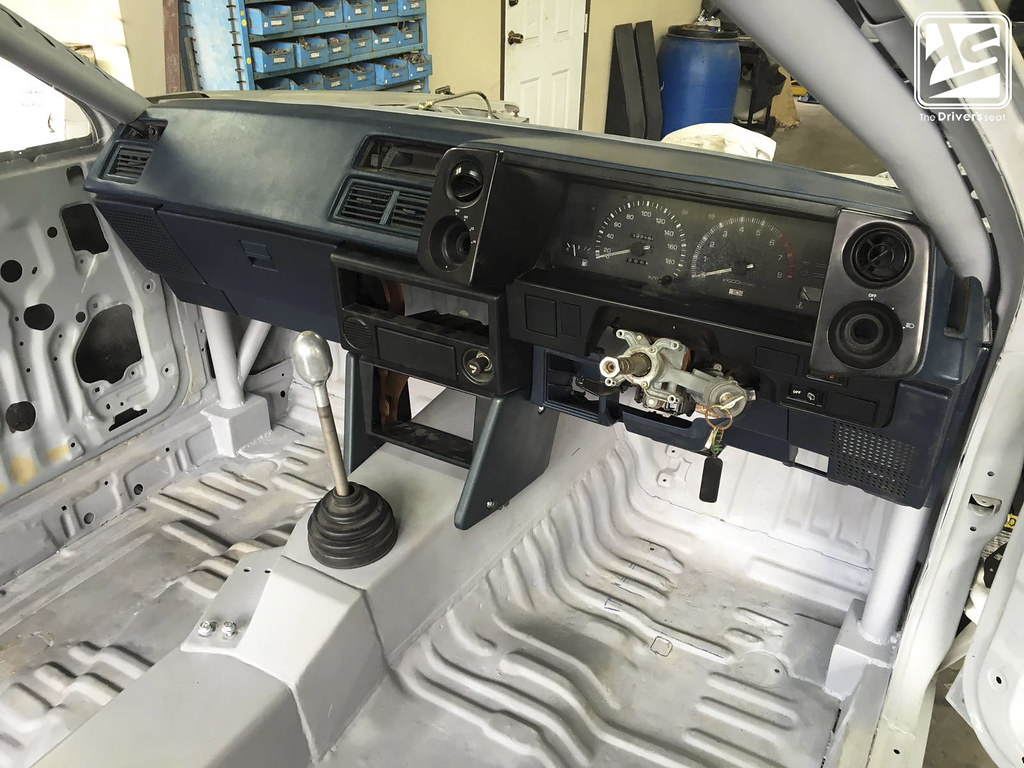

Even thought the cage design was altered, the car was still to be street focused and some trimming was necessary to incorporate it with the factory dash…
Thats it for this update on Sol’s AE86, I want to give a huge shout out to Wayne from Corbin’s Garage for providing me with the bulk of the photos that made this post possible. And also thanks to you guys for taking a look, be on the look out for more in this series coming soon…
