
Jin’s Charmant Build… Part 2
In today’s post we take a look at the decision Jin has made moving forward with his Charmant. Following the previous post on this build Jin has since made some changes and has been enjoying the benefits of his hard work. However, with the changing landscape of motorsport in Barbados, Jin came to the inevitable realization that the car wouldn’t be competitive in the league in which he envisioned. This was one of many realities Jin was faced with; having a motor swap that was speciality built and nearing its peak where performance stood, it wasn’t ideal in Justin’s vision of his daily commuter. Thinking back on his initial goal in mind for the build, which was to have a well rounded reliable car, Jin accepted he would require not just a more powerful motor but one with reliability at the core. Being the purist that he is, the addition of a turbo or any form of forced induction was completely out of the question. This would then leave his options significantly limited where four cylinder motors stood.
For those who would like to review the previous posts in this series, I’ve provided the links below:-
Jin’s Charmant Build… Introduction
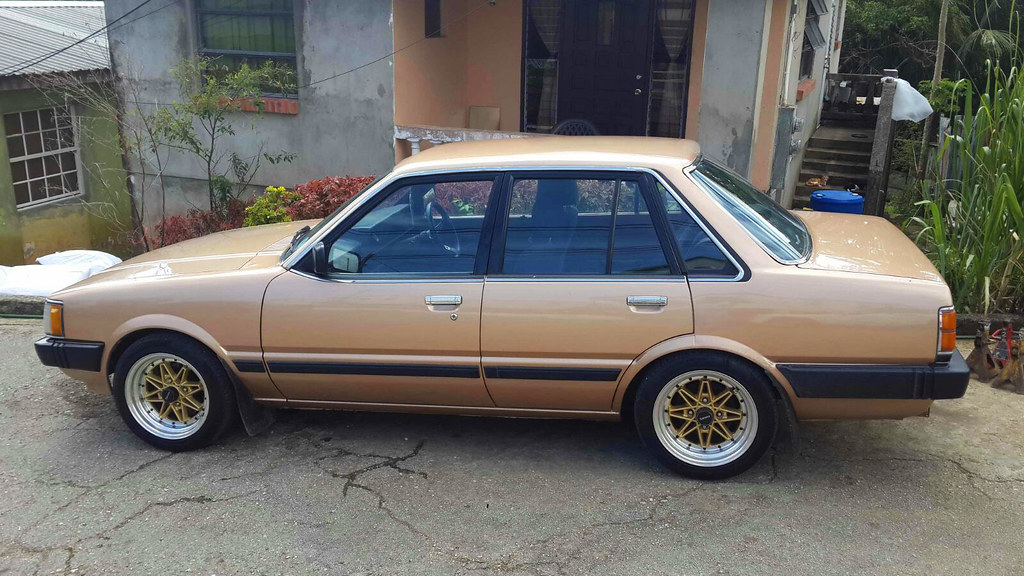
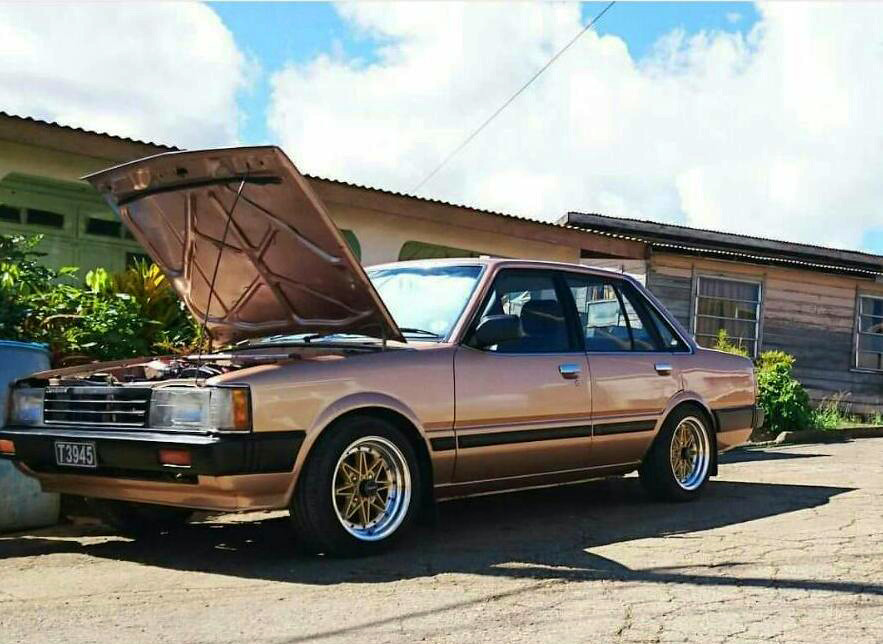
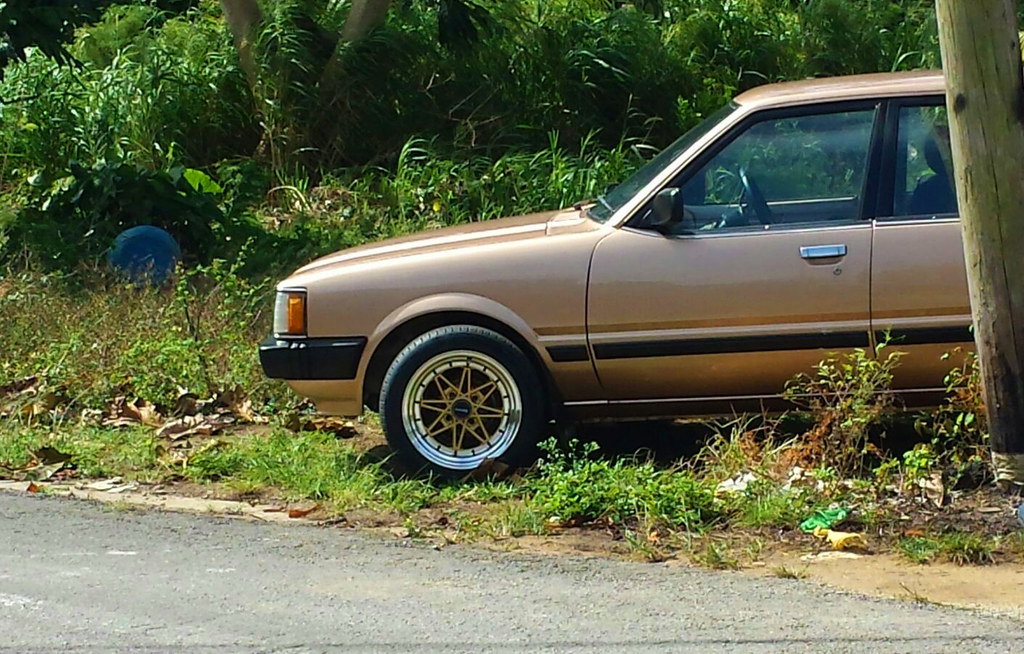
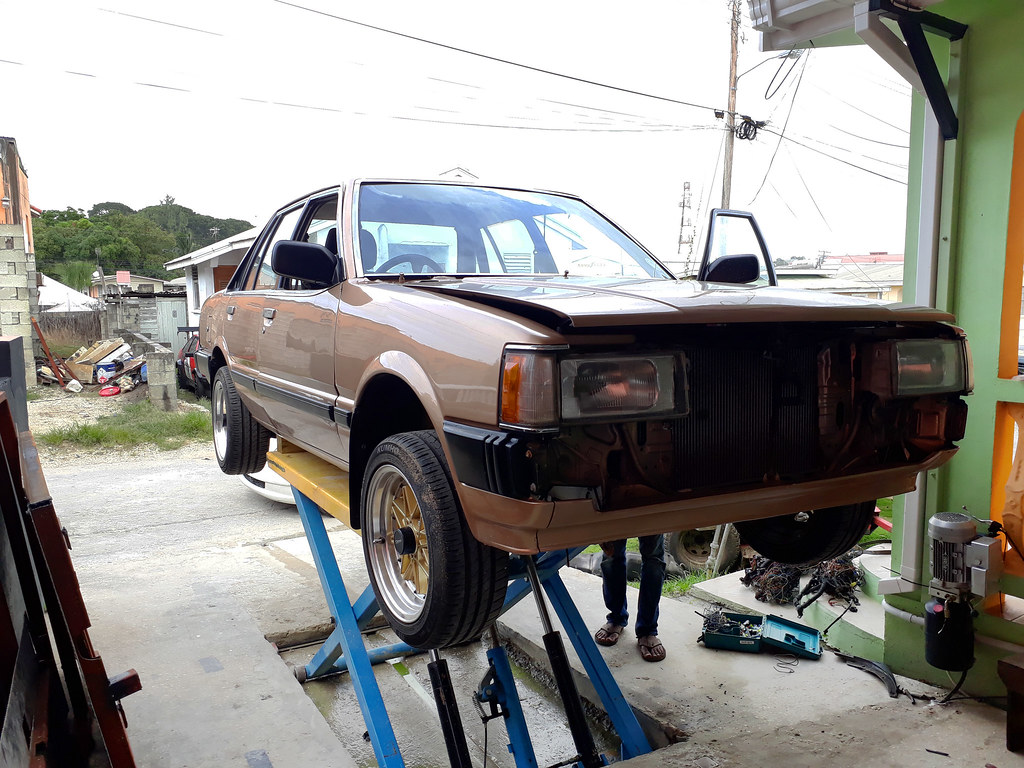
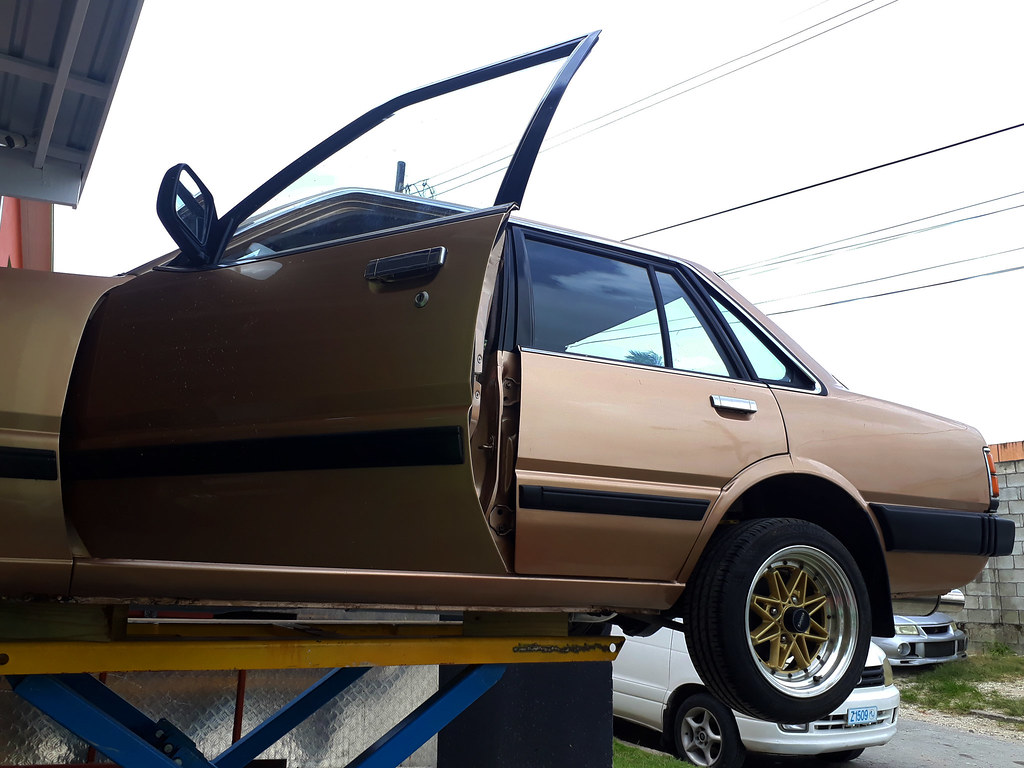
How the car sat when it was completed with a new set of wheels fitted…
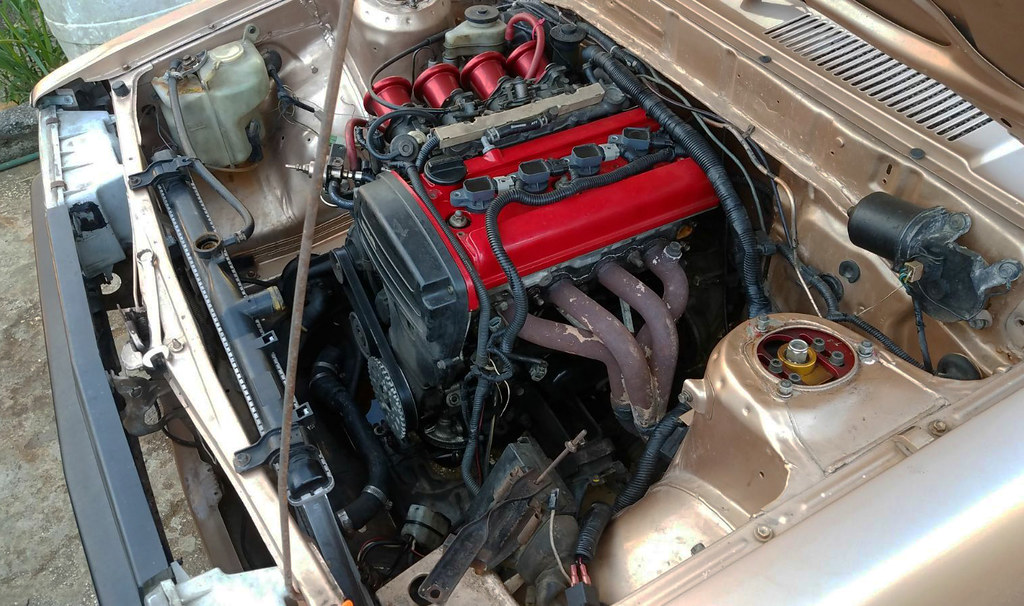
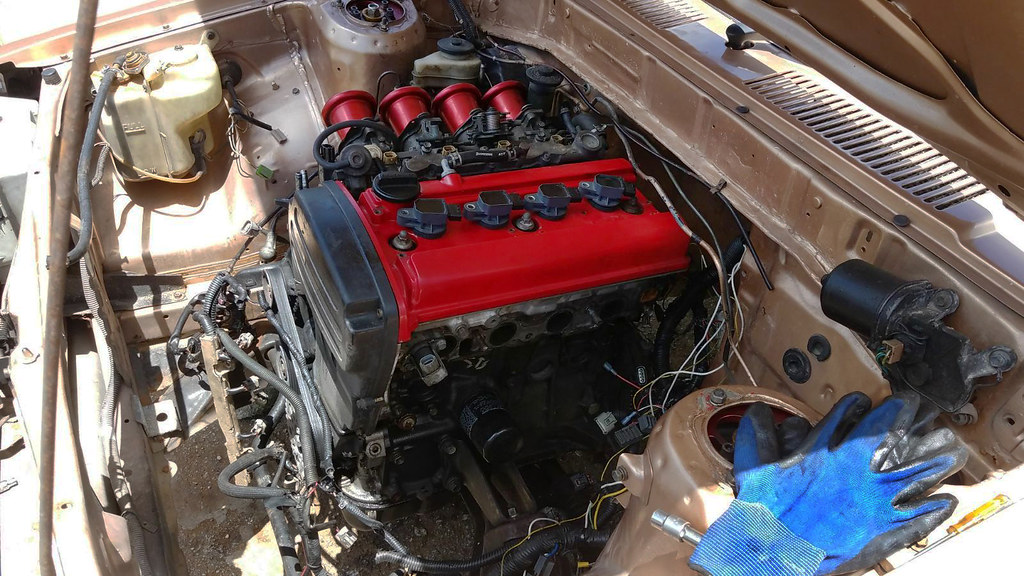
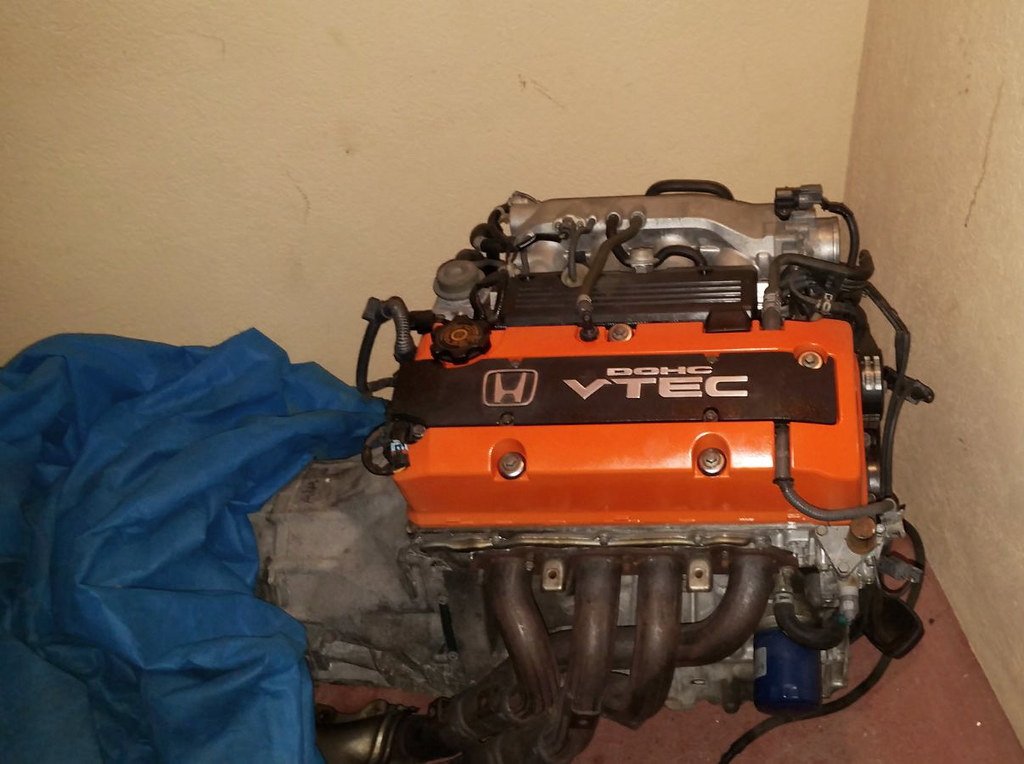
A look at the 20v conversion with a coil on plug setup and Techno Toy Tuning velocity stacks…
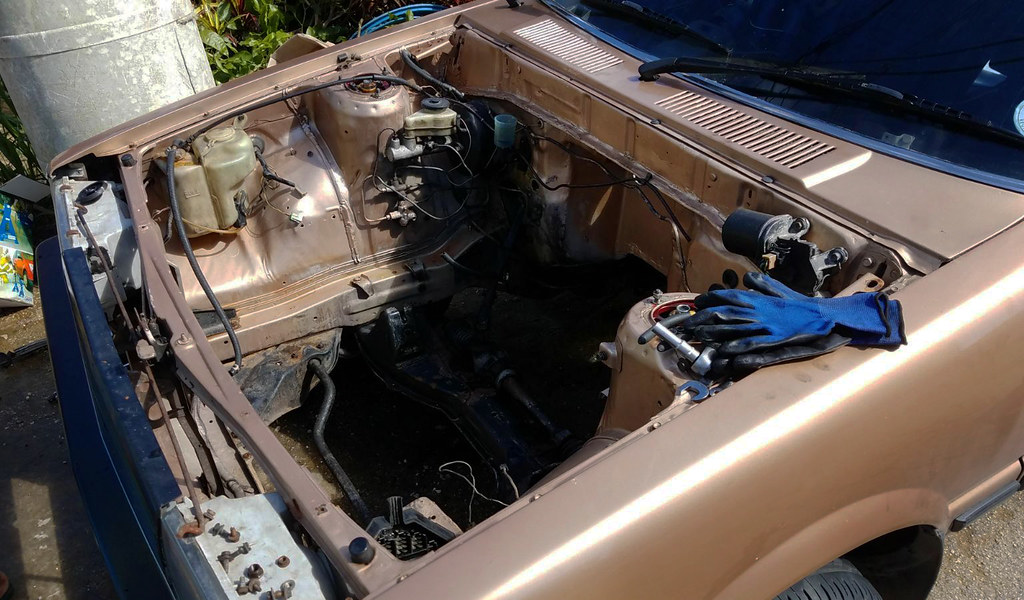
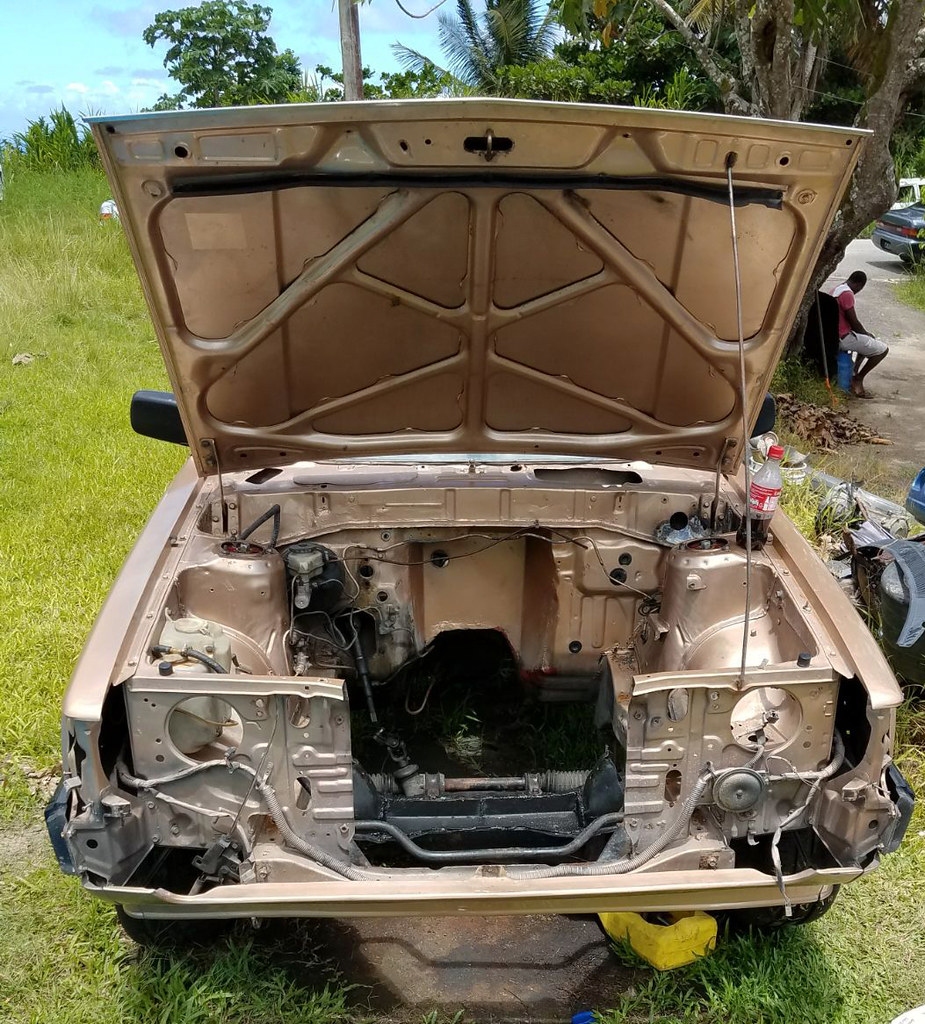
The tear down begins to prepare the shell for the new motor swap…
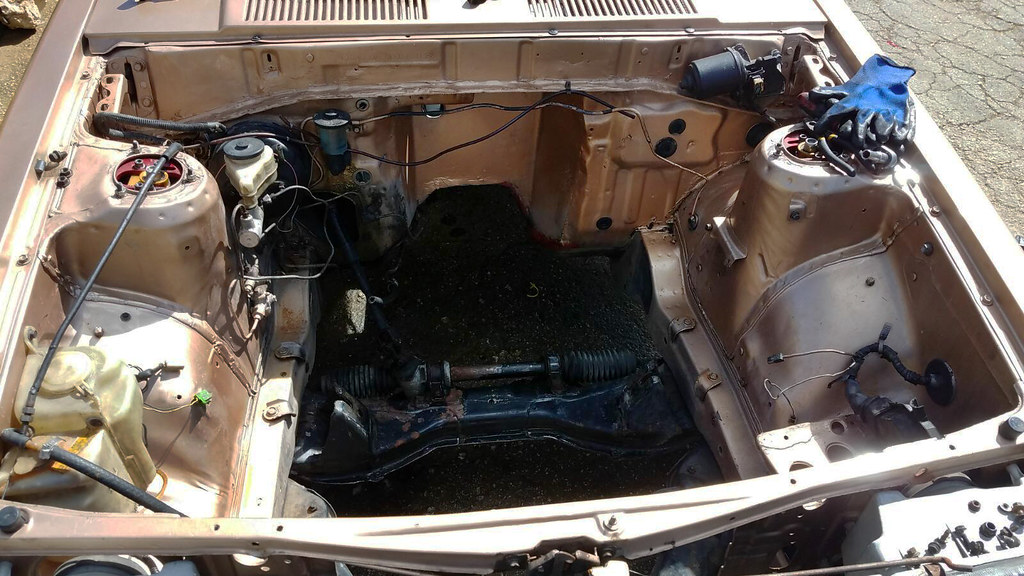
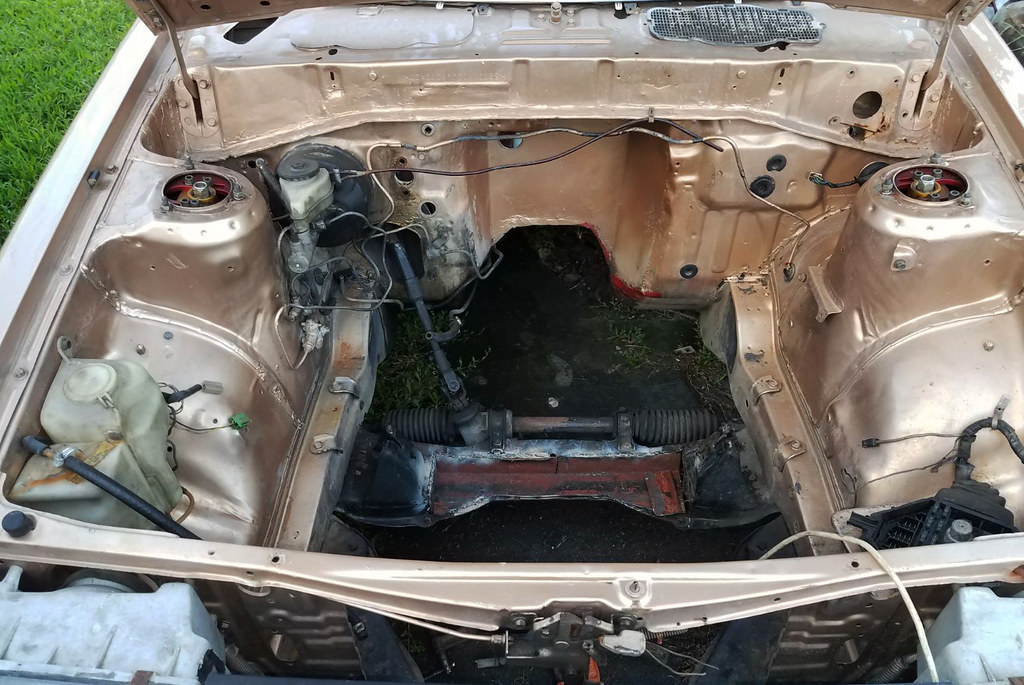
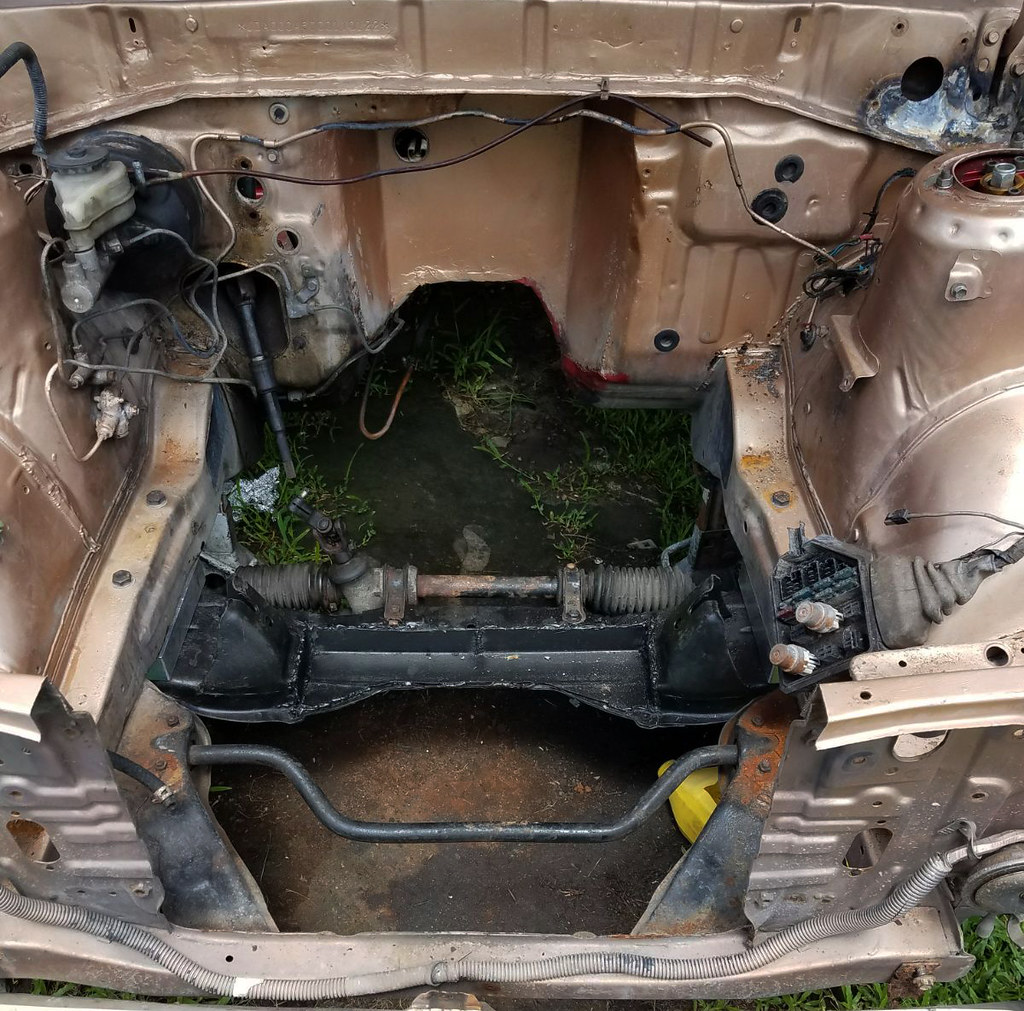
The heartless engine bay as it awaits the next stage in development…
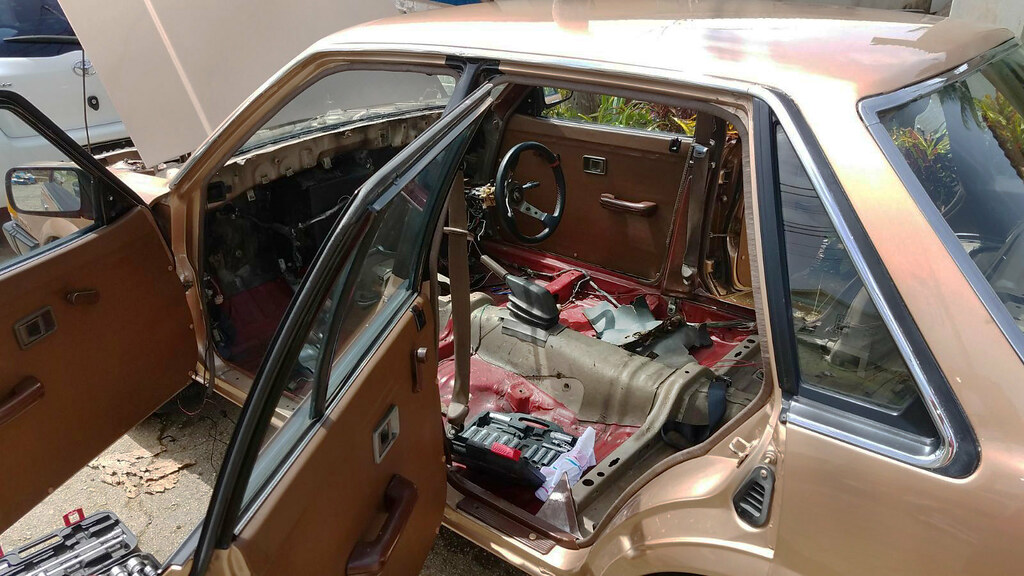
Justin went ahead and stripped out all of the interior for the upcoming plans…
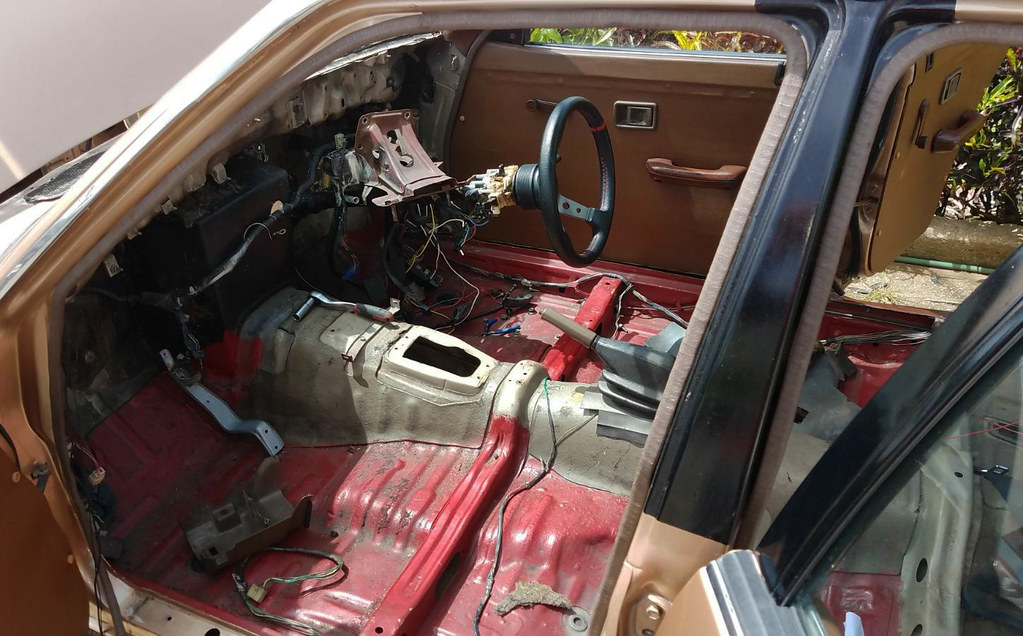
Down to the dashboard was removed in preparation…
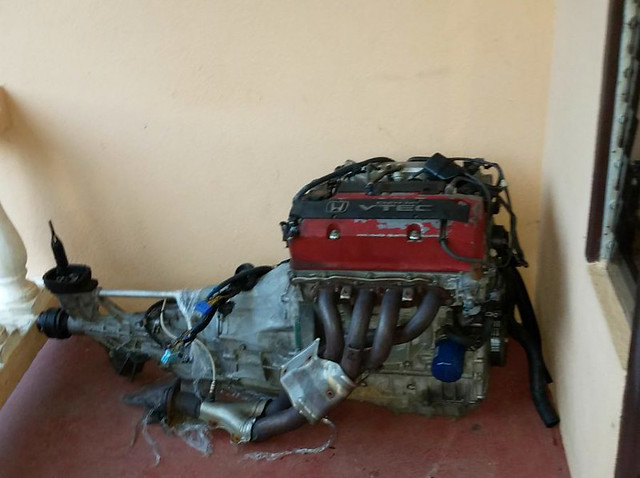
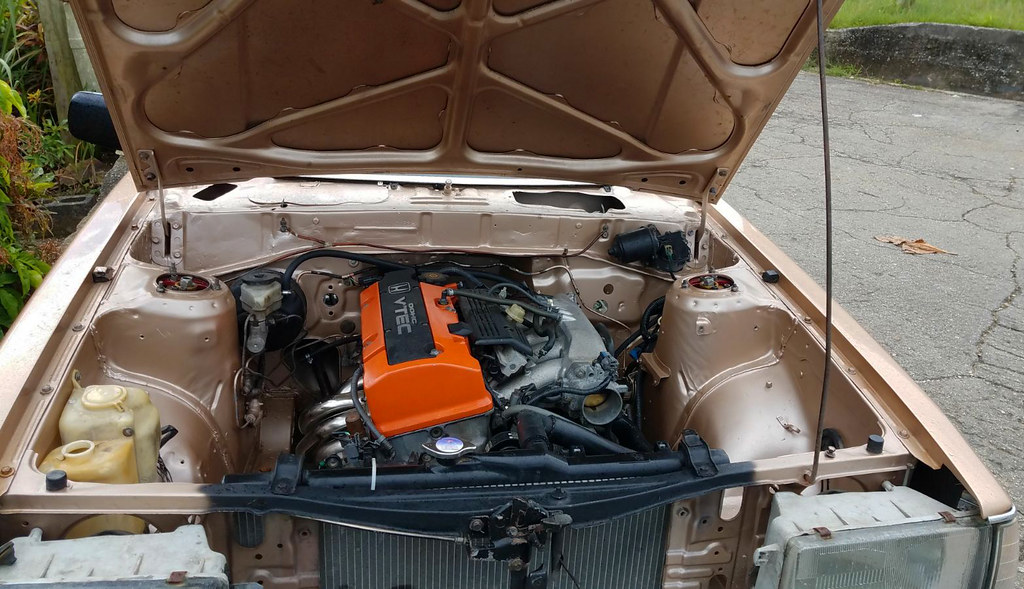
After doing the necessary research, Jin finally landed on a F20c motor swap. Already sharing many similarities with the AE86 chassis coupled with the popularity of the swap, Jin saw it to be a relatively easy conversion to execute. Originally the F20c motor comes from a Honda S2000 which will definitely cause many of the Toyota purist to cringe, however this wouldn’t move Jin nonetheless.
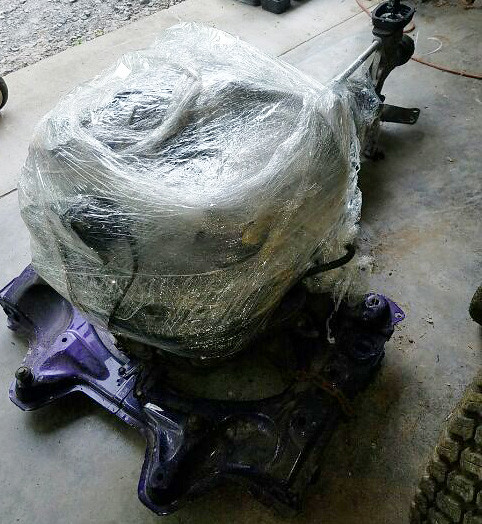
Justin ordered a complete swap which included subframe, engine, gearbox, header, harness, cluster and ECU.

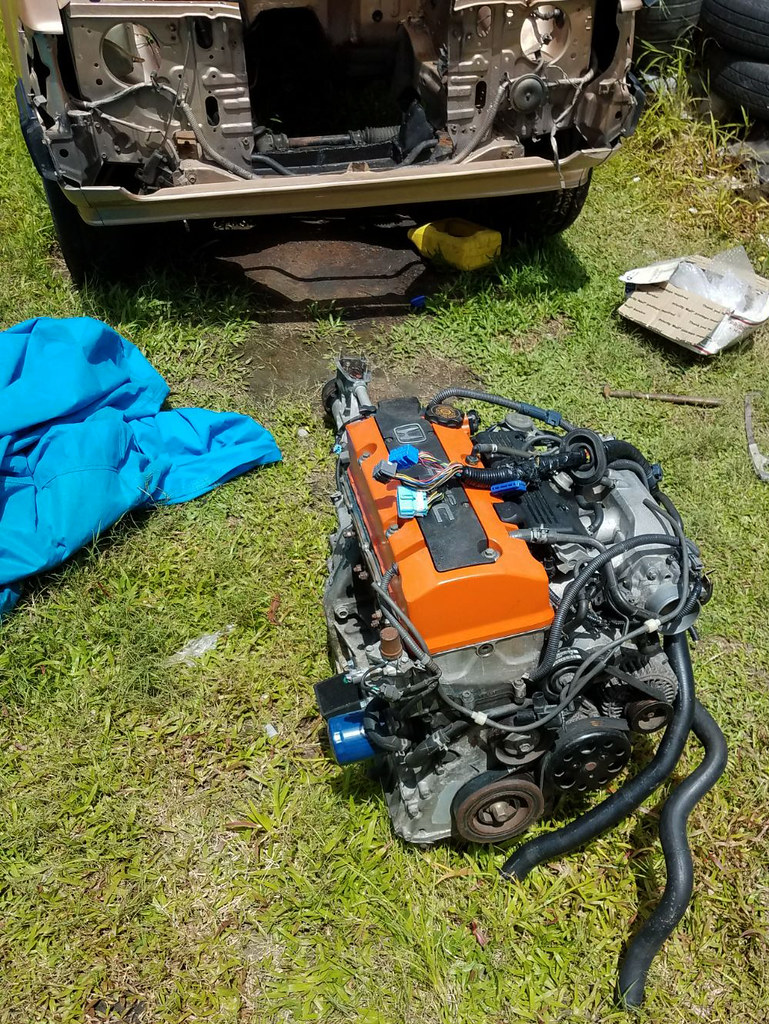
The motor and gearbox assembly after it was unwrapped…
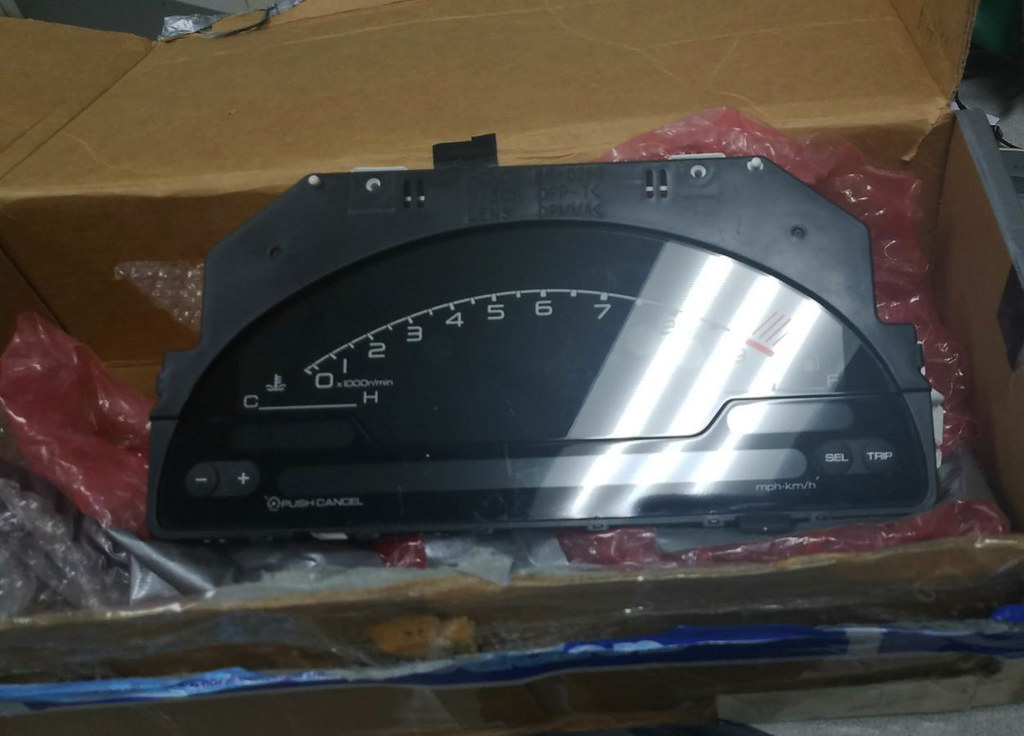
Close up of the S2000 digital display…
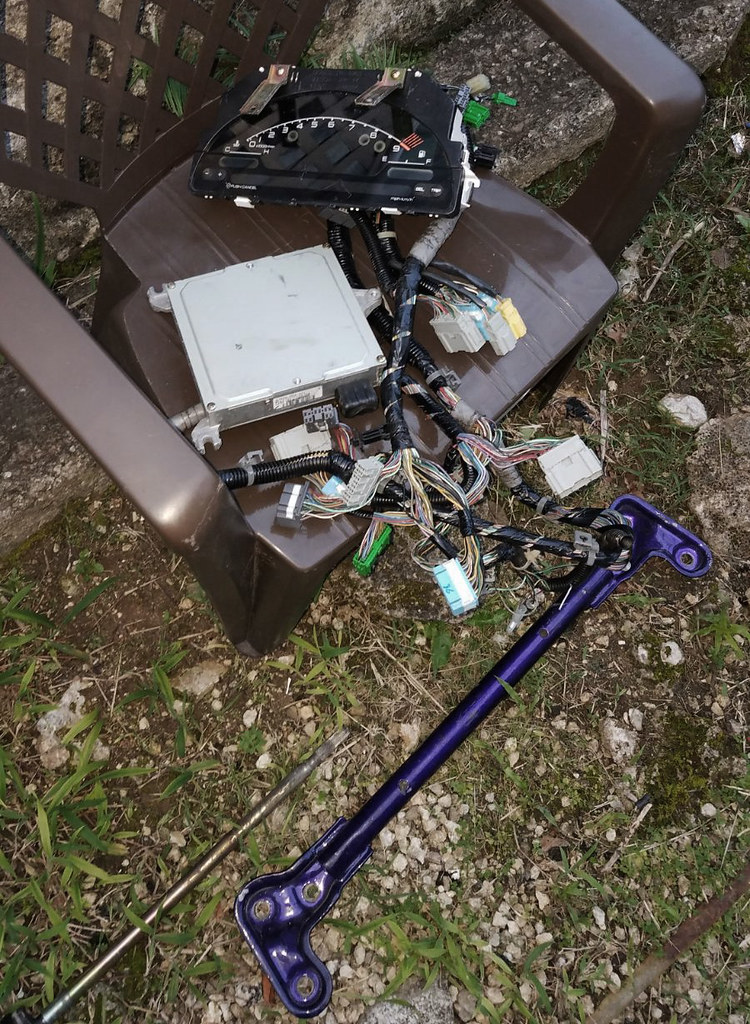
S2000 cluster, harness and factory ECU…
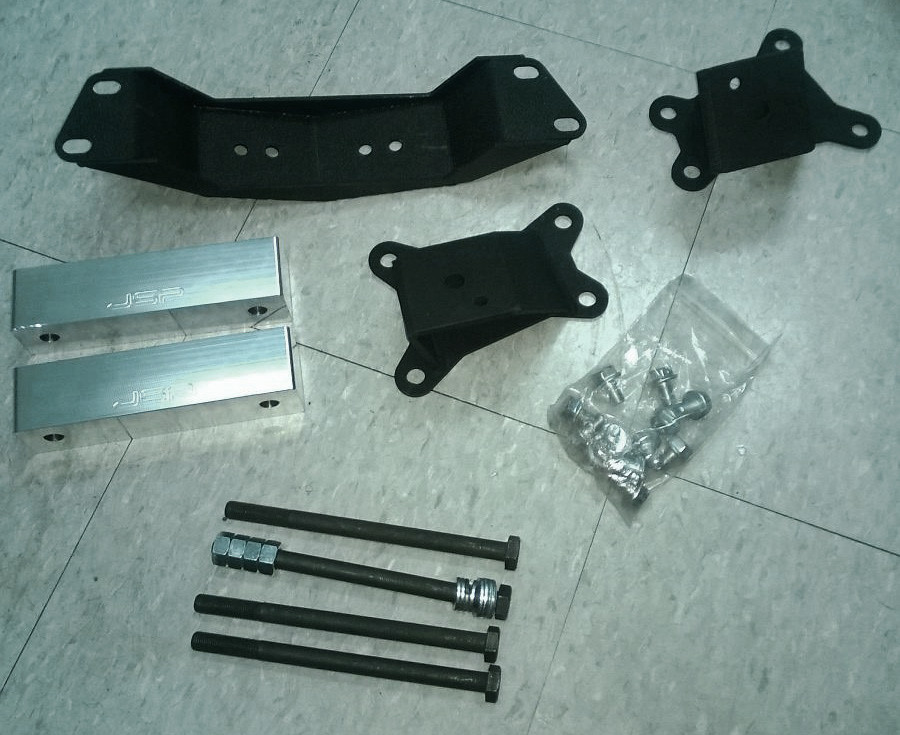
One of the key components to the F20 swap into the Charmant chassis is the JSP Fab S2000 conversion mount set. The kit includes a gearbox bracket, engine mount brackets and cross member spacers. JSP Fab’s kit eliminates the need to cut the firewall for clearance however there will still be some modifications needed to the cross member and engine sump.
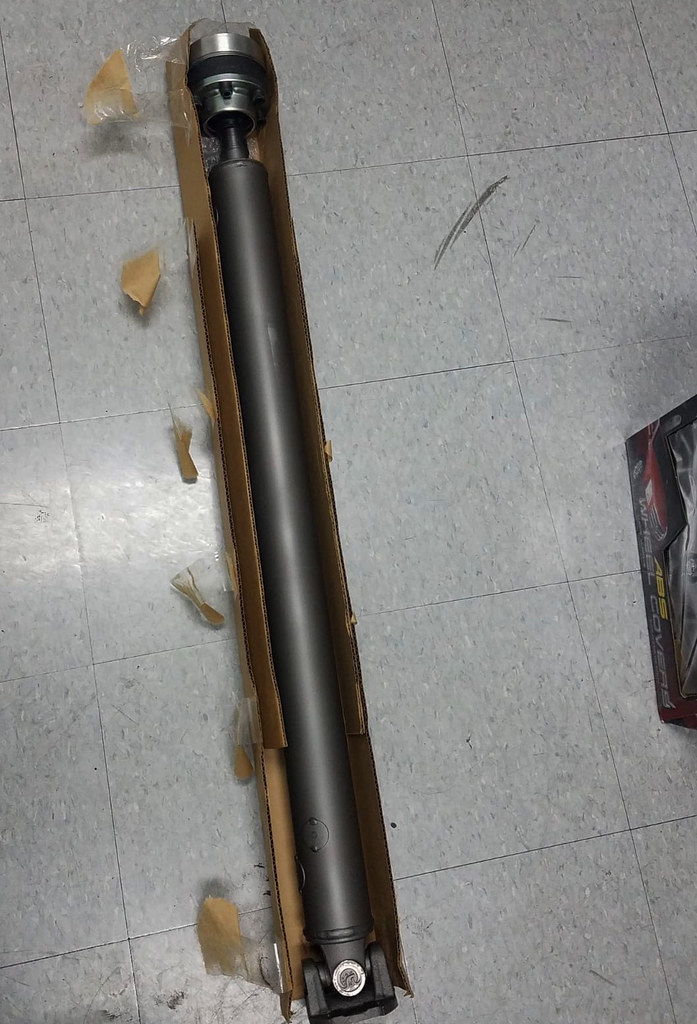
Aside from the visual difference in size between the Charmant and the S2000; the major link between getting the power transferred from the gearbox to the rear axles posed an issue, making the S2000 driveshaft one of the items he wouldn’t be able to use. Even though some would opt to cut and weld a driveshaft, it really isn’t the recommended thing to do especially after hitting all the check boxes thus far Jin wouldn’t approve. The only alternative he saw was to have Driveshaft Shop custom make him a unit being able to adapt to the S2000 gearbox on one end and to the Carina differential housing on the other.
While waiting for some of the necessary pieces to arrive, Jin had some time on his hands, and as the valve cover had seen better days he decided to give a refresh…
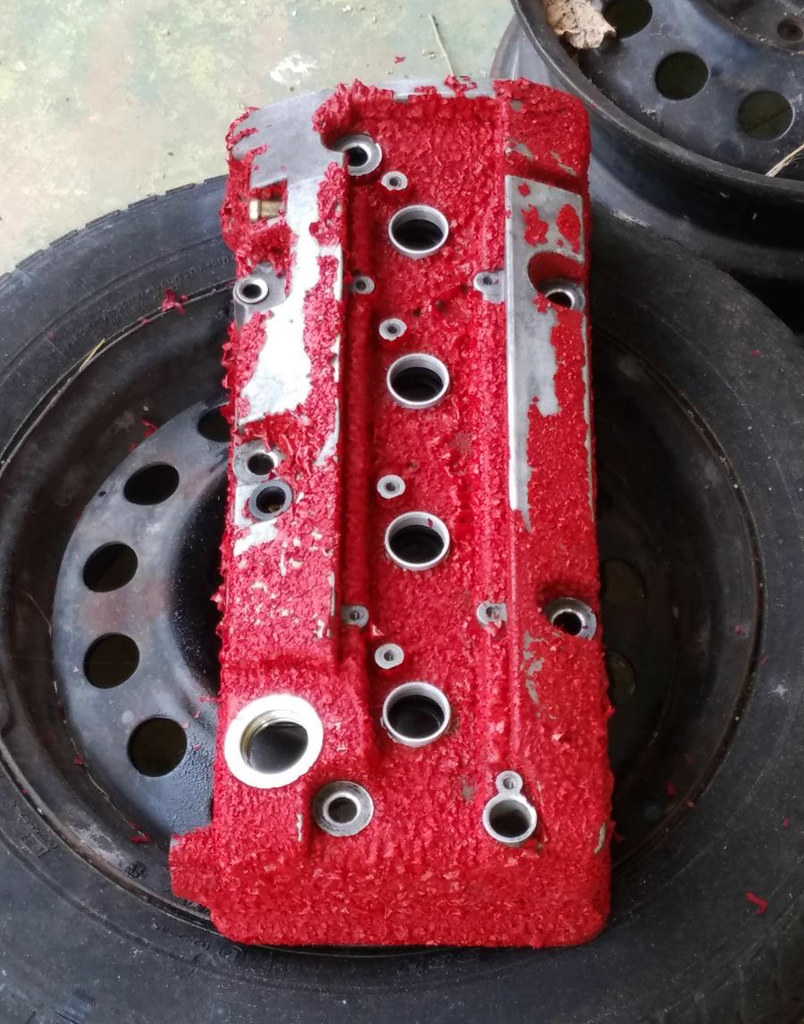
Jin immediately had a vision for the valve cover and wasting no time in applying some paint remover to get the ball rolling…
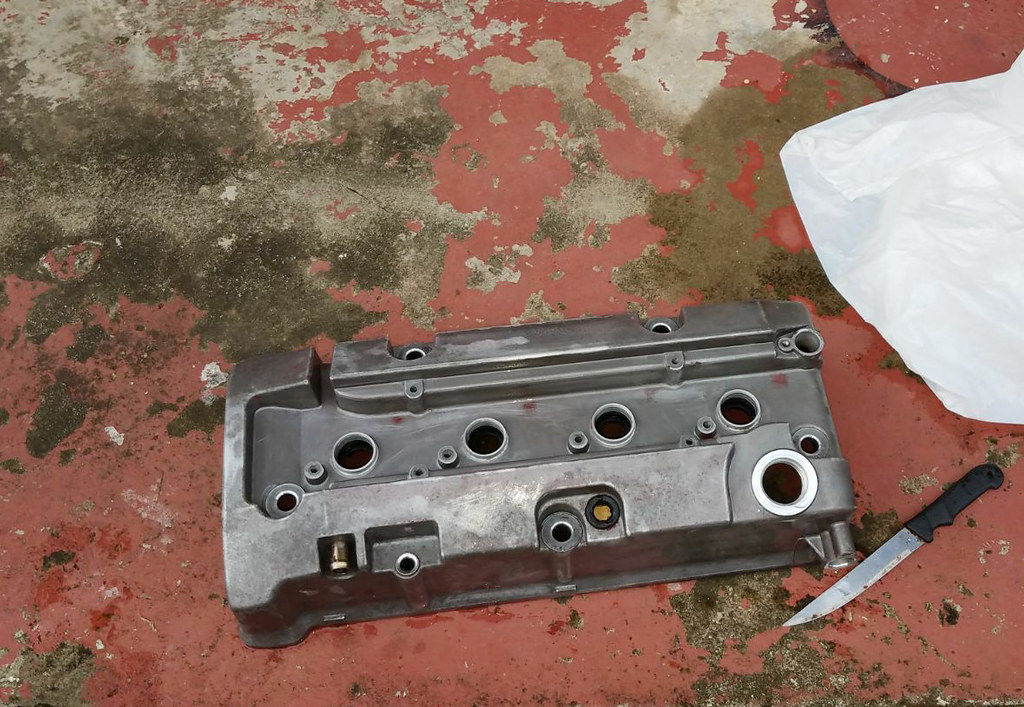
F20c valve cover stripped to its raw finish…
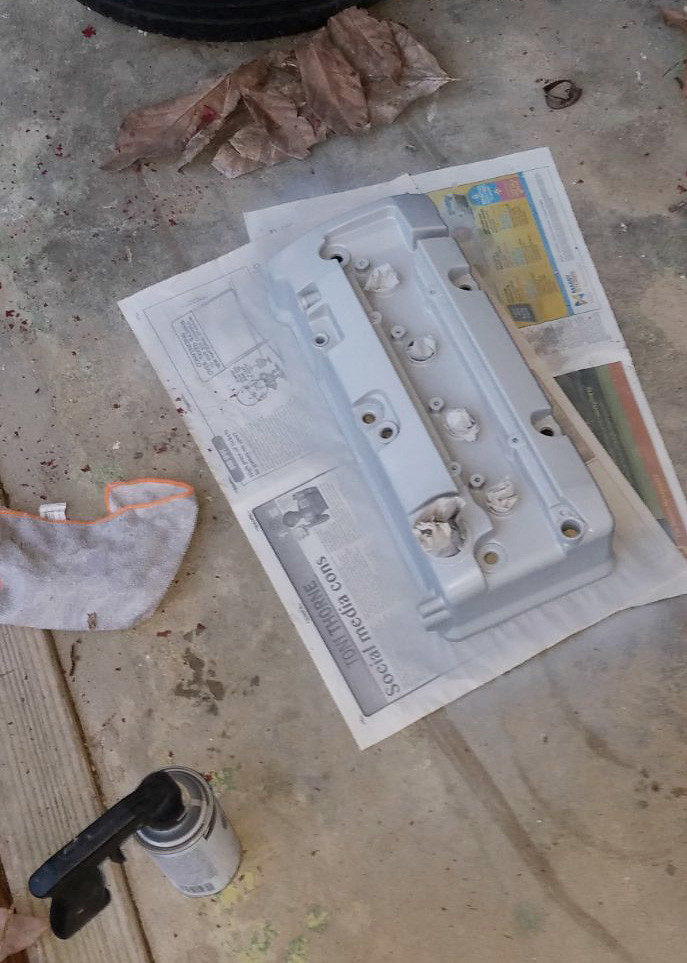
After a few coats of primer…
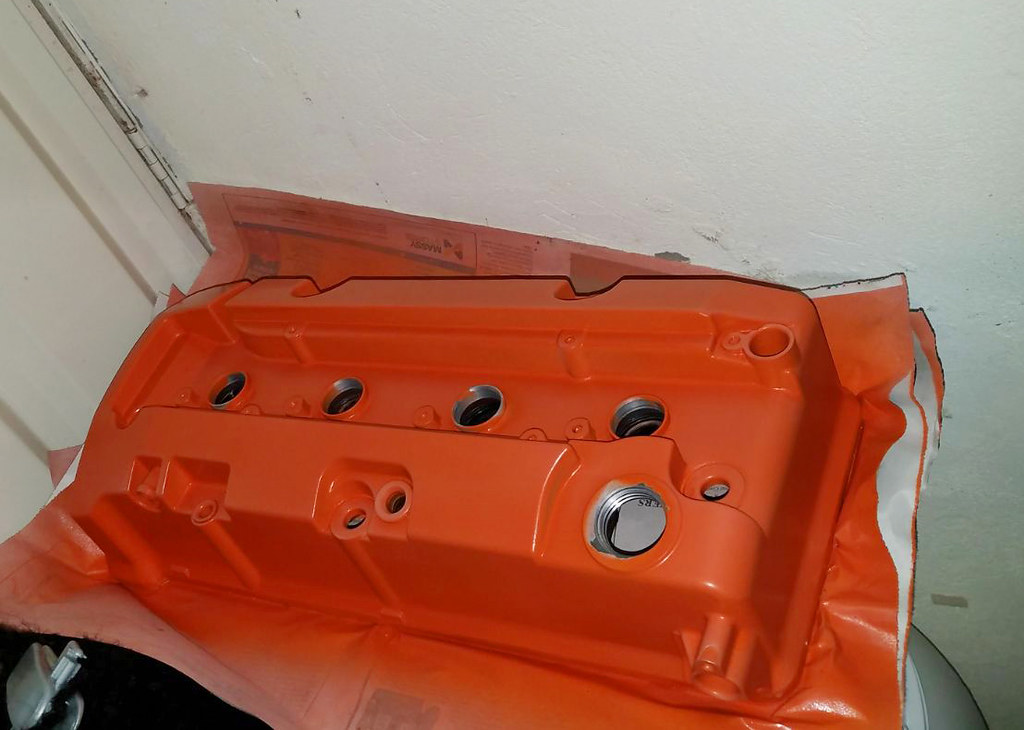
This was the end result…
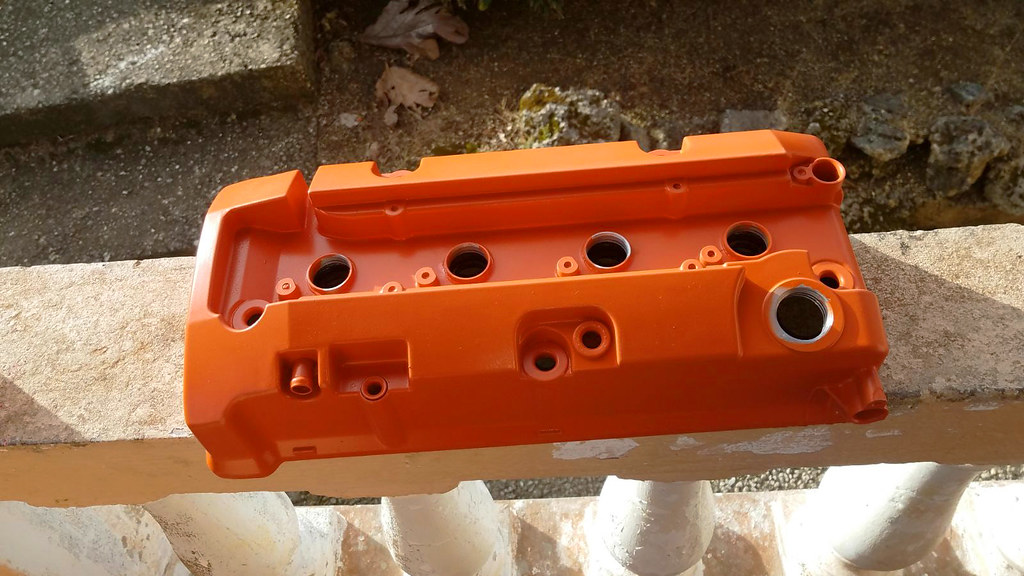
Not too shabby for a rattle can job…
With the bulk of everything finally landed, Jin sent the car to have the bay prepped for the motor swap…
As I mentioned earlier, some modifications would be necessary in regards to the factory subframe to execute this swap…
The guys thought it would make life significantly easier by cutting the radiator support as the engine is taller and longer than the complete 4AGE swap…
The plan is to lift the motor through the front rather than having to tilt it with the gearbox fitted…
Time to get acquainted, F20c meet Charmant because it’s about to go down…
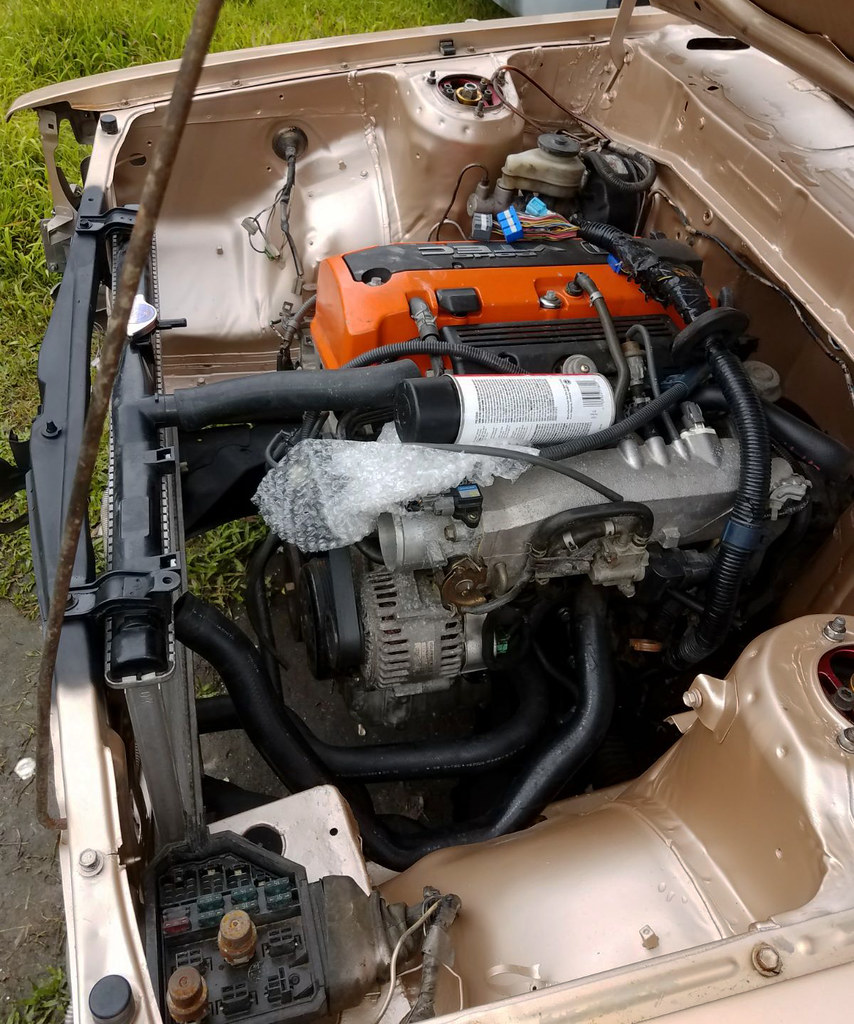
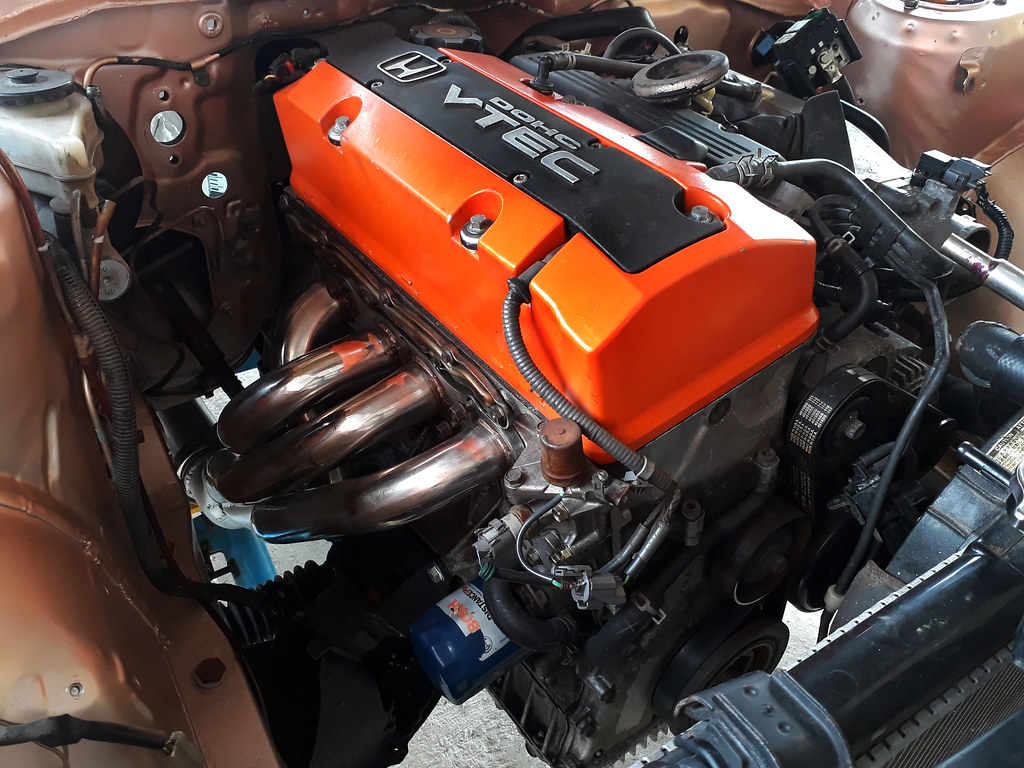
Motor fitted with absolutely zero clearance issues…

Already having a full sized radiator from his previous swap, Jin retained it and it was only a matter time before he found the correct radiator hoses to make it functional…

With the motor assembly in place it look right at home within the Charmant’s bay…
A look at the JSP Fab engine bracket which was designed to work with the factory subframe mounts…
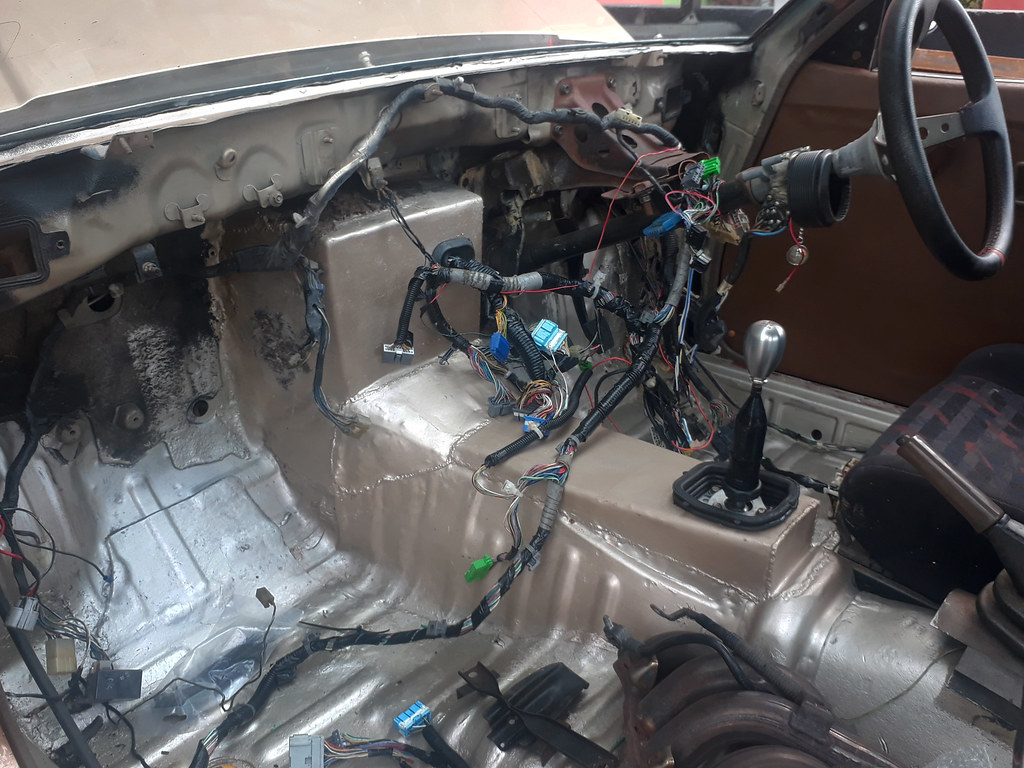
On the interior things weren’t as simple in comparison to the engine bay…
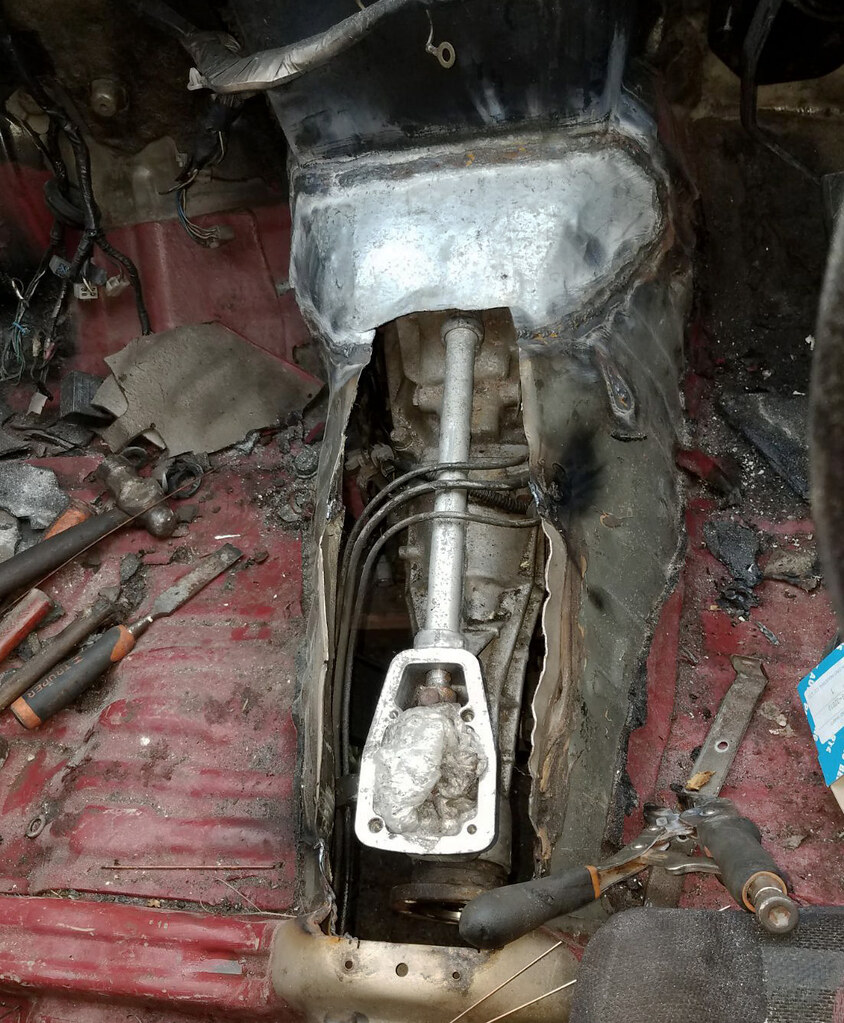
The dated OEM trans tunnel wasn’t as receptive as the engine bay and required some fabrication. In order to fit the F20 gearbox assembly it is common to make some adjustments to the tunnel to accommodate for the shifter placement based on the length of the gearbox…
While Justin’s fabricator worked on finalizing the location of the shifter and the surrounding area..
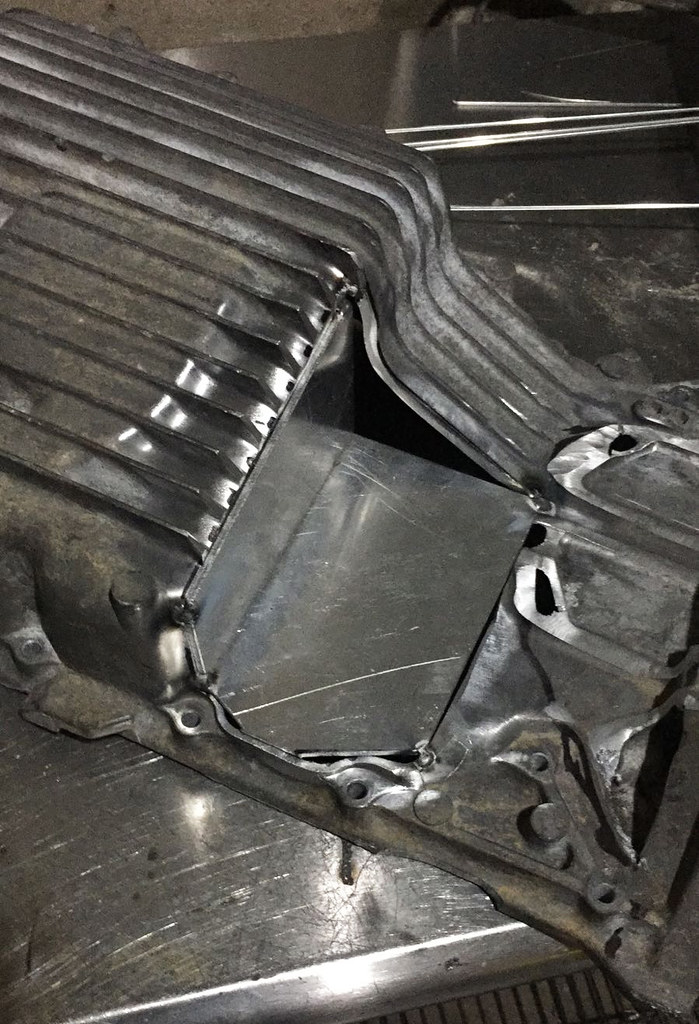
Some measurements were taken and the oil pan was sent off to ReWeld to be modified in accordance with the custom plated subframe…
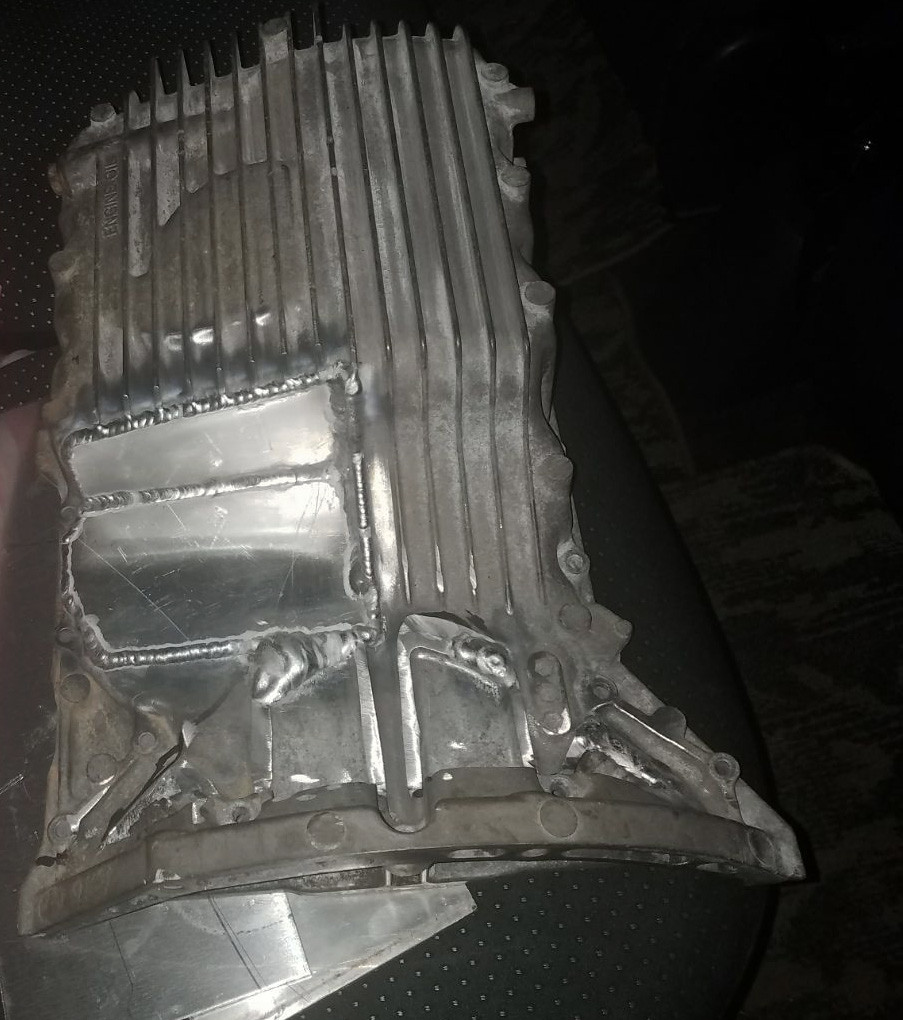
The finished product, another nicely done piece by ReWeld…
Meanwhile a package arrived…
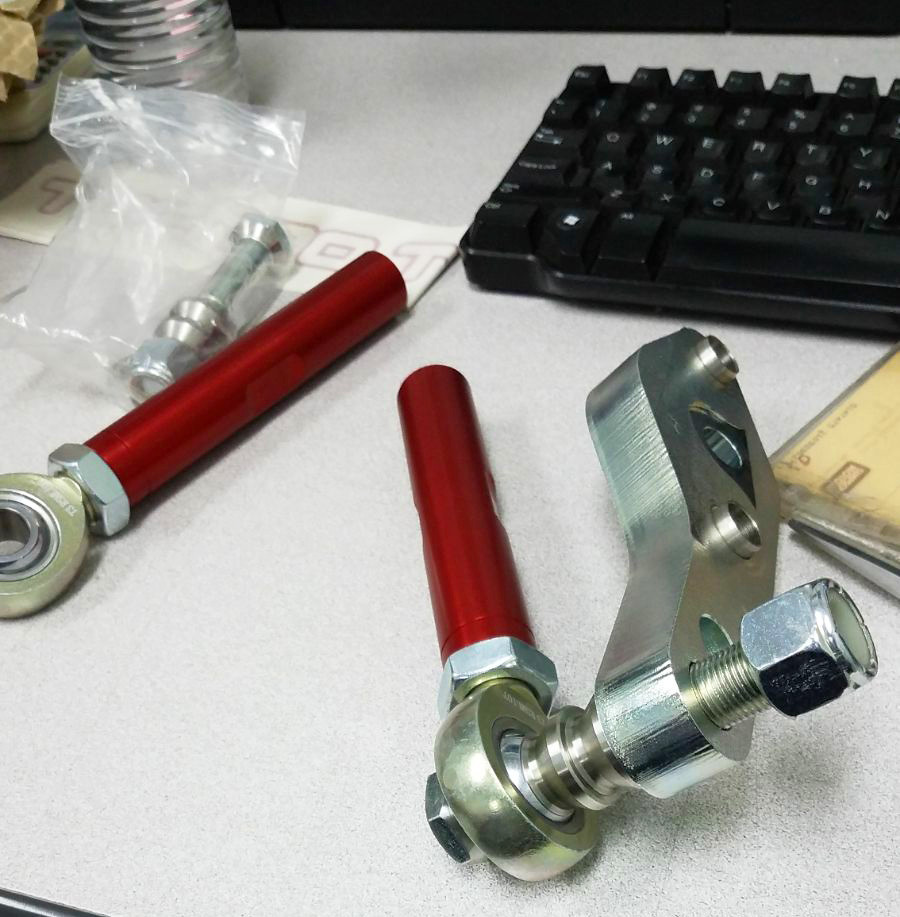
From Techno Toy Tuning carrying their adjustable helm joint tie rod ends. These units are larger and more durable than factory and allow an increase in steering angle. Jin thought with the significant increase in power while driving the extra angle would be needed to get out of any troubling situations…
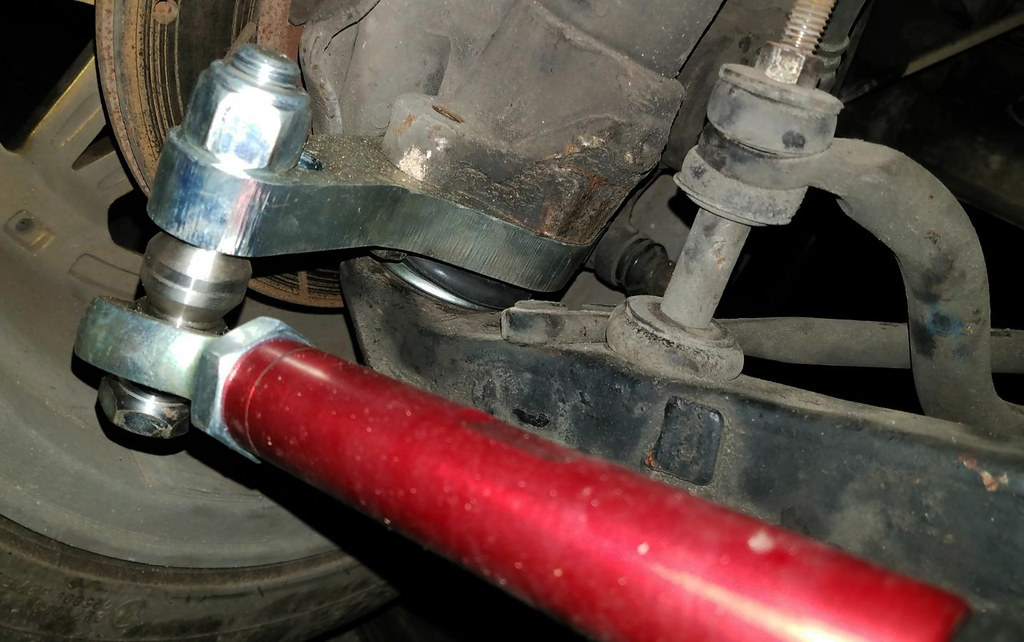
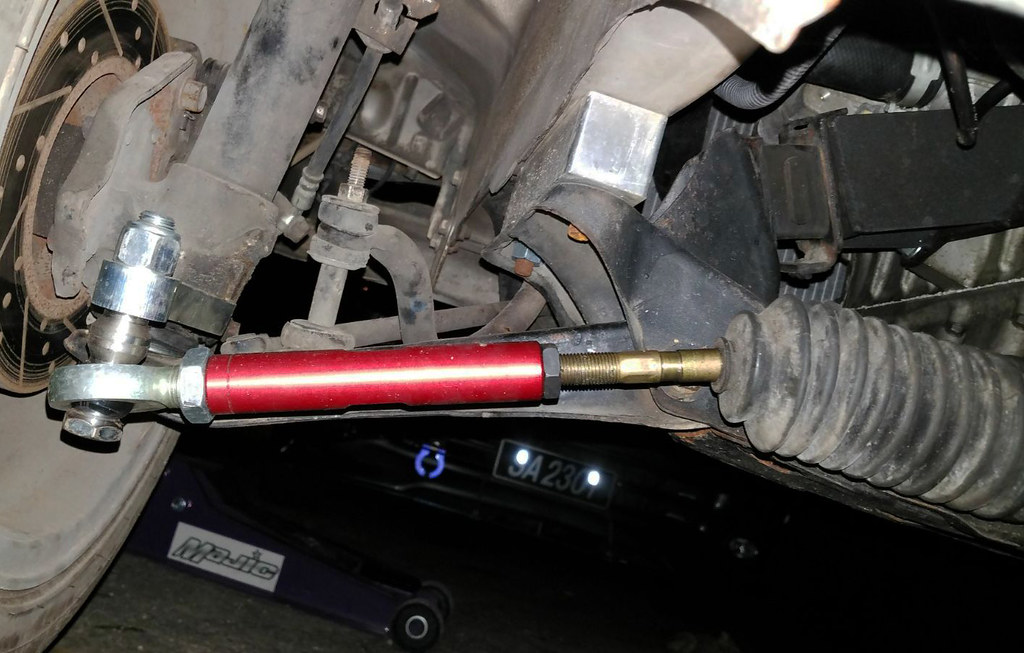
A view of the Techno Toy Tuning rod ends fitted to the car…
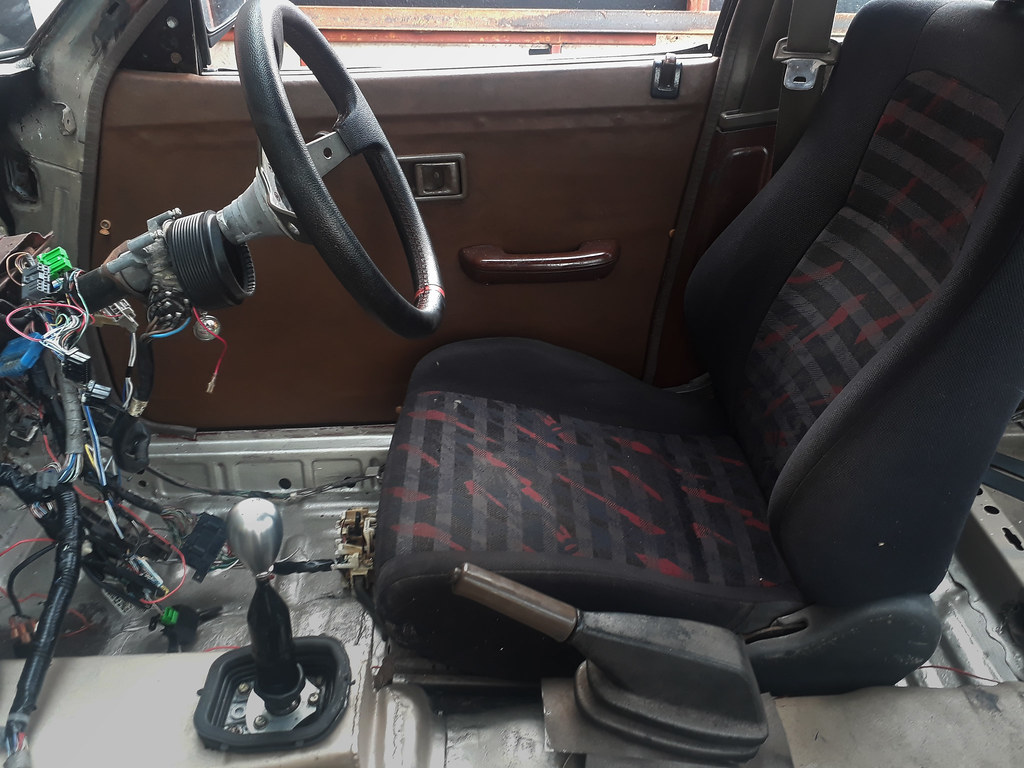
The car was finally back in Justin’s possession with the modifications to the trans tunnel completed…
The interior of the car remained gutted as Jin still had a few things to complete…
Spent gasses was where Jin paid some close attention, being in the car scene for quite some time and been through countless exhaust systems, he wanted to put some thought and time into the choices he made for this setup. The goal he wanted to achieve was to have a system which will be quiet for daily driving but on wide open throttle still be able to deliver on the performance end…
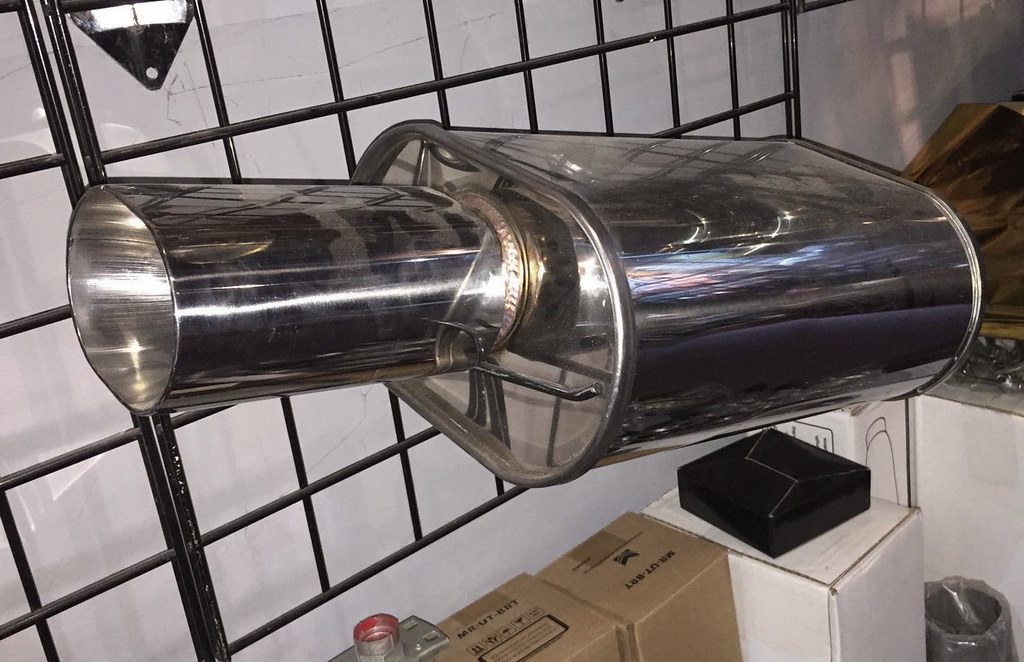
Jin went with a OBX Forza Tuning muffler…

Initially the plan was to use the OEM S2000 header however, given the size difference between the two chassis the OEM header would require extensive modifications to clear the Charmant’s steering column…
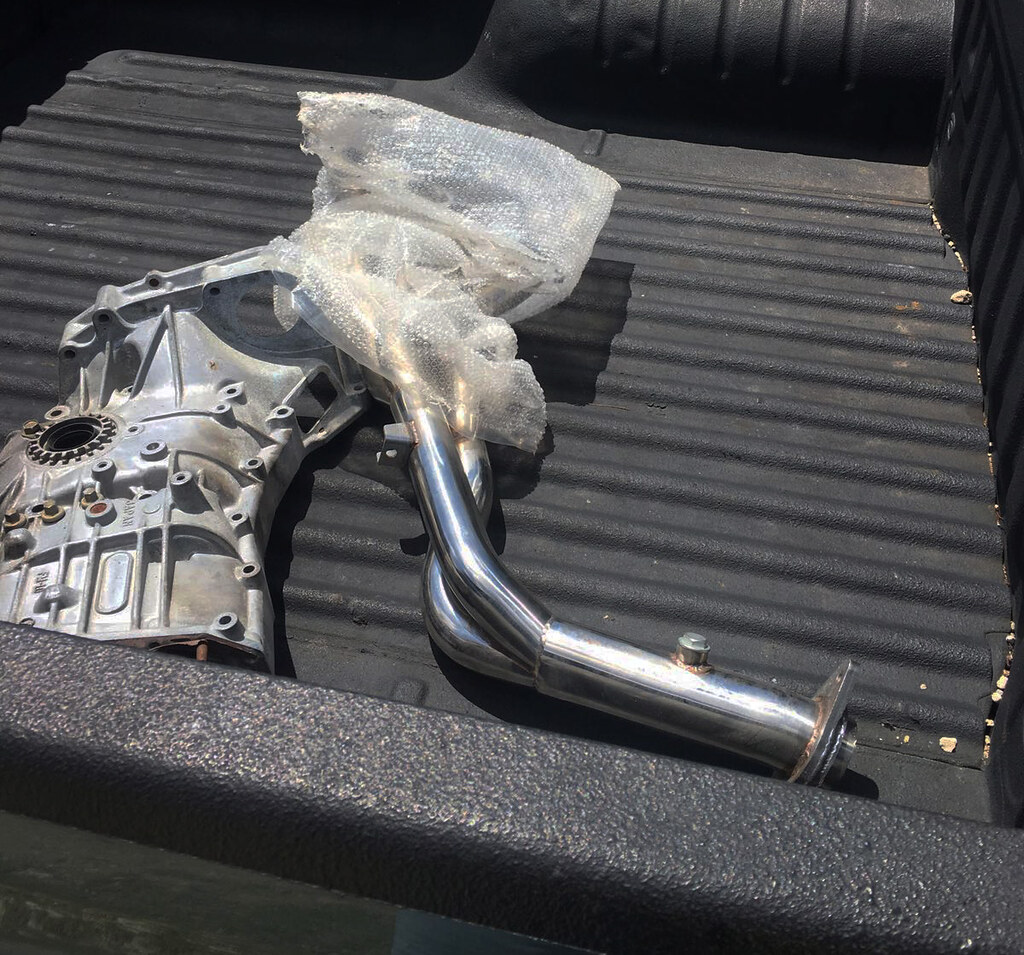
With time constraints weighing heavy on the completion of this build, Jin was fortunate enough to find an aftermarket S2000 header locally and wasted no time in picking it up. He thought it would be easier to have a base to start with rather than fabricating a header completely from scratch…
Jin enlisted the services of Stanford Industries to execute the fabrication work needed for both the header and exhaust system…
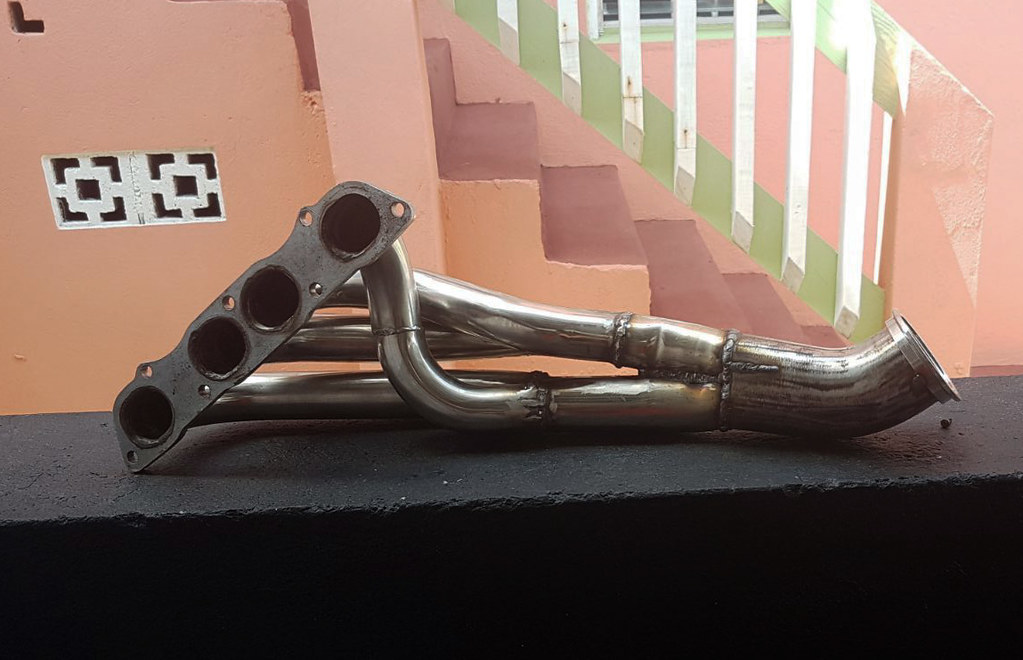
As mentioned the header required some modification to clear the steering column and after some cutting and measuring…
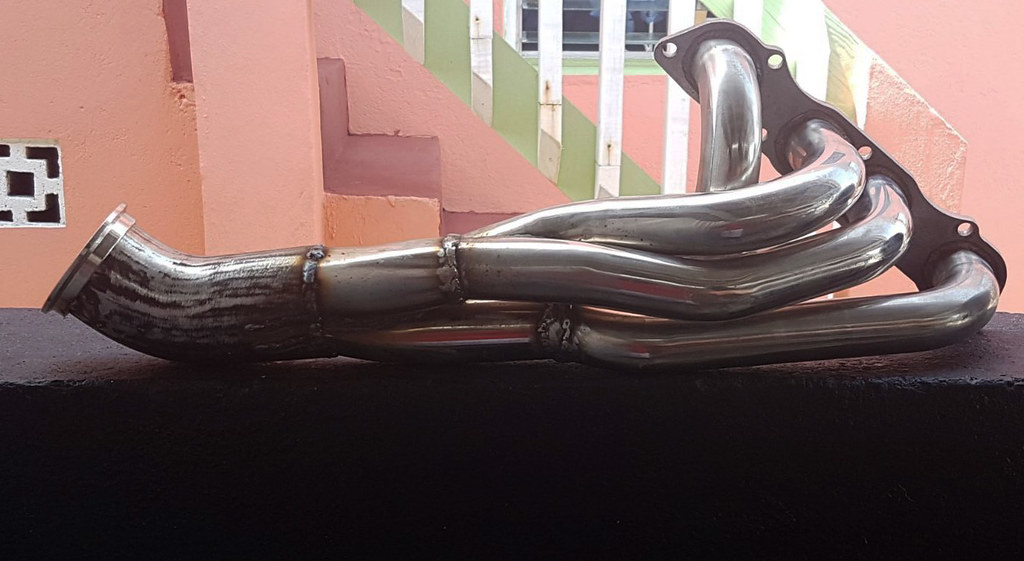
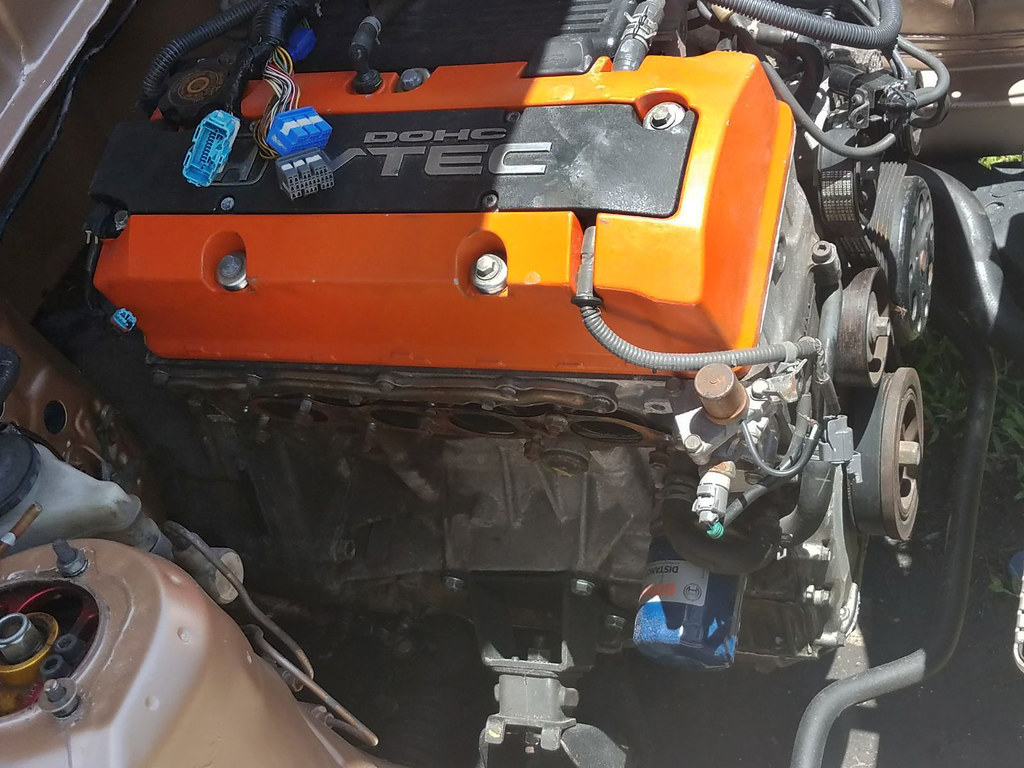
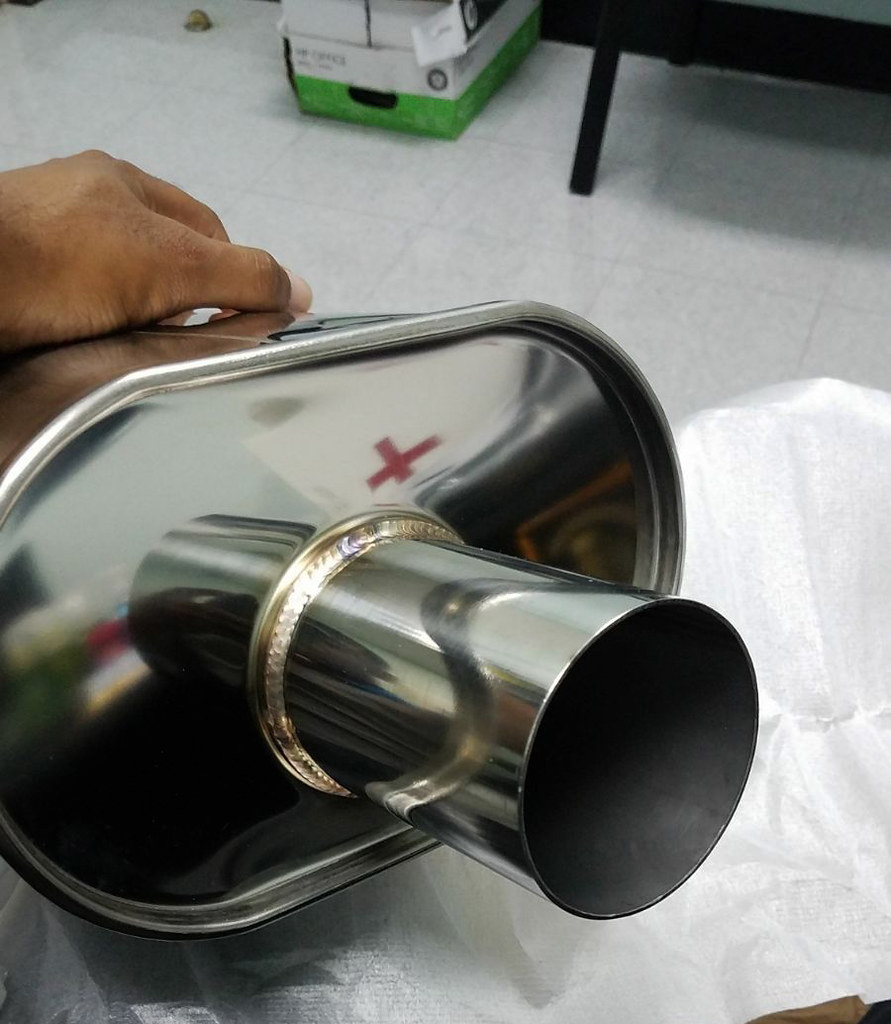
This was the final result of the header which was finished with a v-band connection for ease of removal and to eliminate the to common issue of leakage associated with the flange, donut and gasket combination…
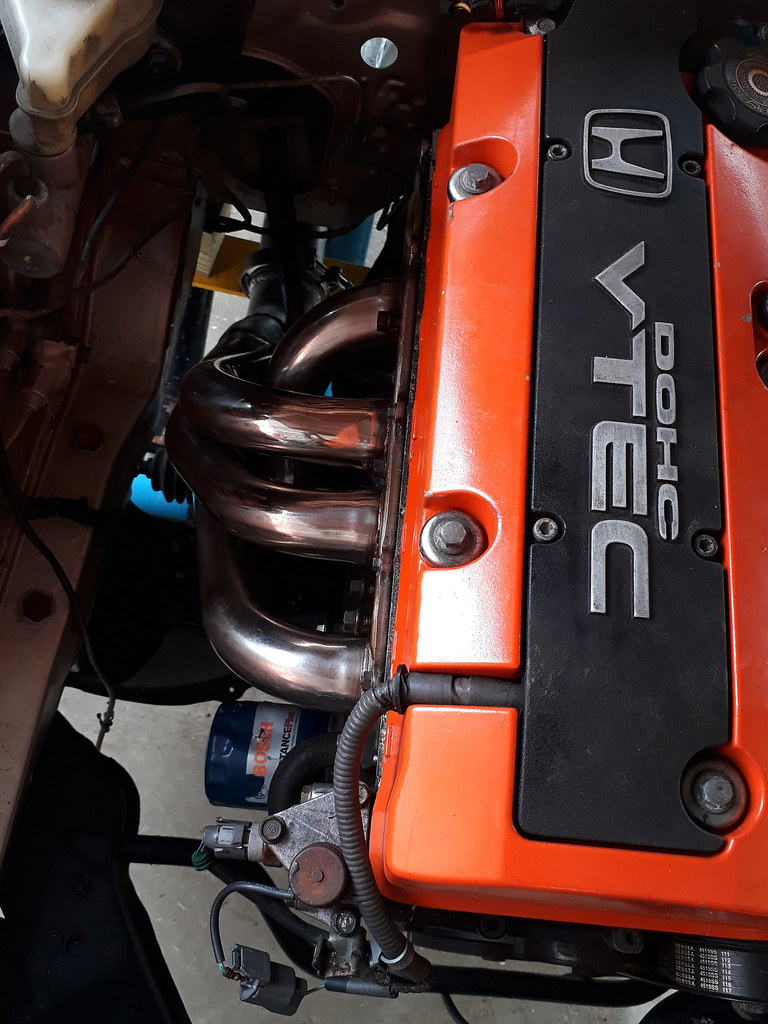
Some shots of the header fitted in place, if you guys pay close attention you can see where the steering column passes between the block and header…

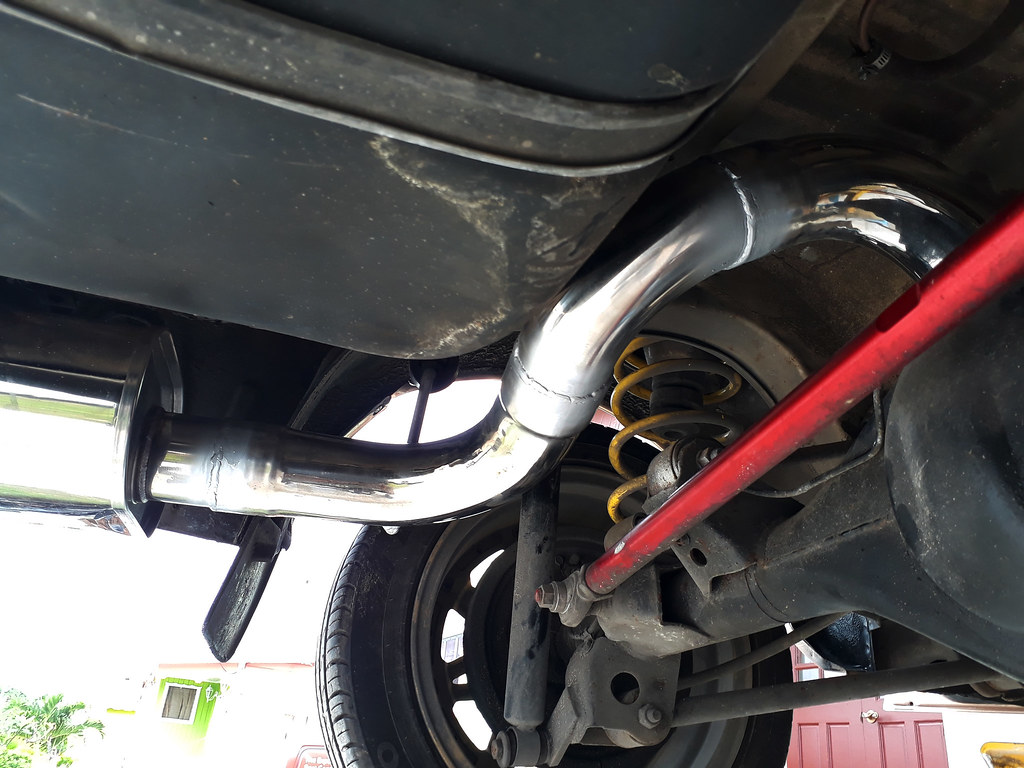
Completed Stanford Industries full custom exhaust system with v-band connections…
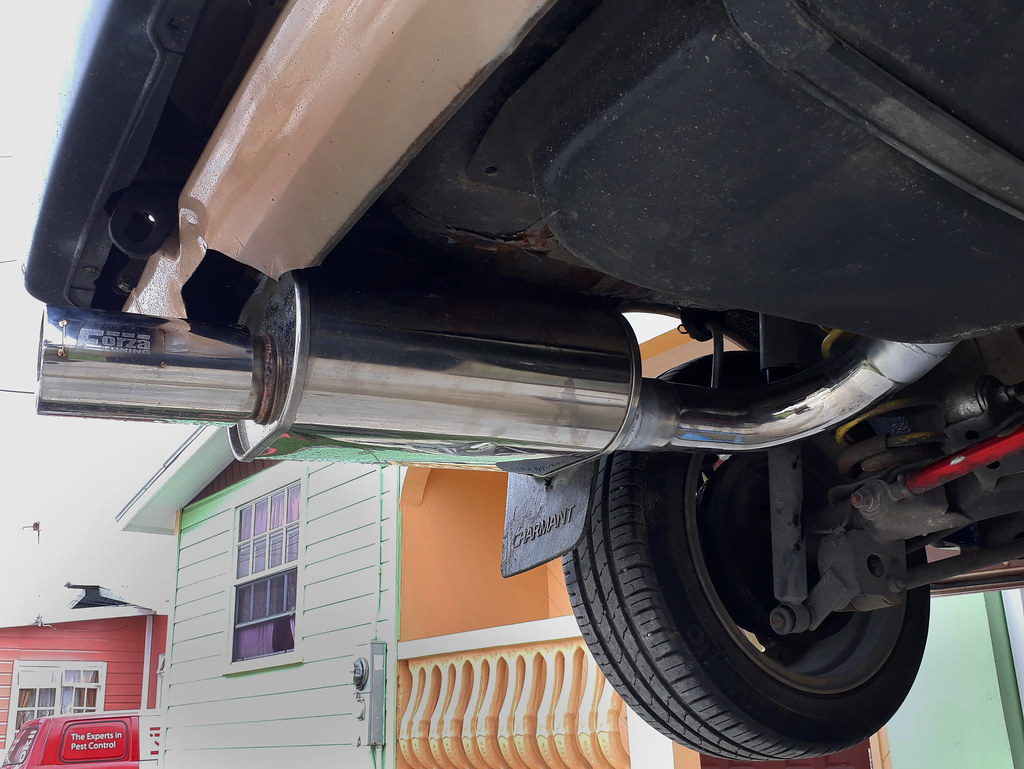
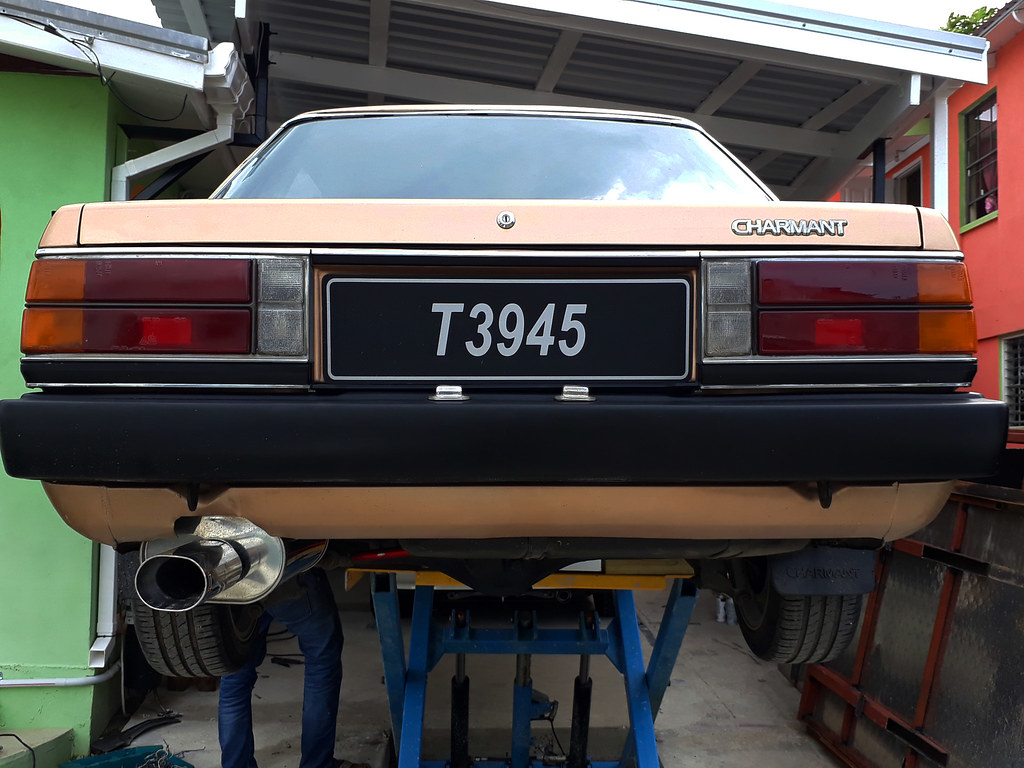
The Forza Tuning edition OBX muffler installed complimented the period correct styling of this classic Charmant giving it a much deserving finishing touch…
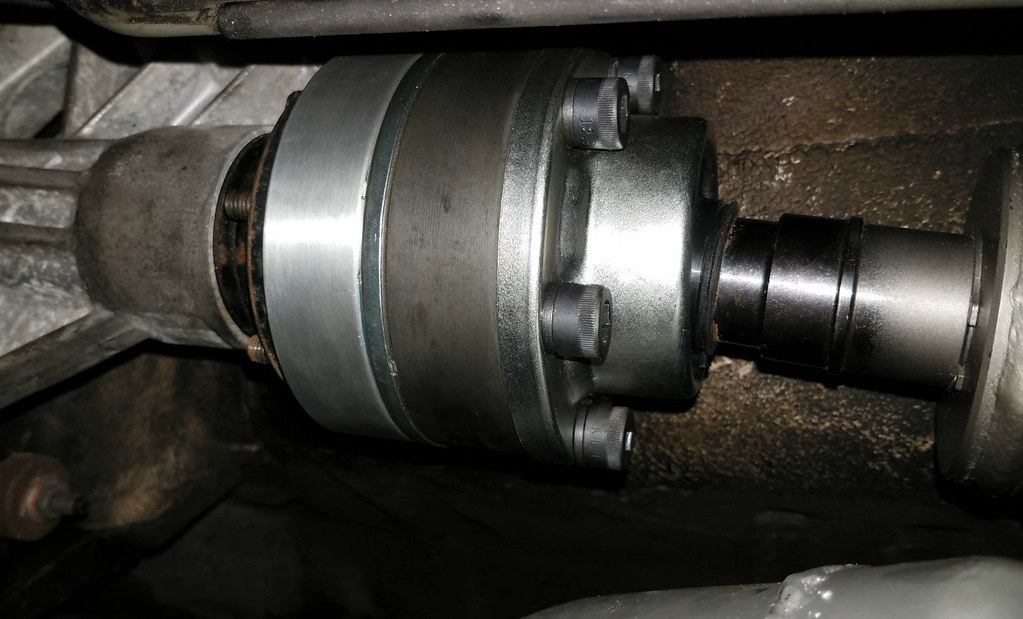
Upon finishing up the exhaust system, Jin was able to bolt up the Driveshaft Shop unit which fit perfectly in place…
Along with that, the engine bay was well on its way to completion, the header had been installed and the radiator hoses were taken care of. This meant the bulk of the work was out of the way…
Lights, camera, action… The S2000 cluster is lit!!

And on that note I’ll close out this post with a stunning shot of the S2000’s digital display in warm up mode…
Thanks for taking a look at another addition in Jin’s Charmant build.
